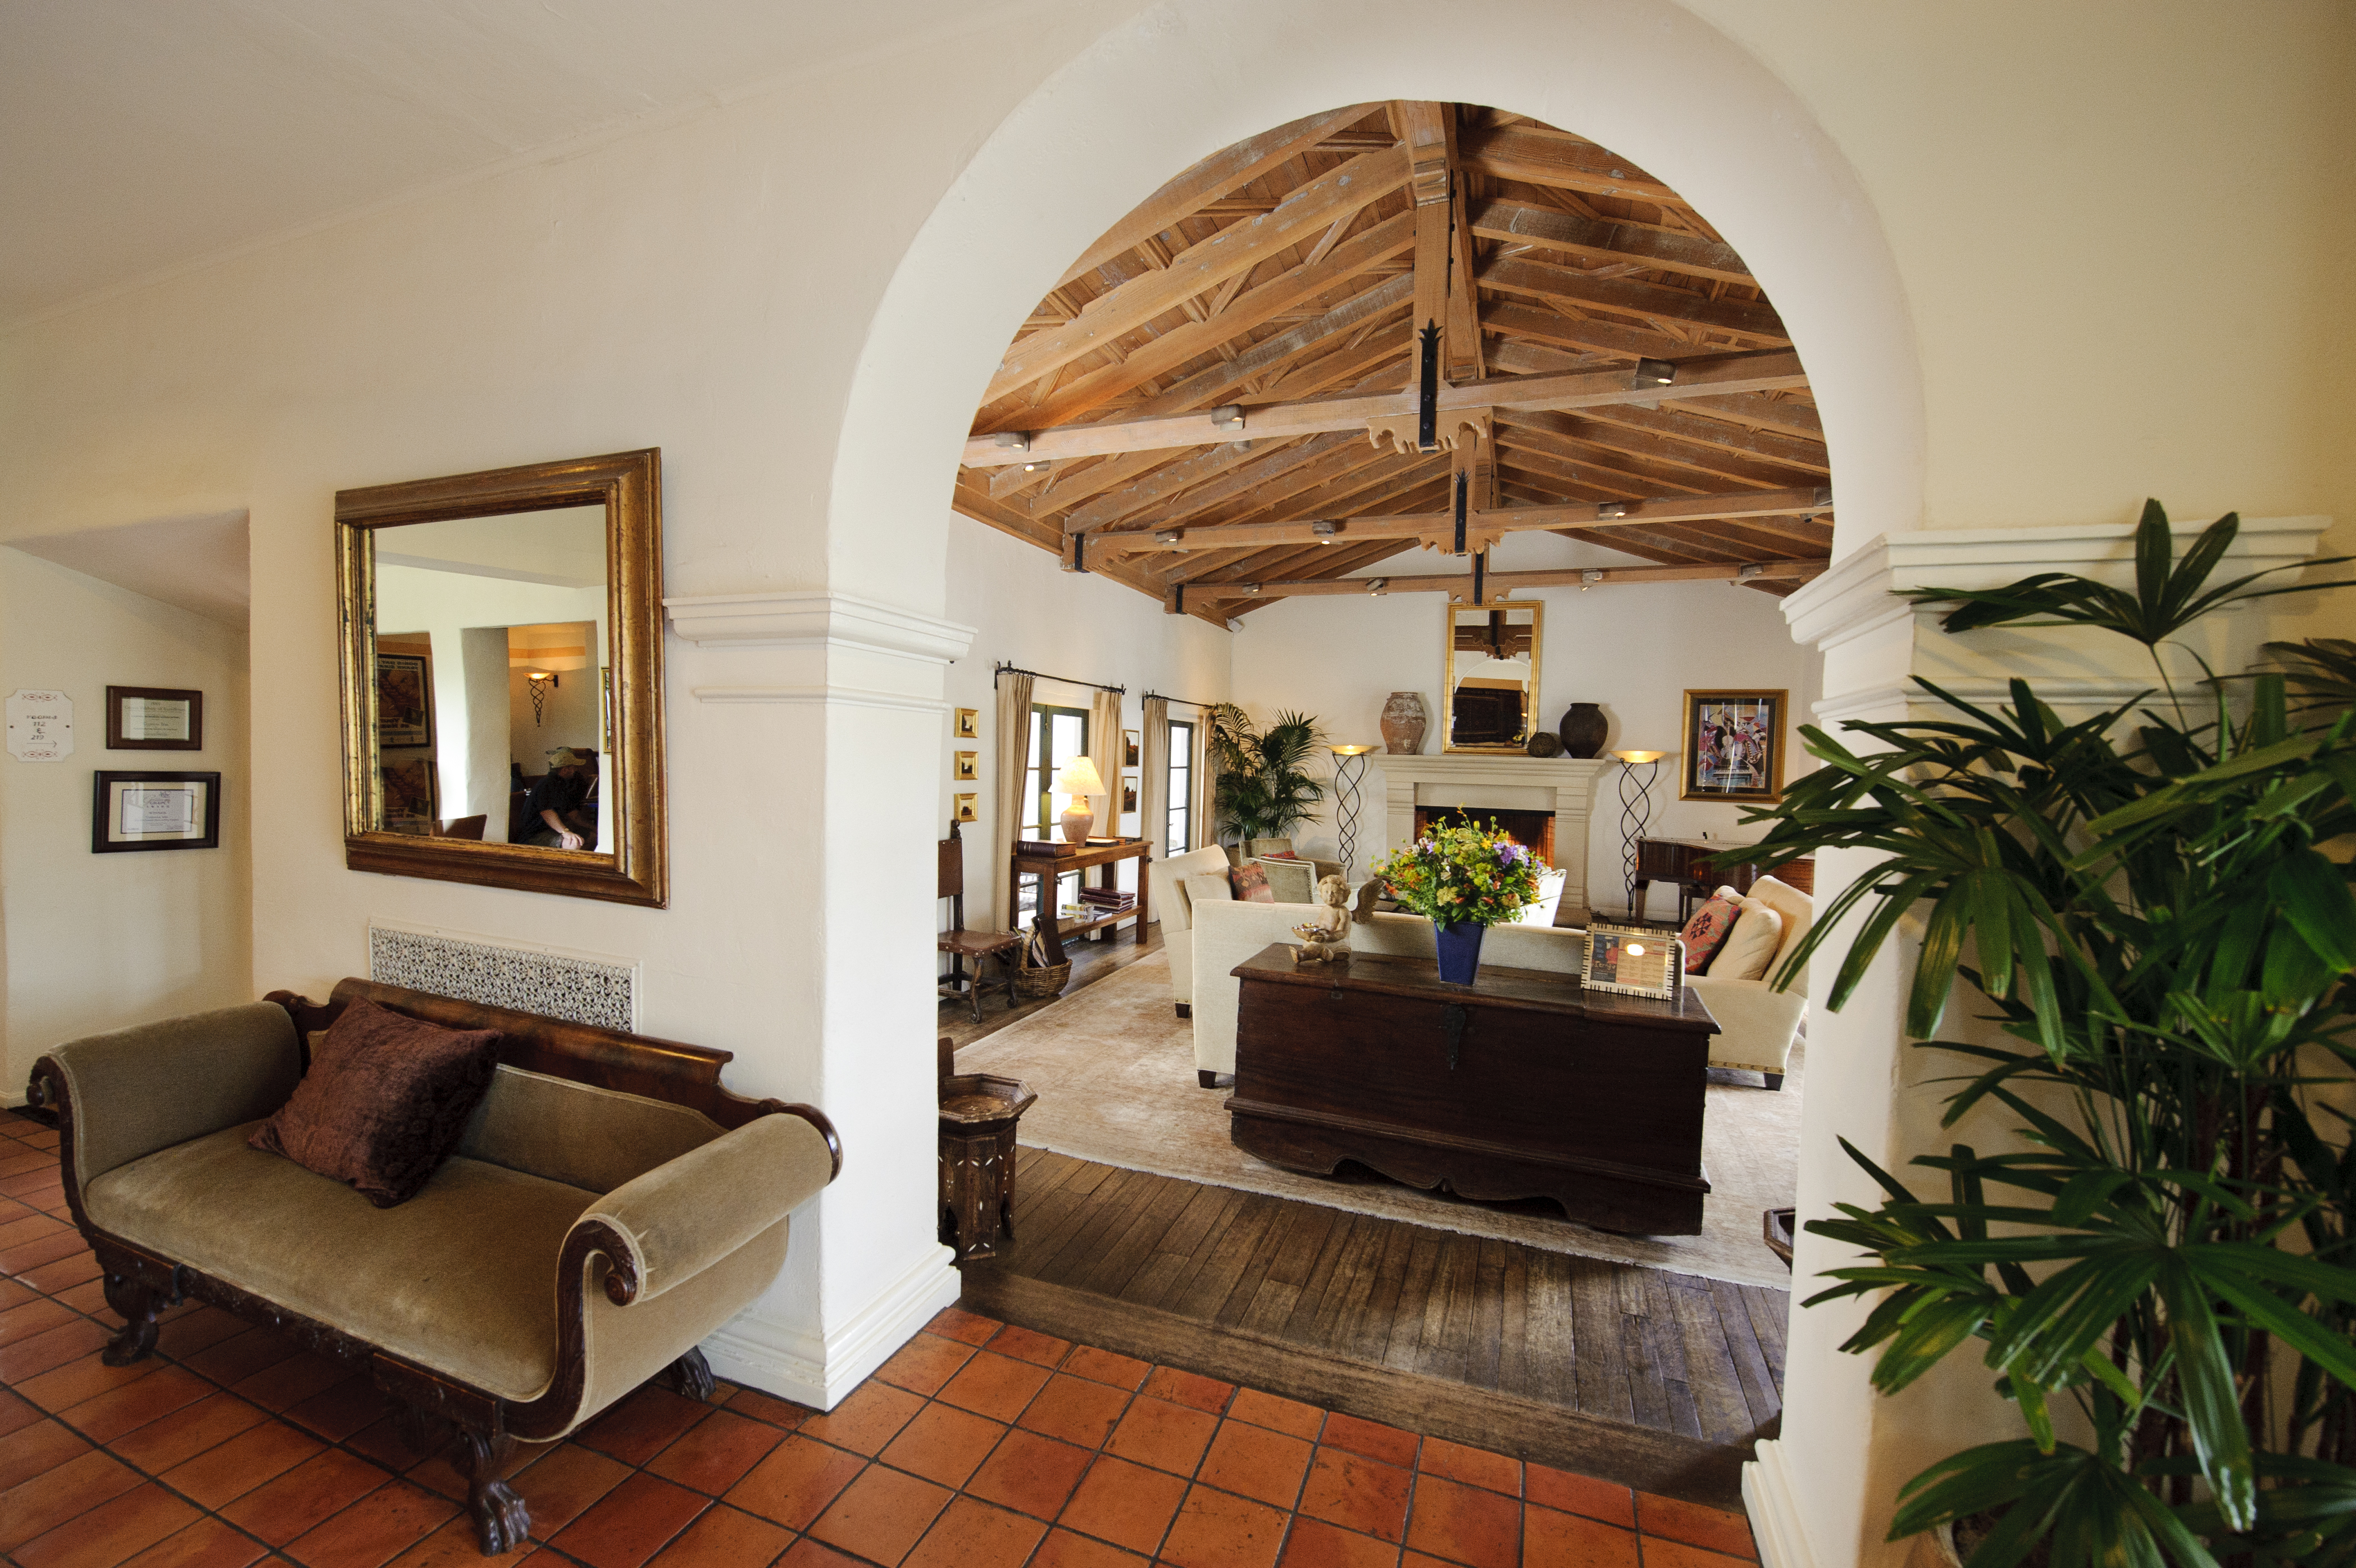
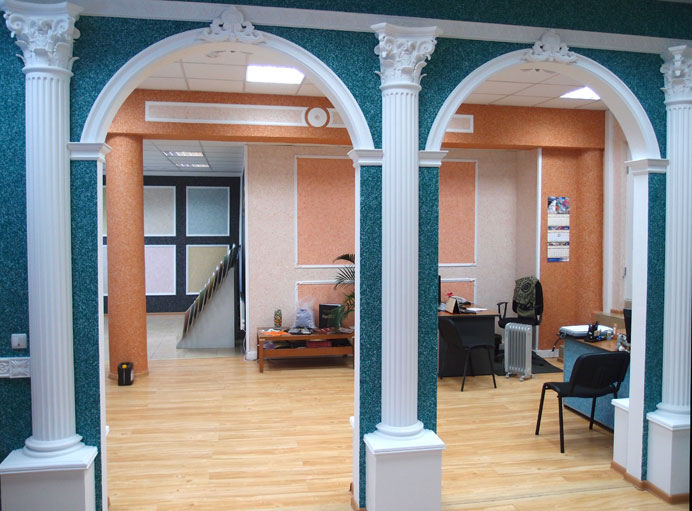
Arches are currently actively gaining a place in houses and apartments. As elite elements in the design of premises, they are most often installed in hallways, especially if they consist of several rooms or have an elongated shape. Doorways to the kitchen and living room are also a convenient place to place geometric slabs.
In translation from Latin, the arch means "arc", "bend". It has been used as a space divider in architecture for over 4000 years and smoothly migrated from the architecture of the Ancient East to the interior. Ancient Rome... Temples and palaces of wealthy Romans cannot be imagined without arched ceilings.
Over the course of several centuries, the arches have changed slightly, and its functions have remained almost the same:
- arches allow you to give the room originality and individuality;
- visually divide the space into separate parts and at the same time are an architecturally unifying principle.
Today, many owners, in the process of repair, are replacing doorways with arched ceilings.
Professional advice and personal preference will allow you to choose the style of the arch and design in general.
Types of arches
Consider geometry when choosing design solutions. It is because of her that the arches are divided into:
1. Passive are classic and strict, standard forms. They are more restrained and standard.
- Classic - absolutely correct arc radius. This solution is applicable in almost any interior. The doorway becomes soft and sophisticated. This is the most commonly used type of arched floor.
- Modern - the arch of the arch has a pronounced rise. There are 2 varieties - with and without legs.
- Ellipsoidal - the arc of the opening in the form of a regular or irregular ellipse.
- Romance - the upper arch has a horizontally cut surface in the middle and rounded sides.
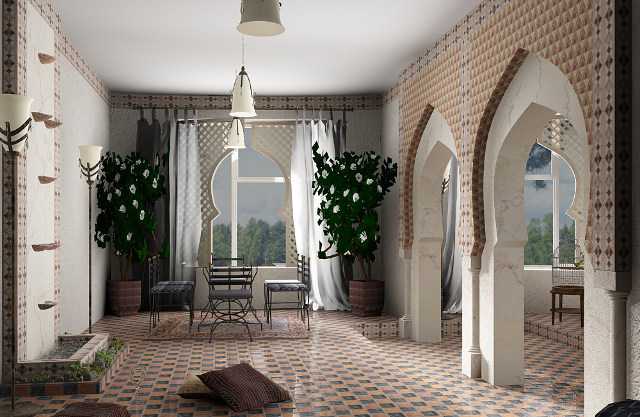
2. Active - have the most varied and bizarre forms. They have the ability to visually expand the space most fully.
An example is an east arch with an asymmetrical vault on one side.
Active arches in shape can be:
- horseshoe-shaped;
- lancet;
- keeled;
- semicircular;
- trapezoidal;
- box-type;
- and even creeping.
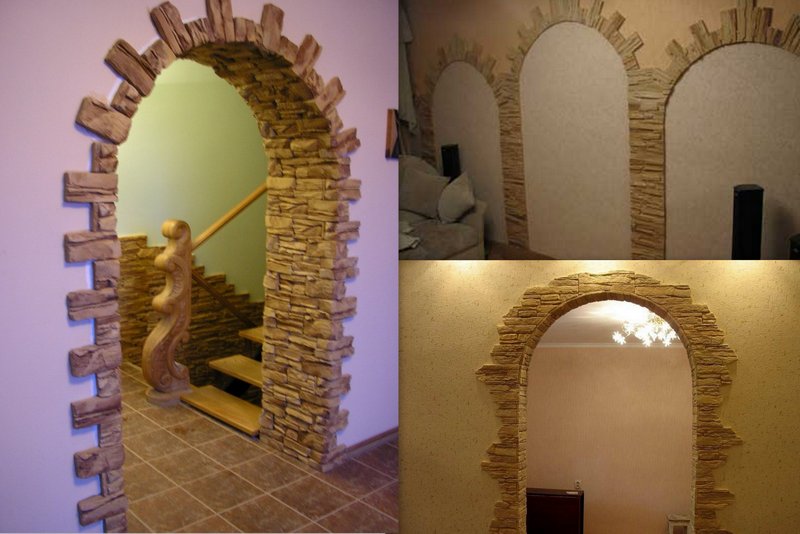
The use of arches is closely related to the possibilities of stone finishing. See how it looks, maybe you will find new ideas.
Asymmetrical arches often serve as Art Nouveau kitchens or bedrooms.
Materials.
1) traditional wood (ash, aspen, pine, oak, beech, etc.) Passive arches are mainly made of it.
These 3 types are the most stable, therefore they are used both indoors and outdoors.
4) drywall
5) plastic
The latest materials allow you to decorate the arch only indoors.
Whether you're designing a new building or converting your home, consider incorporating an arch as a decorative element.
Many of the rooms in our apartments in the original version do not imply the presence of arches at all, but you can easily transform a regular doorway into an arched shape.
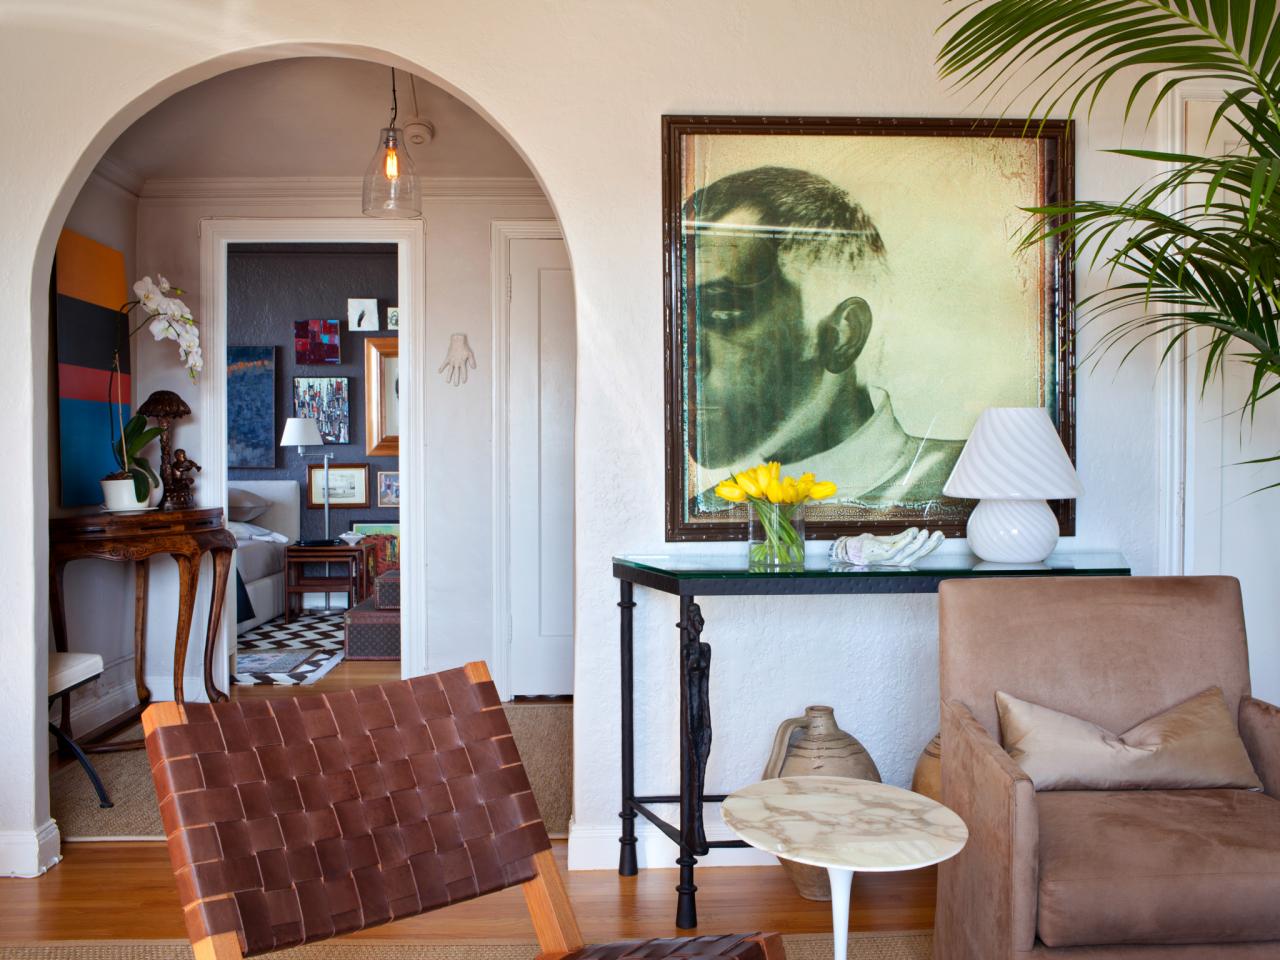
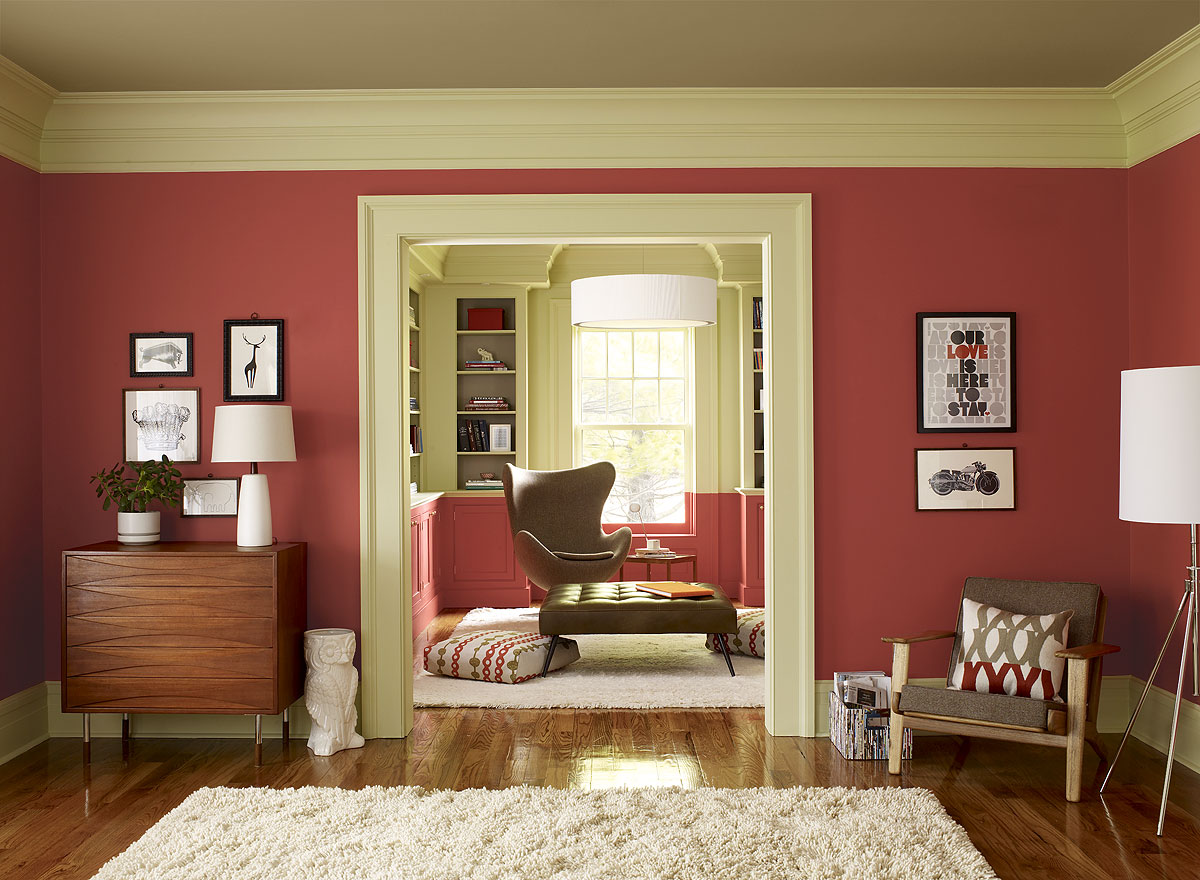
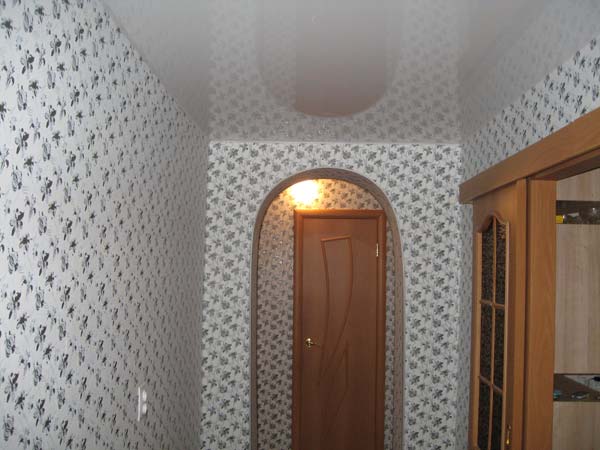
Arched corridors
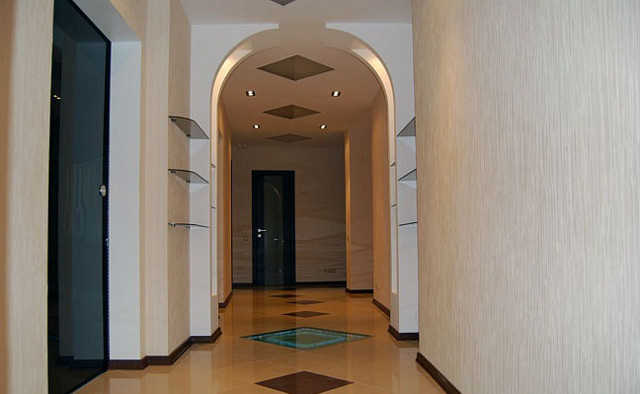
Arched ceilings look great in corridors and aisles that have insufficient light illumination. They also have additional function zoning: divide up the space by creating mini-halls.
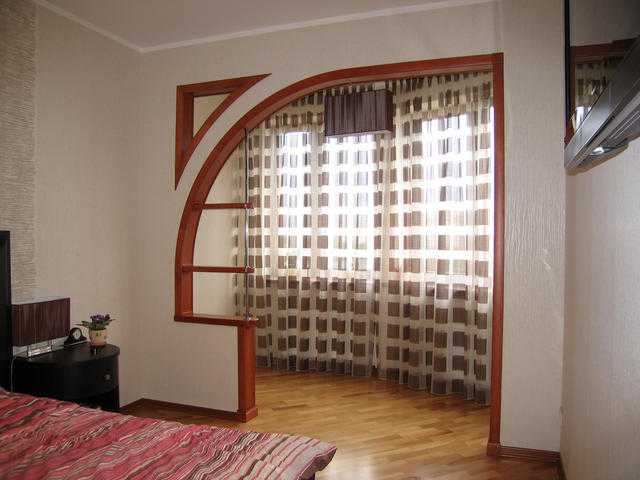
French doors with arches
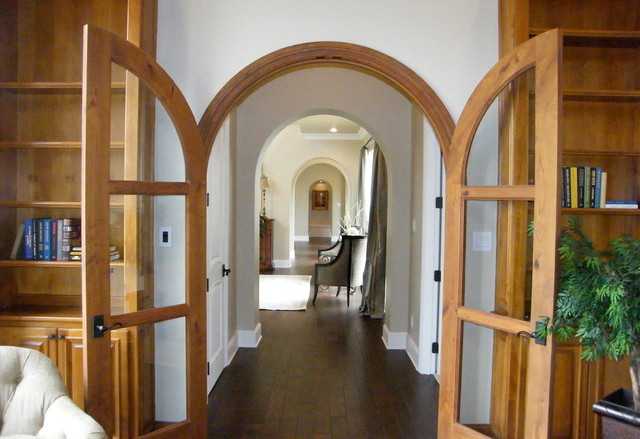
Swing doors with transparent or frosted glass, made in the form of an arched arc on top, decorate the interior with their uniqueness and style. Doors will fulfill their main functions and at the same time unite spaces, letting light from room to room.
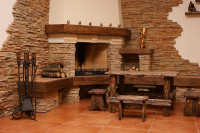
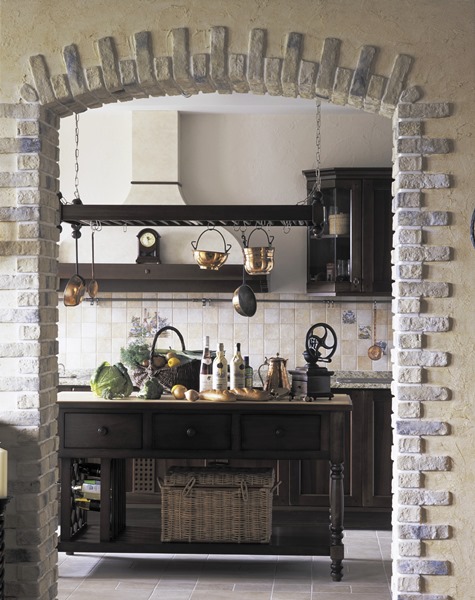
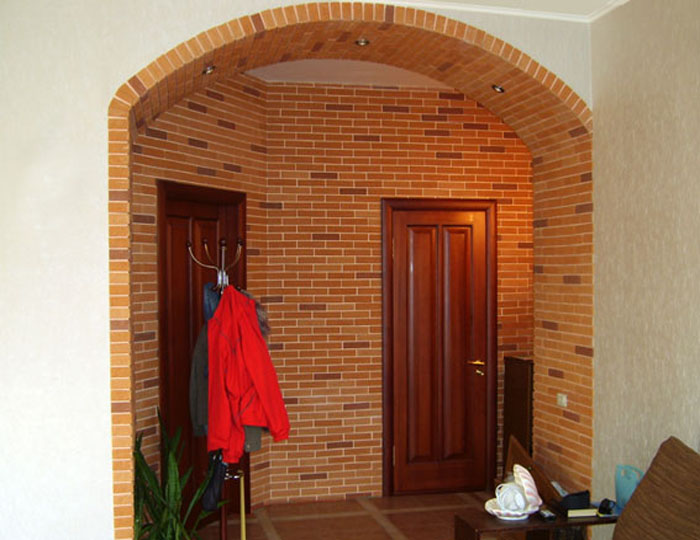
Brick and masonry arch decor
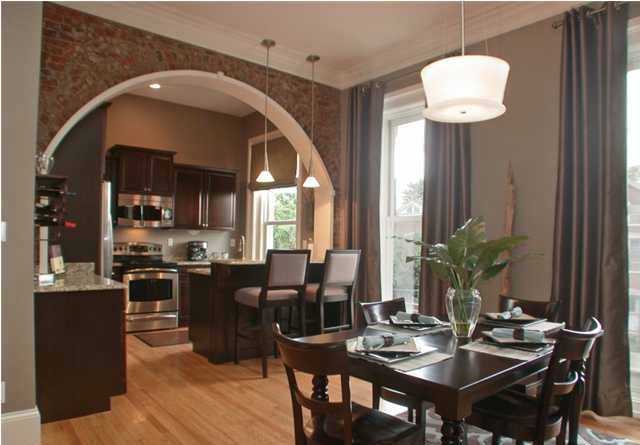
Some people prefer to see rough stone or rough brick in their room. For some stylistic decisions, this is justified. And the brick laid in the arch will give an additional accent to the whole room.
Arch in the bathroom

In our minds, the arch in the bathroom is strongly associated with the oriental style.
Not many have arches in their bathrooms. But if the space allows, then designers can make your bath unique.
Wonderful windows

Arched windows are a stylish decoration for any home.
Nearby windows can be of different sizes, so make sure that the arches on them turn out to be albeit different in size, but the same in proportion.
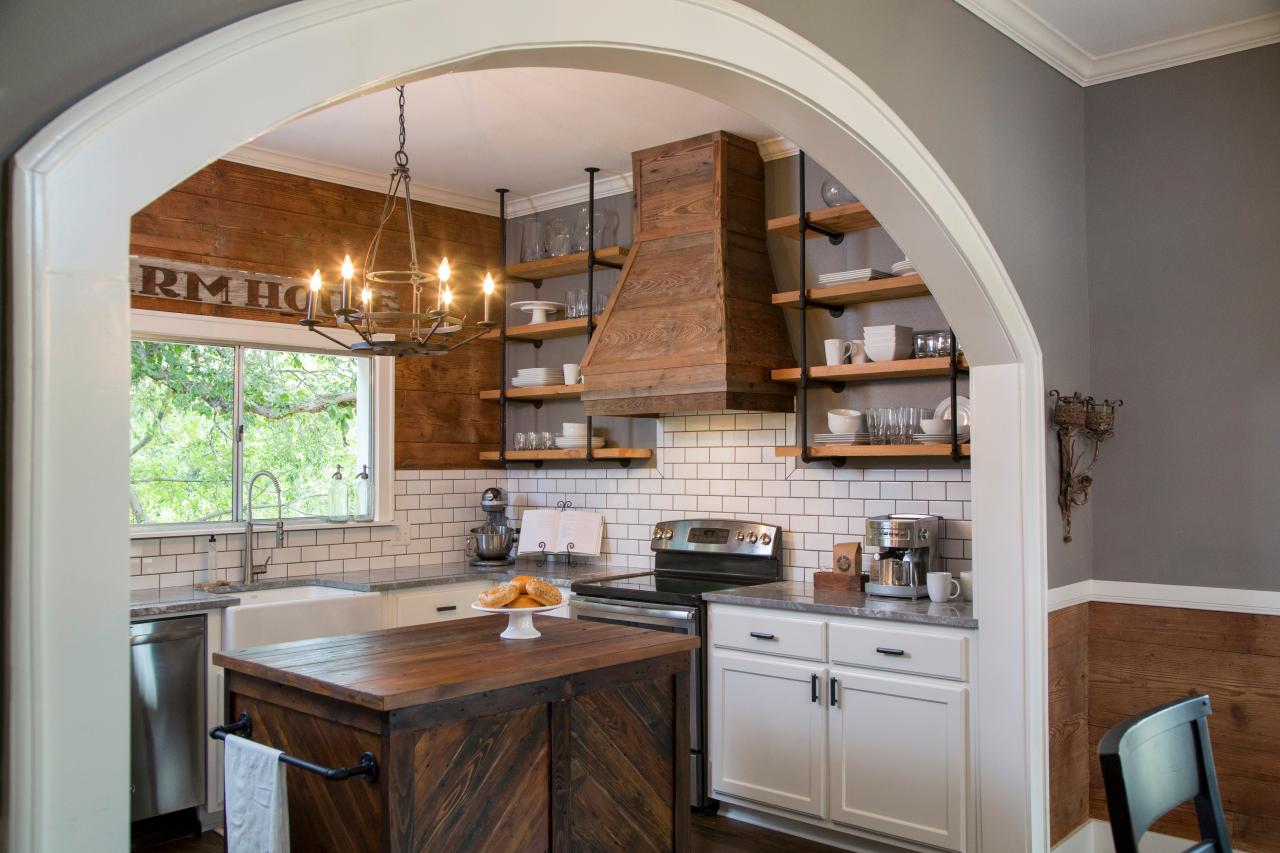
Arches in the interior of the kitchen
Arches allow you to smoothly shift your gaze from the kitchen to the dining room, living room or hallway. At the same time, these are independent spaces. 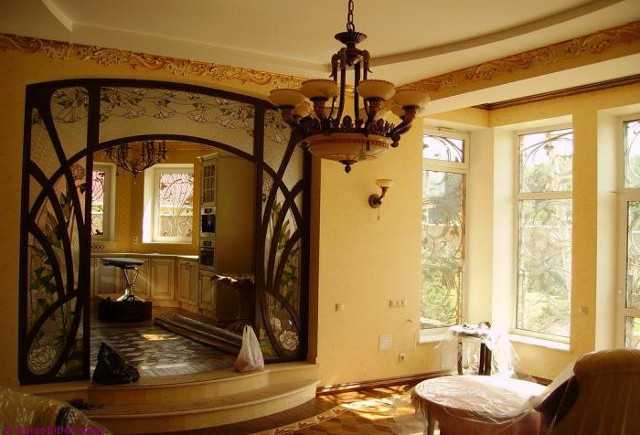
The wider arched doorway, the more precisely it is worth considering the issue of the color and stylistic combination of the two rooms.
Arched entrance to the loggia
It has become customary to connect a loggia or balcony with a room. But the crossbeam, which is not a fancy architectural design, can be annoying at times. Take a closer look at how interestingly you can solve this issue.
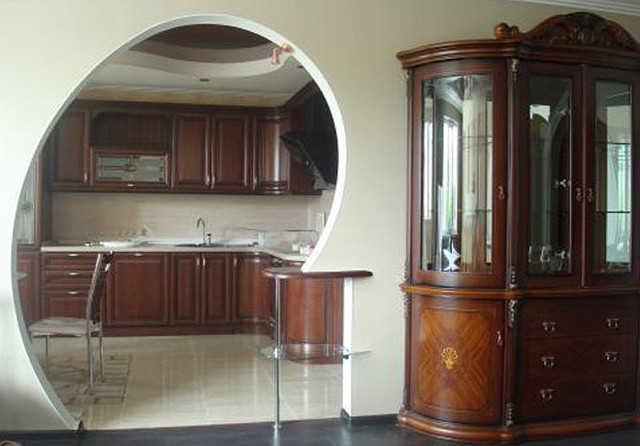
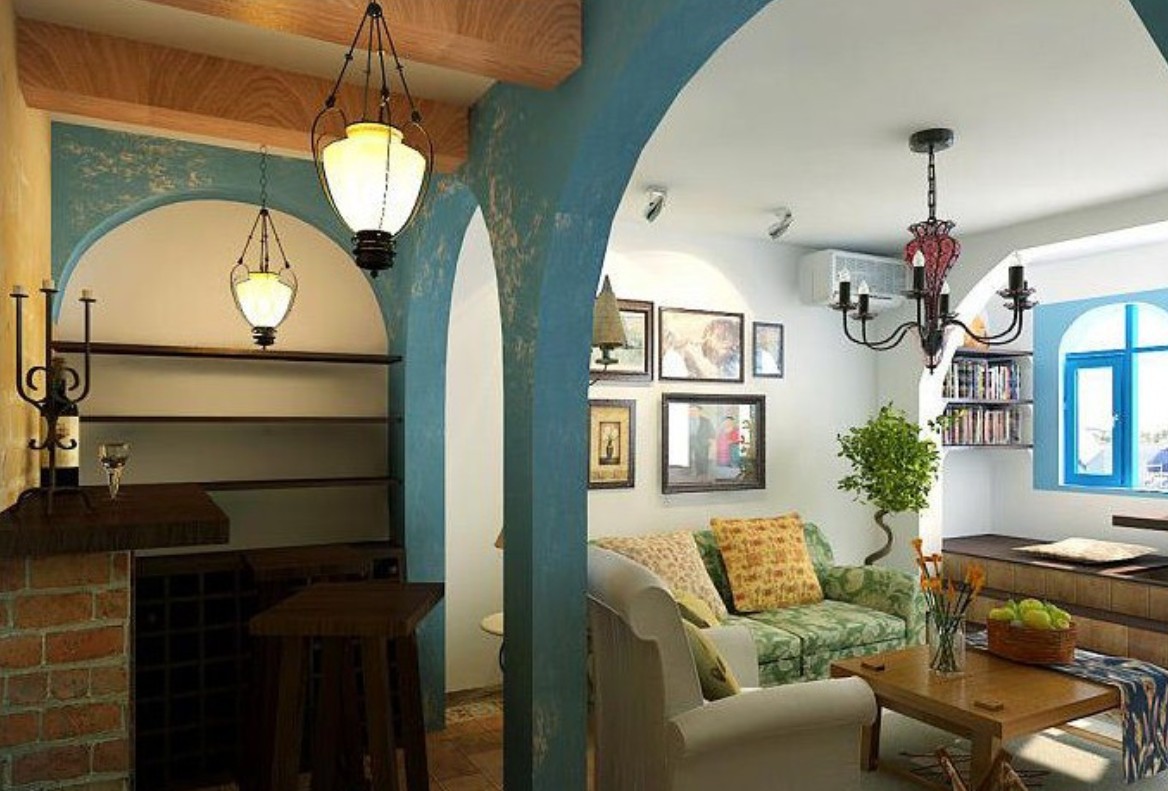
Arch at the bar
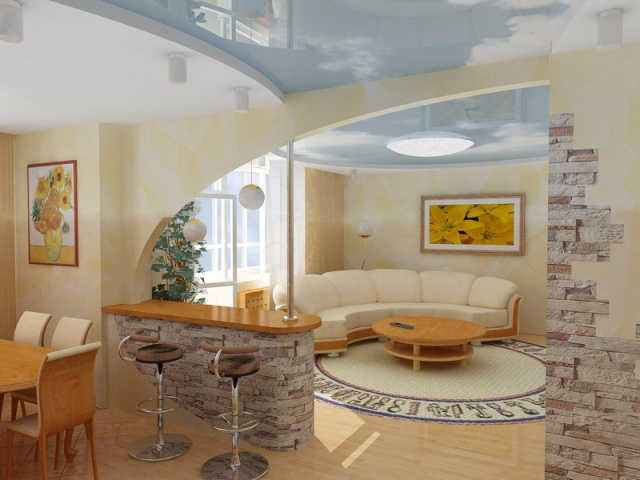
An original solution to connect the living room and dining room. At the same time, the bar counter is an additional unifying element.
Arches with through niches
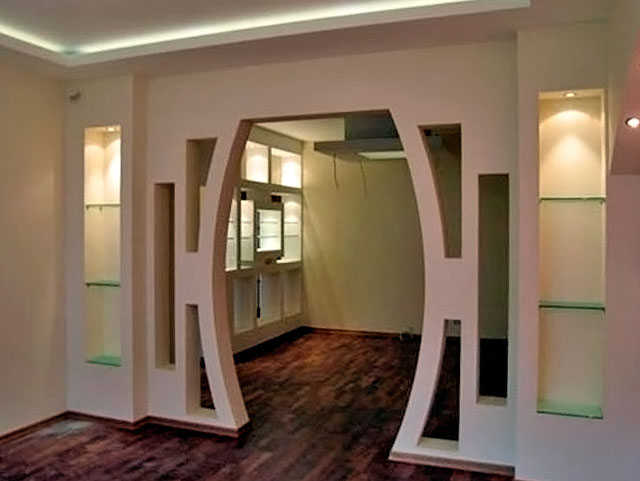
Spectacular decoration and zoning of the room - this is the purpose of the light, as if carved, arches in the children's room, large dining room, studio apartment.
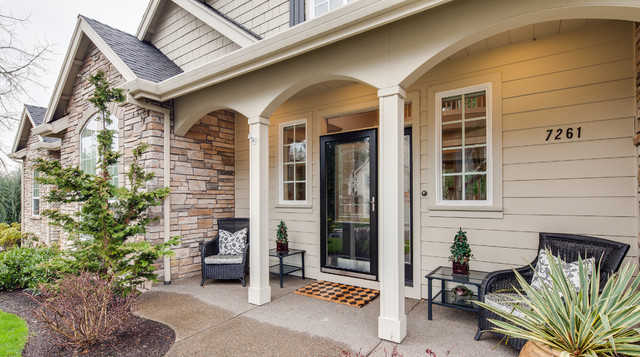
Arches on columns harmoniously fit into the open space of the veranda.
Designers prefer to use arches to decorate the room instead of standard doors... Knowing how to decorate an arch is not superfluous for a beginner in the field of repair work. Arches are made using materials such as drywall, plastic, wood and natural stone. A popular material for making arches is drywall.
Drywall is an environmentally friendly material. Its advantage is the variability in the choice of the shape of the arch during construction. With the help of this material, it is easy to hide irregularities and defects in the doorway in the apartment. The design allows the installation of various lighting sources, shelves and other decorative elements.
Plasterboard arches in the design of the room
Due to the building materials, the geometry of the structure in the apartment is observed. The finished product does not have much weight, which is a plus for apartments with flimsy walls. The material hides the lack of communications in the apartment. Many find it difficult to choose a suitable decor for an arched structure made of plasterboard.
Options for the shape of drywall arches:
- The Roman form is the standard design with a semicircular arch and the correct radius;
- British designs are produced with a truncated radius; apartment decoration using such material is less popular;
- Slavic arched structure in the form of a rectangle with rounded corners, often erected in a classic interior;
- A distinctive feature of Thai doorways is rounding on one side and right angles on the other;
- Simple rectangular portals with no frills;
- The ellipse shape has a large number of options, but it is usually designed like an oval one;
- The trapezoid is decorated with decorative sewing of the corners so that rectangular doorways do not turn into ordinary ones;
- The transom is made when the continuation of the door, which is left, is drawn up.
Building materials for finishing arched structures
The choice of finishing depends on the design of the arch and the material from which it was made.
The owner of the apartment also takes into account the interior of the room.
The variety of materials simplifies the selection of an individual design option.
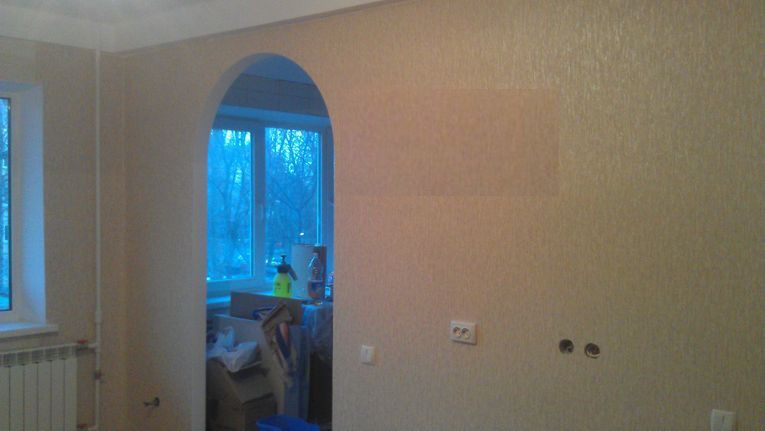
 Drywall arch construction without finishing materials
 The correct decor of the opening will competently divide the room into several zones. This technique is important in an apartment with a studio layout. For self-erection of a structure, drywall is more often used, since its installation is simple. There are no restrictions on the use of building materials for decoration.
The following building materials are used:
- Wallpaper;
- Plaster;
- Decorative stones;
- Tiled and ceramic tiles;
- Plastic.
Popular materials - wallpaper, decorative rock and plastic. They differ from the rest in their ease of installation. This is important when a person does not know how to decorate an arch on his own. Even a beginner will cope with the design of the structure if he follows the recommendations. In order to achieve the best result, they choose high-quality materials for finishing the opening in the apartment.
Using wallpaper
This method is simple and affordable. It is better to use the same wallpaper as for wall decoration. To glue the wallpaper on the structure yourself, use the following materials:
- Ruler, pencil;
- Wallpaper adhesive;
- Scissors;
- Stiff brush;
- Wallpaper.
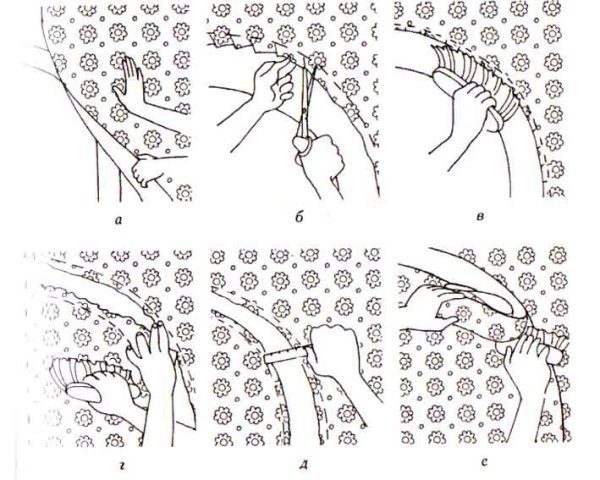 Phased wallpapering of the doorway
 The consistency of wallpaper glue should be thicker than when gluing walls. This is necessary so that it dries more slowly and does not freeze in the form of drops. A strip of wallpaper is glued next to the arch. Another one is glued so as to close the opening (not completely, but part of it). The part of the first strip that protrudes is cut off and an allowance of 20-25 mm is left.
The next step is to cut the remaining stock. An interval of 25 mm is observed. The allowance is tightly bent to the slope of the opening and glued with a brush. Wallpaper on the other side is glued in the same way. For pasting the arched vault, the wallpaper is cut out so that the strip is equal to the width of the arch. A long strip is cut out, since when it is advanced, an exact match of the pattern is achieved.
Next, the strip is glued to the arched vault and to the sides of the opening. If it is tall, then the strip is divided in two. In this case, the joints are located at the top of the arch. After gluing, it is important to iron the wallpaper to remove air bubbles.
Decorative stone for finishing works
The use of decorative stones is a laborious process. The arch of the opening and the surface inside are trimmed with decorative stone. The practicality of finishing with a stone is that the surface is not leveled with plaster for it. Its use is minimized.
Self-finishing with decorative stone of a plasterboard opening requires careful selection of building materials. Heavy building material under weight will change the shape of the arch or destroy it.
 The use of stone in the decor of openings
 The sequence of decorating the arch with decorative stone:
- Surface treatment with putty in order to eliminate unevenness;
- Using a primer after the putty has dried;
- Preparation of a solution for decorating with a decorative stone;
- Laying the first stone from below, at the junction of the opening and further fastening the stones with an overlap;
- Cutting the stone, its further fastening along the arched arc, grinding with a file for decoration with decorative stone - artificial and natural;
- Sealing the seams with a specialized solution.
This decoration technology will allow you to independently trim the arch with decorative stones of unnatural or natural origin. The last option for finishing with decorative stone is more expensive. To obtain the desired result, the following technologies are followed:
Decorating the opening with plastic
The advantage of plastic decor is that this material is cheap. Any color of the coating can be chosen. Plastic is easy to care for. Installation of building materials does not take much time, it is done by hand. more often get off with plastic.
 Plastic arched doorway
 For decoration use:
- Plastic panels;
- Wooden slats;
- Plaster;
- Special glue.
There are many forms of plastic arches. It should match the shape of the plasterboard arch. This building material takes any shape and this is its plus. It is easy to decorate an asymmetric arch with plastic. If panels are used, then a frame of rails is prepared for them, which are attached polyurethane foam... The corners of the opening are shaped with arched corners to avoid flaking of the plastic.
In contact with
You can visually increase the space in the apartment using an arch. The absence of a door and the expansion of the opening make the room larger and brighter. That is why most modern apartments you can find a wide variety of arched openings.
Methods for finishing an arched opening
The arch is comfortable and very beautiful. In addition, it can be trimmed with the most different materials allowing the landlord to use all his imagination to get the best result.
Tips on how to make a drywall arch in the video:
Among the most common design options for arched openings are the following:
Wallpaper gluing. This is the most economical and easiest way to finish. Moreover, a wide range of designs and patterns, as well as the presence of interesting textured wallpaper, allows you to create a unique framing of the arched opening, corresponding to the style of the main room.
If the arch is finished directly by the owner of the apartment, without the help of specialists, then for this he will need such tools: wallpaper and glue for them, a brush, scissors, a pencil and a ruler.
The process itself is within the power of even a person who is far from repair work. Wallpaper gluing is carried out in several stages:
- First, the glue is mixed according to the instructions on the package.
- Next, the first strip is glued on the wall near the arch.
- The next part of the wallpaper is glued to the arched opening. The excess paper is cut off, leaving a 25 mm allowance.
- Now the allowance is cut at intervals of 2-3 cm and folded to the slope. With the help of a brush, it must be firmly pressed against the surface to be pasted. We do the same on the other side of the arch.
- Now the wallpaper is glued to the arched vault and side walls of the opening in the usual way.

The use of decorative stone. This option is truly magnificent, it will decorate any interior.
You can use both artificial material and natural stone. Outwardly, both of these finishing methods look almost the same - chic and expensive. The difference lies in the price and complexity of installation.
Wild stone has a higher cost and greater weight, which makes it somewhat difficult to install. Artificial material is quite affordable, and its installation will be quite simple.

You can correctly put a decorative stone on an arched opening in a few steps:
- First you need to prepare the surface, make it somewhat uneven with notches, for example.
- Next, an adhesive composition of cement, glue, sand and lime is mixed.
- Laying the first row begins at the junction of the arch and the wall. The first stone in the second strip should protrude beyond the corner by the thickness of the tile.
- The stone laid on the rounded part of the arch should be carefully trimmed with a sharp knife and pliers (a basting is made with a knife, and all excess is removed with pliers). Irregularities are smoothed out with sandpaper.
- A day after pasting the entire surface with a stone, it is necessary to wipe the seams. This is done with a rubber spatula.
Not only the arch itself, but also a part of the adjacent wall is usually decorated with decorative stone. Such a technique will add exquisite chic and comfort to the room. More photos and information about this - in.
Plaster finishing. This is a simple and inexpensive way to make an arched opening interesting and original.
With the help of plaster on the surface, you can make a wide variety of relief patterns and apply any colors.
- Finishing is carried out as follows:
- First, the first layer of plaster is laid to level the surface of the arch.
- Further, the surface is primed.
- Now you can apply another layer of plaster and form a relief and the desired texture on it. Sometimes several layers of material are used.
- After the surface has dried (after about a day), the arch can be painted and rubbed over.

Arch decoration - room for the designer's fantasies
Other ways: tiles or mosaics. Of course, they cannot be attributed to popular options, but still worth mentioning. Decorating an arch with mosaics or tiles is a rather laborious and expensive process, only a specialist can handle it. And the result doesn't look particularly impressive. Therefore, this design is rarely used.
To make the arch truly unique will help non-standard ideas landlord or designer. Well, inspiration, of course.
Arch and different interior styles
It is almost impossible to imagine an apartment or house made in a certain design without the use of drywall. And where there is drywall, there are arches.
There are some features of finishing arched openings for different interiors:
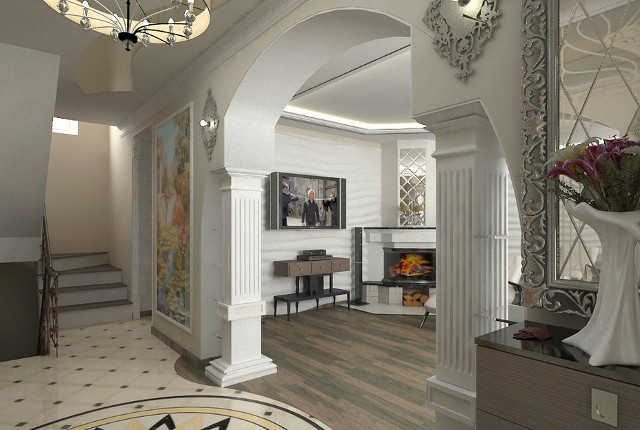
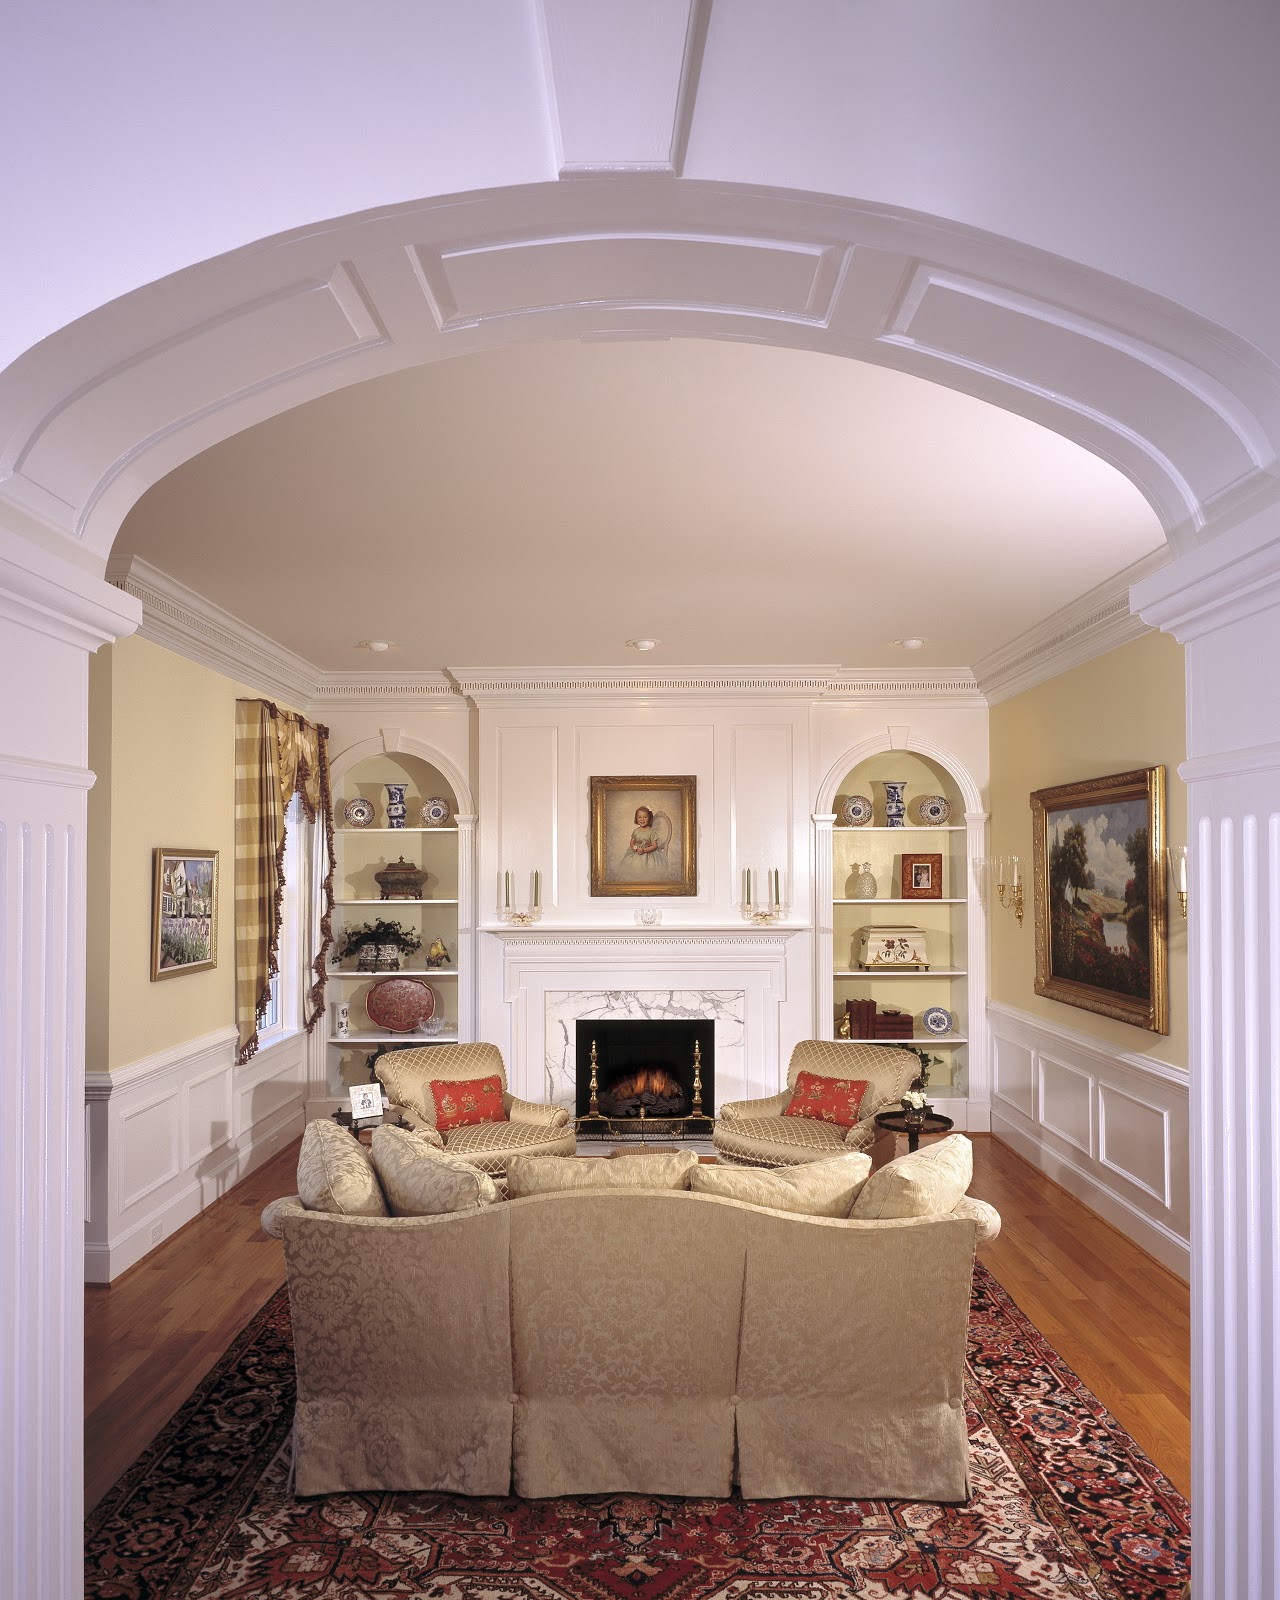
- The classic design of the room assumes the presence of the same traditional semicircular arch. Its radius should be equal to half the width of the doorway. No unnecessary turns, bends, etc., only graceful smoothness of lines.
Arch decoration in classic style provides for the use of natural wood. This method will make the room even more luxurious and attractive. It is also possible to use polyurethane moldings in a color that matches the overall range of the room.
By the way, glass transoms are often used in this style, which are made both from ordinary glass and from mosaics.
- A modern high-tech room requires a minimum of decoration and imagination in the decoration of an arched opening. In such an interior, arches are rarely used at all, but with its correct implementation and design, it will become a faithful ally and emphasize the modern spirit of the room.
To decorate the arch in this case is very simple - you just need to paint it in the color of the walls and that's it.
Since the high-tech style involves the use of smooth metal objects and surfaces, glass and mirrors, the arch can be equipped with built-in lamps or decorated with modern stylish accessories. More about high-tech style - by.

But it is advisable to make the arch itself not just semicircular, but to give it an asymmetrical shape with strict outlines.
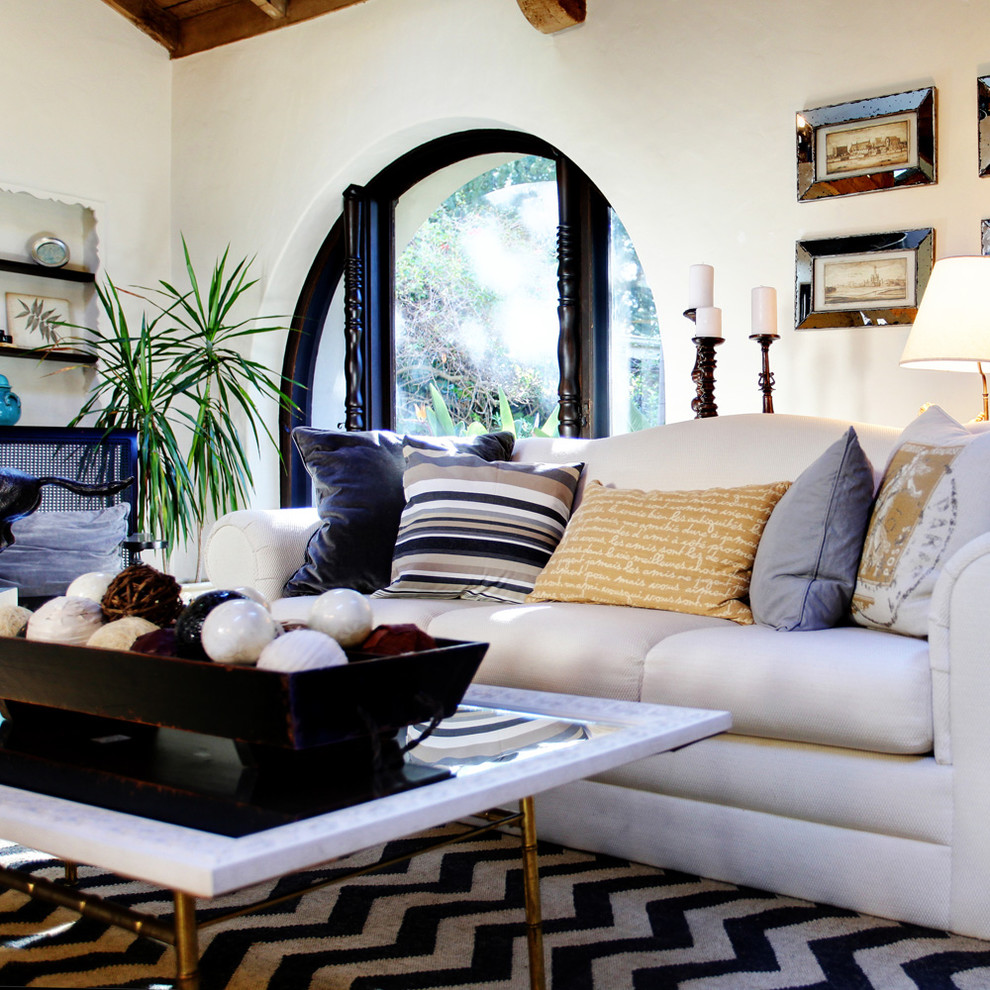
- The Art Nouveau room goes well with arched openings( on our website). However, the arch should have specific features - a fairly large width and a clear transition from a rounded part to a straight line. The opening is very similar to the classic one, but it is more strict and elegant.
You can decorate an arched opening in this style using wood or similar artificial materials. Finishing assumes both simple lines and the presence of non-standard shapes, bends, cutouts, etc.
They are both constructive and decorative elements of the interior. They make the space warmer, more living and more soulful. Often it is the arch that creates the character of the room, but only where it is assembled correctly and tastefully. And even in this case, a competent question arises: how to decorate the arch? The decoration of arches can be extremely varied:
Arches with wood trim
Arches with wood trim make the room more significant. They are ideal for classic-style rooms. Wooden elements perfectly emphasize the shape of trapezoidal, vaulted arches and interior structures in the form of an ellipse. However, designers do not recommend resorting to wood trim where there are arches of non-standard shapes, as well as in laconic interiors and in wet rooms. Natural wood- an expensive material and the expediency of its use should be very well weighed.
Arches finished with MDF and chipboard

Such arches are significantly cheaper than their wood-faced counterparts. However, from such slabs, with the right approach, even corners and arches of beautiful geometric shapes are obtained. If we additionally apply the technologies of lamination and veneering, the material cannot be distinguished from solid wood, but only experienced professionals can carry out such a task.
Arches finished with facing bricks
This option is also not suitable for every interior. This is a rather laborious process that includes 2 stages:
- First of all, vertical pillars are placed;
- In the second, the arch is being erected.
The arch is made using a template, which must not be removed before the solution completely solidifies. The corners and joints can be finished with plastic.
Polyurethane finish

Thinking about how to decorate the arch stylishly and inexpensively, it is worth remembering polyurethane. The polyurethane finish looks expensive, although it is quite affordable. This durable yet flexible and lightweight material has impressive performance characteristics and is therefore commonly used for stucco molding, ceilings, corners, cornices and, of course, interior arches... The undoubted advantage of polyurethane is the ease of its installation - a completely unprepared person can do it with his own hands, with a little effort. In terms of execution, such arched structures are not inferior, and perhaps even surpass, arches made of many other materials.
Decorating the arch with decorative stone
Such a finish looks organic only when part of the wall is involved in the stone composition. Moreover, if natural stone is a very difficult material to process, then finishing an arch with a decorative stone does not imply great difficulties - it is very easy to attach it to special glue or ordinary liquid nails.
Plasterboard partitions, and walls made of light blocks, are not designed for heavy loads, so the finish will be more successful if you use artificial stone wisely. This material is based on a binder such as gypsum or cement. In addition, the composition contains expanded clay or perlite, and modern dyeing technologies make artificial analogs almost indistinguishable from natural stone... A big plus is the infinity of its shades and textures.
Decorative plaster

How to finish an arch without a lot of labor? Decorating arches with your own hands is easiest done by plastering them decorative plaster... First, the irregularities and visible parts of the fasteners should be putty, a primer is applied on top. After 4 to 24 hours have passed (the exact time is indicated in the manufacturer's instructions), you can start applying decorative plaster. The range of such a mixture allows you to choose any surface texture. If relief is expected, it should be applied to a wet composition. In the case of using this method of finishing arches, it will be appropriate to use one that will save the plaster from chipping off.
Pasting the arch with wallpaper
As an option for finishing the arch, wallpapering is suitable. It should be noted that the glue mixture should be slightly thicker than for ordinary wall pasting. The corners will help protect the wallpaper from abrasion. You need to take those wallpapers that are stronger and bend better, suitable options:
Mirror tiles
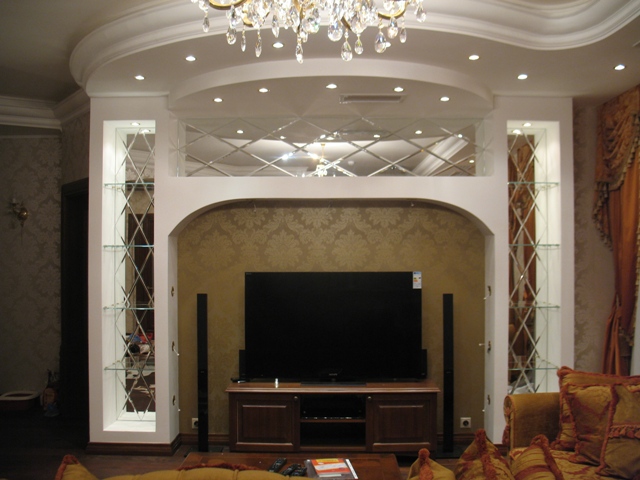
Mirror tiles are a specific facing material that can be used to decorate the most different premises... In the case of an arch, it will fit in the form of separate inserts from narrow stripes. This tile goes well with all others. finishing materials(plastic, wood, etc.) and can serve for a stylish separation of different textures of finishes, decoration of corners.
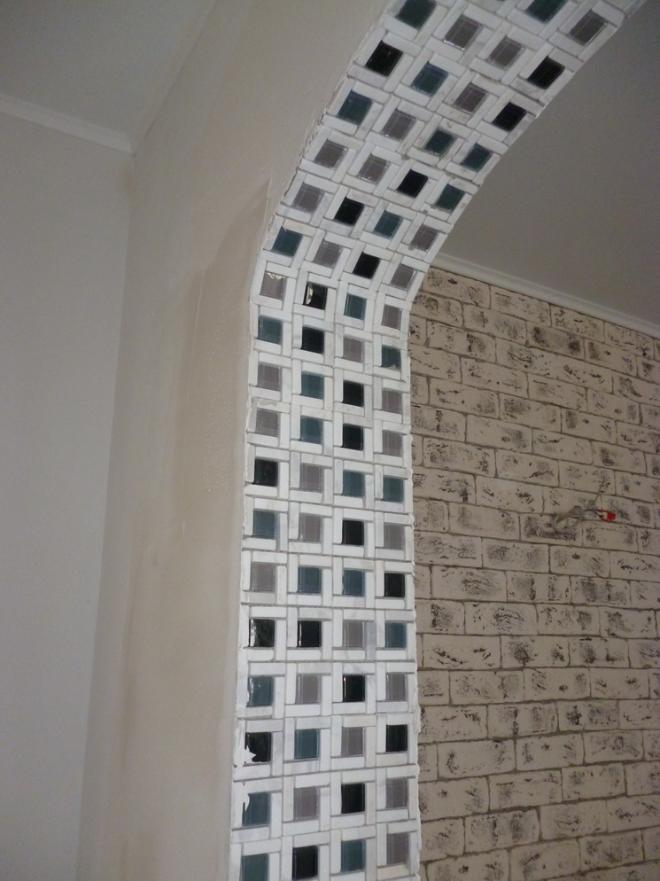
Mosaic

How to decorate the arch to give a unique look to the room? Decorating the arch with mosaics is ideal for stylish interior with character. The mosaic can be:
- From glass;
- Ceramics;
- Natural stone;
- Self-adhesive panels, etc.
In any case, fixing it is a delicate and time-consuming process. Moreover, such a finish is performed quite often, as it looks original and unusual. First, an adhesive solution is applied to the wall, all corners are well oiled, and then a mosaic is applied using a level, beacons are inserted between the parts, then they are pulled out, and the seams are processed with decorative putty.
In addition to the above methods, the decoration of the arch in the apartment can be carried out with the help of a host of other materials that can be unique. For example, it is convenient for finishing to use flexible acrylic tiles that repeat appearance natural stone, but it can be of all kinds of sizes and colors. Stripes of decorative molding, fixed with "liquid nails", look very good. There are options with plastic - the use of plastic lining and panels can quickly and easily give the arch a neat and beautiful view... Plastic trim is very inexpensive and practical.
Wall decoration around the arch
The decorative arched corner serves to highlight the arches against the background of the rest of the interior. In addition to the design function, the corner allows you to hide irregularities in the arched doorway. This is especially true for those who make an arch with their own hands. But even an ideal doorway should match the style of the wall on which it is located. The main purpose of such a wall is to emphasize the beauty of the opening. This works well, for example, against the background of decorative embossed plaster. A wall lined with artificial stone... As elite finishing options - compositions of Venetian plaster on the wall. If the arch is finished with plastic, then a section of the wall can also be pasted over with plastic. You can also decorate the wall with wood - attach wood panels to a part of the wall. Even simple, tasteful wallpapers will accentuate the beauty of the arch on the wall.
Decorative finishing of arches in the house requires great delicacy, at this stage it is easy to make a mistake that will disfigure even the most durable and neat arched structure. And yet, it is quite possible to finish the arch well without the help of specialists - with your own hands.
An alternative way is drywall or wood. Other options are less common. Consumers are trying to decorate with plaster or wallpaper. However, few people know how to decorate an arch in an apartment with their own hands.
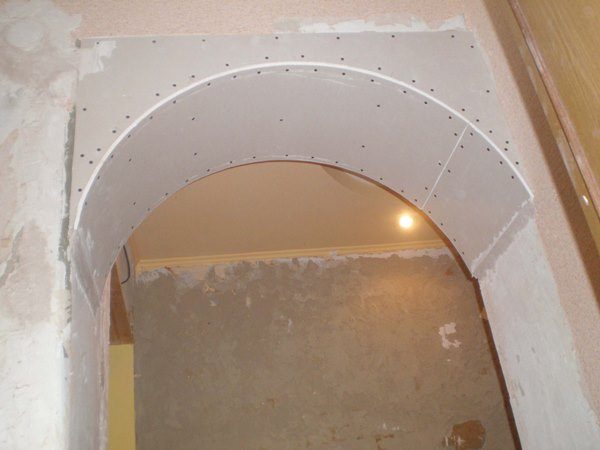
Arch installation
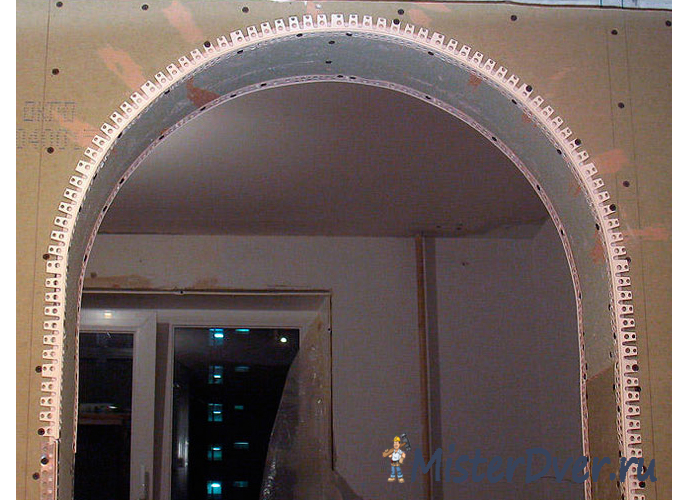
If the owner of the apartment decided to make an arched structure, then initially you need to make a sketch of the arch and free the doorway. If necessary, you can increase its area, but, final decision will depend on the shape and size of the arch. If the product is made of drywall, then you need to purchase the appropriate building materials (dowel screws, drywall, self-tapping screws). Then the owner needs to take measurements according to the sketch. Based on the dimensions obtained, a frame is made. The necessary pieces are cut with metal scissors. After that, you need to fix the profile around the perimeter with special dowel screws.
Next, a drywall sheet of the appropriate shape is prepared. It is desirable to cut the workpiece with a jigsaw. In this case, drywall must be attached to the metal profile on both sides of the arch. Self-tapping screws are used to fix the workpieces. The distance between them must be at least 15 cm. To seal the surface of the arch of the profile blank. For an arched arch, an incision must be made in the profile so that it can be bent. It is advisable to make the distance between the cuts no more than 12 cm.After that, the workpiece must be attached to the drywall with inside using self-tapping screws. In a similar way, the profile blank is attached on the other side of the arch. As a result, the workpiece must repeat the outline of the previously cut drywall sheet.
The final stage involves fixing the bottom element. First, you need to take off the size of the required strip with a tape measure. Then the appropriate piece of drywall is cut out. To bend the workpiece, you need to make cuts on the inside. The interval between them can be 7-10 cm. After that, you can screw the workpiece to the metal profile, which is screwed on the inside of the side strips of drywall. Now you can safely decorate the arched opening. To carry out the work, the following tool is required:
- Crowbar;
- Roulette;
- Level;
- Metal scissors;
- Perforator;
- Jigsaw;
- Screwdriver.
Decorating the arch with plaster
After completing the rough work, it is necessary to decorate the drywall arch with plaster or putty. This material allows you to fill in voids and even out the curvatures formed on the vault. Similar work is done with a spatula. The mixture is applied to drywall and stretched in an even layer along the entire length of the arch. Usually plastering is carried out in several passes. Then you need to let the plaster dry. On the eve of applying the finishing putty, you can make a small cleaning of the previous layers. To do this, you must use special abrasive mesh.
As for the side walls of the arch, they can be immediately finished with a finishing putty. The exception is the joints of drywall with the wall. Here you need to apply a plaster mesh, and then cover it with plaster so that cracks do not form in the future. For finishing drywall corner joints, you can use an arched corner or reinforcing tape.

Before laying this material, it is necessary to apply a thin layer of finishing putty to the corner of the arch. The tape must be distributed evenly on both sides of the gusset of the arch. To prevent the material from wrinkling, you can make cuts every 10 cm. The last layer of putty should be extremely thin. After it dries, the final cleaning is done with a fine-grained abrasive mesh. When finishing an arched opening, tools are usually needed that are different from those used when installing the structure. Here you only need a spatula and a stationery knife.
Decorating the arch with decorative plaster
Another finishing option is decorative plaster. This material is applied exclusively to the prepared surface. To do this, you must first plaster the arched opening and fill in all the voids. How to do this is described in the previous section. In this case, it is not necessary to apply the finishing putty to the arch. However, before applying decorative plaster, it is imperative to prime the previously plastered surface. The primer improves the adhesion of two different building materials. Drying period of the primer is from 4 hours to 24 hours. To create a relief on the applied decorative plaster, you must use a float, sponge or spatula. Following the drying of the applied material, the arch will need to be painted. For this, special paints are used. But, before painting, you need to once again cover the area with a primer.
You can paint the surface of the arched opening with a roller or brush. It is desirable to apply the paint in two layers. You can use different shades if necessary. If the paint is applied with a short-nap roller, the owner can achieve a bark beetle-like effect. Because unpainted grooves create a specific pattern. To enhance the effect, you can add a special dye at the stage of applying the plaster, and change the original shade when painting the walls. After the paint has dried, the surface can be coated beeswax... This will give the arched opening a peculiar matte sheen.
Pasting wallpaper on the arch
Next, the owner needs to decorate the arch. One of the options for the final finish is wallpaper. It is advisable to match the color of the material to the color of the wallpaper on the wall. The framing technology is quite simple. Before decorating an arch in an apartment with your own hands, you need to prepare strips for decoration. Then you should prepare wallpaper glue. In consistency, it should be thicker than when gluing wallpaper on the walls. This is necessary to increase the period so that you can move the strips of wallpaper, if they are with a pattern. It is advisable to start gluing the strips on the wall near the arched opening. Then you need to lay a strip that will cover part of the arch opening. The protruding material residues should be cut off with a clerical knife, but taking into account that an allowance of about 25 mm remains. After that, you need to make cuts at intervals of 20-25 mm, fold the wallpaper strips and glue them to the arched plane.
In the same way, you need to paste over the second side of the arch. To complete the gluing of the arch, a strip should be cut equal to the width of the arched opening. However, the length of the workpiece must be longer in order to fit the pattern. The cut strip of wallpaper must be glued to the inside of the arch. To avoid bubbles under the wallpaper, carefully smooth out the glued strips.
Painting an arched opening
You can decorate the arch with your own hands with ordinary wallpaper or wallpaper for painting. If the owner of the premises has chosen the second option, then after the laid material has dried, it is necessary to paint it. To wallpaper the arch, you will need the following tool:
- Pencil, ruler;
- Stationery knife;
- Glue brush.
When painting wallpaper, you will additionally need a paint roller.
Decorating the arch with decorative stone
You can also decorate the arch with decorative stone.
This type of decoration is one of the laborious ways of framing an arch.
The main burden falls on the decoration of the vault. At the same time, decorative stone is easy to install, since it does not require a perfectly flat surface. Consequently, there is no need to plaster the structure, except for large holes. But, if you need to decorate a drywall arch, then the stone should not be too heavy so that deformation does not occur. Before laying the stone, the surface must be primed. Installation can be done with glue or liquid nails. The first stone must be laid from below in such a way that it overlaps the joint between the gypsum and the wall. When laying the stone along the arch, the appropriate pruning should be done. Grinding the cut is done with a file on a stone. A special mortar must be used to seal the joints. As you can see, framing arches with your own hands, although it requires certain skills, is, however, quite feasible.
Author's advice - when self-made arches should carefully consider the sketch of the future design.
You also need to make sure that there is a whole list necessary tools... The decoration of the arch depends on the capabilities and taste of the particular owner of the apartment. However, the best option would be decorative plaster. This material allows you to use different textures and experiment with shades of colors.