New Year Already not far off. The air is felt in the air, which is slow, but confidently moves to our homes, and hearts, because the new year is a special holiday, when I want to believe in a dream, hopes for the best, and wait for miracles.
The new year's special and bright holiday is for children, because on the eve of the New Year, often children spend a lot of time with their parents, enjoying pleasant family joys.
And if the parents usually do not have time, then under the New Year they definitely find him to do with children New Year's hassle.
Very entertaining and joyful business for the kids on the eve of the New Year is the opportunity to all adjust the New Year tree.
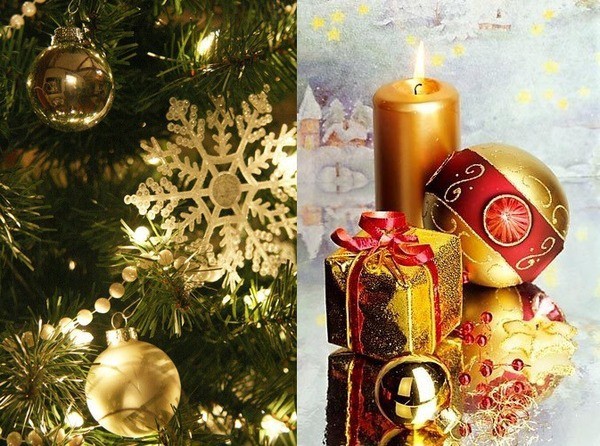
If you can afford to buy new Year's toys, creating stunning stylish design New Year tree - super !!! Such a Christmas tree will enjoy both children, adults and your guests.
If there will be no beautiful toys for the new year and the new New Year's decorations on the Christmas tree, we advise you to work in creativity and create beautiful New Year's toys and decorations for the New Year with your own hands.
New Year's toys do it yourself and Christmas decorations with your own hands for the Christmas tree and at home - a very fun lesson for the whole family.
Therefore, laziness in straight !!! Let's look at what New Year's toys and New Year's decorations for the New Year can be made with your own hands without much effort, not only to decorate the house, but even more to get close to the members of your family.
Create new year toys and decorations with your own hands.
First, we immediately note that create New Year's toys with your own hands, making homemade decorations for the New Year - a very fun occupation. It can be compared with the ritual, with a breathtaking process, in the moments of which a miracle is born and a fairy tale is born.
After all, making homemade New Year toys and unusual, homemade Christmas decorations for the Christmas tree and at home, you breathe in them a part of your love, warmth, so such a New Year's decorations and beautiful toys on the Christmas tree are truly special.
New Year's toys made with their own hands will not only decorate the house, but will give special atmosphere Your home enriching it with bright accents and cozy trifles.
What kind of New Year's decorations can be invented that it is not expensive, it is interesting and that such New Year's decorations transform your home.
In order to make the New Year's toys and decorations for the New Year tree and houses, stock all the necessary materials.
In order to make the New Year's decor, namely homemade New Year decorations and New Year's toys do not need special materials.
For this, such healthy materials like threads, needle, of course, beads, sparkles, and many other little things, who may stand and expect to become the original mega of fashionable New Year's toy, are suitable for this.
Of course, it is impossible to start making New Year's decorations and toys without fantasy, because it is exactly the driving force of the whole process.
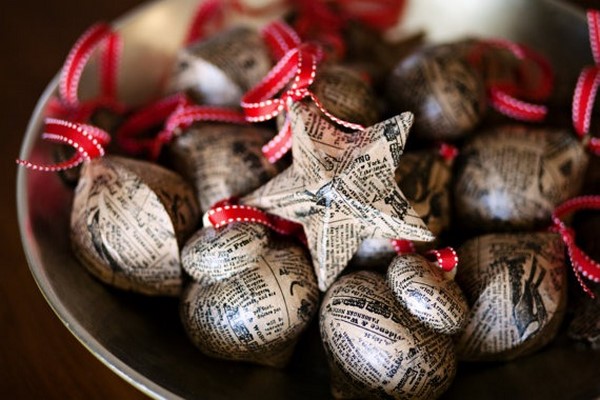
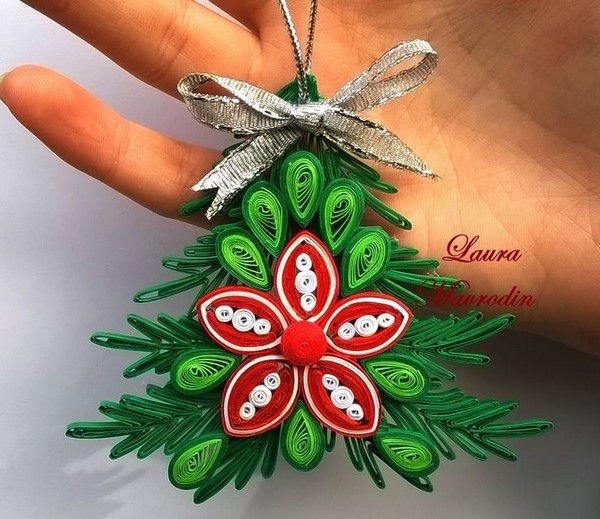
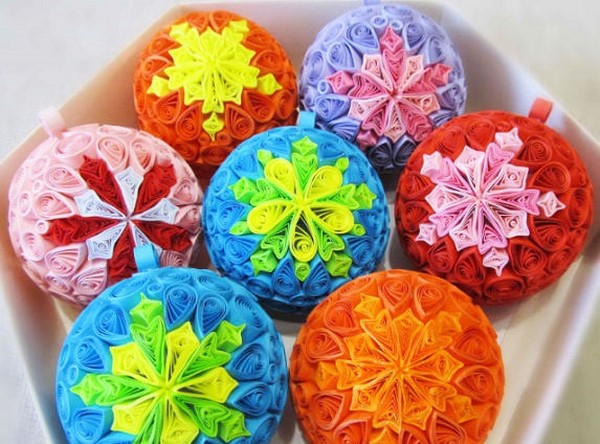
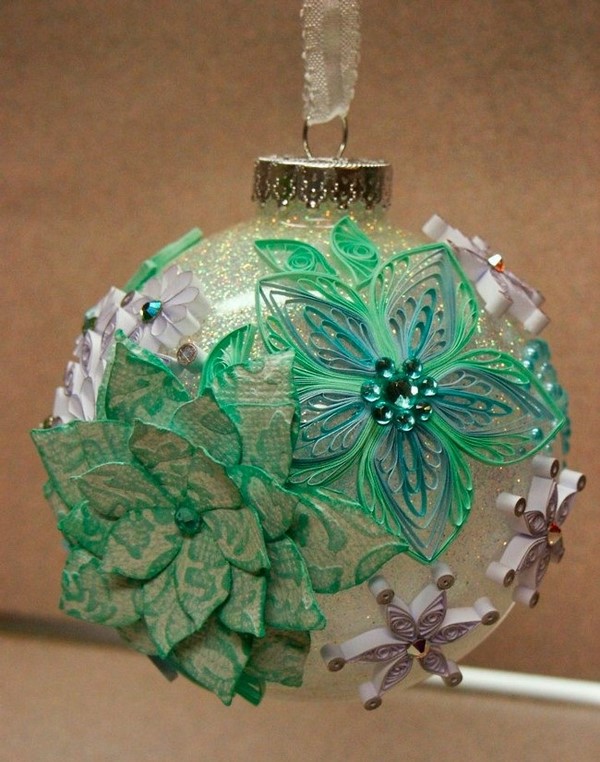
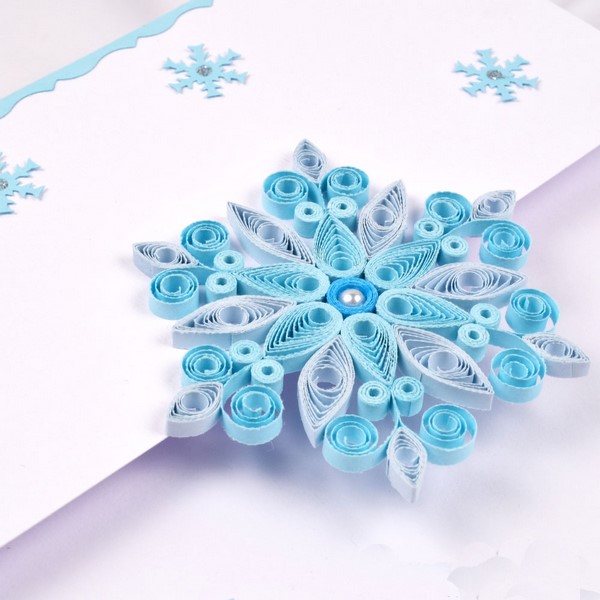
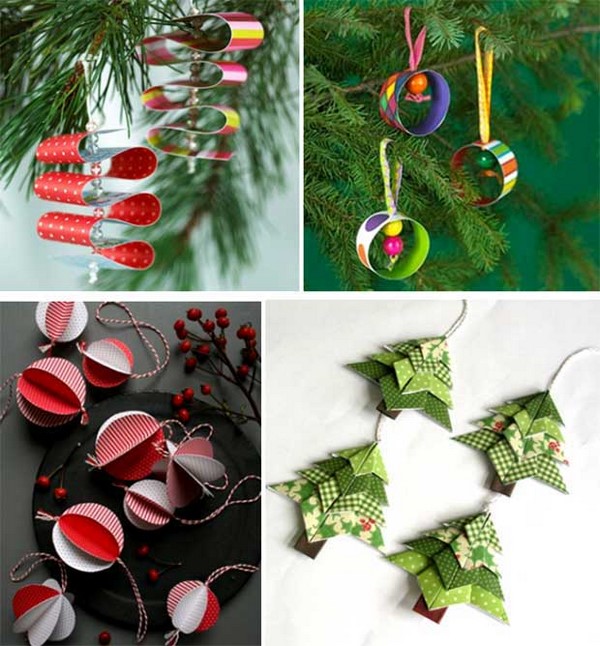
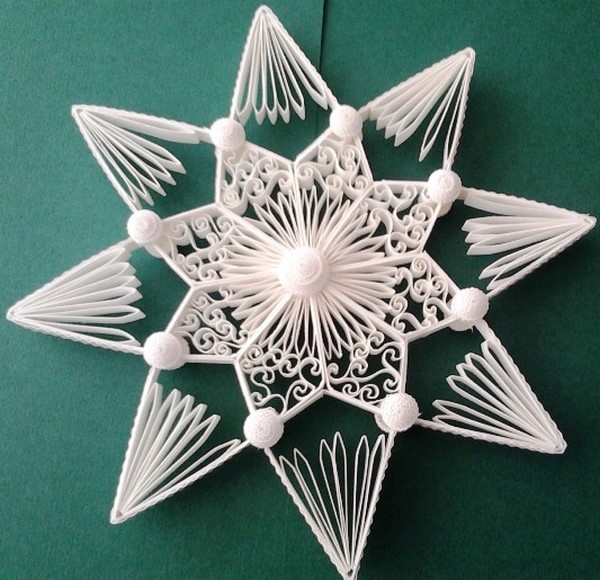
Creative looks for Christmas decorations from paper. They are not at all difficult to do and today's New Year's decorations in the style of papier-mache and queening are so diverse that even if you are not the biggest craftsman, you will no doubt get new Year's snowflakes From paper, New Year's garlands, stars or balls for the new year.
And if you, in addition to multicolored or white sheets of paper, there are ribbons and sparkles - you just risk a queen master and papier-mache, if you try a little.
New Year's decorations and New Year's toys are not only New Year Quilling and Papier - Masha.
For new Year's decoration An excellent option will be the New Year toys associated with your own hands with a spoke or hook. And here ideas are not less than in paper ornaments.
The Christmas tree in retro style will look amazing if your Christmas decorations associated with your hands with crochet or knitting needles will resemble birds, animals.
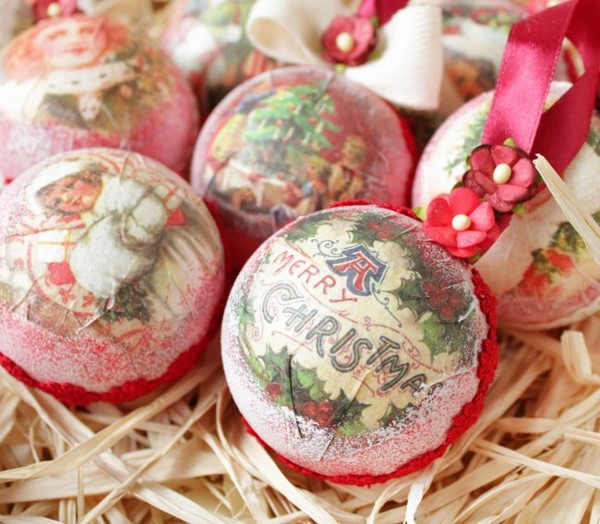
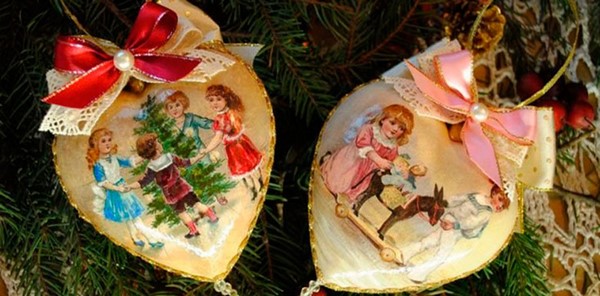
Decorate Christmas tree and house New Year's bells, flowers, snowflakes and asterisks, balls made in a decoupage technique, which will make the design of the Christmas tree and home especially warm and cozy for family evenings.
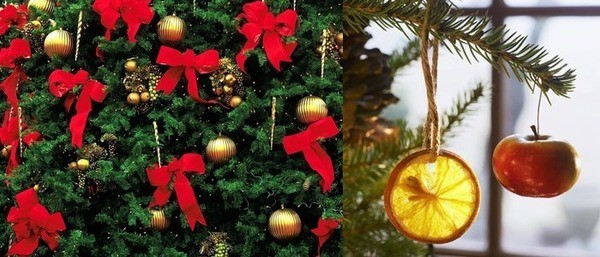
The rich and tasty will look a Christmas tree if the New Year's garlands from sweets, fruits and other goodies will be on it.
Such New Year's decorations will shine bright colors on the New Year tree, and will become a tasty surprise for small residents of the house.
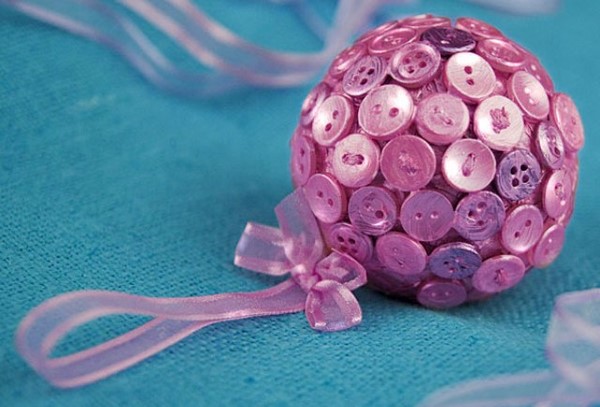
You can make New Year's decorations for the Christmas tree and home in shape new Year's gifts. If you have old trinkets in your box, treat them with varnish, and trigger with sparkles, and you have a very original New Year's toy.
Another very successful New Year's toys and decorations can be created from foam. Make billets in the shape of balls or cubes.
Plug the workpiece with bright ribbons, sequins, you can take beads, also fit different types Cereals, with which you can create a whole masterpiece, and not a New Year's toy.
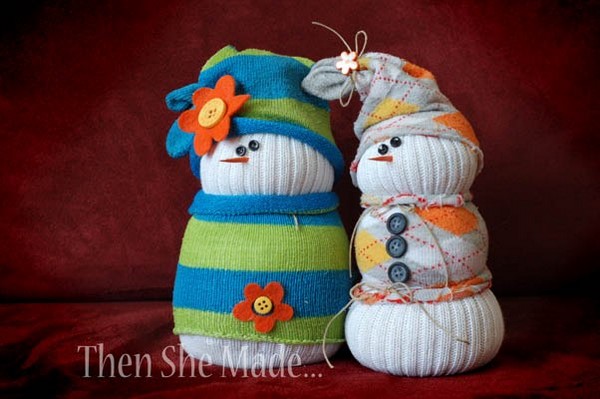
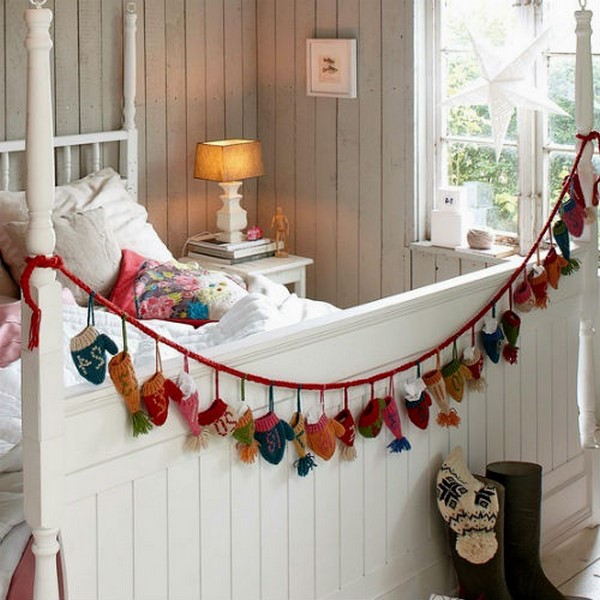
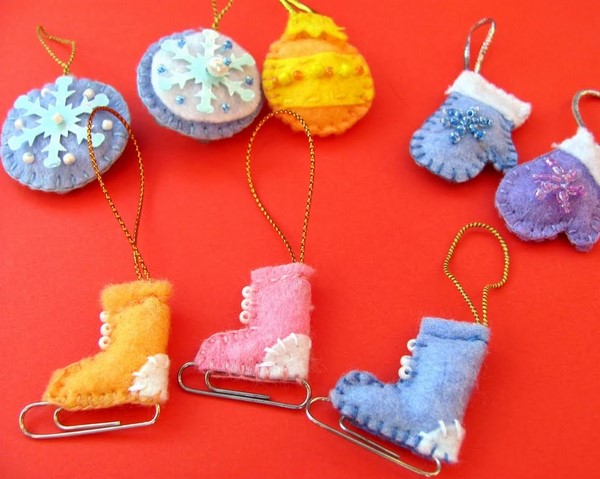
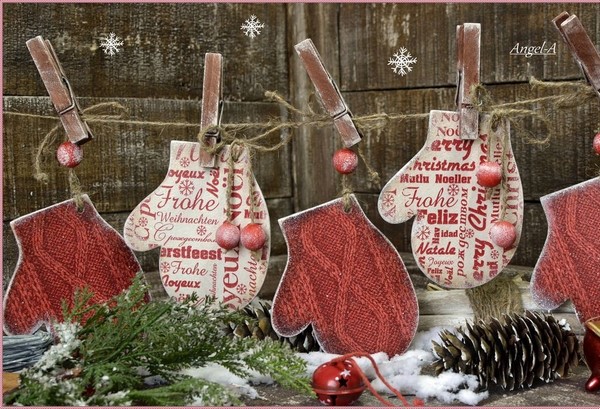
The tradition has already become New Year's decorations in the form of large multi-colored socks, boots and mittens, which are best made from dense fabric.
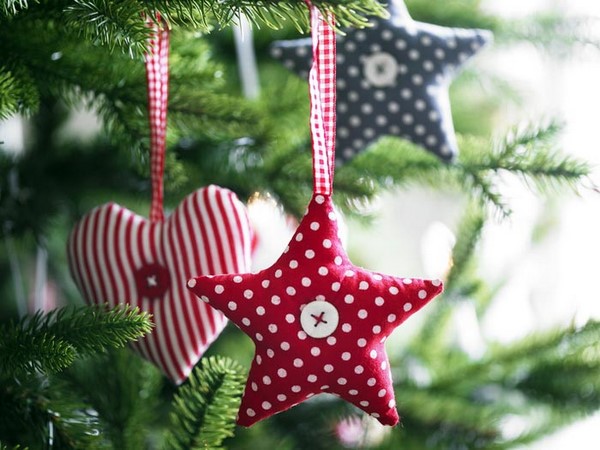
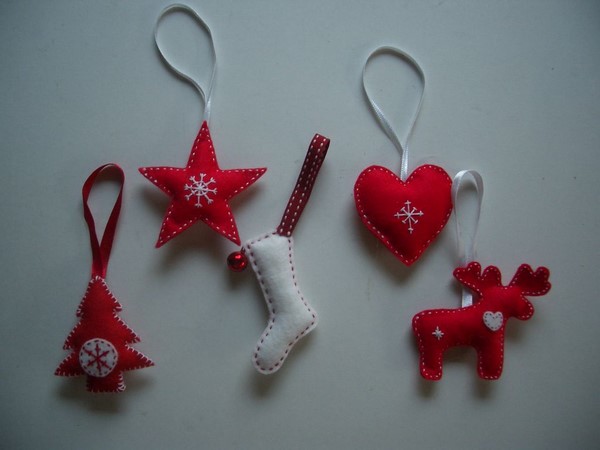
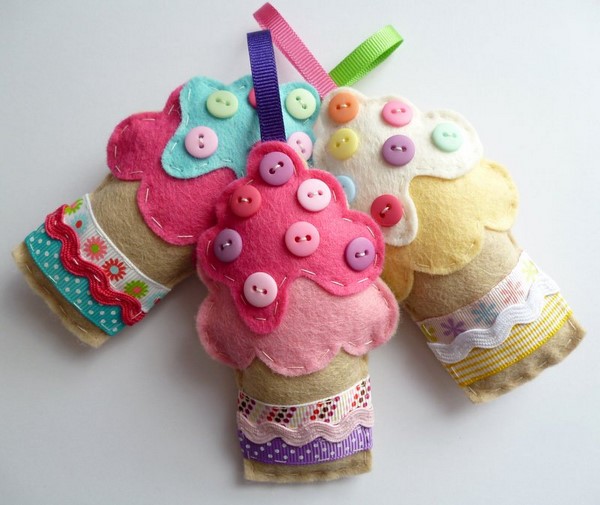
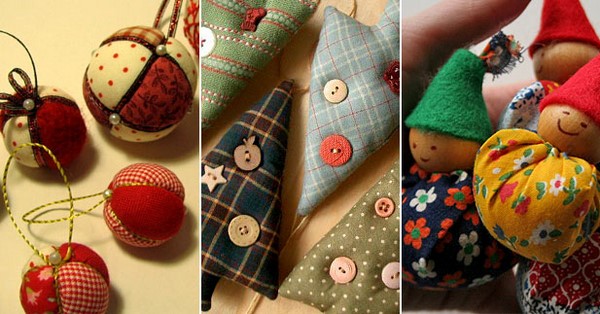
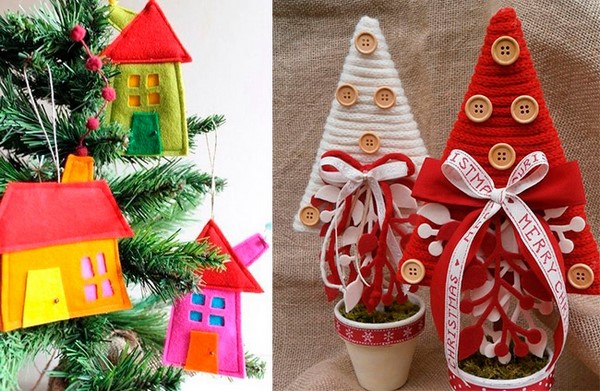
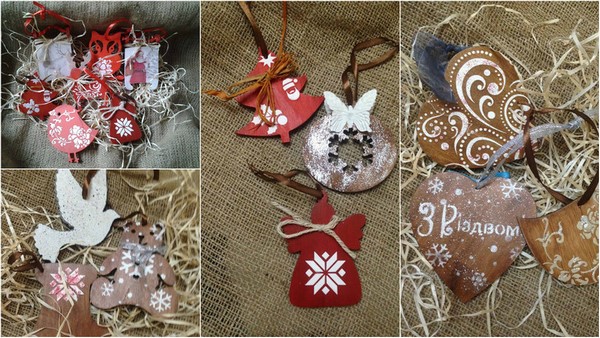
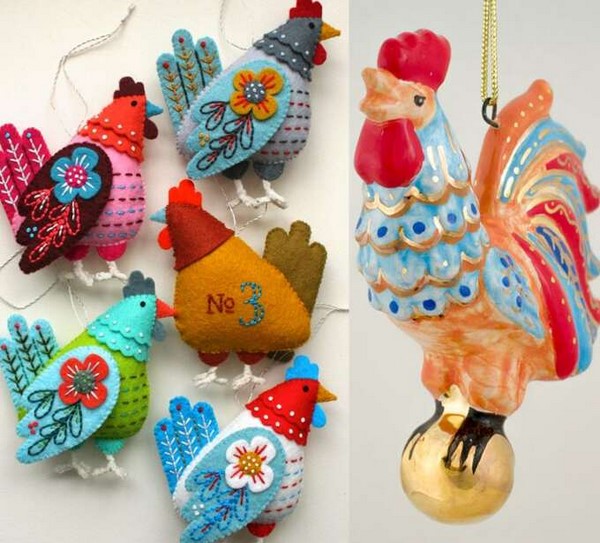
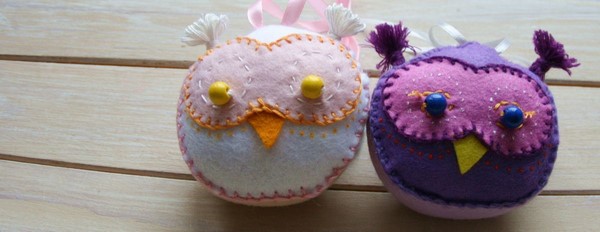
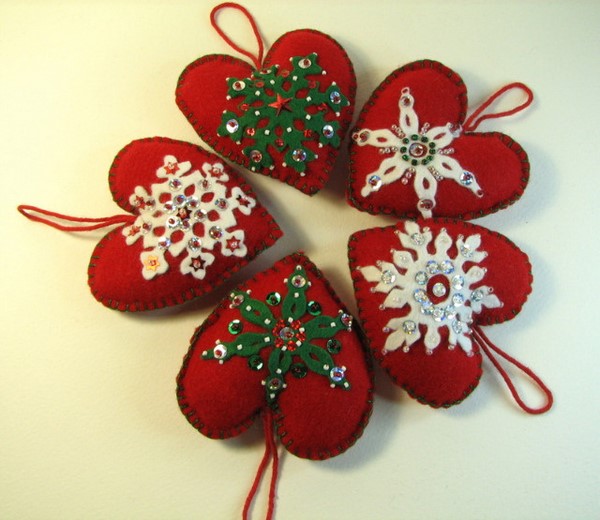
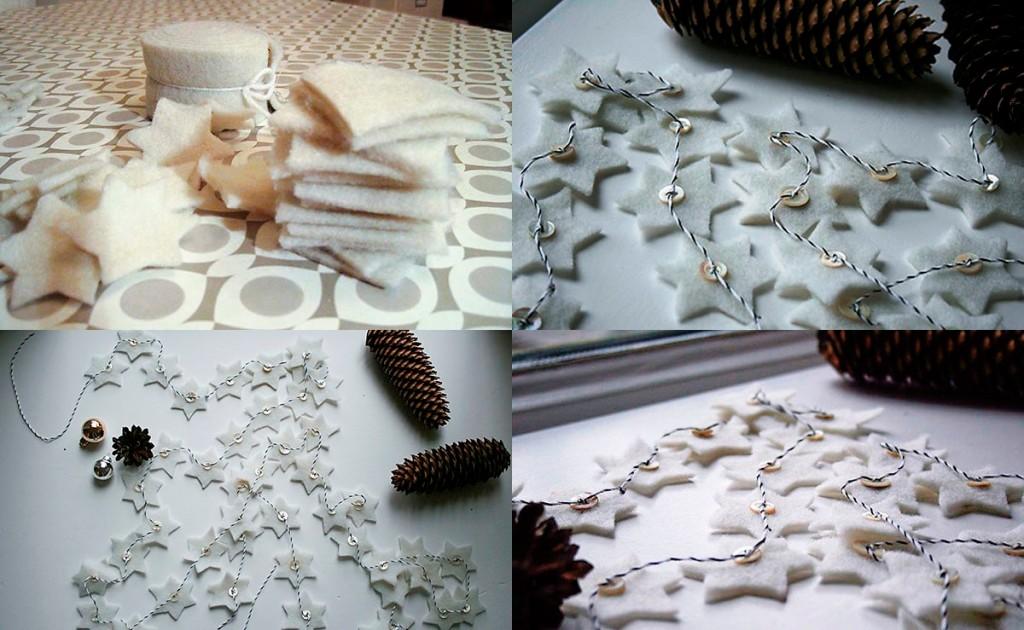
Very interesting New Year's toys and decorations are obtained from burlap and felt. It is easy to work with this material, and any decor on it will look very impressive.
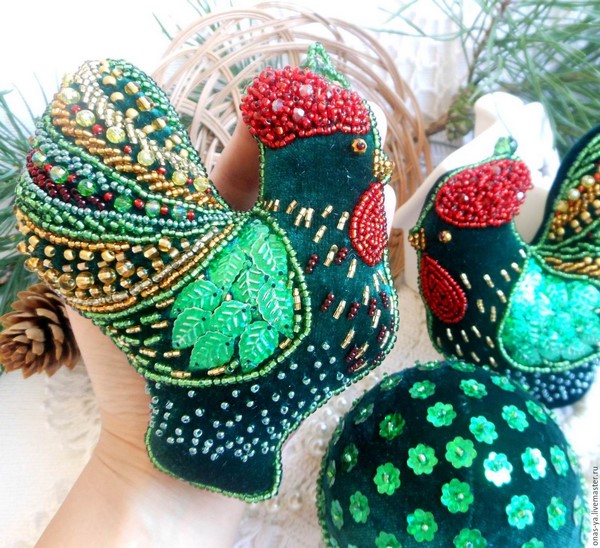
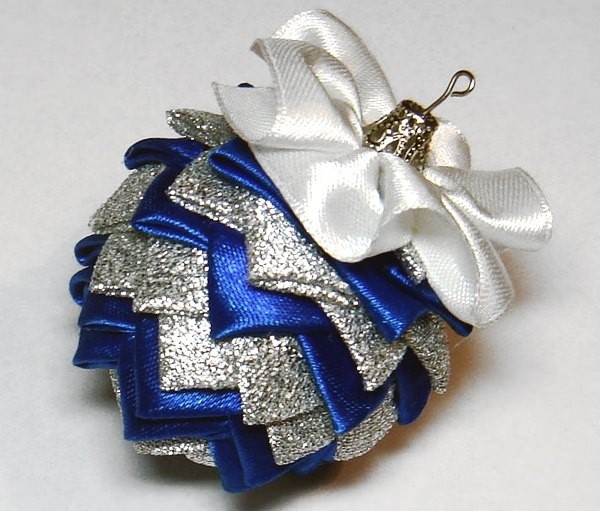
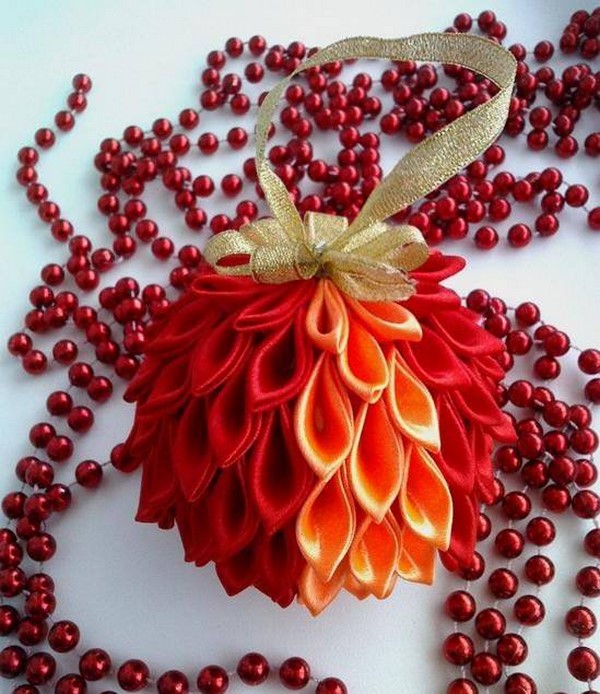
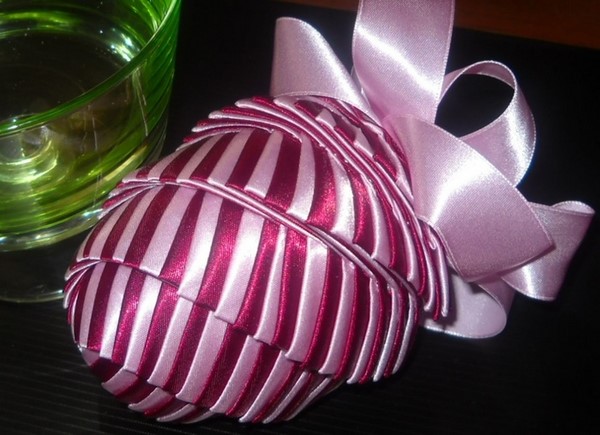
You like both children and adults to make New Year's toys, made in Kanzashi technique.
For the manufacture of such Christmas decorations, you need to go ribbons, beautiful fabric, beads, pearls, cords and wire.
Unusually festive mood Create new year toys in the form of garlands. New Year's garlands made by their own hands can be much more interesting than purchased in the store.
Paper garlands can be combined with garlands of foam balls, garlands from old toys, decorated with modern way, etc.
Do not forget that New Year's toys can perform the role of not only jewelry, but also symbolic Christmas presents, which will always resemble pleasant New Year's Evening, spent with loved ones.
Especially love to do such Christmas toys children, because they invest in such a homemade surprise for mom, dads, grandmothers and other family members a part of their soul.
And now let's see what New Year's toys and beautiful New Year's decorations, except called, can still be made from ordinary materials, giving them a completely unusual and very important essence.
And what kind of New Year's toys do you do?
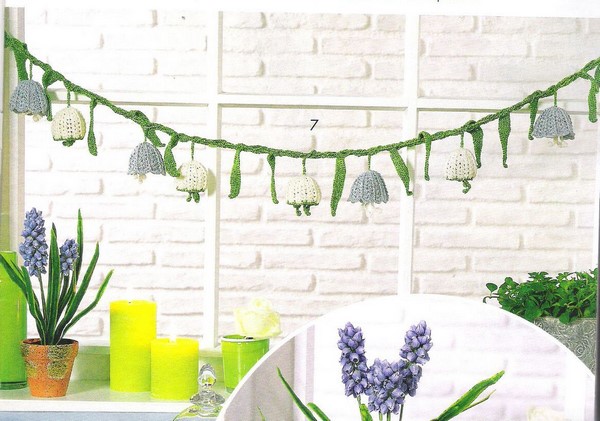
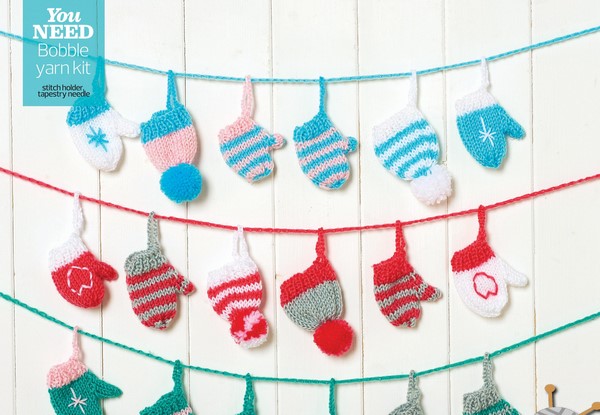
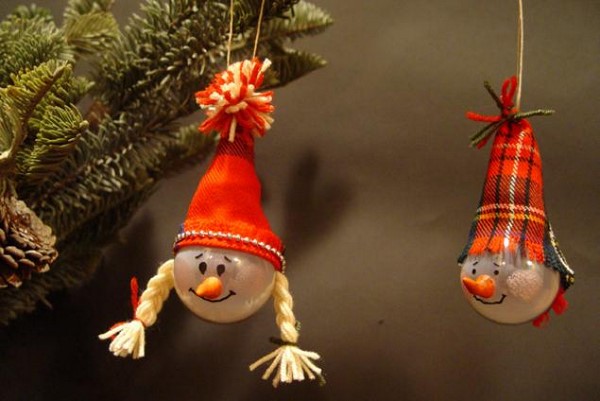
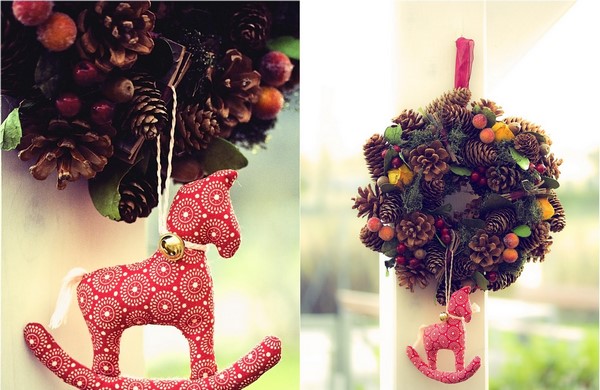
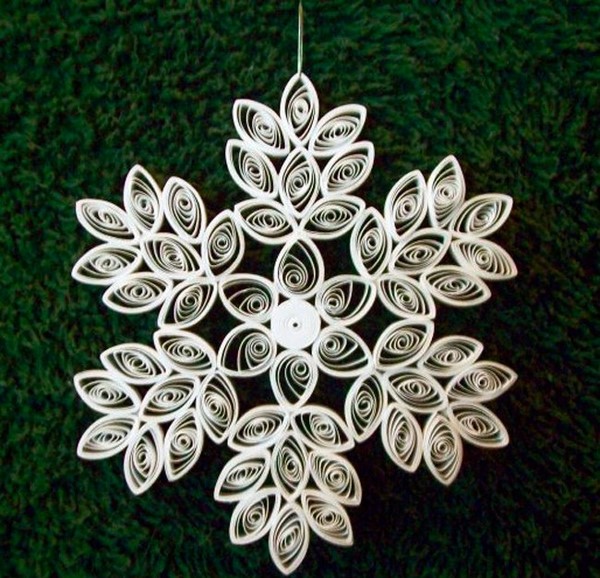
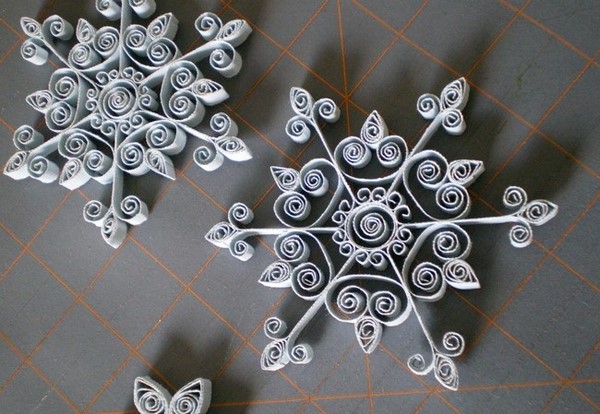
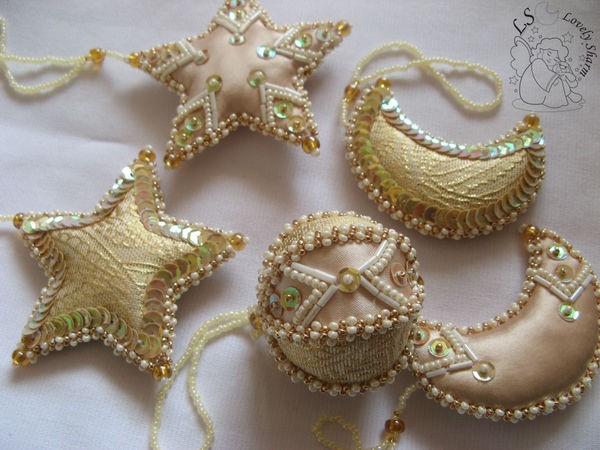
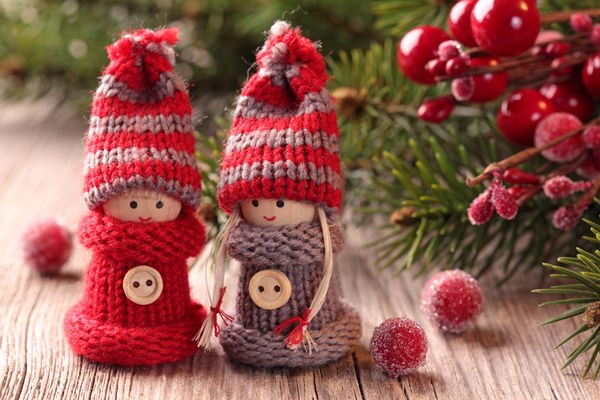
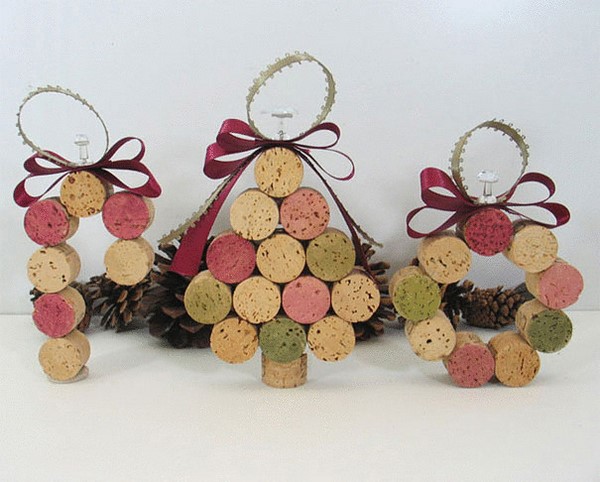
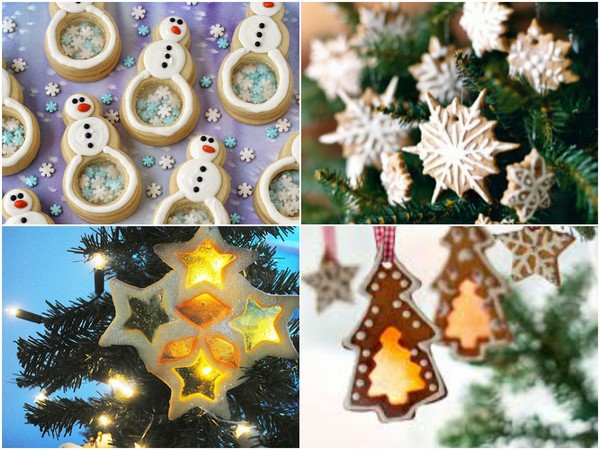
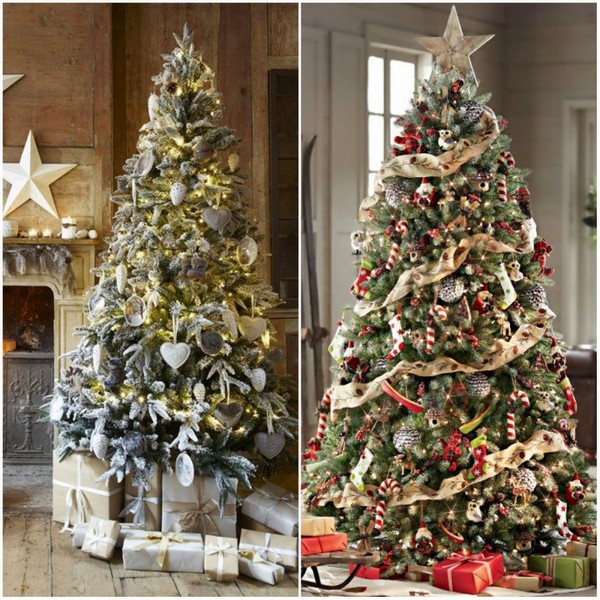
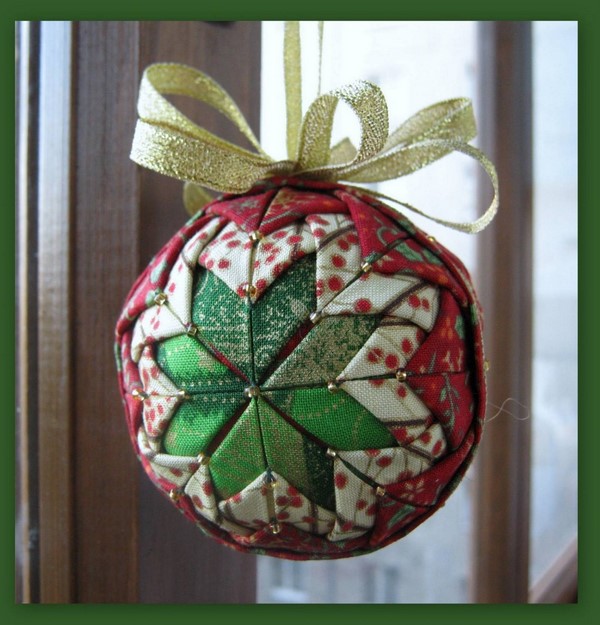
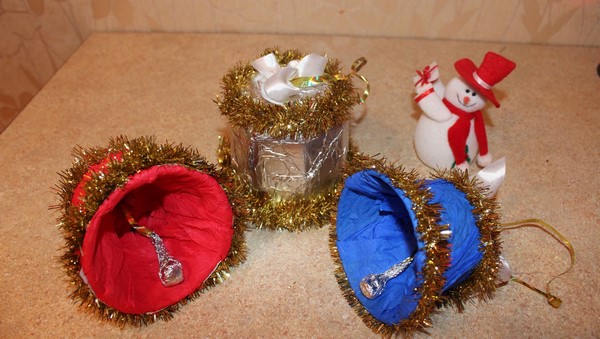
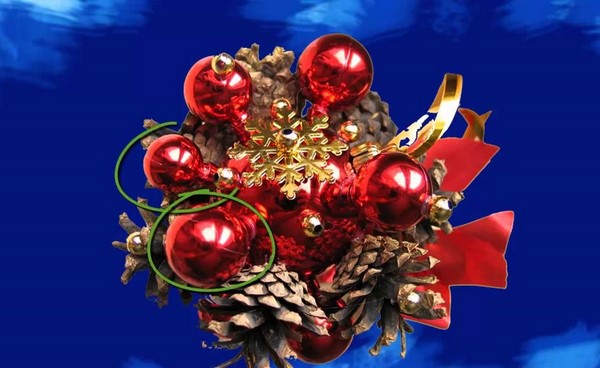
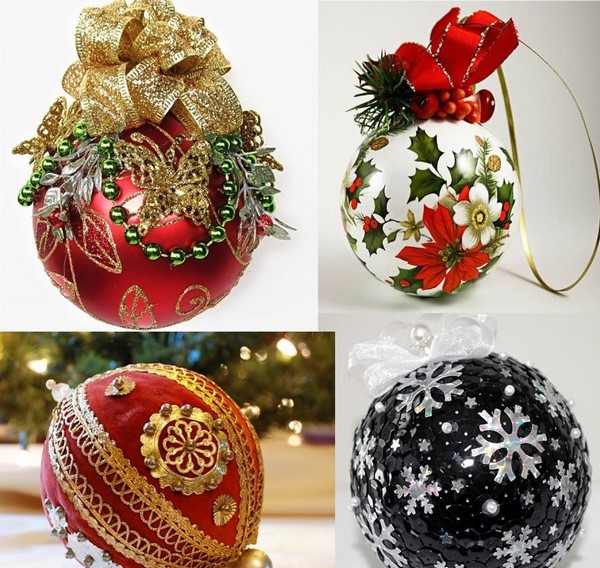
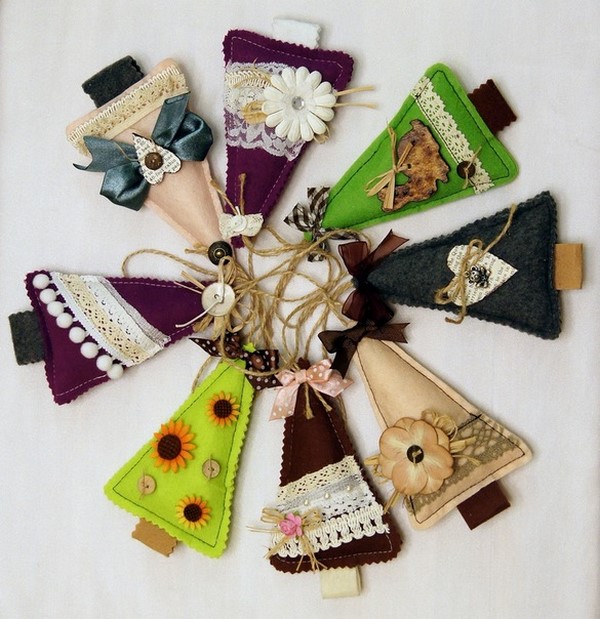
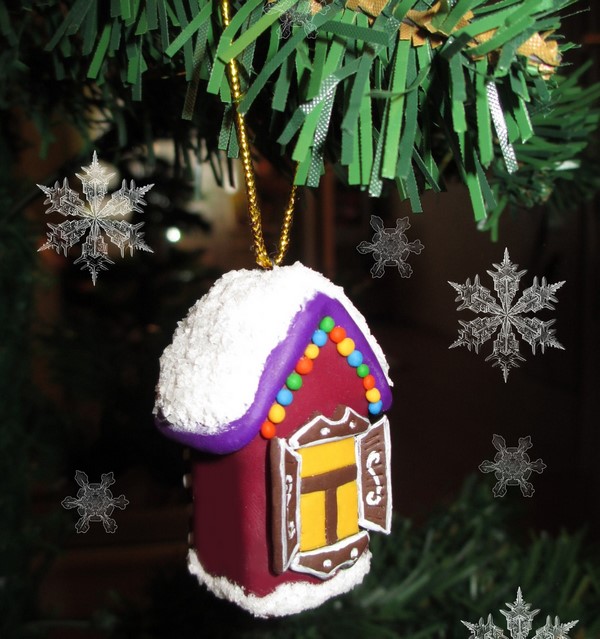
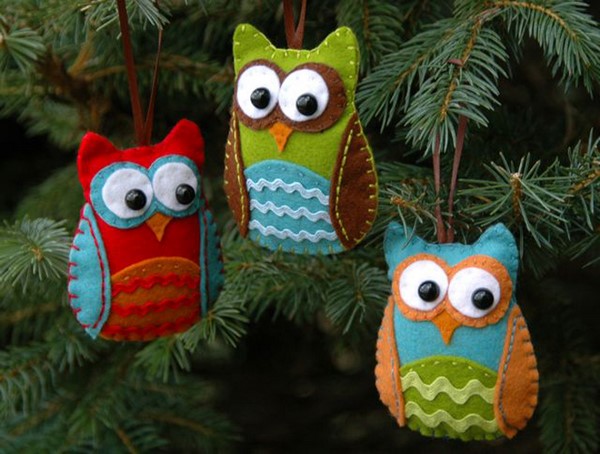
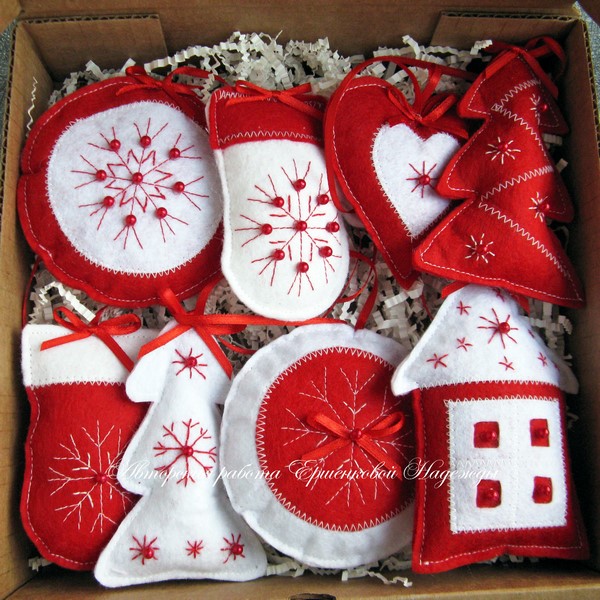
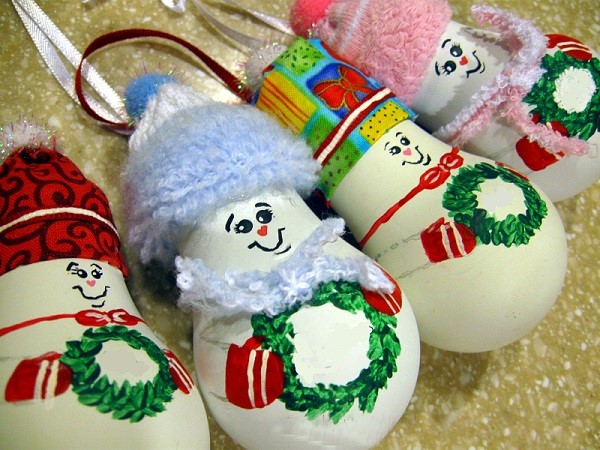
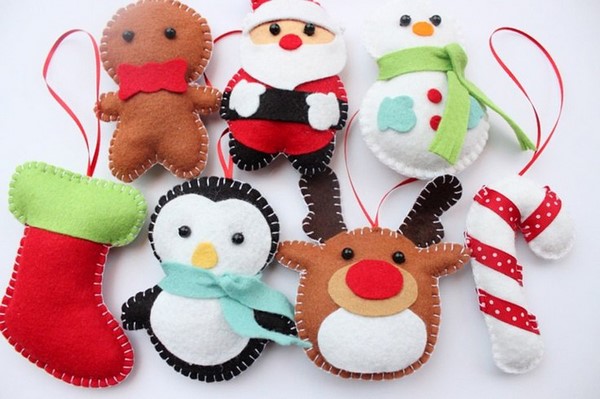
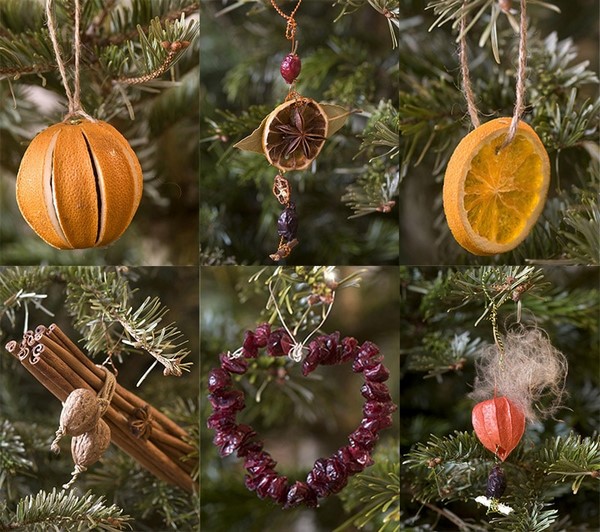
New Year's toys do it yourself: photo ideas for inspiration


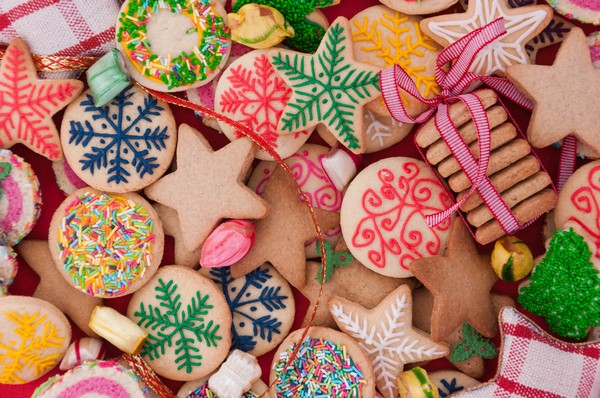


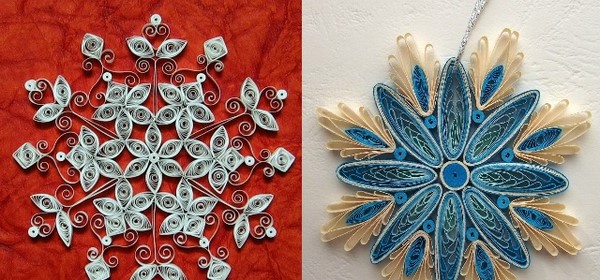


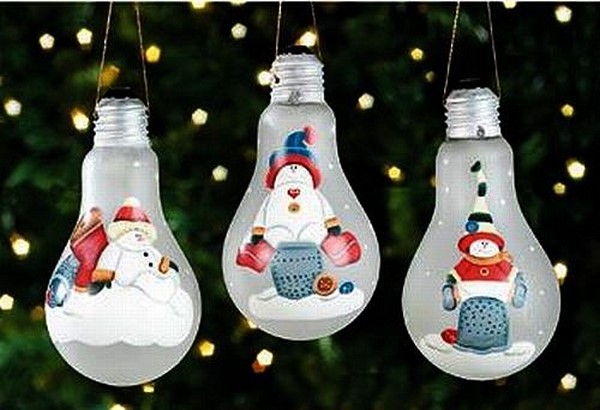


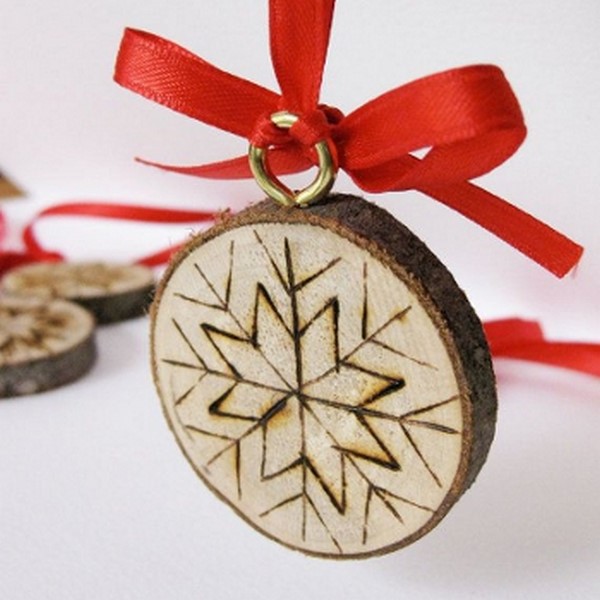

![]()


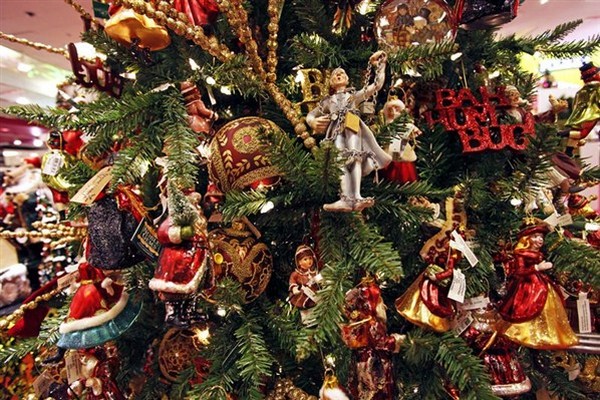


![]()


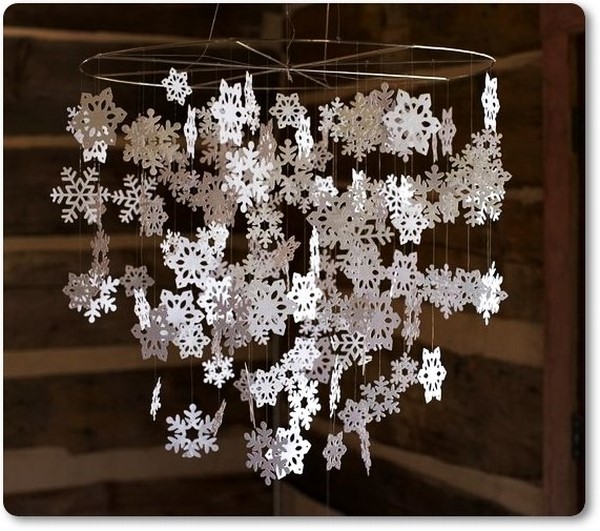


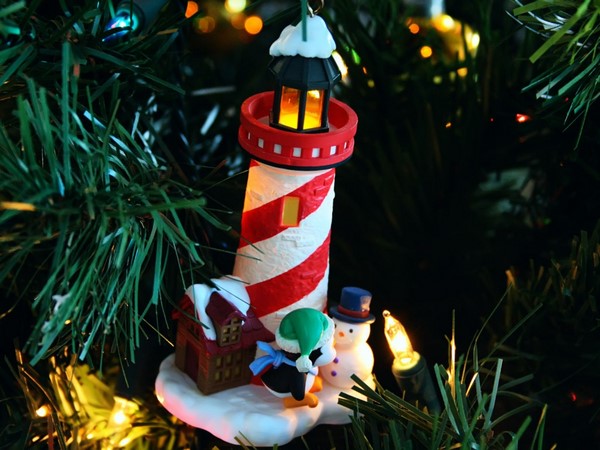


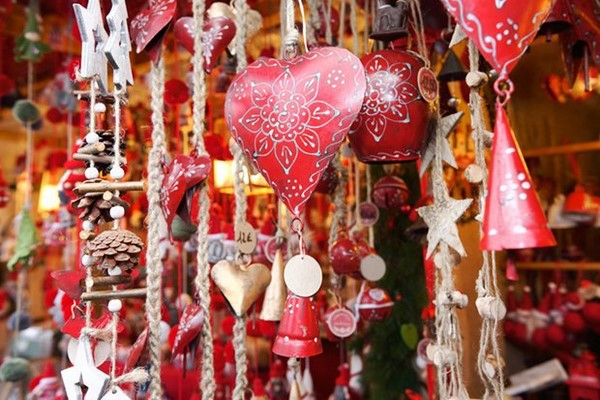
![]()

Did you have the most charming teddy bear in your childhood? Without a ear or with a blurred nose, he was the right and loyal friend, despite the flaws. If you want to give such joy to your baby, it is worth understanding how to make a soft toy.
What is interesting to the independent sewing of toys?
Children's stores offer an incredible choice of toys, while videos How to make a soft toy do not lose their relevance and give a daily high views. Where is the regularity?
The rejection is that the toy, who sewn by the mother is a special energy, love embedded in each stitch, and also a unique design and safeguarding of safe materials. If you doubt and do not know even the initial moments of how to make soft toys, get acquainted with the advantages of this process:
- even if you become used common patterns, as a result you will have a unique product, because each craftswoman makes his nuances;
- the sewing process gives pleasure and soothes;
- you can also sew as a gift, and to order, turning your own modest hobby into a good business;
- independent tailoring guarantees the use of high-quality environmentally friendly materials;
- sewing will always be cheaper than the acquisition.
Choose suitable materials
How can I make a soft toy? What materials will be required for this? For sewing you will need:
- fabric, felt, ribbons, fur, leather, lace, threads for pumps or even socks (it all depends on what is available or what you like);
- threads (for fastening parts and for embroidery decorative elements);
- any suitable filler (cotton, foam rubber);
- cardboard or wire for creating a rigid frame;
- thimble, needles, scissors;
- fittings (nozzles, eyes);
- santimeter tape and ruler;
- soap or chalk for drawing pattern;
- copy paper;
- pattern.
If you choose all the materials correctly, then questions, how to make a beautiful soft toy, you will not have - will remain just starting to sewing.

Sewing a soft toy - a sequence of actions
The main stages of the works are:
- The choice of material, its washing, ironing (that is, preparation).
- Cutting elements.
- Lock and firmware.
- Putting the details.
- Assembling toys.
- Its clearance.
First you need to figure out how to make a pattern of soft toys. The pattern is copied to the tracing. In this case, the tracing is carefully sealed with the pins with the base so as not to move. Then, through the copier, the pattern from the tracing is translated into cardboard and cut the pattern.
Thereafter, the cloth is folded for cutting up the withdrawal side, and the tissue decreases on which the elements are cut off.
Tip! Make sure that pair parts are decomposed symmetrically. Otherwise, the risk that paws or ears will be carved for one side.
Recommendations on how to make a soft cat toy, do not cost without tips on tailoring. So, you can sew manually, and you can use the machine line. Interestingly, in the middle and big toys The seams are performed from the offline, and in small - from the front part (so the product is also additionally decorated).
Tip! Hang the seams and follow the first time before turning the workpiece. Then the edges of the product will become beautiful and smooth. Do not forget that the threads must be combined with the color of the fabric.
How to make a soft kitten toy, an elephant, bunny or a bear? You can also use a wire frame. It is carefully hidden behind the package, and the wire tips must additionally be "wrapped" by cotton so that they do not break the fabric. Then the package is carried out. For these purposes, the synthene is ideal - eco-friendly material capable for a long time Do not lift. It is favorably different from scattering with the time of the foam rubber and knocking cotton wool. Eco-friendly toys are also hammered with a bench (as an artificial alternative, a plastic crumb can be used).
Follow the toy need extremely thoroughly - lumps are unacceptable, violations of form or discontinuation. Small details are stuffed with a pencil or a thin stick.
Registration of the result
After all the works on the sewing are finished, it remains only to decide how to make your eyes with a soft toy and make a muzzle. To do this, you can use finished accessories, and you can do buttons, beads or embroidery.
Eyes are performed from felt, oilcloth or skin - the main thing is to be well fixed, the edges did not appear. So that the face turned out is pretty and alive, necessarily make a pupil, combining materials of different colors or lining under the buttons a white felt. Eyebrows and eyelashes are created by appliqué or embroidered - just like mouth and nose. As the last strokes, you can decorate a toy - beads, flowers. All, soft friend for your baby ready.
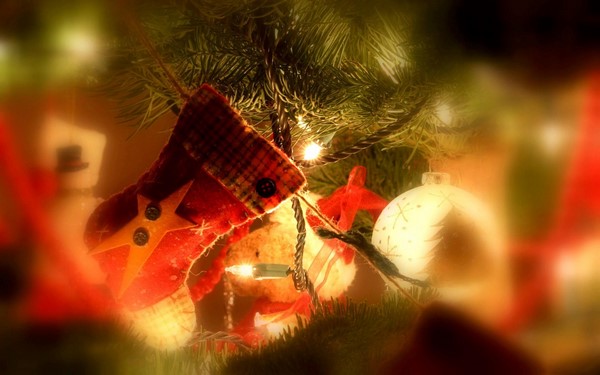
Christmas tree - Eternal embodiment of joy and holiday. And not only for children. Adults, too, with poorly hidden trepidation, await the onset of the new year, when all the most cherished dreams are carried out. And for this you need not so much - just decorate the Christmas tree with cute baubles. It is said that this is this ritual and helps to come true in any desire. Especially if these are made.

Of course, the Christmas tree is easier to decorate expensive purchased toys: huge glass balls, fun electric garlands, bright rain. No one argues that such a tree will look very presentable and elegant. But will there be so much soul in a cold glass toy, as in a touching cardboard toy, a suitable personally, and even children's handms. Over the years, of course, the purchased, and homemade toys will wind, lose the past gloss. But if the impeccable, but constituted factory decoration you just throw away without a drop of regret, then the toy you did with your child will not throw a hand. And then you try to breathe in her new life, Carnate broken parts, put or tinker. And not because you will feel sorry to throw off the piece of paper or fabric, but because in this naive product - the particle of your soul, the fragment of your child's child. By touching this craft, you seem to re-survive the moments of the long-stayed years, which you can return, except, in such memories.
So, consider what we can do. The simplest and most affordable thing that we can have to repair the old toys of their children and sew ribbons to them, if it is a soft toys, stretch the braid through the hole or tie it to the finest part of the toy from solid materials. Such a small toy will be very cute to look at the Christmas tree.
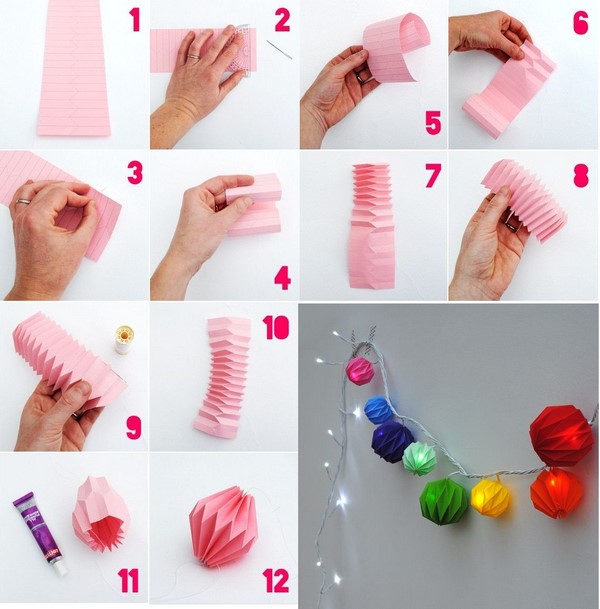
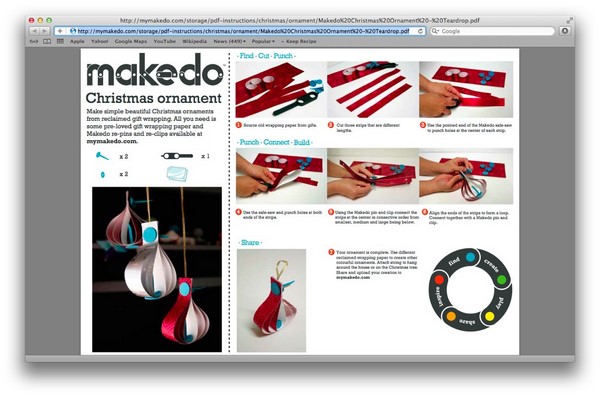
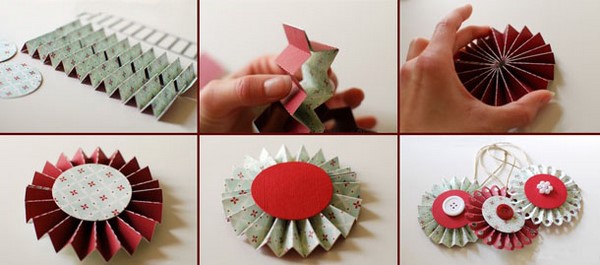
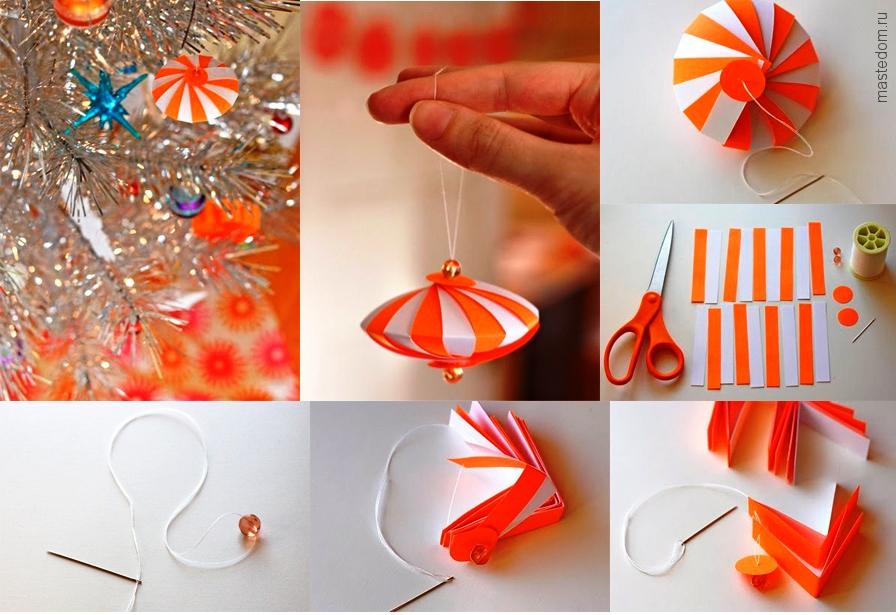
The most common design of Christmas decorations is paper toys. To make a simple, but very pretty festive toy-ring with your own hands, you will need only sheets of color cardboard and paper, and more scissors and glue. First you have to work on a cardboard ring, which, however, can be replaced with a decorated - salamic or painted, ring from the tape or any other suitable element. Then from the strips of white or colored paper, a width of less than the ring of the ring, the harmonica is made and is glued from the inside into the base ring. After that, it will only be left to add bright strokes with the color of the color of the squares. They are flexing in pressure and symmetrically pasted into the folds of the harmonica.
How to make Santa Claus do it yourself?
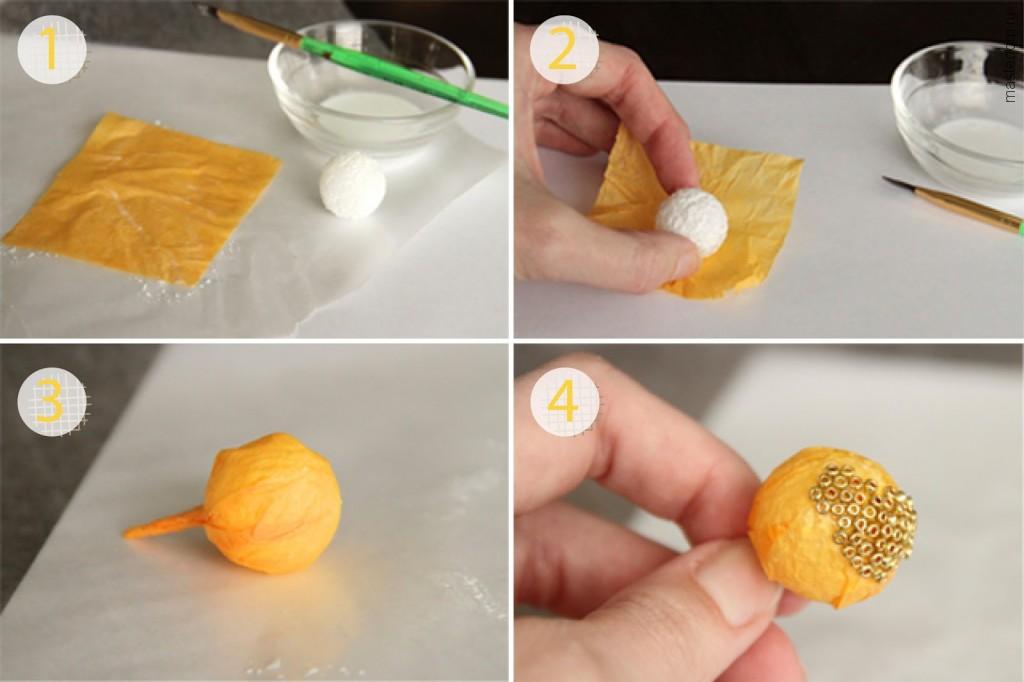
To make a new year toy do it yourself, You can come up with something your, unusual and interesting. The original will look at the decoration in the form of a lamp from felt or magic snowflakes from beads shining like a diamond paint. And you can make a real Santa Claus. To create this kind old man, which will be the original decoration of the child's room, you will need a paper plate, cotton wool, colored sheets, markers, watercolor paints, white glue, acrylic paint white, scissors and, of course, a good mood. So, you can proceed.
- First takes the paper plate and paint in white color acrylic paint. After drying, the peel on the back side of the plate is glued with a nose from a crumpled paper ball, which is glued with white paper flaps on the principle of Papier-Masha. By the same principle, you need to make cheeks and eyebrows grandparents, and after drying the glue to paint everything into white.
- After a complete drying of the nose, it is necessary to mix the white and brown paint shorter to obtain the natural color of the face. The resulting shade is applied to the plate. A little red shade is added on the cheeks and the nose.
- It is checked, whether all the paint dried, after which the facial features are diammithers. When the child does not like to draw or it does not quite well do it, you can stick your mouth and eyes from the same paper harnesses, painted in white, and then in a natural color: reddish lips and blue eyes.
- Further of the red paper triangle making a hat.
- On the tip of the caps, we glue a small cotton ball from which Pompon will turn out. After that, a wide wool strip is taken and glued to the lower part of the face. So it turns out Beard Santa Claus. To make eyebrows and mustache, more subtle small stripes are taken, which symulates gorgeous mustache and bushy eyebrows.
- After drying glue toy is ready!
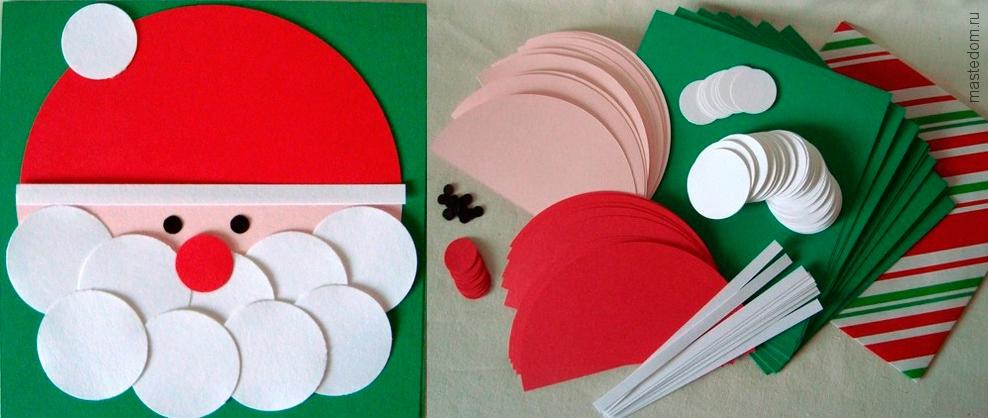


By exactly the same principle you can make a snowman's head, Pinocchio or another funny face. It would be only a desire!
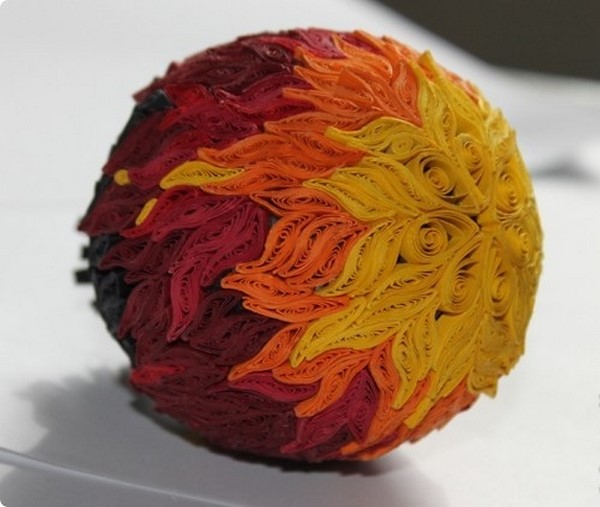
Another easy way to make a beautiful toy is to re-establish the heart of the foam heart. For this, the adhesive gun is fixed with a pistol on the rib toys. Then begin to stick beads, and they are laid strictly in one direction, forming the turns from the edges to the center. Beads are not necessarily the same. They can be selected in different colors and sizes. Reaching the middle of the heart, the bead thread need to trim and then glue only the small parts of it, cutting the desired amount of beads with scissors. After complete filling of one side of the heart, you can move to another. At the end, thread or ribbon for hanging toys are fixed.
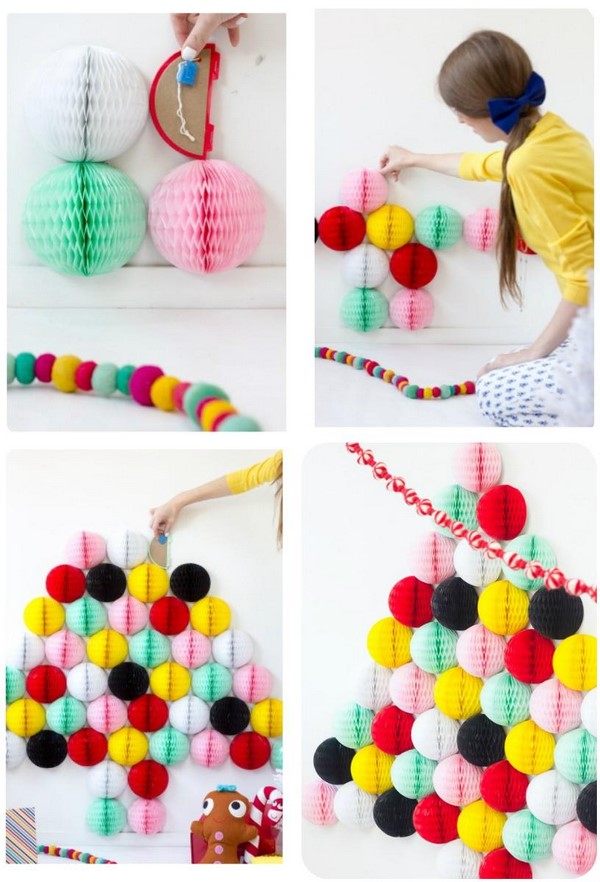
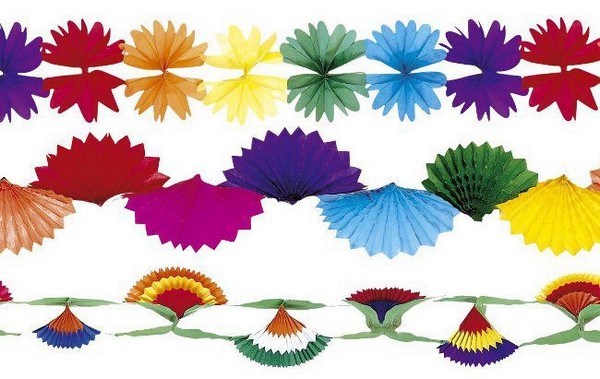
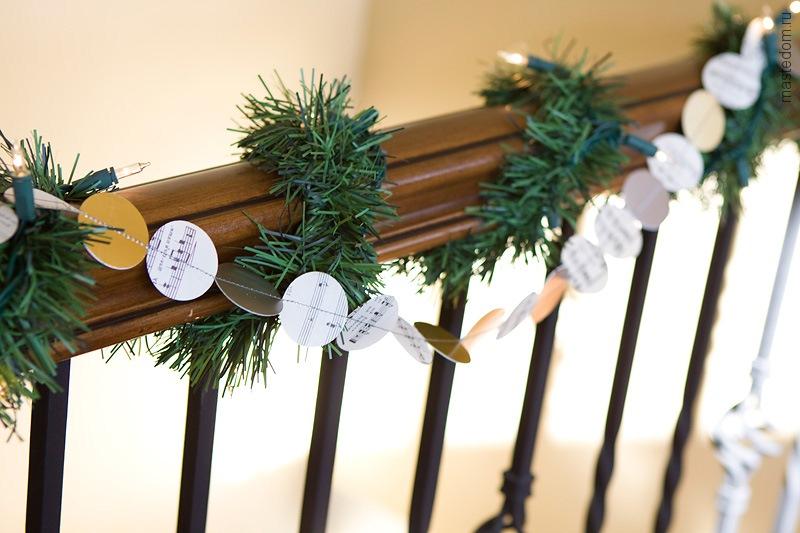
New Year's toys do it yourself: garlands and balls
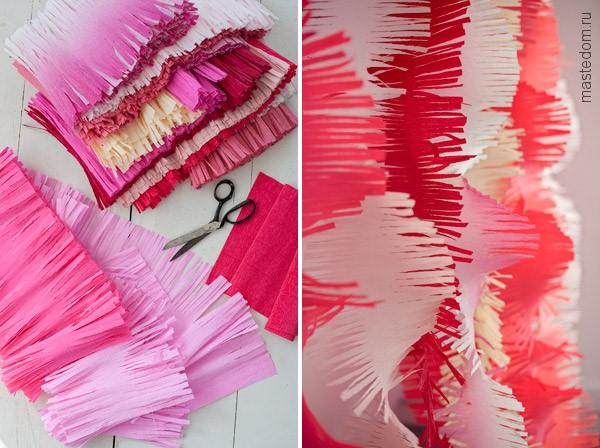
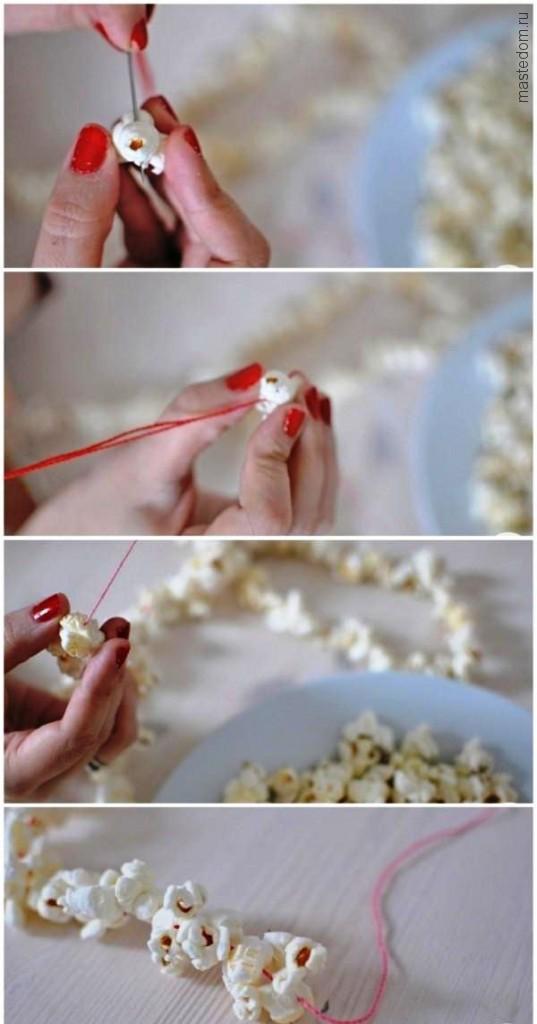
In December New Year's days, decorate the house and create a festive mood will help christmas tree garland. And if you connect to its manufacture the whole family, then the inside of the winter evenings will be provided. So, one of the simplest, but very original options for such an ornament - garland made of paper pomphones. For its manufacture, you will need paper different color and various textures, scissors, rope and glue.
Initially, the sheet of paper is folded along the width of pressure, then - once again in length.


On the side without folds with the help of scissors, an incision is made - a band in a half-meter full length, leaving a fold in 6 centimeters. The sheet turns around and is cut in the midst of two parts, one of which is postponed to the side. The sheet is completely revealed and the leaflet dried on two sides of the strips with a whole untouched with scissors part in the middle. Then you need to take your fingers for the middle and twist the leaflet, not assigate cut edges. After the center of the leaflet is completely twisted, you need to bend it to the loop formed and then glue it at the base. After the rope of this tassel, you can start making the following. This shaggy caterpillar will become a cheerful addition to the Christmas decor.
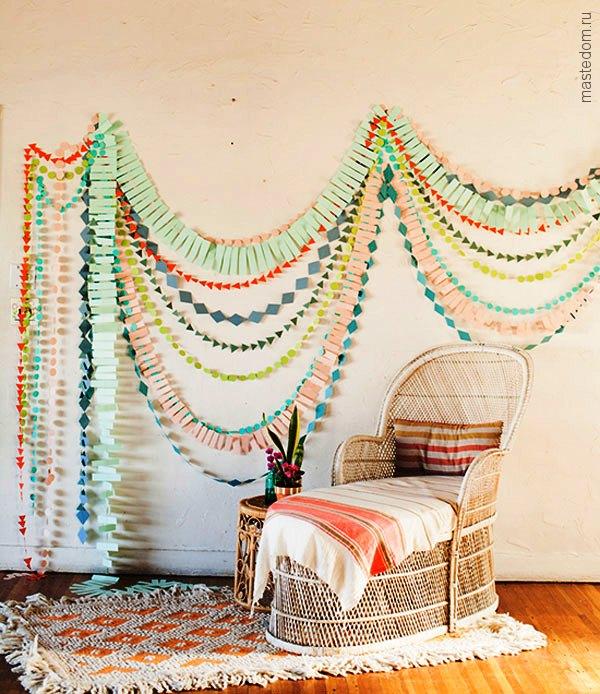
New Year's paper garlands do it yourself
There are many types of garlands that are easily made on an ambulance hand, remember, we have already written about how to make a garland yourself. So on the rope you can ride the patchwork of multi-colored fabric.
If the rope is used through the tissue triangles, it turns out an excellent garland from flags! If we make pumps from the shaggy yarn and ride them on the thread, it will turn out the garland, which the child wants and just play, so cute and fluffy.

And when tissue strips tie to rope with bows, it will be very even a flirting garland. Yes, and the remains of old wallpapers are also quite successfully applied to create new Year Garland. And even if the carved paper napkins fold in half, put on the rope, glue with each other in the corners, then it will also be excellent garland. Vintage garland can be obtained if cut from multicolored paper heart and penetrate their thread. Such a touching romantic garland can become not only a Christmas decoration, but also the attribute to the day of lovers. This symbol of love may well provoke its appearance for the new year. Do not believe? And you check: invite your friend to help you decorate the Christmas tree, and, as if by passing, make the garland from the hearts together. Make sure that pleasant consequences will not make long wait.


Such christmas christmas garlands do it yourself It is more convenient to make from ordinary colored paper for manual labor, but better if it is bilateral. For example, you can take red, pink and white paper. The combination of these colors will create a very gentle ribbon-garland. Also, for its manufacture, you will need: handle, scissors, ruler and stapler. Strips are cut from paper, the width of which is 3 centimeters. In order for your child to participate in the work, you can draw every line of the cut, and it is offered to praise them. Then every strip folds in half. The tips are flex and fasten with a stapler with each other. With each subsequent strip, the same actions are made. Each heart is connected to the previous and subsequent. The work continues until the desired length of the garlands. And so that the hearts do not stretch during the tension of the garlands, it is possible at the base of heart to pierce the stapler paper. Here you have a heart garland.
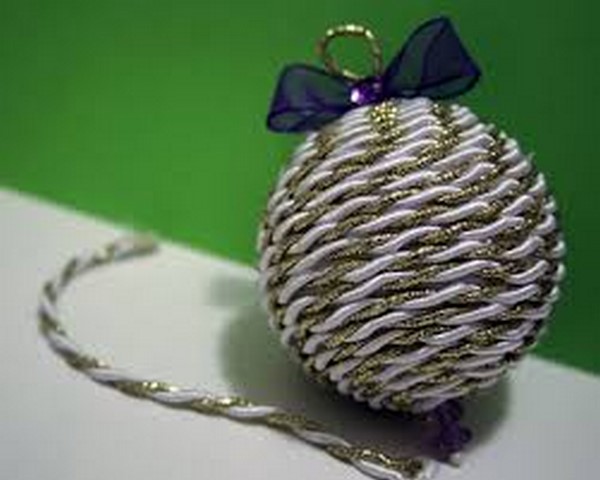
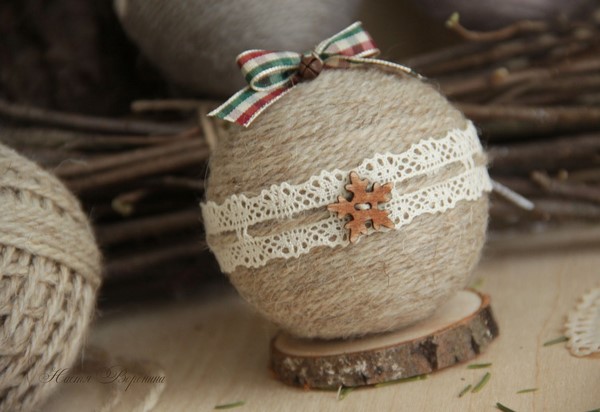
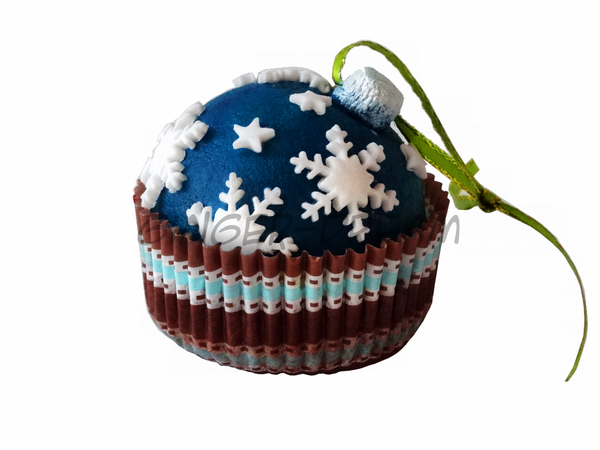
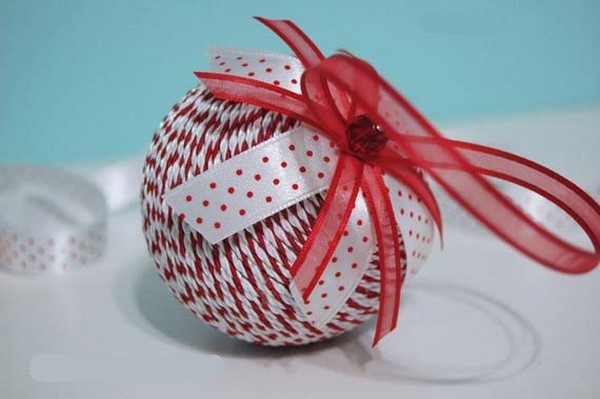
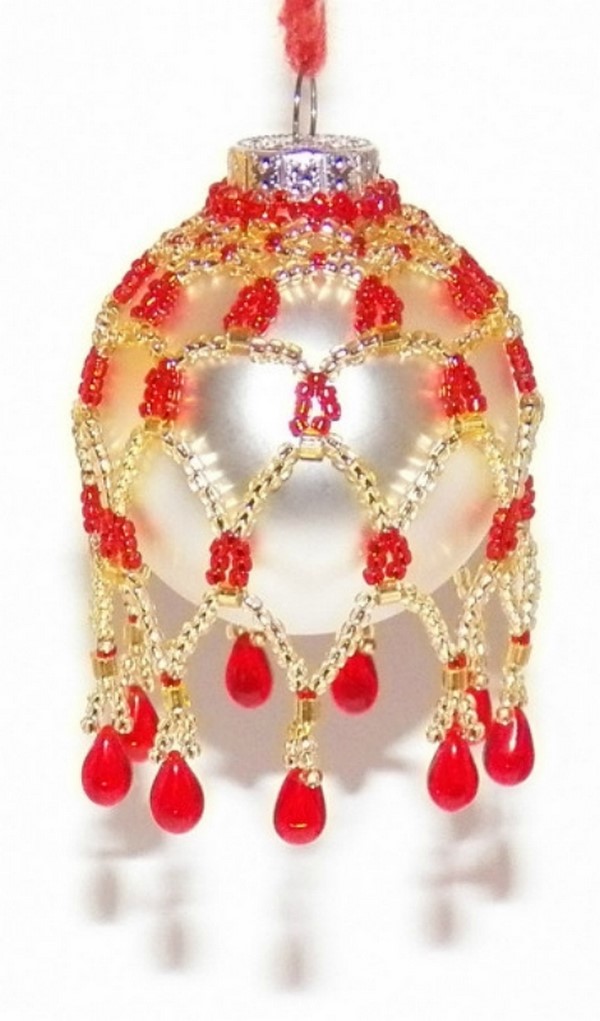
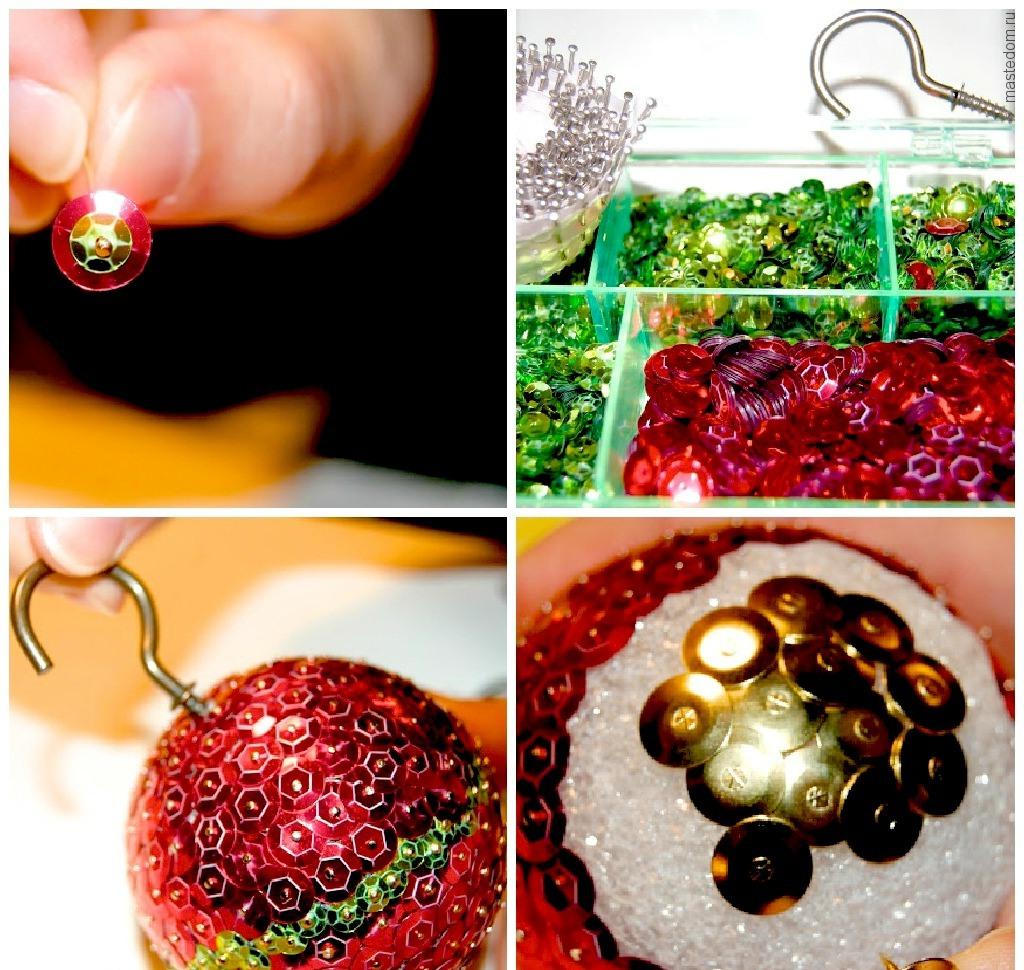
In addition, or rather - most often on the Christmas tree, balls are cling to decoration. These traditional homemade toys are very different: glass, paper, foam. By the way, if the glass ball can quickly break up, the toy of the foam is very easy to scratch, breaks, crumbs. If you have such reversible balls, they can be very quickly turned into a real precious decoration using small plastic beads and decorative cords for decorative cords - for example, a dairy-white color.
From the tools you will need a glue hot gun, scissors and tweezers. In this way, you can not only update old foam balls, but also make not very interesting plastic. And the diameter of used beads and cords can be the most different. But, naturally, small balls are better to decorate a thin cord and thread of small beads, and large toys can be saved both large and small beads. Even more original, the balls are decorated with three cords or threads simultaneously. First you need to conclude ready-made garlands on individual threads. Then the cord is taken, and its end is immersed in a foam ball with a manicure scissors or ordinary tweezers. A little glue is applied to the ball of the cord near the cord fastening site, and the tip of the bead thread tip is attached. The next part of the ball is gradually covered with glue and slowly, the layer behind the layer, beads and cord are stacked, until the entire surface is filled with entirely. Cuts are cut off, the end of the lace is to the foam. In the end, with the help of a thread with a needle, passed through the cord web, a loop is made to hang toys.


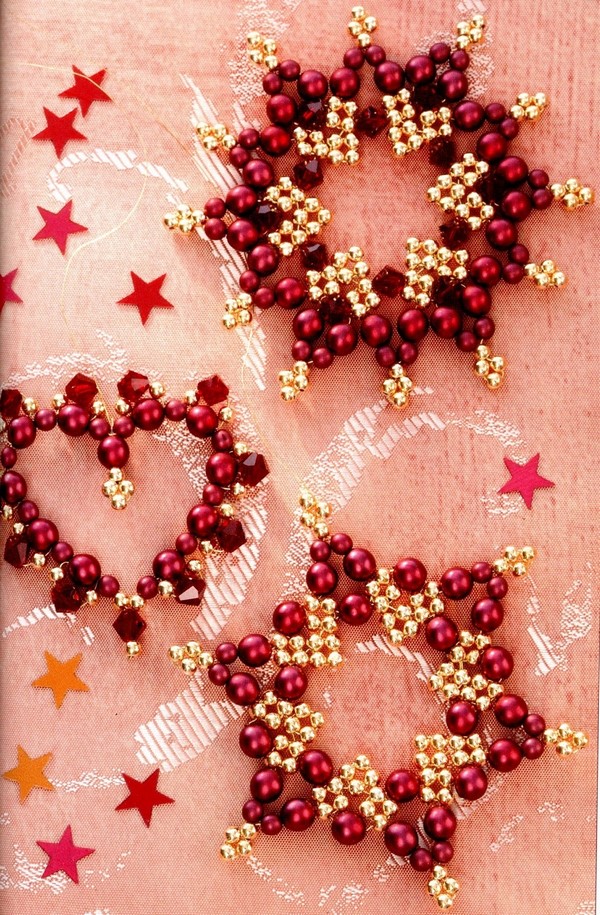
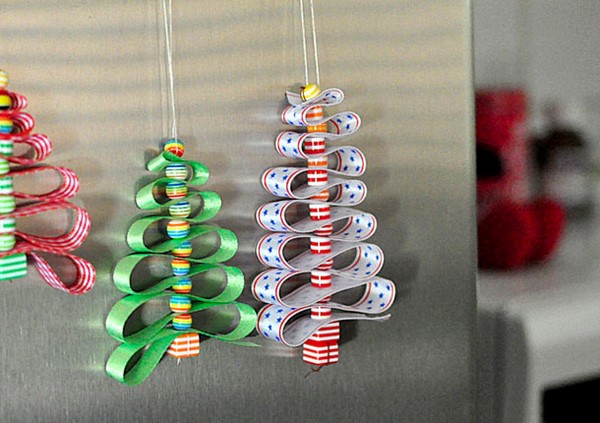
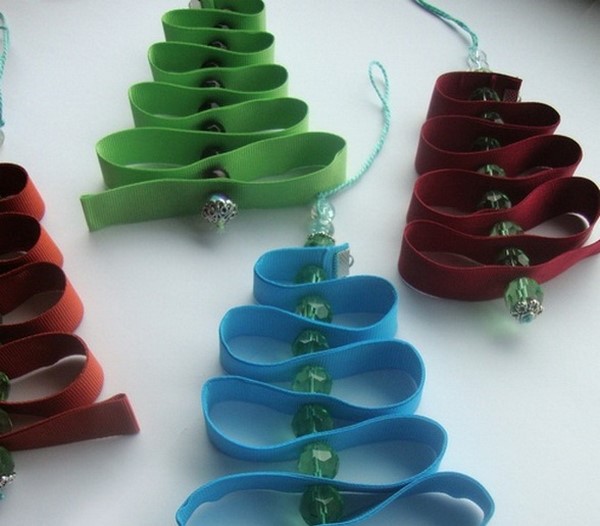
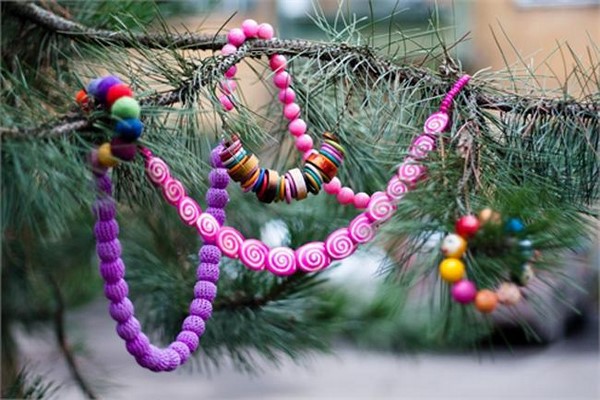
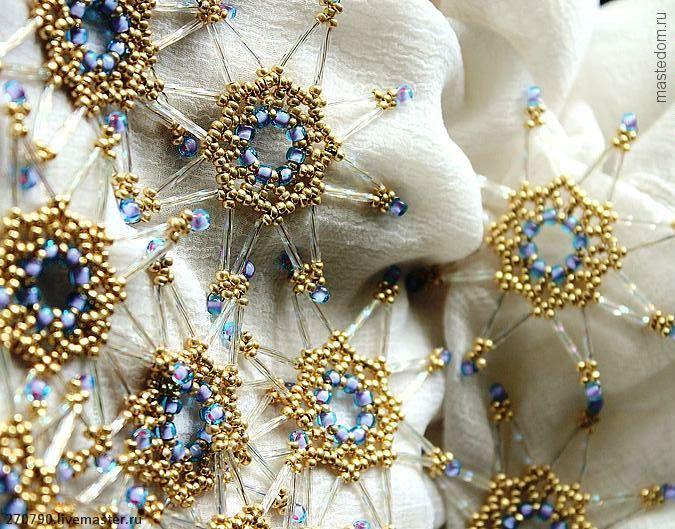
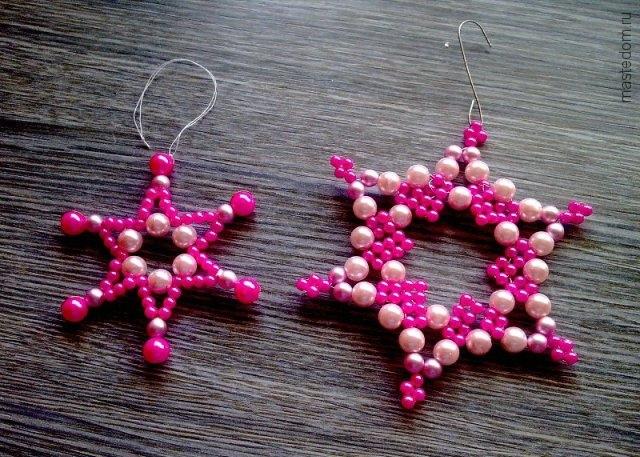
Often we do new Year's toys do it yourself FROM BEADS. From it, very pretty Christmas decorations are really turned out, which can be thrilled throughout the house, which will help create a great New Year's atmosphere, we have already written as weighing a tree from beads. To make such charming toys, you will need red beads, ribbon and wire. So, the beads are driven onto the wire, and then wire toys are formed from the finished hard boats, for example - asterisks, heart or christmas. There will be no special work, but if you hang such toys on the Christmas tree, pre-decorating them with ribbon bows, the result will be very nice.
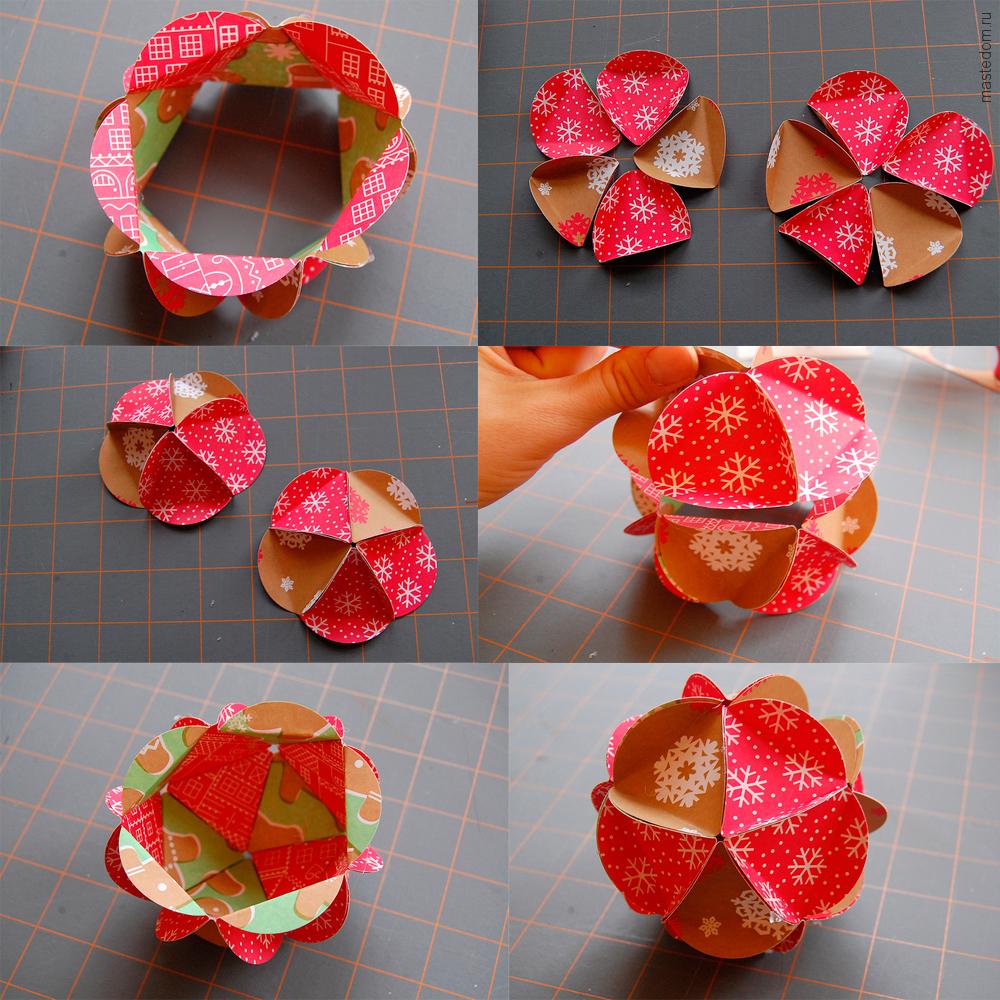
Returning to the same balls, you can try to make christmas decorations With the help of decoupage technique. To do this, you need aged glass Christmas ball, sheets from a tank notebook, PVA glue or special - for decoupage, glyter and paint silver color, a special stamp with an inscription for Christmas topics, ink, a small bell, a ribbon for tie a bow, as well as a thin twine for Peltlek. Although all these components can be replaced by the fact that you have at hand, leaving the main thing - a ball, glue and napkins. The technique of performing toys is very simple, not requiring additional skills. Initially, a little white is laid out on the palette acrylic paint, Then the sponge should be gently blocked into the paint and put it to her whites on the entire surface of the ball. On the sponge you need to constantly pick up paint, then it turns out the similarity of a snowy flying. So all the balls are harvested and left for complete drying. Meanwhile, you need to prepare napkins. To do this, the top layer of napkins is separated, the most colorful. Then half with water is divorced pva glue and the motive is glued to the ball. It begins gluing from the central part of the motive with uniform progress towards its edges. All motives are also attached. In general, everything is done standard, as with any decoupage, just with a greater fraction of shine and decorations.
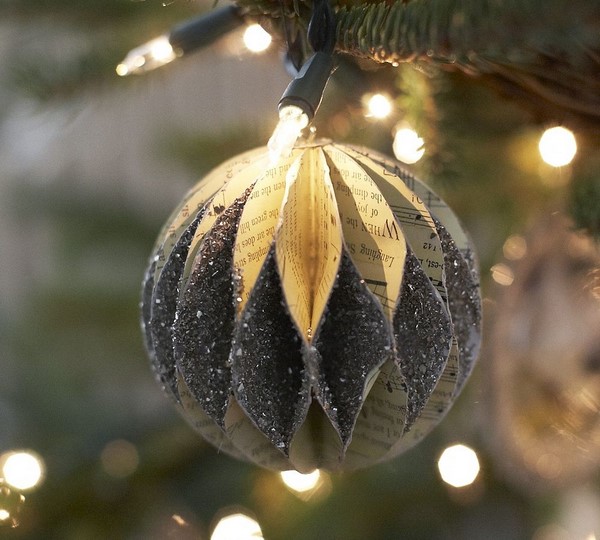
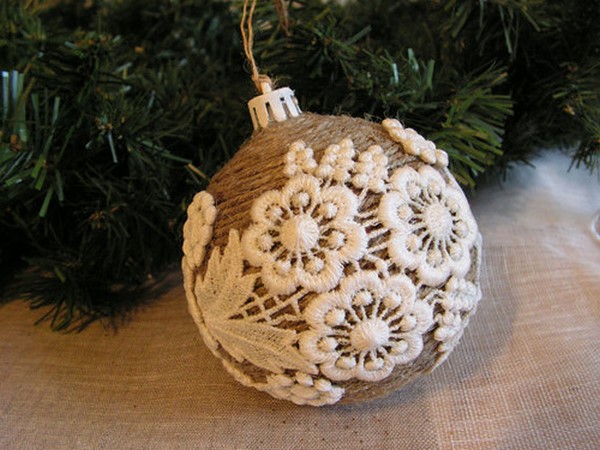
Interesting balls are obtained from ... book pages or, for example, pieces of felt. So, on the flaps of the material you choose, the circle contours are designated (you can circle any household subject, for example, a cup). With the help of a sewing machine, approximately 10 circles are stitching along the diameter. Behind the absence of the machine you can cope with the stapler. The line must go smoothly in the middle of the centers of all circles. The clips are connected to the face in a checker order: it is one compound in the middle, then closer to both ends of the seam of two connections. Etc. It turns out the similarity of a book unfolded by 360 degrees with oval pages bonded by two then in the middle, then at the edges. It gives a paper toy the effect of a volume corrugated ball. At the end of the work is attached to the loop. Already such a toy can be cling to the Christmas tree, but it is better to additionally apply decoration with sequins and glue. Better, of course, if there is ready glue with sparkles.
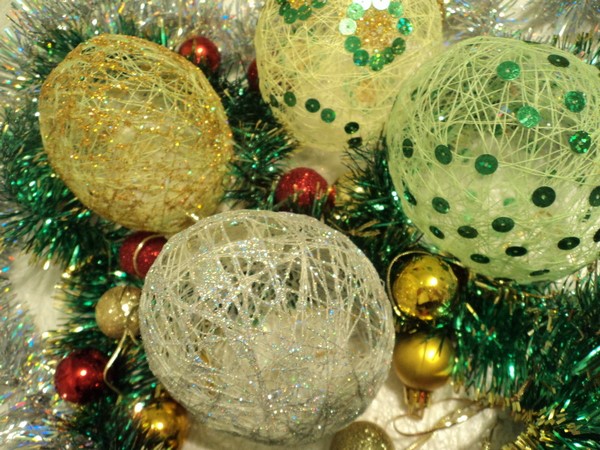
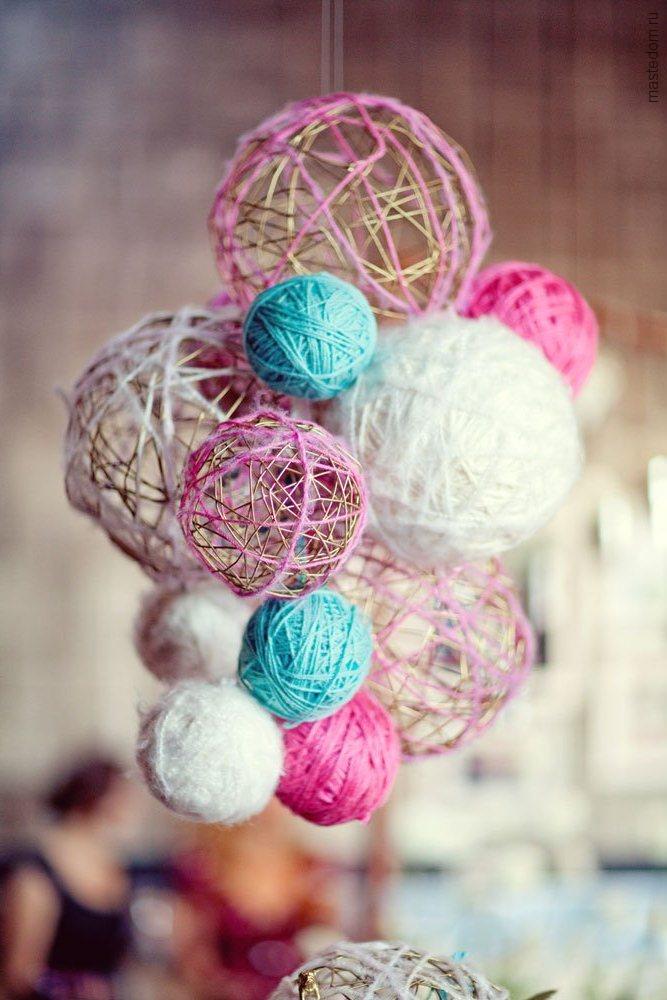
A ball-cobweb looks very unusual and sophisticated. It will take a simple manufacturer balloon, Any threads, good glue (best - PVA), as well as your imagination and perseverance. Naturally, the ball is inflated to the desired sizes (by volume of the future decoration), is well tied and lubricated with ordinary oil. Then the thread watches in the glue, the surplus of glue is removed from it, passing the thread through compressed tight fingers. Although it is possible to make a special container in which glue is poured, and a small hole makes itself in the lid. Motok is placed in the container, the thread tip is passed into the hole made and it gradually pulls out, so that it is dosed with glue. Then this thread gradually excavated the whole ball. At the same time will have to be stockpit, since the first rows of the thread can simply slip from the ball. Thread must be kept in lightweight (slightly tense). After completing the winding, the ball must be suspended for drying. But you should not dry it with a hair dryer or over the heating battery, since this ball can burst. The thickness of the thread can be selected at its own discretion. But you do not need to rush. Let the ball will die, and then it will be necessary to neatly pierce it with an ordinary needle and gradually remove the frame out of the threads. Frozen threads impregnated with glue will well hold the form. But it is not all: the ball can be reappeted, again, at your discretion.
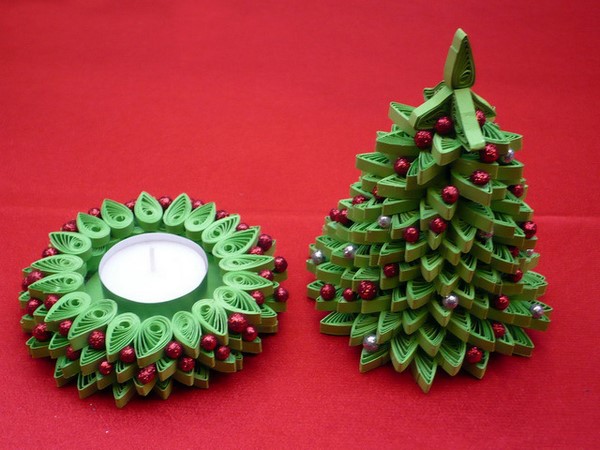
New Year's toys do it yourself: Christmas trees and snowflakes
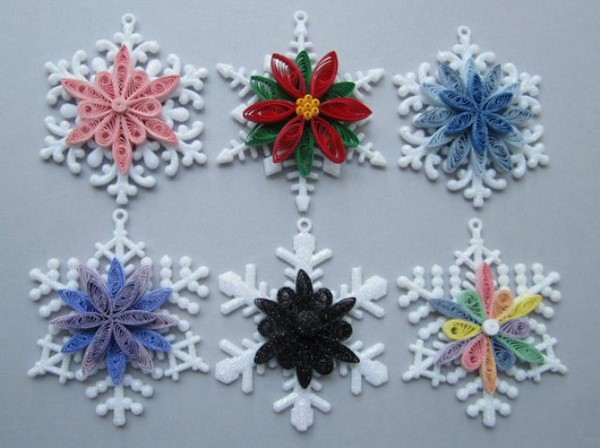
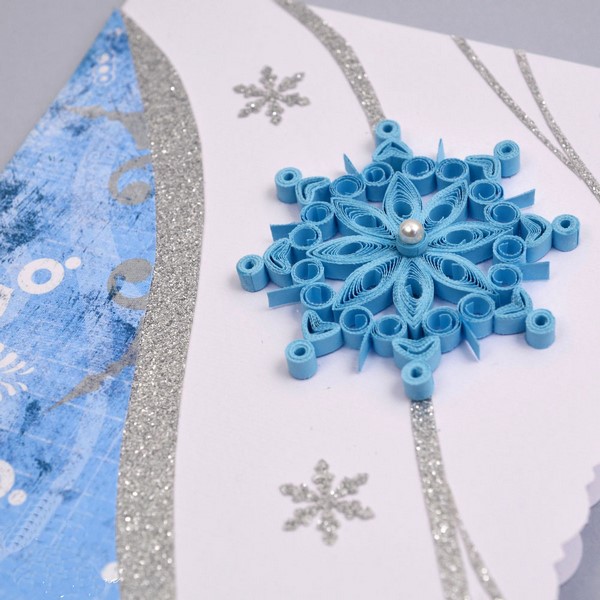
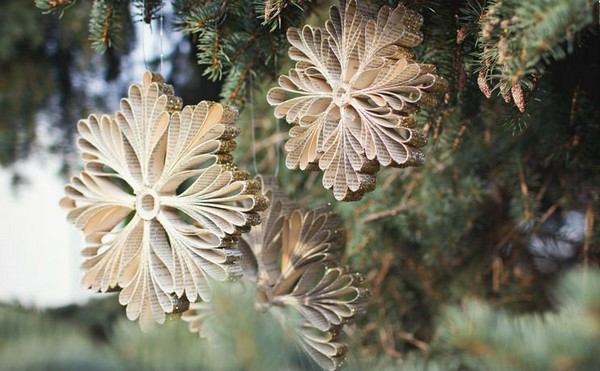
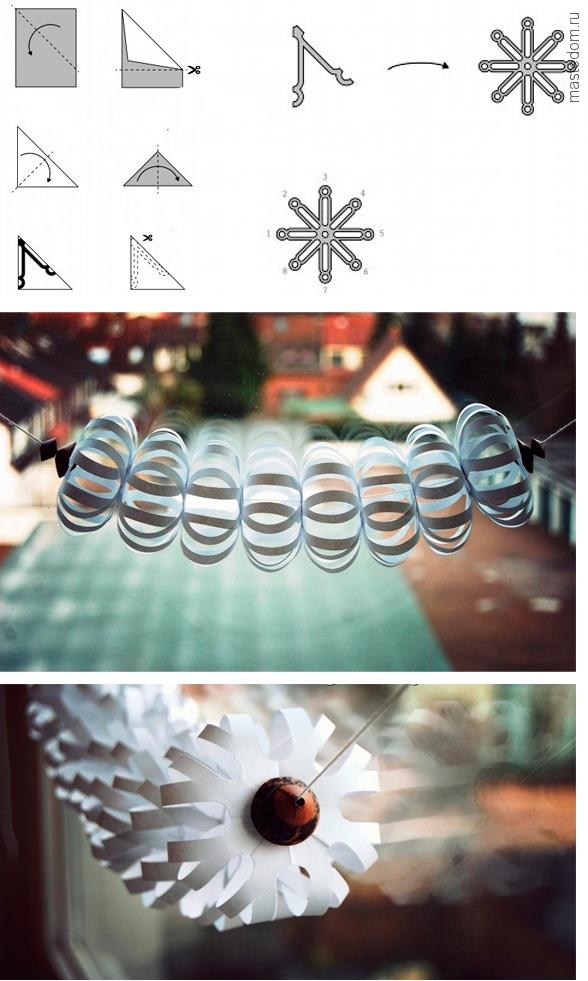
Most Popular new Year's toys do it yourself from paper - These are ordinary snowflakes. They do not require any special skills, no expensive material, no special time spending. More than just, if not to say it elementary. For this new Year's decoration It will take ordinary paper - from white to color, glue - better, of course, the same PVA, clips stationery and scissors.
Methods for their cutting are the most diverse: from the simple, such as those that we cut out in school years from the airtal sheets, to complex volumetric snowflakes. Folding by the origami or cutting method by the way Kirigami is made according to special instructions with the demonstration of each step. If everything is more or less familiar with Origami, then the snowflakes in the technique of Kirigami are made first by folding the square diagonally, then bending the corners to the middle of the triangle, which will be divided into three identical triangles. Then, on bends and from above, several parallel curly cuts are made, the tongues of which after turning the snowflake will need to be subjected to the center for the basis of creating the similarity of the petals. In addition, the snowflake can be embellished, lubricating glue and sprinkled with sparkles. So the snowflake will become even more beautiful and brighter. The method of enclosure of individual parts is made of a postcard in the form of a snowflake.


Unexpected soft New Year's toys do it yourself It turns out, for example, in the form of a Christmas tree, we have already written about how to make the Christmas trees with your own hands. For the manufacture of such a Christmas tree from tools and materials, you will need:
- hook, the size of which is suitable under the thickness of the thread,
- soft material (as for filling pillows),
- white bead packaging,
- the remains of three shades of green threads,
- needles and thin threads for sewing suitable by tone
- golden ragged threads.
At first, according to the scheme, the stand, the trunk of the Christmas tree and the triangular base. When knitting the triangular base, a diagram in which each row is repeated four times. The Christmas tree knits striped, each strip will have three rows width. Alternation bands are carried out according to the scheme: green dark tone, green, green light shade.
So, first five air loops are closed into the ring, and then knitting on such a scheme:
- three identical rows of 8 columns without Caida (dark green color);
- row of 8 columns without Nakid (green);
- two identical rows of 14 columns without Nakid (green);
- two identical rows of 14 columns without Nakid (light green color);
- a row of 20 columns without Nakid (light green color);
- three identical rows of 20 columns without Nakid (dark green color).
The toy is decorated with large white beads or beads as if it new Year's toys. Send beads to the base arbitrarily. Then the base is stuffed with a soft filling material.

The stand of the Christmas tree and the trunk will fit according to such a scheme:
Five air loops are closed into the ring, then three identical rows of 8 columns without Caida are pronounced ( brown color). So it turns out the trunk of the Christmas tree;
The base is further liked by the same scheme that is presented at the beginning of work (dark green color).
To strengthen the base, the circle is cut out of the cardboard, the diameter of which is equal to the diameter of the knitted stand. Then the knitted stand is sewn to the cardboard. The first row of loops passes around the trunk of brown threads, the second - along the outer edge. It will only be left to connect the Christmas tree and stand, and the real New Year's beauty will delight you, and not one year. Yes, and the real fir can be saved.
There are many more different options homemade New Year toys. You only need to include your fantasy and try a little. And then certainly any of your desire will come true. After all, the first is to make creative christmas decorations - came true. Well, who else doubts the magic of the New Year toys?
