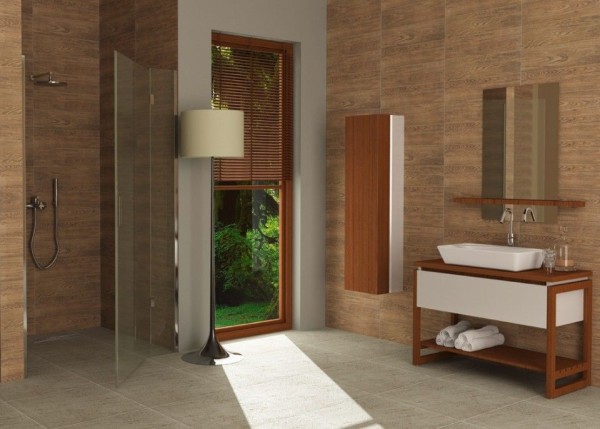
For many years, tile has been one of the most acceptable materials for bathroom decoration. Its characteristics correspond to the harsh operating conditions of the cladding in a given room, therefore it is widely used in finishing works... Today, the design of veneering ceramics is presented in a variety of compositions that can satisfy all tastes. Manufacturers offer original solutions for tiling both walls and floors. However, the price of such beauty is quite high, which means that a lot of money is required to purchase the material. If the owner of the apartment wants a unique finish for his bathroom, then individual pieces made to order are even more expensive. And why not try with your own hands to make decoupage on tiles, which will be a wonderful decor even for the cheapest, plain colors.
The quality of the ceramic cladding will not change from such decoration. It will remain durable and waterproof, and the bathroom will have a sophisticated look. In addition, this tile decorating technique is quite interesting and completely uncomplicated to perform, any person can easily cope with it. This ancient type of needlework, which is an imitation artistic painting with the help of an applique made of napkins, decoupage cards and even fabric, it became fashionable again literally in last years... The growth of its popularity could be due to many reasons, one of which is that decoupage made with your own hands on ceramic tiles in the bathroom looks much more expensive than the materials required for its implementation.
A simple way to apply a decoupage picture
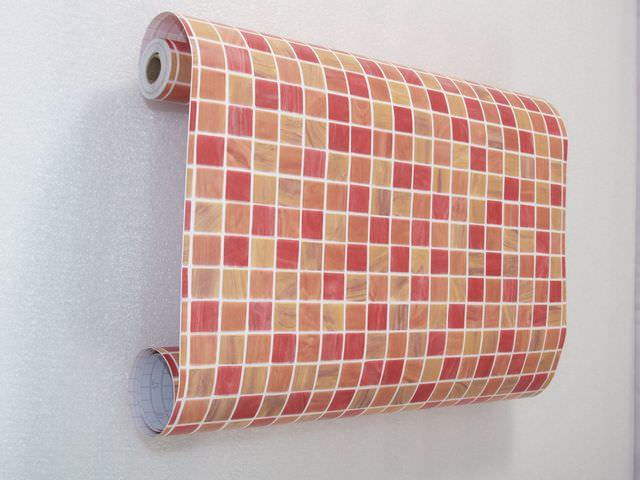
Old bathroom wall finishes are easy to decorate with stickers printed on self-adhesive vinyl. Pictures on vinyl are resistant to mechanical stress, have good water resistance and easily adhere to ceramic surfaces. This is the easiest way to decoupage tiles, even those who first decided to try to update the bathroom interior with their own hands can handle it. In addition, sticker manufacturers offer not only images of small figures, but also patterns for real colorful panels that allow you to change the look of tile cladding beyond recognition.
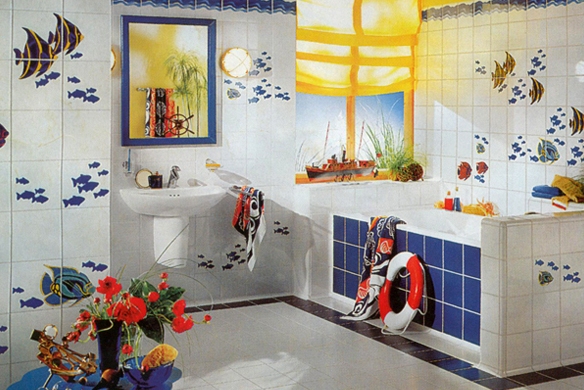
Decorating your bathroom walls with fish stickers, intricate shells, jellyfish and stars can transform it into a real underwater kingdom.
Decoupage on a tile with your own hands can be done both before the start of laying separately on each tile, and directly on the ceramic cladding. When decorating walls, any decoupage technique is possible, for example:
- place the same motives on all tiled elements;
- alternate pictures in a certain order or chaotically;
- decorate only the necessary parts of the tiled masonry;
- combine separate consonant patterns into an ornament;
- make a square of four elements in order to obtain a decorative insert.
Decorating materials
Today, creativity stores offer many pictures designed for DIY decoupage ceramic surfaces. They can be applied to one of the following substrates:
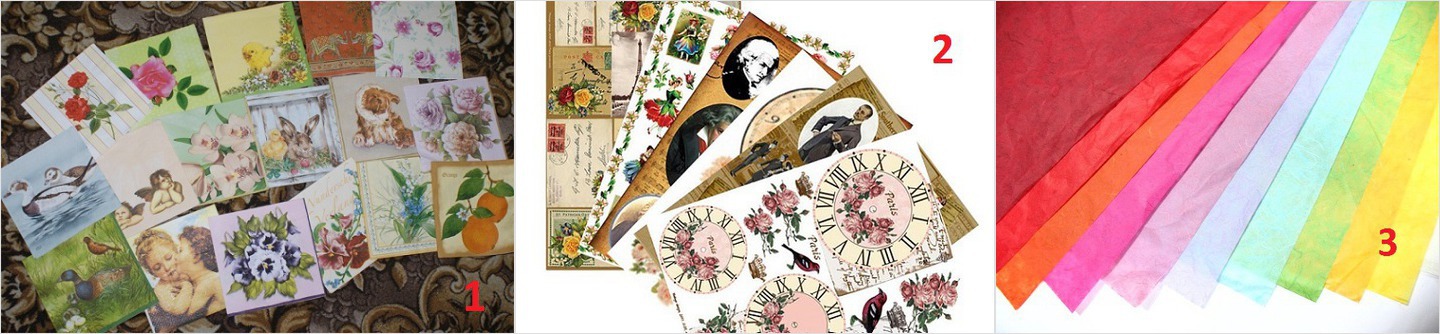
- Napkins, consisting of three layers, which are most often used to create decor on tiles. This is the easiest way to find the pattern you want.
- Decoupage cards differing in paper type, weight, size and style. They are convenient because the printed motif is repeated many times on the sheet.
- Blank sheets of tracing paper, tissue and rice paper, on which you can print your favorite motifs on a printer with your own hands.
Tools and solutions
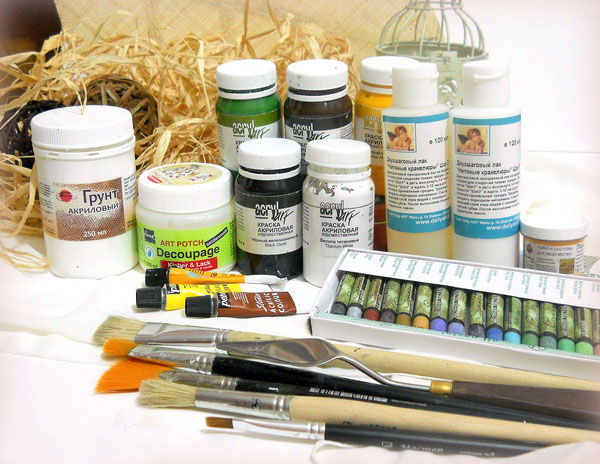
Regardless of which pictures are selected, tools and solutions will be needed to work:
- scissors;
- alcohol or acetone;
- acrylic glue for ceramics and PVA;
- small capacity;
- flat synthetic brush;
- roller;
- colorless varnish;
- file for papers;
- a hair dryer to speed up the drying of varnish and paint coatings.
In order for decoupage on tiles to last a long time in the bathroom, you need to choose the varnish especially carefully.
After all, the durability of the picture depends on how well it is protected from external influences. For indoor work, it is better to use a water-based varnish. It has no pungent odor and dries quickly.
Preparation for work
First, you should prepare the surface so that the pictures lie flat, you need to do the following:
- clean ceramic tiles from soap stains;
- wipe the dust with a cloth;
- dry well;
- degrease the surface with alcohol or acetone;
- prime it with a mixture of PVA glue and acrylic paint in a ratio of 1: 2;
- dry;
- inflict acrylic paint to create a background and let it dry completely;
- lightly smooth the surface with fine sandpaper.
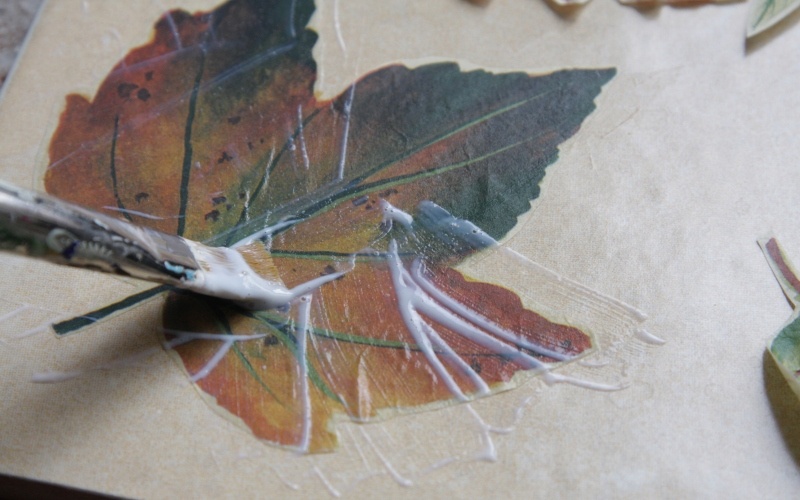
Now is the time to start with the pictures, they, like the ceramic base, must be prepared for further work. Those who have already had to do decoupage with their own hands usually carefully pull out pictures with their hands. This is not difficult to do, because the print is applied only to the top napkin layer, which is previously separated from the rest. Wet, uneven edges, oddly enough, are smoothed out better and after drying they become invisible, from which the pattern on the ceramic tile looks like one drawn with a brush. But it is more convenient to cut the motifs of the decoupage card with scissors to the size of the tile, in addition, before gluing, hold them in water so that the paper base softens a little.
Ways to apply a picture on a tile
A small fragment cut from a napkin can be glued to a ceramic surface in two ways:
- Apply glue to the tile and attach a napkin motif to it. This method is more convenient because hands and clothes do not get dirty with glue.
- Put the picture on a dry tile, and then cover it with glue. In this case, it is imperative to make sure that the napkin base is well impregnated, then it will certainly stick.
If you need to glue a large napkin motif with your own hands, then it is more convenient to work with a stationery file. In this case, the pre-cut pattern is placed on the front side of the polyethylene. They pour water on it so that it can not only get wet, but also swim slightly in a puddle. It is easier to melt the resulting wrinkles on the floating tissue fragment without fear of tearing. After making sure that everything is aligned, the water from the file is carefully drained and applied with the wet side to the lining. Then the polyethylene is rolled with a roller so that no air bubbles remain.
When the file is removed, the decoupled image remains on the tile. Then it is gently and effortlessly coated with glue, moving the brush from the center to the edges. If the consistency of the adhesive is too thick, dilute it with water in a 1: 1 ratio. The well-soaked napkin is allowed to dry. After that, several layers of protective varnish are applied over the decor with a brush.
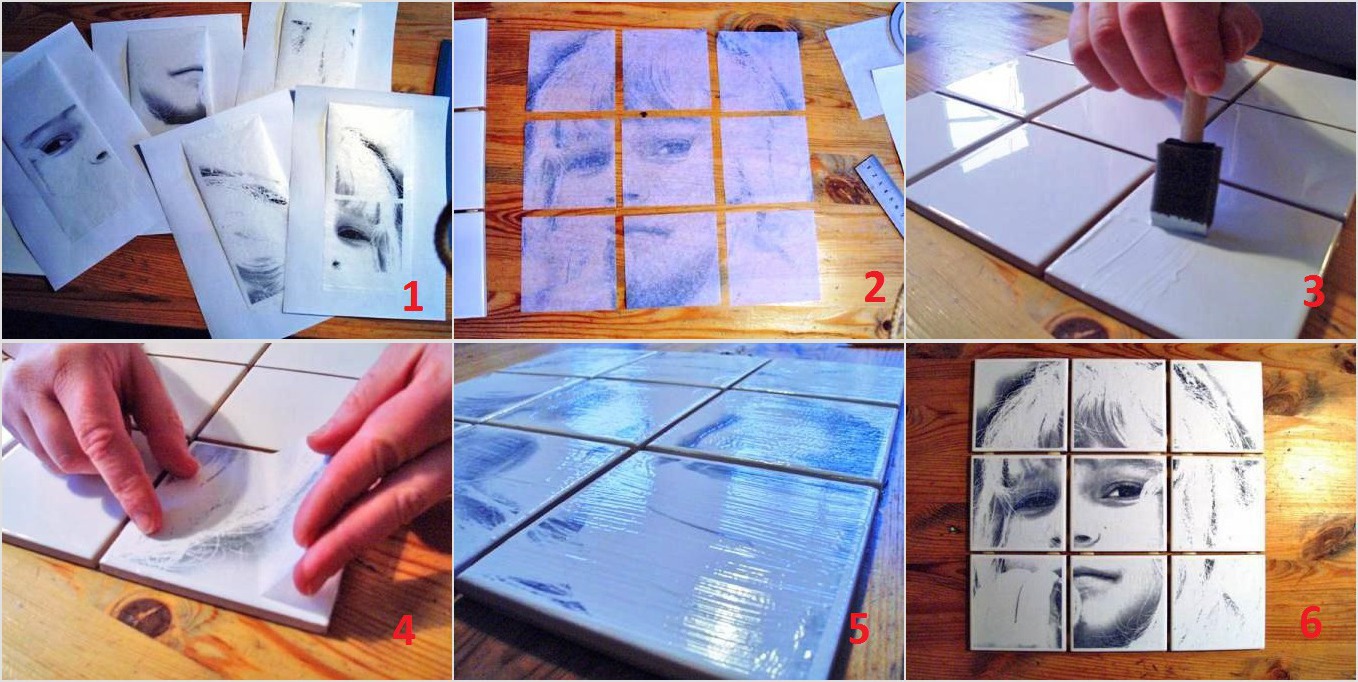
Decoupage cards are glued differently. They are first impregnated with glue, and then applied to the wall, gently spreading them with a brush. The cards are best glued with acrylic ceramic adhesive. After drying, the decoupage card motif fixed on the tile is covered with several layers of varnish. Each subsequent varnish is applied after the previous one has dried.
Printing images on a printer
Even in a small room, decorating tiled walls requires a lot of napkin decor. And since the decoupage material is quite thin, it is easy to tear it in the process. That is why, when deciding to make decoupage with your own hands, it is a good idea to master the technique of working with images printed on a printer, so as not to worry about a lack of decor. In addition, today on the Internet you can find such unusually beautiful motives that you often cannot find on napkins and decoupage cards. You can print the image you like, found on the net, as many times as you like.
Decoupage works best if you do the printouts with your own hands on a laser printer. It uses dry powder instead of ink, so the printed image from glue and varnish does not flow. It is desirable to make prints on an inkjet printer with pigment ink.
Various papers are used as a basis for printing the selected motifs:
- tracing paper;
- rice;
- napkins;
- office paper;
- photographic paper.
To prevent the printer from jamming thin paper, it is fixed on an A4 sheet with masking tape. Tracing paper and rice paper are fixed at the corners. A single layer of white napkin is ironed and attached to each side.
If a thick base was used for printing, then it is more convenient to cut the image according to the size of the product, then it can be glued like a decoupage card, without delamination, removing, only later with sandpaper, excess edges. But a small fragment printed on a thick base must be thinned out so that in finished form after gluing, the edges were invisible.
Summing up the above, we can conclude that decoupage is a fairly simple way to decorate, but it requires a certain amount of time. And if you do all the actions sequentially, then you can create a unique bathroom interior with your own hands.

Tile serves for a long time. But sooner or later, time affects her too: either she starts to look unpresentable and loses her appearance, or she gets bored. It is far from always possible to replace it with a new one. And then the question arises - what can be done to make the old tile again pleasing to the eye? The answer is simple - update the tiles in the kitchen. Here are some of the recipes available.
What can be done
You can improve the appearance of the apron in the kitchen and even transform it beyond recognition without changing the old tiles. different ways. The most affordable and popular ones:
- renewal of seams;
- painting;
- decoration with stickers;
- decoration with self-adhesive film;
- partial replacement of tiles.
Some of these methods require more costs and skills, others less. The choice of method depends on what kind of result you want to get - completely transform the tiles in the kitchen or just refresh them.
Important: Whichever method is chosen, before decorating the tile, it must be thoroughly washed from dirt and degreased. Otherwise, the work will fail.
Renewal of seams
Ceramic tiles in the kitchen can look untidy and old due to the fact that the grout between the joints has lost its appearance. All dust, soot, grease settles on the grout. No matter how thoroughly the apron is washed, there comes a time when the space between the seams loses its snow-white appearance, cracks, chipping. Another nuisance that can happen in the kitchen is that mold can settle in the gaps between the tiles. She also does not add beauty. There is a way to return the apron to its previous appearance - to update the seams. Surprisingly, this immediately transforms the appearance of the surface and the backsplash in the kitchen looks like new. There are several ways to update seams:
- clean the seams;
- apply a new grout;
- apply seam paints.
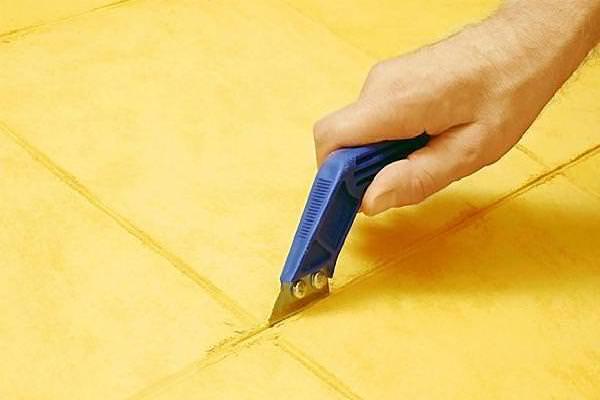
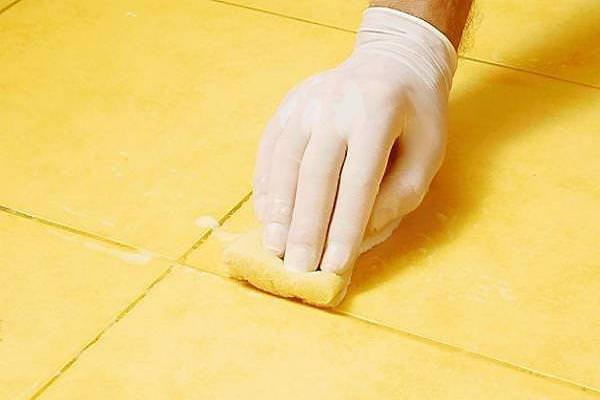
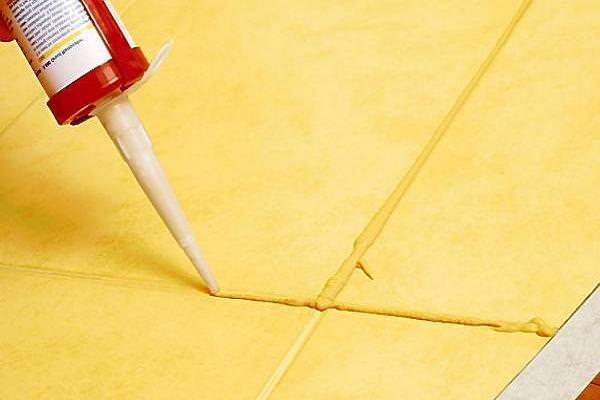
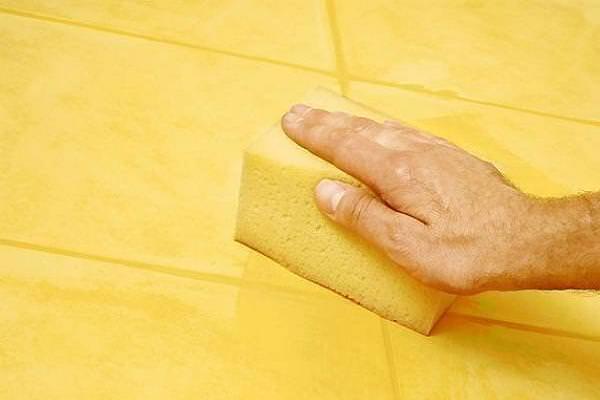
At first, you can try to just thoroughly clean the seams with a special tool. But if the dirt has already absorbed into the grout, only applying a new one will help.
To do this, you must first remove the old grout. The joints between the tiles are then washed or sprayed to remove grease and dirt. If mold begins to appear, then the old tiles should be treated with vinegar. Next, the usual grout is applied.
Important : If you want to give the design a new sound, then you can use not a white grout, but a colored one - this way you can change the old tile beyond recognition - there will be a feeling that a new apron has been laid out.
To update seams, you can use a seam marker white... Or using seam paints of different colors.
Tile replacement
If some of the tiles are noticeably damaged, you can try to replace them partially. To do this, you need to think over the future design and choose companion tiles so that the apron looks decorative and harmonious. It should not be apparent that repair attempts have been made. It is best to choose a tile that contrasts with the color of the main one. If the main tile is monochromatic, then you can pick up decorative tiles with a pattern.
Important : When choosing a new tile, you need to make sure that it completely repeats the dimensions of the old one.
Replacement is simple - the old tile is carefully separated from the wall, making sure that it does not damage the adjacent elements. Previously, the seams between them are removed. Then a new one is glued in place of the old tile. Finally, a new grout is applied to the entire surface of the apron. This allows you to combine all the tiles together and create the illusion of a new backsplash.
Painting
Rarely does anyone think of updating a tile by simply painting it in a different color. And in vain - if everything is done correctly, it will turn out to be very original and aesthetically pleasing. It is important to develop a concept for the appearance of the future apron. The easiest way is to perform geometric elements.
A special paint is selected for painting tiles - epoxy paint is best suited for this role, which does not spread over a smooth surface and has good waterproof and heat-resistant qualities. Epoxy paint retains its appearance and brightness for almost 10 years.
Important: The tile can be painted as a whole or you can make a pattern on the apron. To make the pattern smooth and aesthetic, its contours must be limited with ordinary electrical tape or masking tape.
Before painting, the tiles must be washed, lightly sanded with a sandpaper, degreased with acetone and primed. Next, paint is applied. After the paint is completely dry, you need to renew the seams using a new grout. This apron will look like new.
Film decoration
You can decorate old tiles using self-adhesive tape. It has a lot of advantages:
- variety of colors and patterns;
- moisture resistance;
- resistance to chemicals;
- resistance to temperature extremes.
Film is easy to work with. Before decorating the tile, it must be sanded and degreased. After that, in the right places, attach the film and gently smooth it over the surface of the tile. We must try not to form bubbles. If this could not be avoided, then the bubbles are pierced with a needle and smoothed out.
Decorating
You can update the tile by applying decorative elements to it. You can decorate the surface with vinyl stickers. Today there is a large selection of a wide variety of stickers on various themes, so you can decorate your kitchen in any style. Vinyl stickers adhere well, last for years and are not afraid of water and detergents.
With vinyl stickers and other decorative elements, you can quickly transform your kitchen without wasting a lot of time and money. Even a child can cope with such work.
Tiles can be decorated and renewed quite quickly and inexpensively thanks to modern decorative and finishing elements. In this matter, only the accuracy of work and the concept are important. And then the updated interior will not look handicraft.
Rating 2.10 (5 Votes)
Attention, only TODAY!
It will not work to make the bathroom cozy only with the help of wall cladding with new tiles. The room will remain empty and cold if you do not add a couple of original notes to the interior design. Therefore, it will be useful to learn how to decorate the tiles in the bathroom and make the room more interesting.
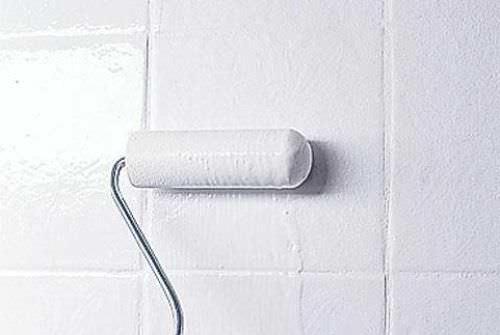
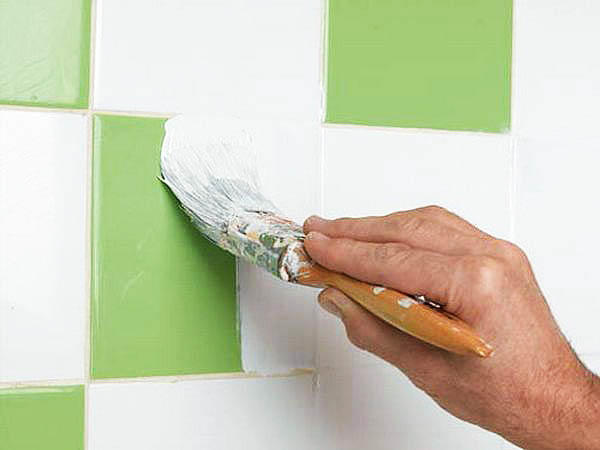
When you want to decorate boring tiled walls, the simplest thing that your imagination suggests is to paint! Of course, you can just take and paint the tiles in the bathroom, or you can do it beautifully and highly artistic. For example, you can paint not all tiles, but in parts. You had a white tile, but it has become multi-colored. See how the walls of the bathroom are unusually painted.
It's not just a checkerboard pattern of colors, it's surrealism on the wall! This is not difficult to do. First, pick the paint in the colors you want. The paint should be for tile or glass, otherwise your art will quickly come off the surface of the tile. Before painting, the tiles must be degreased and dust-free. That, in fact, is all. Then you paint the tiles with a brush, sponge, roller - whatever is more convenient for you. To make the lines smoother, apply masking tape.
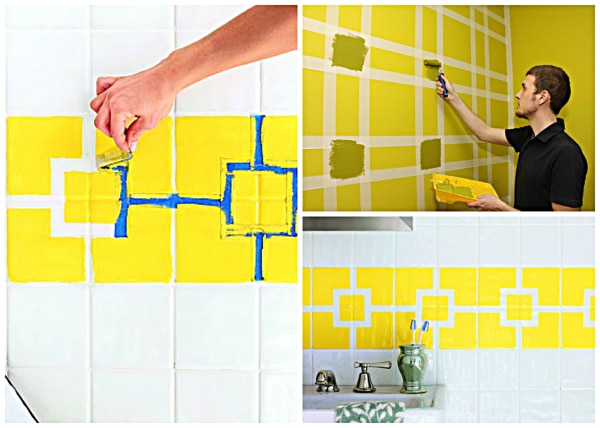
Tile painting technique with masking tape
But why is strict geometry necessary? You can draw whatever you want. All you need is imagination, paint and a brush. The technique is the same: degrease the surface and paint with tile paint or acrylic.

You can create this kind of Asian-style beauty in the bathroom with paint and brushes.
Do-it-yourself tile painting: video
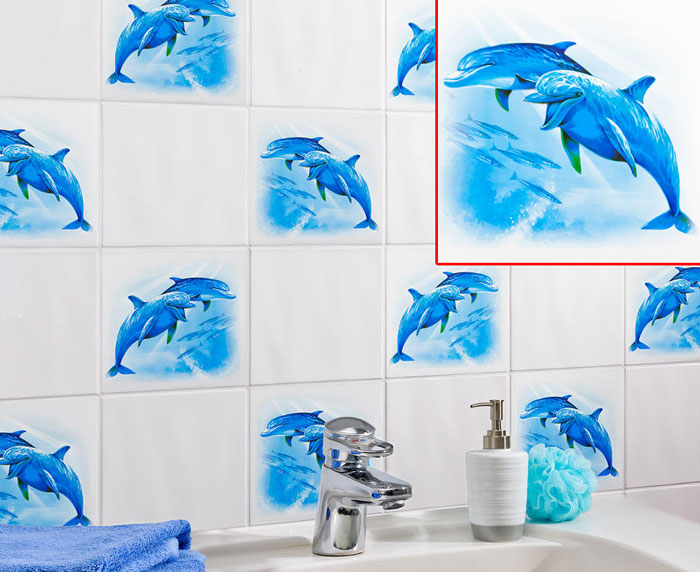
Vinyl stickers and stencil
One way to bring cool tiles to life is to use stickers (vinyl decals). The choice is wide: stickers of all shapes, colors and sizes can be purchased at a specialized store. Together with them, the tube contains instructions and tools necessary for gluing.
These stickers are resistant to moisture and detergents. Images of dolphins, sea turtles, swans, mermaids and ornamental fish can transform a bathroom beyond recognition.
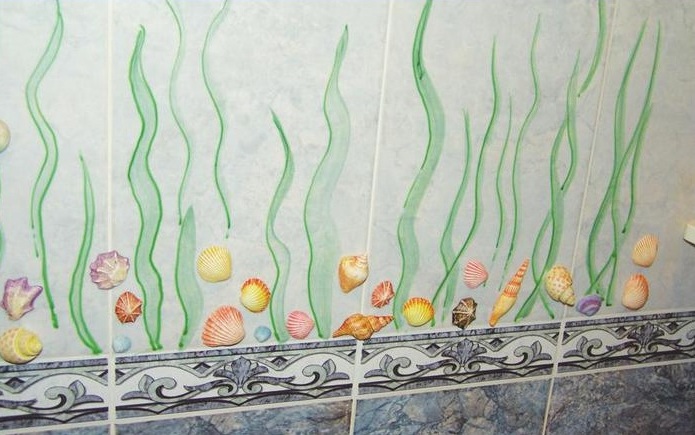
Durable plastic stencils are a worthy addition to your stickers. They are tightly applied to the wall and painted over with moisture-resistant paint with a sponge. The seaweed and scallop pattern will blend in perfectly with the sea-themed stickers.
This is important to know: before gluing stickers or applying a pattern with paint, the tiles must be degreased.

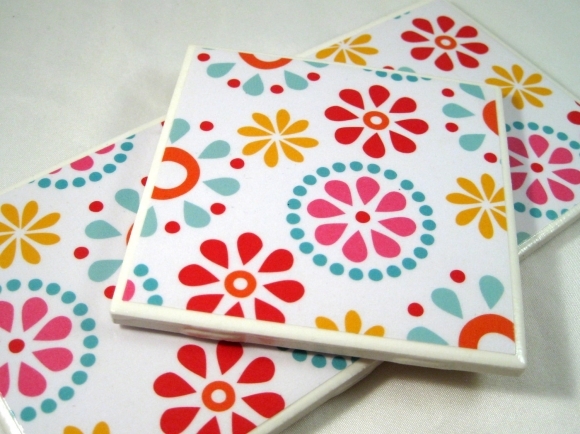
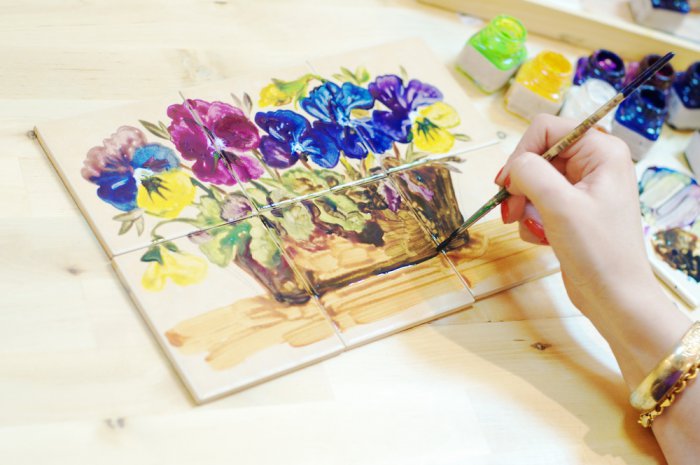
Decorating using decoupage technique
This technique is very popular today. It consists in using three-layer napkins to create decorative items. The step-by-step process can be represented as follows.
- Cut out the decor from the napkin using scissors (usually a plant element).
- We remove the two lower layers and apply to the tile under the ceiling (not worth it below: there is a high probability of damage), after which we apply PVA glue over the element with a brush. In doing so, the formation of air bubbles and wrinkles should be avoided.
- After the glue has dried, apply a moisture-resistant acrylic varnish over the decor.
Despite the protective layer of varnish, this decor will not last long in an aggressive humid environment. This allows you to periodically change it and thereby add variety to the interior.
Filling the room with fun accessories
The bathroom can be equipped with unusual shaped towel racks, soap and toothbrush holders. In a plumbing store, you can choose models that match the style and color of the tile, well in harmony with the ornament on it.

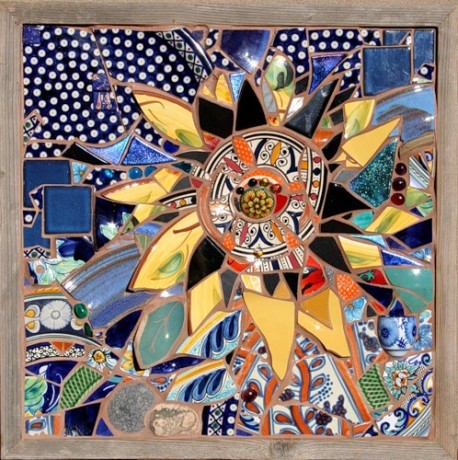
Decorating a bathroom with paintings and mosaics is a great way to add sophistication to the interior.
Curtains with a thematic pattern can also serve as a decorative element. A large mirror with a beautiful frame will make the room bright. The frame can be decorated with decoupage elements. The tile will sparkle with new colors if you hang pictures on the walls and complement the interior with shelves with flowers.
We use seashells
Sea style- the most demanded in the design of the bathroom interior. You can decorate tiles with natural or plastic shells using hot melt glue: gluing these decorative elements next to stencil images of seaweed or simply around the perimeter of the room or on the mirror frame, you can create a unique interior design. For greater originality, the shells can be painted with acrylics.
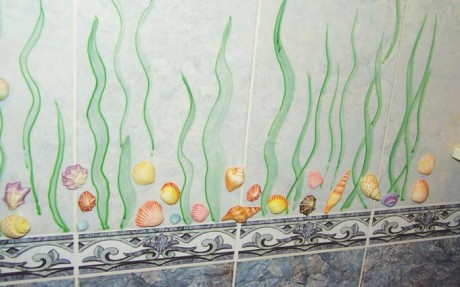
Decorating tiles with shells is a great idea for creating a "sea" landscape
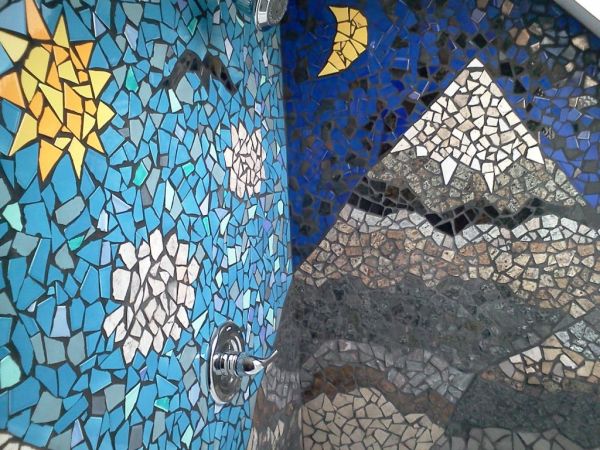
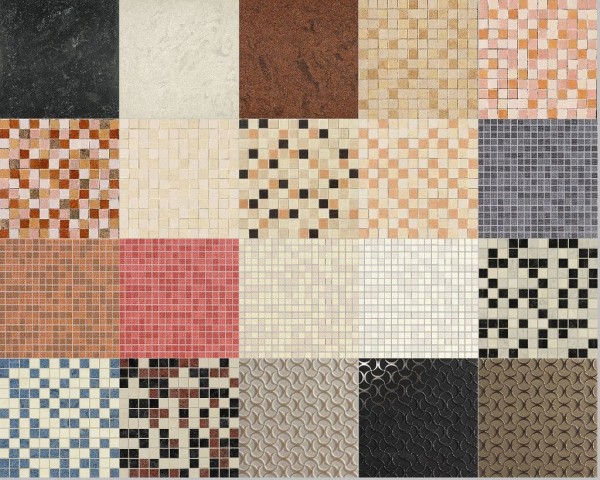
Bathroom decor mosaic
In stores selling ceramic tiles, discounted broken tiles are always on sale. There you can always choose a few interesting pieces for making mosaics, which can be used to decorate a bathroom, replacing an expensive border. To do this, we perform the following actions:
- using a marker on the tile, outline the geometric shapes that will need to be cut;
- using a glass cutter and special nippers, we cut out the outlined elements;
- using waterproof glue, we attach fragments of tiles to a nylon mesh, laying out a drawing invented in advance;
- we attach the made mosaic to the wall using tile glue;
- after drying with colored grout, seal the seams.
Decorating old tile
There are ways to decorate a bathroom interior not only by facing with new tiles and decorating it with decorative elements. Old tiles can also be restored to their previous attractive appearance. To do this, carefully, using a slightly dull (so as not to damage the enamel) tool, you should clean the seams. Mold often appears in these places, so treatment with an antiseptic composition is necessary. The cracked tile must be removed and replaced with a DIY mosaic.
A chisel, hammer, chisel is used to extract the tile.
In order for such mosaic inserts to look logical, it is necessary to sacrifice several whole tiles arranged in a checkerboard pattern, but with some randomness. We also fill the vacated places with mosaics.
You can embellish old tiles with another type of mosaic, which is obtained using a stencil and paint. To do this, use:
- acetone;
- sandpaper No. 100;
- level;
- roulette;
- breadboard knife;
- a brush or foam swab;
- masking tape;
- epoxy gloss paint;
- strengthening primer.
You will also need protective equipment: gloves, mask, glasses. Old tiles in the places where the decor is applied must be degreased and slightly cleaned with sandpaper. Then, using a level, you need to stick masking tape on the tiles in several rows. With a simple pencil, we apply geometric (it's easier) patterns. Using a mock knife, cut them out, and degrease the free areas again with acetone.
Using a foam pad and different color acrylic paint, fill in the cut areas. After the paint has dried, the masking tape must be completely removed.
With the help of such simple methods, you can transform the tile in the bathroom, spending a minimum of money for this. You can combine various design techniques, but it is important not to overdo it: everything should look harmonious. And then your bathroom will look no worse than those for which expensive materials were used.
Unusual tile decoration: video ideas
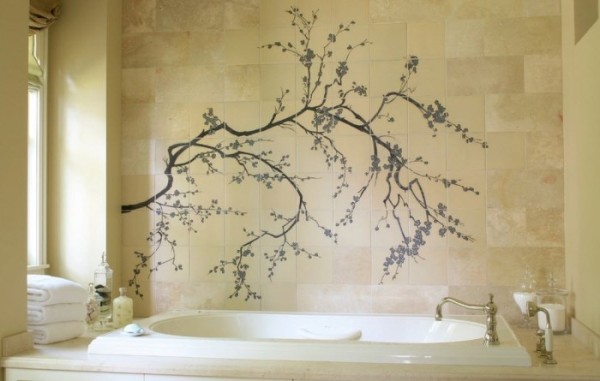
Tile decor options in the bathroom today are truly diverse. Decoupage takes a very special place among the methods of interior decoration. Such bathroom decor based on familiar interior items is popular in many countries around the world. The technique is used by both professional decorators and amateurs who want to bring something new and unusual to the design of their home. And if decoupage on pieces of furniture has already become quite commonplace, the use of this technique on tiles still looks fresh and original today. What is decoupage of tiles in the bathroom?
Bathroom decor
In fact, decoupage is a kind of applique. That is, the application of decorative elements made of fabric or paper to various surfaces by the adhesive method. How to decorate bathroom tiles?
Decoupage is used to work with various materials - from glass to wood.
And tiled or ceramic tile occupies not the last place in this series. After all, it is always easier to apply decorative elements on a smooth surface with even edges and fixed dimensions.
What is the reason for the popularity of decoupage? How to decorate bathroom tiles using this technique? In fact, decoupage of tiles in the bathroom makes it possible to:
- Get unique bathroom decor tiles on any surface;
- Minimize decoration costs;
- Decorate the house with your own hands without help.
Decoupage: use in the interior
Applying the decoupage technique on tiles, you can approach the design of the composition in different ways. For example, you can:
- Place the same pattern on each tile;
- Alternate decor options - orderly or fancy;
- Apply decorative elements in the form of a border or decorate a separate part of the wall with them;
- Create a panel, united by a common plot of decorative design;
- Decorate the tile surface with elements that are repeated in the overall design of the room or the whole house.
However, decoupage of ceramic tiles in the bathroom does not limit the designer's imagination - techniques can be combined, creating original author's combinations and bringing to life the most unusual ideas.
Decoupage: materials and tools
What can a master need to create such a bathroom decor with his own hands? The main stages of decorating require only two tools - scissors and a soft-bristled brush. Additionally, paint rollers, curly scissors, toothed rollers, die-cutters, tweezers and a hair dryer can also be used to speed up the drying process of the contour and varnish coating.
Purchase everything necessary tools To create such a decor for bathroom tiles, today you can in any stationery store.
As for the materials for work, they can be purchased ready-made - in sets, or made yourself - from tissue paper, thick paper napkins, fabrics or a special mass for modeling.
Modern technologies allow you to transfer any images to thin tissue paper using a printer, having previously fixed it on a sheet of paper with adhesive tape or glue (tape should not be used to avoid damage to printing equipment). A laser printer is suitable for printing, but inkjet ink can lose its durability when it comes into contact with varnish.
It is better to use acrylic-based compounds as an adhesive base. But PVA adhesives turn yellow over time, giving the composition an unaesthetic appearance.
As topcoat such bathroom tile decor uses varnishes on acrylic, acrylic-urethane, polyurethane or urethane bases and are water-soluble mixtures. It is better not to use alkyd varnishes due to the presence of aggressive chemical components in the composition that can damage the decor or change its color.
For surfaces in rooms with high humidity (bathroom, kitchen, lavatory), it is better to use polyurethane varnishes that are highly resistant to chemical, mechanical and other external factors.
Decoupage tiles can be further decorated with patterns by applying an outline over the created composition before applying the topcoat, for example, you can create a room such as a bathroom with a vertical or horizontal decor.
We create decor using decoupage technique
How to decorate bathroom tiles? It is possible to decorate the tile using decoupage technique both on the already laid surface and on individual elements before installation. The main thing is that the surface undergoes the necessary preliminary preparation - it is degreased and free of dust and dirt.
 Decoupage ceramic tiles in the bathroom
 We decorate the tiles in the bathroom - steps:
- Preparing. If the elements have already been cut to fit the tiles, you just need to distribute them over the surface. If not, the material should be cut according to the planned decoration plan. So, you can make the decor of old tiles in the bathroom.
- Distribution of decorative elements. They are fixed on the surface with glue. When using thick paper, the glue base is applied to the surface to be trimmed. If the decoupage technique uses woven materials, tissue paper, napkins, glue is applied over decorative elements.
 Fastening the decorative element to the tile surface with glue
 - Consolidation of the result. After the adhesive layer is completely dry, a layer of fixing varnish is applied over the decor. This work can be done with a roller or brush. Depending on the requirements for the decor surface, the varnish can be applied in several layers. A new layer of varnish can be applied only after the previous one is completely dry.
- Decorating. How to decorate bathroom tiles further? You can decorate decoupage using contour images both before applying varnish and after it - over the topcoat.
In the event that it is a question of decorating individual elements of the tiled covering before its installation, you should pay Special attention symmetry of the decor during installation. The seams on the mounted tiled surface are embroidered to match the decorative coating and fixed with varnish.
The use of decoupage technique when decorating tiles allows you to create original design in the interior of a bathroom, kitchen or bathroom, without spending a lot of time, effort and money. As a result, you get an original decor and design of the bathroom, which you can create without outside help - with your own hands. And if you study the photos of the finished work on the decor, you will get a lot of ideas!
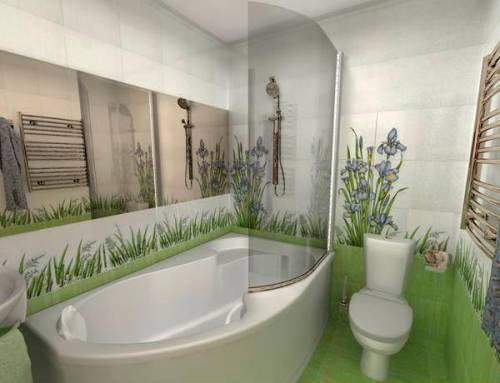
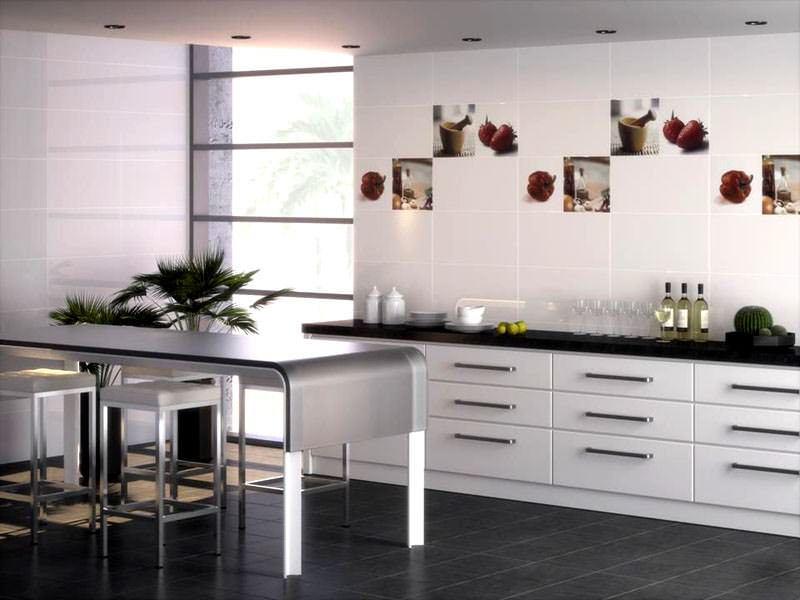
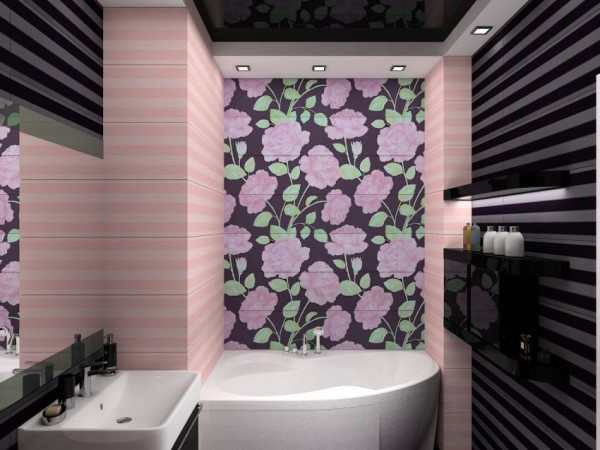
Today, no bathroom interior is complete without ceramic tiles with decorative inserts. After all, such a finish can transform a boring monochromatic decor of a room that makes you constantly dream of something else.
Decorative tiles allow you to recreate any time of the year, any era in your bathroom, or simply add zest to the decor we are tired of.
Bathroom in gray-blue shades
The main feature of the original ceramic finish
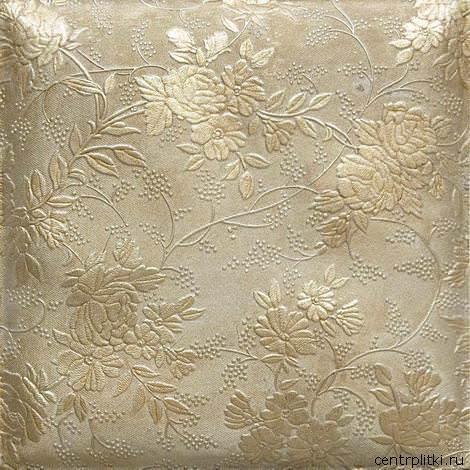
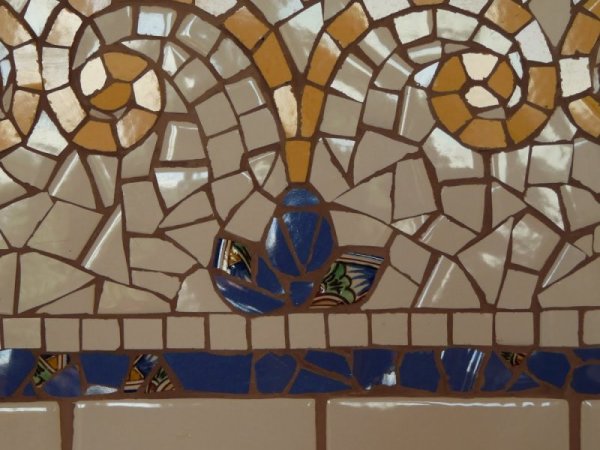
There is a certain stereotype that decorative tiles are a whole or something like that. In fact, even light inserts of a simple pattern or pattern already make the tile decorative. The main thing is that there is a clear composition or just a combination of the kit.
An insert is a ceramic tile characterized by the presence of a convex pattern or pattern. This most simple decorative element can be of various sizes and shapes. The main thing is that the drawing stands out somewhat against the main background of the tile. This type of product is most often used to decorate the work surface of a kitchen or bathroom.
Tiles Kalebodur Nordic series
On sale you will find decorative tiles in two sizes: 10x10 cm, 20x20 cm.The elements are laid in different ways: a checkerboard pattern, horizontally or vertically, proceed from your imagination and the shape that the drawing itself requires.
Types of decorative inserts on ceramic tiles
Call the variety of decorative tiles immense and you can't go wrong. Imagine how many different design trends exist in the world such as Art Deco, Empire, Hi-tech, English style, Baroque, Vintage, Greek and classic style, eco style and many others.
Modern manufacturers offer decorative tiles suitable for each of the presented directions, so any design, which you would like to recreate, you can emphasize not only with the decor, but also with the decoration itself.
The total mass of decorative tiles can be roughly divided into two types:
- Piano.
- Freesize piano.
The basis of the two types of ceramic tiles is identical, however, the difference is the size of the inserts and the time of their creation.
The first on the construction market of our country was the "piano" model. Her characteristic feature is a large volumetric drawing or pattern. Such elements are often included in the set of the main tile, which is slightly smaller in size, which shows the same pattern.

Orange bath
On the bathroom wall, such a composition appears as a classic painting surrounded by a multi-colored or monochromatic background with a small pattern.
A more modern type of decorative ceramic tile is the "freesize piano" model. The product is a classic ceramic tile with various patterns and sizes.
The peculiarity of the "freesize piano" tile: when laying each element on the wall, you have to assemble a puzzle consisting of a huge number of parts. For comparison, the classic decor is represented by single inserts with an identical pattern or pattern on each tile, which makes the installation process easier.
By appearance and the principle of operation, this type of decorative tile is similar to ceramic, only in large sizes.
Designers note the great demand of consumers for this type of finish due to the really stylish and original solution... For the kitchen, "freesize piano" is not used, it is created exclusively for the bathroom.
Decorative elements in bathroom design
There are many options available to decorate your bathroom. Let's highlight the most popular ones:
Each of the options is able to revitalize the bathroom, giving it integrity and style.
If you do not want to depict any drawings on the walls of the bathroom, but you want to diversify the decor of the room, you can use decorative borders.
The decorative border is a small rectangular ceramic tile with a convex pattern. This option is an excellent solution for a neat and unobtrusive bathroom decoration.
The decorative border is laid horizontally along the perimeter of the entire room or in certain areas. Rectangular elements form a kind of belt with the same pattern or pattern, like a rim on a woman's skirt.
As practice shows, such a laying of decorative tiles divides the wall into a lower and an upper part. Often this belt fits between tiles of different shades: the upper part of the walls is one or two shades lighter than the lower one.
However, such masonry is not an axiom, the border is laid under the ceiling (tiled molding) and at the floor (floor plinth). In each case, the decorative border looks like a horizontal belt.
Vertical masonry is more unusual and rare. It gives the room a mysterious and non-standard look. Most often, decorative tiles are laid vertically to frame a mirror, window or shower.
Original panel in the bathroom
Chess or chaotic masonry of rectangular tiles also looks attractive and original. With an organic selection, the ceramic border goes well with classic tiles, which also have a pattern or pattern.
In choosing one or another type of decorative tile, the main thing is to show imagination, which will make the bathroom austere and at the same time bright, the room will be with a special charm inherent in the owners of the apartment.
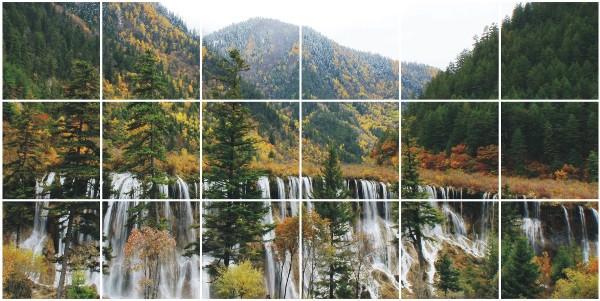
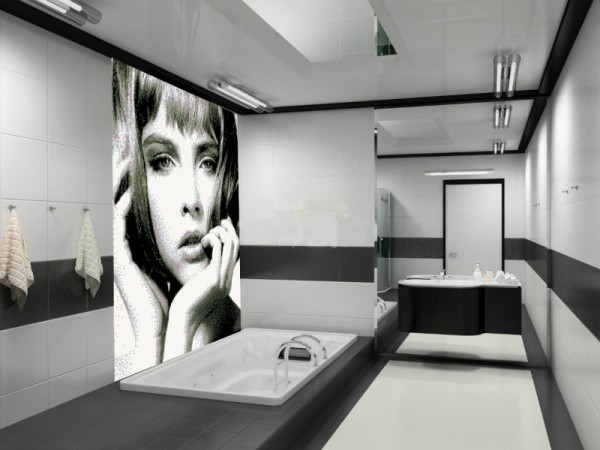
Modern mural ideas easily decorate a plain bathroom wall. Today, a favorite photo, a familiar landscape, any macro image of a flower or tree is used as an image.
can be arranged vertically, horizontally or crosswise, it all depends on your wishes and ideas.
The design of a modern bathroom boggles our imagination, and the talent of manufacturers and designers is simply amazing.
The decor can be bas-relief or flat; the material comes across smooth and with patterns, coasters, shelves and even hooks. For example, convex decorative tiles rise slightly above the rest of the room, while glazed tiles reflect light, increasing the bathroom space.
Stylish panel in the bathroom
It is quite easy to decorate a room, given the choice of decorative tiles, each of us can imagine ourselves as a designer and try ourselves on the example of our own bathroom.
With the utmost imagination and a little energy, you can create a designer bathroom on your own, in which it will be a pleasure to relax after a hard day.