Table of contents:
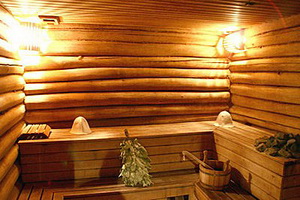
Everyone knows that the lighting in the bath (sauna) should be soft and dim, because bright daylight is associated with movement, work and does not allow people to fully relax. In fact, the created twilight takes an active part in the wellness procedure. Man is a “child” of the sun, who is sensitive to changes in lighting; visual deception easily leads us into a state of relaxation, which enhances the effect of a visit to the sauna. All unnecessary and harmful leaves our body without hindrance, and the received values and usefulness are delivered exactly "to the address".
Today, there are many ways to equip quality lighting saunas. Moreover, modern lighting allowed to significantly diversify, making it possible to completely abandon the standard arrangement of "light points". To illuminate the bath, they began to use multi-colored lamps ׃ now the effect of visiting the steam room is enhanced by a favorable session of color therapy.
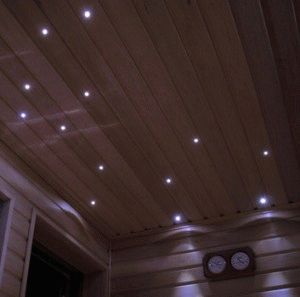
Advice from the master!The sparkling starry sky, glare of the northern lights or flames on the wall are the most popular illusion light effects that will decorate any modern bath with dignity.
But before we move on to an overview of special electrical equipment for sauna lighting, let's look at the fundamental basics for wiring.
How to keep an electric "beast" in a "cage"?
Arrangement of electric sauna lighting involves a number of measures to protect the wiring line from the extreme climate of the room. A miscalculation would be too expensive! Therefore, we design lighting in the steam room, taking into account all standards for the fire safety of a wooden structure ׃
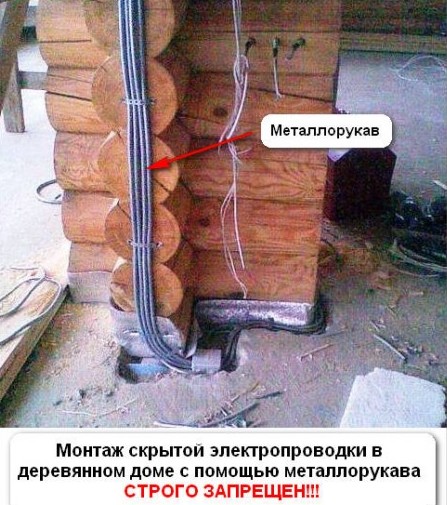
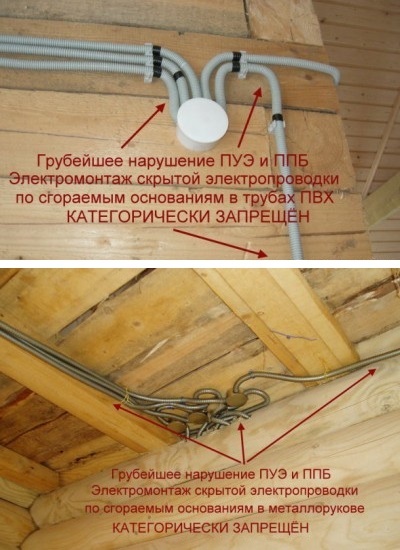
- Sauna wiring should only be of a closed type
To illuminate a wooden structure, which is a classic sauna, open internal wiring is required. Ideally, no lines should be laid in the steam room, and the cable for connecting the lamps is pulled through the wall of the adjacent room.
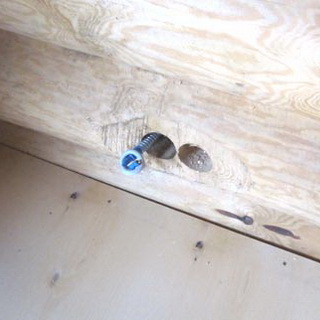
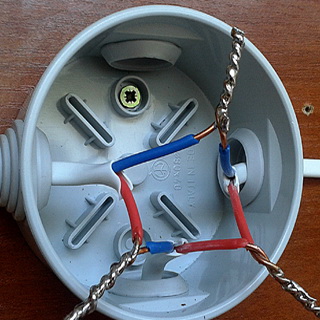
- The wiring wires must be connected to each other by soldering or welding
Cable connection points are the "Achilles' heel" of electrical wiring, so traditional wire twists are strictly prohibited for wooden structures.
- All elements of the circuit are chosen strictly for the upcoming loads in the network.
For sockets and switches, an important parameter is the current strength, and for a cable, the power of all devices used in the construction.
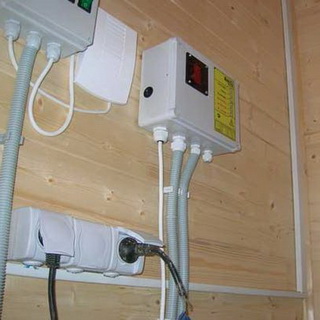
- The internal one must be equipped with safety devices for emergency shutdown.
The automatic machine is the protection of the sauna against short circuits and overloads. It should be matched to the weakest "member" of the chain.
RCD - protects a person from electric shock. As soon as the device detects a leak in the circuit, it immediately breaks it. For a sauna, an RCD that responds to a difference in current of 16 mA is optimal.
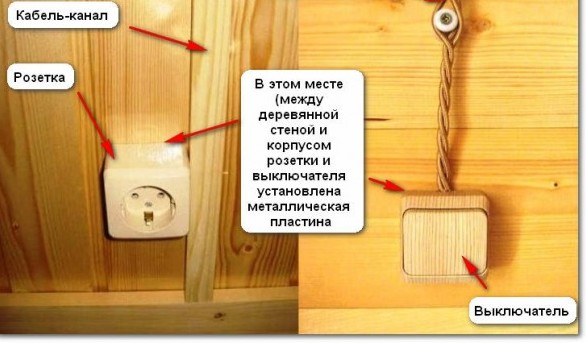
- Switches and sockets are not placed in a hot "zone", but taken out to an adjacent room
These elements are also a weak link in the chain, and sudden temperature changes will quickly disable them.
- Sauna wiring must be grounded
In Soviet times, the old lines consisted of only two cables (phase, zero), but modern safety requirements dictate complete protection against an emergency.
Only if all of the above conditions are met, the lighting for the sauna will not cause your troubles. The statistics of the fire service clearly indicate the main reason for the fires in the baths - "problem" electrical wiring.
Competent arrangement of lighting in the bath is a rather difficult task, since in this case it is necessary not only to provide for a convenient location of the lamps, but also to observe all safety measures concerning mainly high humidity and temperature.
All the equipment necessary for lighting a bath must be selected in accordance with certain requirements. For example, lamps for a steam room should be made of heat-resistant material - porcelain, refractory plastic, ceramics, etc. The same can be said for electrical wiring.
First, you need to carefully plan the installation of the electrical cable. This procedure can be divided into two stages.
Stage 1. Connecting the electrical cable
In most cases, the cable is supplied from a distribution board located in the house. Sometimes the cable is led directly from the pole.
This can be done in one of two ways:
- by air;
- underground.
The first option is preferable in terms of time and material costs.
Important! Before running the cable through the air, you should study the temperature the environment... So, if it (temperature) can reach 40 ° C, then the cable cross-section must be increased by about a quarter.
For this, only an insulated self-supporting cable is suitable, which does not need support in the form of additional wire, which cannot be said about standard products for outdoor use. Although such a cable is more expensive.
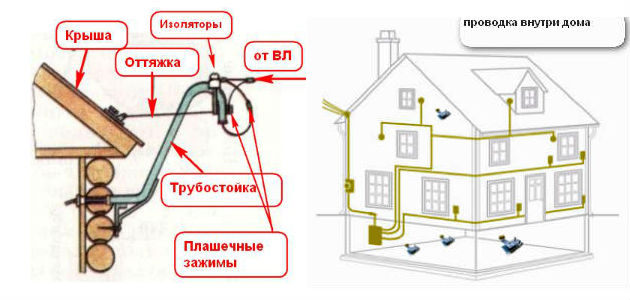
For fixing, special fasteners are used to prevent sagging, and the cable is pulled into the bath through the roof or wall.
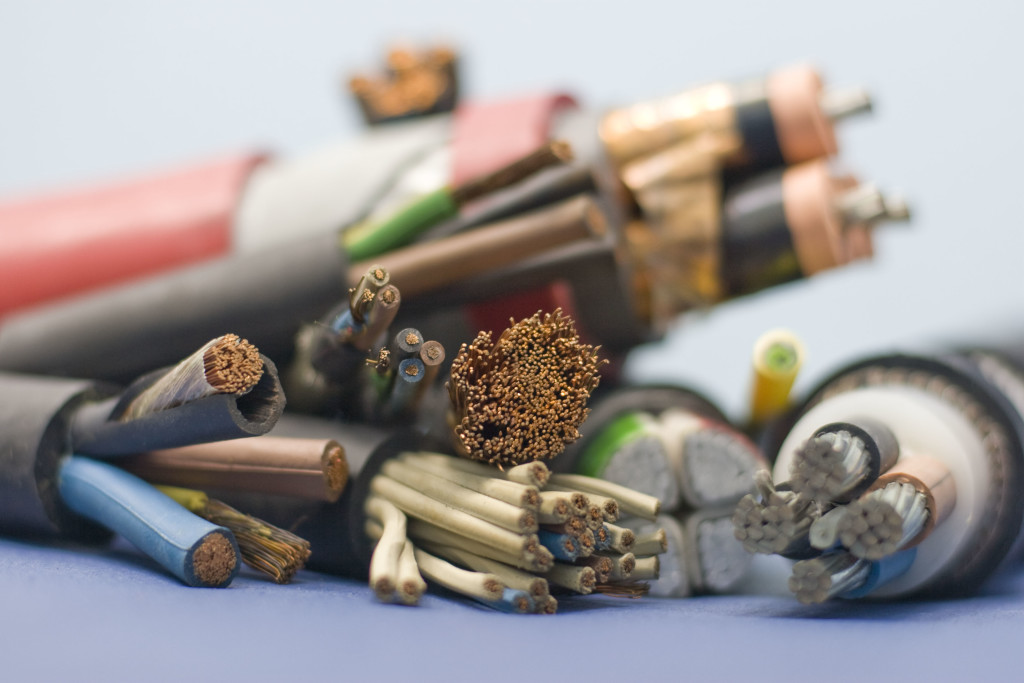
Important! With regard to the metal from which the cable should be made, then aluminum, of course, is much cheaper than copper. But due to some properties of this metal, the cross-section of the aluminum cable should be larger than the copper one.
Stage 2. Internal installation
There are a number of requirements regarding the installation of internal wiring.
Steam room
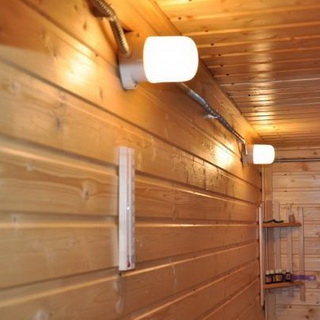
Lamps in the twin room are installed in special shades. Electrical wiring and fasteners are carefully insulated.
If you plan to install a window, then it is worth remembering that they can cause heat loss even at the smallest size. Therefore, thermal insulation will be required. But if you cannot do without windows, then their dimensions should be minimal (approximately 50x50 cm). It is advisable to use double-glazed windows for this.
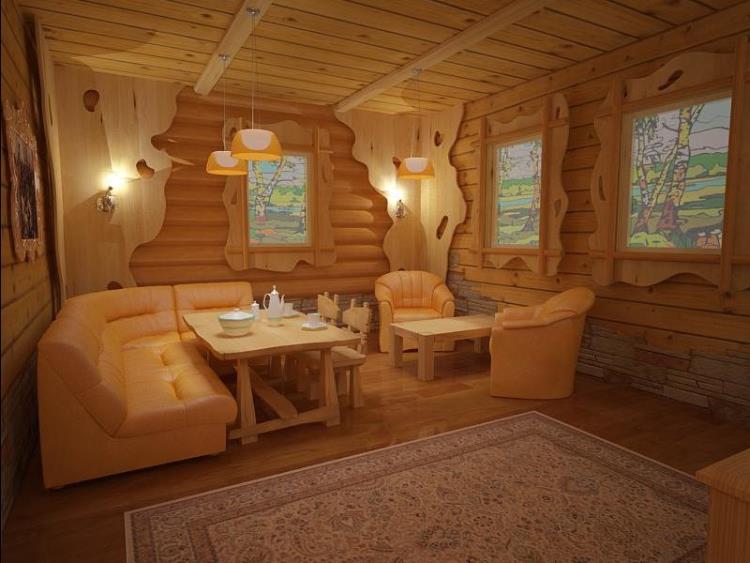
Dressing room
The conditions in the dressing room are not so critical, therefore, it is allowed to install any lighting equipment, in particular sockets and switches. According to experts, it is in this room that all devices and electrical appliances should be concentrated as much as possible.
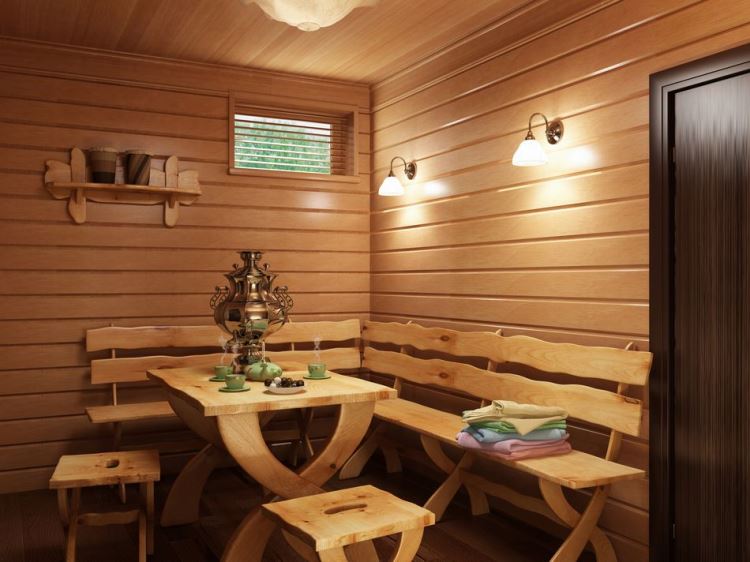
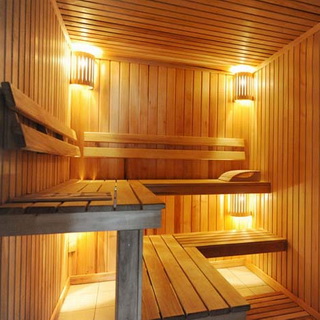
A chandelier is usually installed on the ceiling, it is also possible to use several wall lamps. Sometimes LEDs are installed under the ceiling and shelves. In general, the dressing room is a wide field of activity for design imagination.
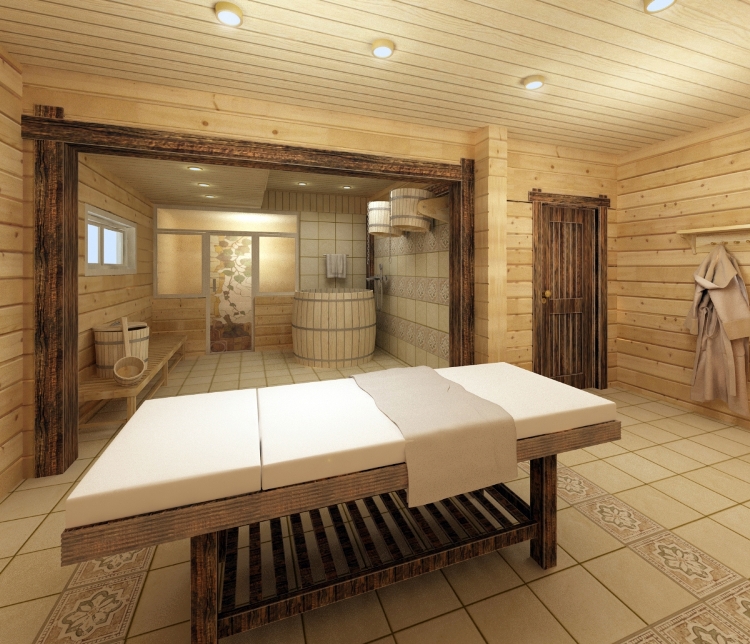
Washing room, swimming pool
In this case, the brightest possible lighting is required. Due to the acceptable climatic conditions, it is possible to use LED and fluorescent lamps, tapes, as well as multi-colored illumination for the Jacuzzi.
Important! To install luminaires in water, you should select exclusively sealed devices that operate from low voltage.
At the same time, it is unacceptable to install switches and sockets where water can get on them (near a pool, shower, etc.). The class of all equipment used should be higher than IP-44 ("splash-proof" lamps), but as already mentioned, it is better to take the devices into the dressing room if possible.
The best option for a washing room is class IP-68 LED strips, which are powered by low voltage (12 W). Typically, they can be installed in water.

LED lamps in the bath
- Security. The essence of the lighting is that the lamps are installed outside the steam room. In this case, fiberglass is only a conductor of visible radiation.
- Profitability. Fiberglass lamps consume a small amount of electricity.
- Polyfunctionality awn. The lighting can be installed on the walls, ceiling, in the pool. Using the remote control, you can control the play of light, which provides a kind of light therapy.
- Space saving - Fiber optic lamps are extremely thin and do not need shades.
Usually, only the area near the bathhouse that is visible from the house is illuminated. When planning, you need to proceed from the following considerations:
- the number of holes in the walls should be minimal;
- external lighting should be economical;
- the wiring should run as far as possible from the walls, especially from the insulating material;
- the glow should be cold so that the structure does not heat up.
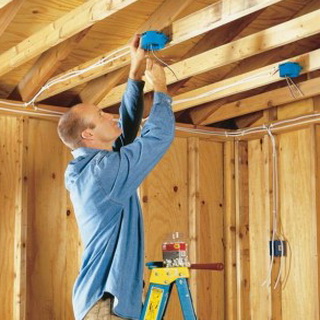
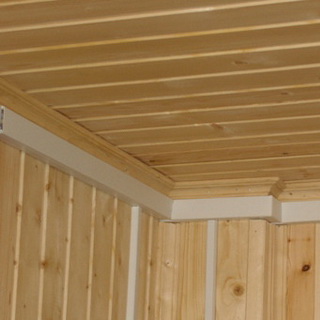
Stage 1. The electrical cable is passed between the decorative covering and the roof, and is attached to the bottom of the rafters. Lamps are installed, one of them is recommended to be installed above the entrance to illuminate the approach to the bath.
Stage 2. If plastic lining was used as decorative cladding (and in most cases it is), then Spotlights with a low profile. In this case, the holders must be threaded - this will allow the use of a wider range of lamps.
At the bottom of the rafters, clamps for the corrugated hose necessary for laying the cable are attached in appropriate places.
Important! Due to the use of low power lamps, a wire with a cross section of 1x2 mm is used.
Stage 3. Now it is worth talking in more detail about the lamps that are required to illuminate the bath. They should be low power (5 W will be sufficient), except for the one intended for installation above the front door (minimum 17 W). This has several advantages at once:
- electricity is saved;
- the lining does not heat up;
- warm air flows do not go under the roof.
If you install four lamps - one for each wall - then the total power of the external illumination will be as follows:
5 W x 3 + 17 W = 32 W
Of course, this is not enough for full lighting, but to enhance the effect, you can use lamps with mirrored bulbs - this way the light will not be scattered to the sides.
Another way
Do-it-yourself lighting of the bathhouse can be provided in another way - to install lamps in the ground about one and a half meters from the walls. But this will cost several times more, because the amount of materials expended and work performed will be large.
This will require:
- landscape planning (there should be no obstacles in the path of light);
- underground cable laying;
- sealed lamps.
A competent bath lighting device will allow you to be content with its healing effect with maximum comfort. But the choice of one method or another still remains with the owner.
Video - Lighting in the bath
And saunas are right - to provide pleasant light, which will make the "bath procedures" more comfortable. When analyzing the requirements for the organization of bath lighting, the reliability of the system is primarily taken into account.
The electrical characteristics of lamps from different manufacturers are somewhat different, but for baths and saunas it is necessary to purchase products with an IP54 moisture protection class. You should also pay attention to such an indicator as "heat resistance". If the technical data sheet indicates that it is heat-resistant, the product is able to withstand temperatures of 125 degrees Celsius without consequences.
Even economical models with a simple design for baths and saunas must meet these requirements. More expensive options can be fitted with a diffuser, louvres and shades, but they also need to be safe.
We will form a number of mandatory requirements for lamps for baths and saunas:
- Stylish look,
- Convenience when turning on / off,
- Withstand temperature extremes,
- Security class IP54 and above,
- Absolute tightness,
- Thermal stability of parts.
German products in most cases have a ceramic body and frosted glass, which provides heat resistance. Convenient fastening system allows you to install them not only on, but also on the wall.
The cartridge is also made of ceramic, therefore it is able to withstand high temperatures, and a silicone gasket protects the product from moisture. The contacts are made of high quality metal and are weakly subject to oxidation. The frosted glass provides a soft light, therefore the product is not equipped with a grill. It is necessary for luminaires with bright rectilinear light to form the scattering of the rays.
There is a special requirement for organizing lighting in a sauna - an even distribution of rays throughout the room. This is the only way to create a relaxing atmosphere. For this, low-power luminaires are installed evenly from all sides. Experts believe that the most successful system for performing these tasks is fiber optic.
When organizing it, a tourniquet and several projectors are fixed on the wall of the steam room. Due to the fact that the fiber is able to withstand a heating temperature of 200 degrees, and the projectors have high moisture and heat resistance, it is created optimal system for soft, uniform light in the bath.
A significant disadvantage of a fiber optic system is its high cost. However, it is not necessary to use optical fiber everywhere for lighting in the steam room. You can combine technologies and install spotlights in some places, which will complement the picture of a "tropical night" or "starry sky".
However, if the budget for organizing lighting in the room is limited, it is quite possible to use incandescent lamps or their gas-discharge counterparts, but be careful: when exposed to excessive temperatures, these lamps can crack into many small fragments.
It is impossible not to pay attention to the lamps of well-known manufacturers. Tylo and Harvia... They produce a fairly large range of luminaires that are protected not only from high temperatures, but also from splashes. The housings are sealed and can withstand extreme temperatures.
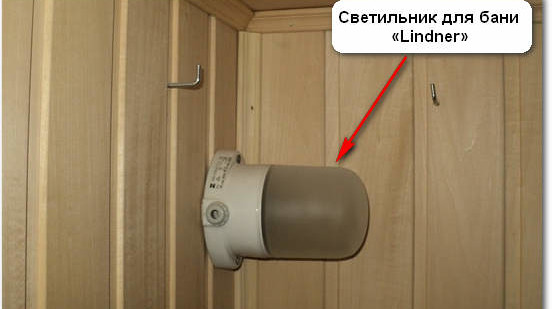
 Lighting fixtures "linder" in terms of design features, they are somewhat inferior to the analogs of the above manufacturers, so they are not recommended to be installed high under the ceiling. The advantage of the products of this manufacturer is the low price. The lamps are equipped with a rubberized body, therefore they work successfully in the washing room and in the bathhouse.
Lamps "Steinel" are popular because they are equipped. These devices allow you to turn on the light immediately after opening the door. This increases safety and eliminates the use of switches, which often fail in baths and saunas.
 When organizing lighting in baths and saunas, it is important not only to choose the right design of the product, but also to rationally place it. As a rule, the products are not installed in hot areas of the room. Many LED models intended exclusively for dressing rooms, where they are placed at a distance of 70-80 cm from the floor. It is very important to place the lamps behind the backs of the vacationers so that they are.
If you plan to arrange products on the ceiling, you should carefully analyze their thermal and moisture resistance. The ceiling is considered the most dangerous place. Hot air accumulates under it. The high temperature at the top of the room is constantly present, so any fragile elements that will be installed on the ceiling are exposed to increased loads... Note also that the luminaire bodies must be durable. If fragile products are installed on the ceiling, they will crack when exposed to high temperatures.
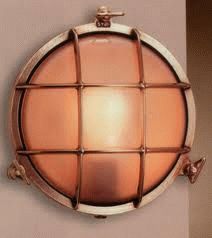
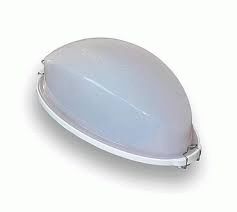
 Classic incandescent bulbs are made of durable materials that are resistant to corrosion. For moisture resistance, they are equipped with a silicone gasket. The most commonly used type of product is hermetic fog lamps with opaque or milky shades. To reduce the level of illumination, a wooden grille is used in them. It is able to effectively diffuse the flux of light rays, therefore it is installed on all luminaires.
LED bulbs are cheap and practical, but not suitable for a steam room. They create a bright light, which is optimal for bath rooms. To create even illumination, they must be equidistant from each other.
The LED lighting system is energy efficient. It can be used to create attractive decorative light paintings on walls and ceilings. Professional designers often use LED systems to decorate the bath and sauna color composition. Due to the fact that LEDs are conveniently placed on the ceiling, and in the hands of a skilled craftsman, puffs of steam can create interesting lighting effects.
Fiber optic systems are used for the sauna. They guarantee even lighting, heat and moisture resistant, but quite expensive. The light in them is transmitted through optical glass conductors and flexible beams. The core of the light-guiding vein has a high degree of refraction. Such lamps do not dazzle, therefore they do not require the installation of grilles. Today, fiber optic structures are considered the safest, strongest and most durable. They are installed in private baths and saunas and show good efficiency.
 In the hands of professional designers, these systems can play with tongues of flame, splashing water and other attractive effects. To do this, they are combined with lenses and crystals. Unconventional and original ideas illumination of baths and saunas without fiber optic systems is impossible to implement.
Halogen lamps are very popular today. It is convenient to install them in the steam room thanks to the built-in reflectors. Low power of 20-35 W saves electrical energy. The products are not afraid of temperature and are protected against touching and splashing water.
Halogen lamps can be installed in any room. The advantage of the products is the spectrum of light rays close to the human eye. The product is externally heat-protective, and from the inside it heats up to 400 degrees Celsius. On sale today there are lamps with colored shades, as well as devices with decorative shades.
Fluorescent lamps are energy efficient. They do not tolerate low temperatures, therefore they are not installed in the dressing room, where in winter, without constant heating, they create low temperature... When using such lamps, it is possible to adjust the brightness, which gives them advantages.
Thus, in order to choose lamps for a bath and, it is not enough to find a reliable manufacturer, a modern high-quality lamp, it is also necessary to evaluate the structure of the sauna. Only careful design and consideration of all the features of the structure of the lighting system in an individual building will make it possible to organize it correctly.
Foreword
Required tools and materials
 Drill
Drill
Content
No one doubts that lighting in the bath is necessary. True, there are significant differences between the lighting of the steam room in the bath and the lighting in other rooms of this building - not all lighting fixtures are suitable for this hot and humid room. What are the lamps for the bath and how to carry out their independent installation, you will learn by reading this article.
What lamps are better for a bath: classic and LED lighting
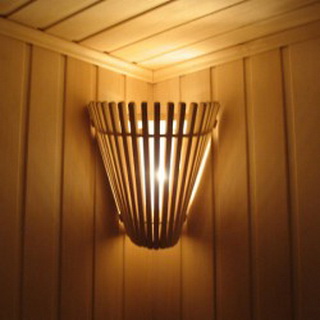
The lighting in the steam room in the bath should be dim, soft, in order to encourage peace and relaxation. And lighting fixtures must be moisture-resistant, heat-resistant, sealed, safe and economical.
For baths and saunas, LEDs, classic lamps, as well as fiber-optic light sources are suitable. Typically, the protection class of lamps for a bath is not lower than IP-54, and switches and sockets are not lower than IP-44.
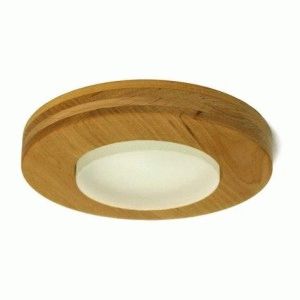
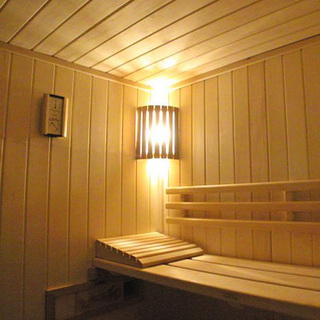
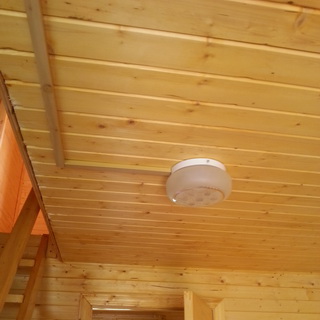
Typically, classic sauna lamps come in the form of milky or matte fog lampshades and blend in with the wooden louvred shade to create a soothing atmosphere.
Recently, it has become more and more popular LED lightening in the bath, however, it is not suitable for a steam room, as it gives a rather bright light. But in other bathrooms, they are more than appropriate if they are evenly spaced around the perimeter.
When deciding which lamp to choose for a bath, pay attention to the advantages of LEDs:
- significantly save energy and effectively illuminate the room;
- they can be mounted not only on the ceiling and walls, but also on the floor, which will allow you to create an original and unusual lighting design for the bath.
Look at the photo of lamps for the bath: they are not only functional, but also very beautiful:
How to make your own fiber-optic lighting in a bath
It is up to the owner to decide which lamps are best for a bath, but experts advise fiber optic lighting. These light sources are used to equip a steam room: they can withstand temperatures up to 200 ° C, do not blind the eyes, therefore they are optimal for use without wooden lampshades. Fiber optic lighting for a bath is the safest and most durable, easy to install, applicable in exclusive interior design (for example, using lenses and special crystals, you can make original lamps with the effect of flowing water, aurora borealis or a burning flame).
For safety reasons, it is better to mount LED lamps in the steam room from below, for example, under benches, since the temperature near the floor is much lower than under the ceiling. Here the devices will function more stably.
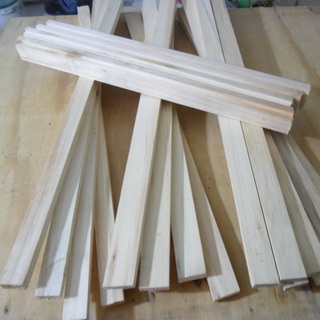
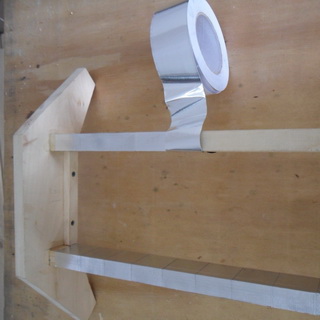
It is not difficult to make a lamp for a bath with your own hands, and it will be inexpensive. This will require: wood (possibly the one left over from construction work), plywood, glass 4 mm thick, a special PET film resistant to temperatures of at least 120 ° C, getinax electrical insulating material, LEDs with an illumination angle of 120 °. Also, for lighting in the bath, mounted by hand, you need to purchase aluminum tape, superglue and mounting glue.
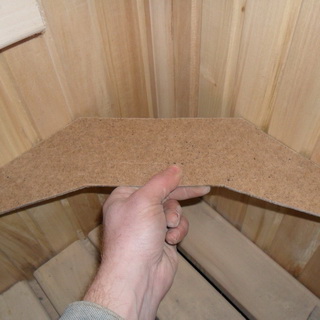
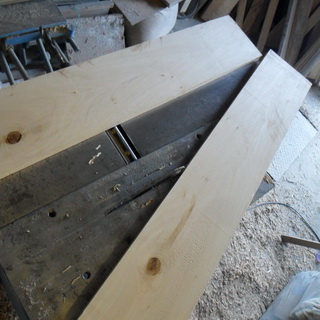
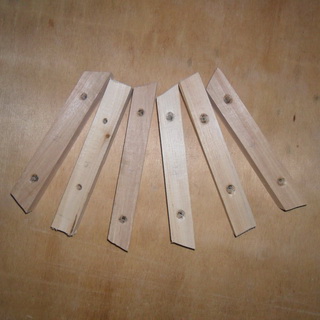
Before making the lighting in the bath, templates of the main parts are made from fiberboard. Vertical slats with rounded edges are planed according to the template for the frame of a luminaire made of lime wood: 4 pieces with dimensions of 750 × 35 × 15 cm, 8 pieces with dimensions of 750 × 40 × 15 cm, 4 pieces with dimensions of 750 × 45 × 15 cm and 1 piece - 550 - 50 -20 cm (it will be required when arranging a groove for glass).
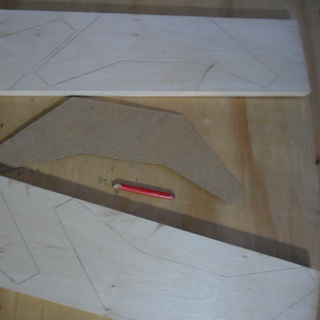
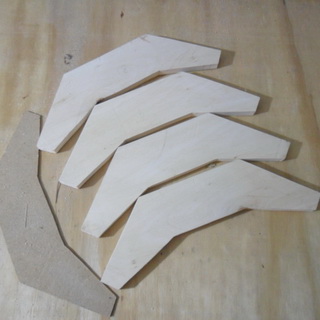

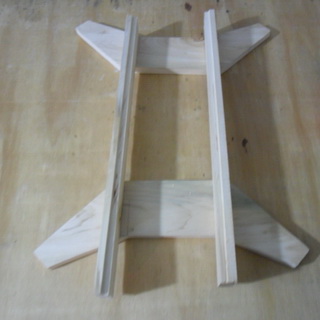
1. The main parts for lighting the steam room in the bath are fastened with rails and coated with universal mounting glue, the attachment points are tightened using self-tapping screws 70 mm long.
2. Before making fiber-optic lamps for a bath, specially provided strips are attached to stop the glass. The glass is cut and wrapped with PET foil as insulation.
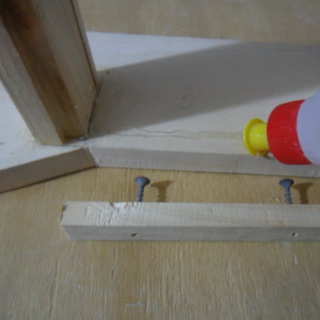
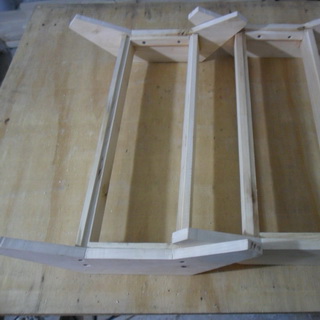
3. Then the slats are sawn, measured on, coated with assembly glue and tightened with self-tapping screws.
4. On two slats measuring 750 × 45 × 15 cm, mark the points where the holes for the glass are subsequently drilled. With the help of the rails, it will be fixed in place. In this case, the outer vertical slats are fixed with screws from the back side.

5. Print on a computer a table with cells 3 × 3 cm, stick it to a sheet of getinax and drill the places where the lines intersect. The diameter of the holes obtained should be 5 mm - just under the diameter of the LED. A larger drill is used to make conical grooves so that the light from the LEDs is more directional. The paper is washed off the part with water.
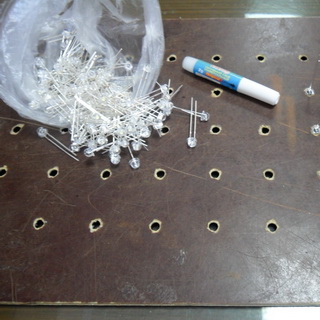
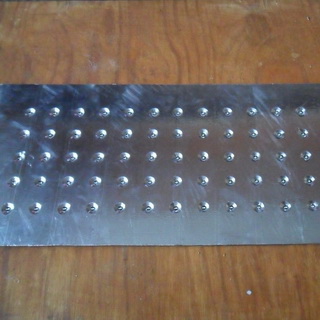
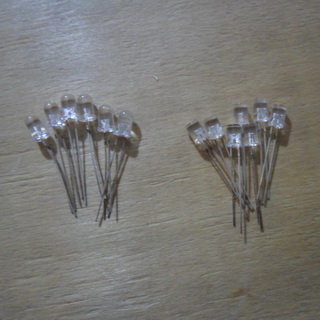
6. LEDs (80 pcs.), Soldered by 4 pcs., Are attached to the reverse side of the panel with superglue. There will be 20 LEDs in total - 4 in each of the points. The luminaire is designed for 12 V. The reflector for the LEDs will be aluminum tape.

7. Install the power supply as for halogen bulbs. Place it outside the steam room, leading a cable to the lamp through the wall. Consume given original lamp will only be 250 mA, or 3 W.
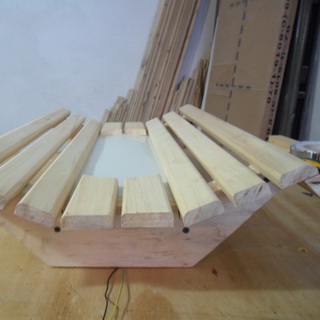

8. Attach all the slats (they should not be visible from the front side) to the frame using self-tapping screws. The LED panel is wrapped in PET foil and fixed to the base.
Now you know how to properly make lighting in the bath, below you can familiarize yourself with the rules for installing lamps.
Do-it-yourself lamps for a bath made of wood (with photo)
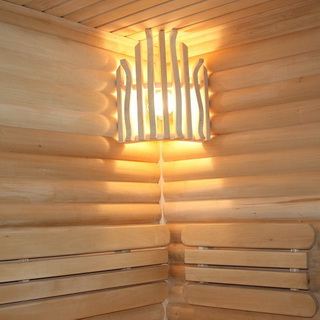
Decorative grille- the most common option for finishing bath lamps, but you can also make a diffusing screen from a thin but durable fabric (silk) or birch bark, wood, plastic, clay, paper, glass. For a steam room, a wood screen is more suitable: a curved or straight plate with a pattern is attached to the base instead of slats. The simplest kind of diffusing screen is a shelf or its back. Instead of LEDs, it is permissible to buy an LED strip, glue it behind the board of the back of the shelf - you will get a soft emission of light directed down or up.
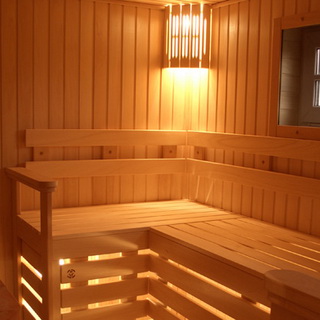
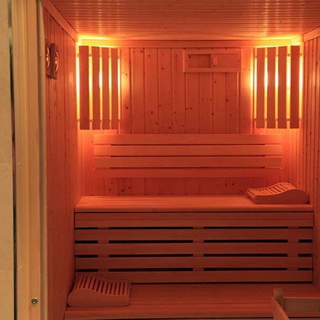
As you can see in the photo, the lighting in the bathhouse with decorative grilles looks very original.
Lighting device in the bath: installation of lamps
The installation of lamps in the bathhouse is carried out in several stages.
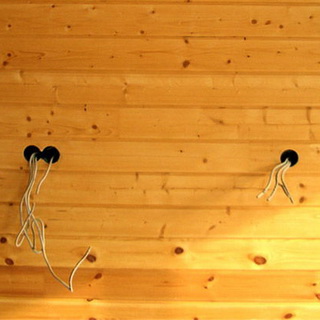
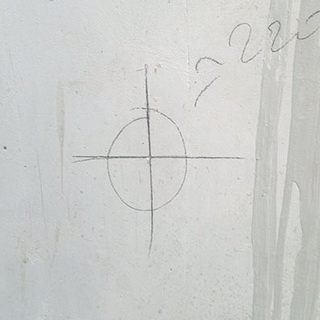
1. Before you independently make lighting in the bath, on the basis of the ceiling or wall, mark the locations of the lamps and the output of the wires, marking them with a cross or a circle.
If it is conceived to place the lamp in the center of the ceiling, mark the point of intersection of the diagonals on the floor and use a plumb line to transfer the desired point to the ceiling. Before making the right lighting in a bath from several lamps, you need to calculate the distance. The extreme luminaires are located from the side walls at a distance equal to half the distance between the lighting devices inside the row itself (for example, to arrange 3 lamps, you can use the following formula: B / 4: B / 2: B / 4, where B is the length of the wall) ...
2. Power is supplied by means of a three-core wire placed in a protective corrugation. The electrical route is laid a little away from the mortise lamps, otherwise the wires will overheat and melt during operation.
Behind the frames and lathing, the cable is attached to the base using special clips.
If you want to mount a group of recessed lamps, the wire is laid in a loop with loops. For the installation of surface-mounted luminaires equipped with small mounting caps, single wires are used from the junction box: they will damage the sheathing at the exit point to a lesser extent and make it possible to fix even a small mounting plate.

3. Before the start finishing works check the wiring using a lamp holder and a piece of wire, since a simple tester - a screwdriver will show only the phase, and there are also zero "losses". The tester checks when it is required that the switch breaks a phase, and not zero. If all is well, the stripped ends are carefully insulated.
4. After covering the walls and ceiling, cut out the holes for the recessed luminaires. Their diameter is indicated in the passport attached to the product. But they must first make the markings and only then cut a hole with a drill or screwdriver with a crown on wood.
In the dressing room, it is better to strengthen the chandelier in the center of the ceiling and several wall lamps. You can equip LED lighting near beams, under benches, near the ceiling: it will turn out to be very cozy, modern and original.
5. When installing a surface-mounted luminaire, first fix the mounting plate or platform: attach it with dowels to the frame (the hole for the plate should not fall on the wire). Then the power is connected to the terminal block of the lighting device, observing the polarity. The body of the device is put on the lugs of the plate and the lamp is fixed with screws.
6. Installation of recessed luminaires begins with cutting the loop from the wire, if it exists. Then the two resulting ends are connected to the ceramic cartridge using twists, screwing them into the terminal block under the screws, and wrapping it with electrical tape from above.
7. If the luminaires are designed for lamps with a power of 12 W, a step-down transformer of the required power is connected to the circuit before the first luminaire (it is calculated by summing the watts of all consumers of one group). The transformer is placed inside the frame near the hole cut for the luminaire: this will allow you to quickly replace it when it suddenly fails.
8. Before finally installing the lamp, screw the lamp into it and check if it lights up. It is better to mount devices without lamps.
9. When the recessed lamps are mounted, they are placed in one line, since there is a significant backlash on the holes - a difference of about 1 cm. Then the lamps are carefully screwed in. The lamp is connected, wearing clean rag gloves so that no sweat marks appear on the lamp bulbs, and the chrome-plated parts of the lighting fixtures do not have to be wiped off from the remaining fingerprints.
The main thing when arranging lighting in a bath- be extremely careful, especially when cutting holes, because a hole made incorrectly or in the wrong place can ruin the whole appearance premises.

Pay attention to the photo of lamps in the bath, assembled by yourself - if you approach work competently, homemade lighting will look no worse than professional.
Where to make a socket and a switch in the bath
In this section of the article, you will learn where to make an outlet and a switch in a bath and how to install them. When installing lighting in a bath with closed wiring, the installation of electrical points begins simultaneously with the laying of the cable. By marking the lines for the wire, the location of the future electric points is also fixed.
An earthed power outlet must be at least 50 cm from electrical appliances and 25-30 cm above the floor.
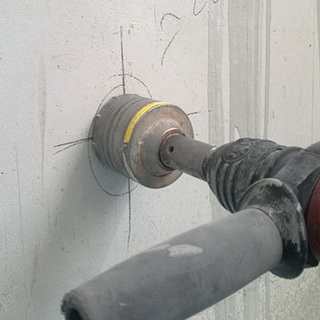
1. Mark the center point of the outlet on the wall, draw a pencil around the outline for the socket, attaching the installation box with the bottom to the wall. Cut a hole for the box along the contour in the wall. If the wall is concrete, then the excess material is knocked out of the hole with light blows of a hammer (or with a drill on concrete), the bottom is trimmed with a chisel.
Usually, in the process of how to make lighting in the bath with your own hands, round-shaped installation boxes are used, but there are also square ones. In this case, the hole is drilled with a perforator or cut out with a grinder. It is more convenient and easier to do this with a perforator with a diamond crown for concrete (a drill in the center of the nozzle is attached to the center of the drawn contour and a depression is marked with several test inclusions). As a result, the drill will go deep into the wall and fix the crown in one place so that it does not move during operation. Its height corresponds to the depth of the socket hole.
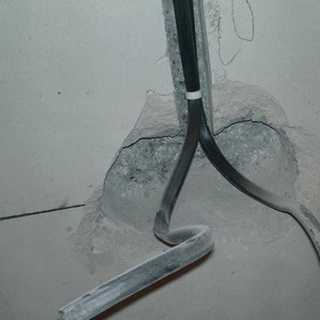
2. Try on the installation box to the hole, install the socket box. There is no need to lay the strobe: in the bath, the wires are usually hidden behind the wall cladding. But if the rest room is planned to be pasted over with wallpaper, then a line is made to the hole itself and deepened so that the cable can freely pass inside. At the bottom of the box there are several holes (they are covered with plastic hatches that are easy to remove), and they are inserted into them.
3. Before placing the installation box in the hole, it must be cleaned of dust and primed with plaster, stucco or gypsum glue. Holding the socket with your hand, cover the gap between the box and the edge of the hole with a spatula. Press the box with your fingers, remove excess mixture and wait 30 minutes until it dries completely.
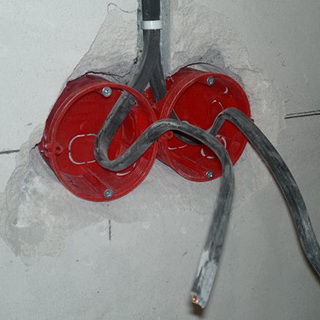
4. Now, in order to carry out the lighting in the bath, proceed to the installation of the block. To prevent the wire from jumping out of the installation box, it is held next to it with a clamp or bracket.
Insulation is removed from the ends of the conductors by 1-2 cm. If the conductor is multi-wire, then the bare conductor is twisted into a tight bundle.
There are 2 contacts on the socket strip (with grounding - 3). The neutral and phase wires are connected to two contacts, and the ground wire is connected to the third. If the socket is installed correctly, then the contacts are at the bottom and the wires are going up. The contacts are equipped with a spring or screw connection. The latter is the most reliable, and the former allows you to quickly complete the installation. Twist the excess wire into a spiral and hide it on the bottom of the socket box so as not to interfere with the installation.
The block is attached in two ways:
1) sliding legs: the block is inserted into the box and screwed in with a screwdriver 2 screws located on the sides and connected to the movable paws with teeth. When tightening the screws, the legs are spread out to the sides and abut against the walls of the socket, fixing the block in the box;
2) screws - along the edges of the socket, there are special holes that coincide with the holes in the block: the screws are inserted into them and the block is screwed to the box.
Attach a protective plastic case to the outlet. If, after installing the socket, you plan to interior decoration premises, then the block does not need to be mounted, and the hole should be filled with crumpled newspaper so that construction debris does not penetrate into it.
It is permissible to arrange the sockets in a "loop" or connect each to a separate line from the junction box or switchboard. When installing with a "loop", the power wires of each next socket are attached to the contacts of the previous one.
When mounting switches, it is important to place the keys correctly so that you press on the top, not the bottom.
There are types of switches, on the contacts of which it is marked, to which of them the incoming wire is connected, and to which - the outgoing wire.
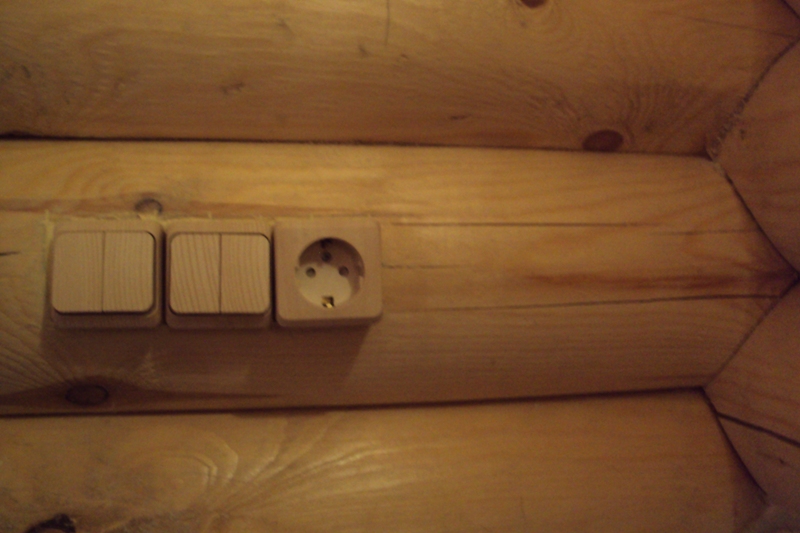
Special one-, two-, three-slot frames are sold for switches. They are bordered by electric points, giving them an aesthetic look.
It is easier to install switches and sockets with open wiring: you do not need to drill holes in the walls for installation boxes and dilute gypsum or plaster. Electrical appliances are installed on the wall using screws or dowel-nails. To do this, the device is disassembled and its lower part - the bottom - is screwed to the wall. After that, wires are connected to the block, and the block, in turn, is attached to the bottom. Then the assembled structure is closed with a plastic cover screwed on with a screw.
Many switches and sockets have special holes in the casing, closed as additional protection by inserts for a plastic pipe or cable channel, which is important for use in a room with high humidity. In sockets of this kind, there is also a special rubber gland at the point where the wire enters the housing.
If the wiring in the recreation room is enclosed in a plastic cable channel, then it is even easier to conduct it. On the surface of the cable channel there are special inserts - supports designed for 1-2 or even 10 electrical points. In addition, there are landing boxes, junction boxes for exposed wiring. In this case, the cable duct must have an appropriate width. Open junction boxes are attached with dowel-nails, screws or ordinary nails to the floors.
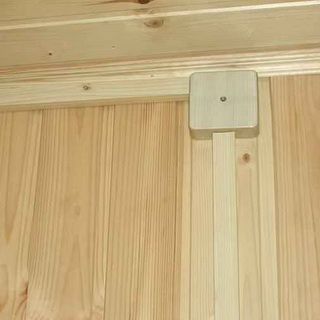
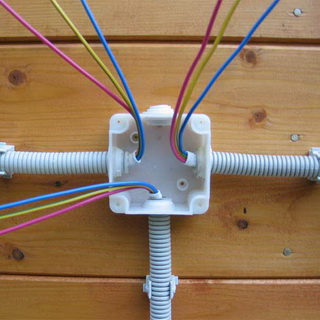
How to carry out lighting in a bath: installation of junction boxes
The configuration and dimensions of the junction boxes depend on the conditions in which they will operate, as well as on the number of wire connections. The hidden junction box can be equipped with a protective gasket (suitable for a bath) or without it. A rubber ring on the cover seals its connection to the box. If there is no gasket, the cover is attached with screws or snapped into the grooves.
A supply cable is connected to the junction box from below, which is divided into several outgoing wires.
If the cable is enclosed in a plastic pipe, then it must necessarily go into the junction box by 1-3 cm so that the cable does not remain unprotected. This also applies to installation boxes, socket boxes. If the box is compact, a diamond core bit can be used to drill a hole in a concrete wall. But this method is suitable only when the diameter of the junction box does not exceed 70-100 mm.
If the box is large, then several adjacent grooves are made with a diamond crown and the hole is trimmed with a chisel. The depth of the cut should be such that the junction box cover is flush with the wall surface when closed.
At the next stage of the installation of the junction box, all the necessary wires should be laid in it.
1. Put all the wires to be connected inside the junction box. At the bottom and sides of it there are plastic hatches: they need to be broken off and the ends of the cables inserted into the holes formed.
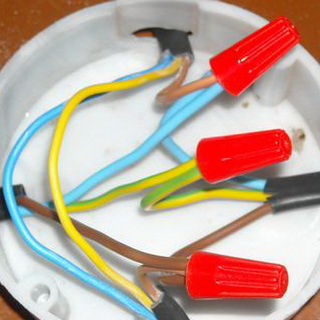
2.Using terminals, caps, terminal boxes, clamps or hand twisting. Additionally, the wires are wrapped with electrical tape, twisted, hidden in a box, closed with a lid and placed in a recess specially made for it. Then they are fixed in it using gypsum or plaster.
Other types of junction boxes can also be attached using screws or nail plugs.
It is quite possible to cope with the arrangement of an electrician in a bath with your own hands. The main thing is to choose suitable electrical appliances designed for a humid and hot room, and carefully carry out their installation.
Many people like to spend their free time in the bath. Such a vacation is a very pleasant procedure and is liked by almost every resident of the country. As a result, a considerable number of people want to build their own bathhouse.
The construction of a bath itself involves many stages, and one of them is to carry out electrical wiring and create a lighting system.
It is worth noting that for this type of building, the presence of a light supply system is very relevant, since the structure itself provides for a small number of small windows.
Working conditions of luminaires
The creation of a lighting system for a bathhouse with the help of your hands is accompanied by its own characteristics and, first of all, depend on the conditions that are observed in the room. As you know, the main conditions for the functioning of a sauna are:
- high air temperature, especially in the steam room;
- high humidity levels.
Actually, the last factor plays a very important role in creating lighting in most rooms of a sauna or bath.
Moisture is the factor that increases the risk to the life of sauna visitors. In addition, it can lead to a short circuit in the lighting fixtures and, as a result, to the possibility of a fire.
Considering these two conditions, the bath lighting must be protected from moisture and heat. The entire lighting system consists of a distribution board, wiring, switches and the luminaires themselves. First, let's pay attention to the features of the lamps themselves.
Luminaire requirements
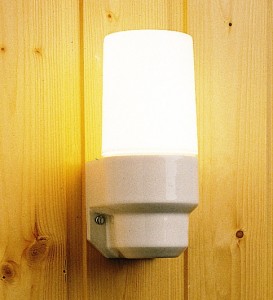
Sauna steam room lamp
The main requirement for any lighting device that will be used in a sauna to create a lighting system is called tightness.
He should not let any moisture inside him. Its design should provide for the presence of a watertight housing and a shade. In this case, there must be a sealing gasket between the dome and the body.
It is desirable that the bulbs are low voltage. It is imperative to use an RCD and circuit breakers when creating lighting in a sauna or summer cottage.
Note that the bath involves the presence of such premises as:
- The dressing room.
- The pool.
- Washing room.
- Steam rooms.
- Shower room.
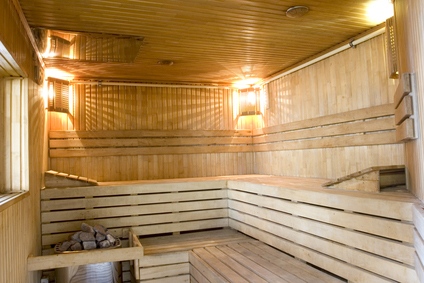
Steam room lighting
The most important room in the bath can be called the steam room and the requirements for its lighting are the most stringent. The reason for this lies in the fact that very high temperatures and high humidity are created here.
As a result, the light delivery device must be heat-resistant and waterproof.
So, if lighting is created in a Turkish-type bath, then the heat resistance of the device should reach 150 degrees Celsius. The lamp for the steam room of a Russian bath or sauna can withstand a temperature of 120 degrees.
In the event that installation on the ceiling will be carried out, then the heat resistance should reach 200 degrees Celsius. The maximum lamp power should be 60 watts.
As for the type of lamp that will create lighting in the bath, it is advisable to use only an incandescent lamp. Luminescent and LED lamp should not be used.
First, they are not designed for such an environment. Secondly, at high temperatures, fluorescent lamps can explode, which should not be allowed.
Helpful Hint: Most the best option to supply light is to use a fiber optic lamp. Fiber optic can withstand up to 200 degrees Celsius.
Any lighting device that is in the steam bath must be protected by a wooden decorative grill. This will eliminate the possibility of direct contact with the plafond, as well as soften the light.
By the way, the light should be soft and diffused. It should not be bright.
Usually, two light sources are installed in the steam room. At the same time, they try to place them as low as possible. The switch must be outside the steam room.
Lighting for washing, pool and dressing room
The design of the light supply system in the pool, sink and shower is the same. The requirements are also the same. There is no high temperature here, and you may already have fluorescent and LED lamps, as well as LED strips at your disposal.
In this case, the latter can be installed on the walls of the pool. Of course, these tapes must be airtight, that is, they must be protected from water. The lighting that you create with your own hands in these bath rooms should be bright enough.
All luminaires that will be installed in these rooms must have at least IP44 protection. They must have waterproof shades.
Helpful advice: the switch must be taken to the dressing room. This increases the level of security.
Wall lights must be installed so that they cannot be touched or damaged.
As for how to make lighting in such a bath room as a dressing room, this procedure provides for the least number of requirements. Any type of luminaire can be installed here. It is advisable to place all switches and sockets in this room. The light should be bright.
These are the features of organizing lighting in a sauna or bath room and you need to know them when installing a lighting system with your own hands.
Calculation of the number and power of luminaires
In the future, we will focus on the very stages of conducting light into the bath. From the very beginning, they develop a project and calculate the required number of devices for supplying light. This calculation depends on the type of room.
Note that each of them needs a certain level of lighting. So, the average horizontal illumination of the dressing room should be equal to 150 lux or 150 lumens per square meter. You need to determine the area of the dressing room and multiply the number square meters 150 lumens.
As a result, you will know how many lumens all the fixtures have to create.