Beautifully carved products from paper Even a weekday can be made festive, lighter and elegant, then preparing for the holiday, just a sin not to take advantage of the possibilities that gives the ability to cut out of paper. Mastering them, you can on the occasion of any celebration in a special way to decorate the house and make funny and unique gifts.
Decorations for candles do it yourself
What a new year or christmas without mysterious flickering candles! But after all, the candles can be decorated in the spirit of the winter holiday - patterns of white paper. In this form, they perfectly complement the decoration of the room, an elegant composition on the table, and moreover, the candle is easier to move to a more suitable place.
What you need to work
■ White or colored paper - Based on the color of the candles, tablecloths, napkins, general IT design. d.
■ Scissors and knife with removable blades.
■ Cataca, copy paper, dense paper - for templates.
Procedure for performing work
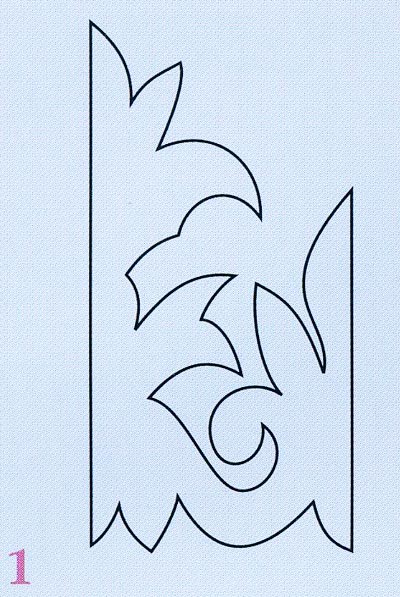
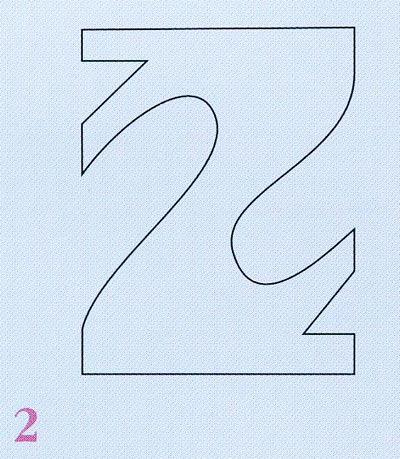
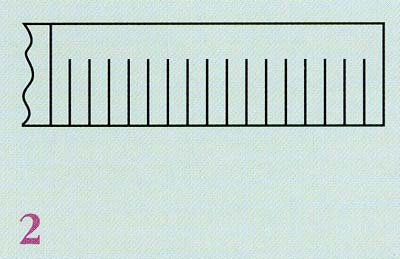
■ 1. Take the selected pattern using the traction and copy paper (Fig. 1, Fig. 1, 2, see options for the pattern) on the paper from which you want to make a template: Cement to the pattern given in the article and circle his soft simple pencil; Put the paper for the template, on top, "face" to it, - copy paper and tracing.
After that, a well-sharpened solid simple pencil circle a picture with pressure. Cut it with scissors and, if necessary, a knife with removable blades. The template is ready.

■ 2. From white or colored paper. Crop the tape, the length of which should be equal to the length of the circumference of the cylindrical candle or the rectangular around the perimeter (do not forget to add 1 cm on the allowance for gluing the edges of the decoration!), And its width is equal to the optimal height of the Candle Decor. Fig. 3).
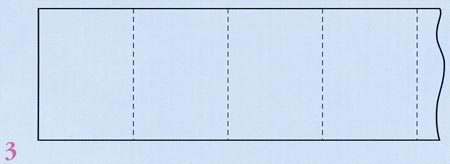
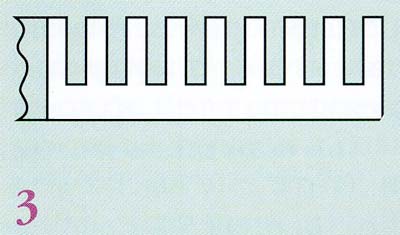
■ 3. Fold the harmonic tape, then apply the selected template to the top face. Circuit with a soft simple pencil drawing. Remove the template, then cut the pattern with scissors or knife with removable blades.
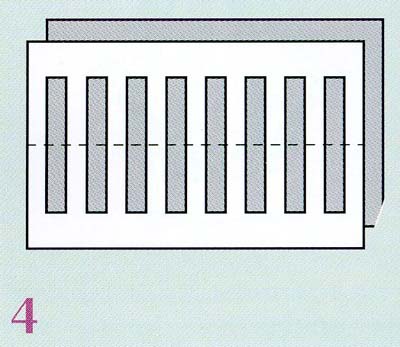
■ 4. Expand the paper strip. Putting on it a sheet of other paper, convex part of the spoon as you should smooth out the remaining traces of folds.
■ 5. Spread the edges of the decoration made and put it on the candle.

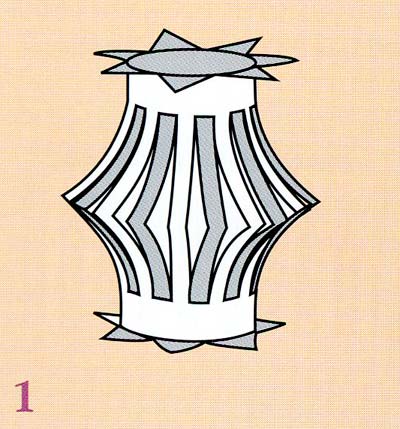
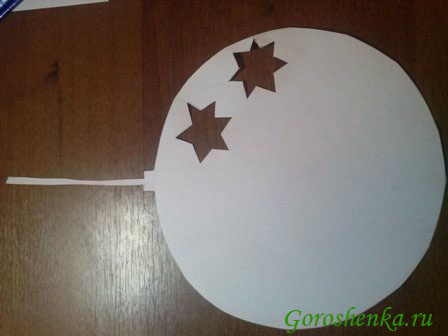
Christmas decoration - Chinese lantern 
In addition to the mulosis bosses - elegant "snowflakes" or the messengers of a clear sky - "Suns" on the green beauty of the Christmas tree - the symbol of the New Year's celebration - you can hang and famous Chinese lanterns, bright, funny and moreover uncomplicated in the manufacture.
What you need to work
■ Three contrast paper, combined with a smooth surface or corrugated color.
■ Folding knife.
■ Scissors.
■ hole punch.
■ PVA glue or any universal glue.
Procedure for performing work
■ 1. Take two sheets of paper different colors, fold them together, then - in half (Fig. 1) and fix the bends with a folding knife or metal line.
■ 2. Cut the bent with noodles, not reaching the top (and future niza) 3 cm and retreating from narrow edges to the width of the strip - "noodles", approximately equal to 1 cm - so that then it was possible without prejudice to external view glue the side of the flashlight (Fig. 2).
■ 3. Expand the leaves. Further, firstly, you can cut odd stripes on one workpiece, and on the other - even so that the strips of different colors are visible in folded (Fig. 3.4). Secondly, you can leave everything as it is, and then the inner part of the paper of another color will not be so noticeable. Spread the side sides of the frame.
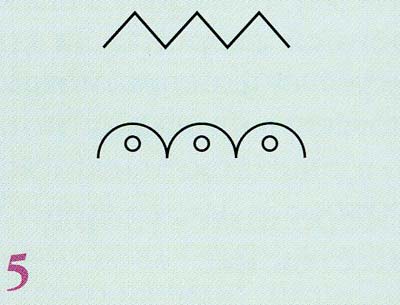
■ 4. Take the third sheet of paper of the same size of another color. Cut the edges of the long sides (inside each festoon using holes, you can make holes - it will add the grace of the product) - Fig. five.
■ 5. Slide the sides of the second billet so that the resulting cylinder is then easily entered into the first workpiece, and let it dry. The inner part of the flashlight will give it hardness, will help save the form.
■ 6. Insert the cylinder inside the first billet and, slightly folding the outer part of the flashlight on the collar, move away from above and below the cutting edges of the cylinder (Fig. 1).
■ 7. Cut paper strip 0.5 cm wide and 12 cm long and glue to the top of the flashlight with inner. For this loop, the flashlight can be hung on the Christmas tree.
"Frosty" patterns for glasses 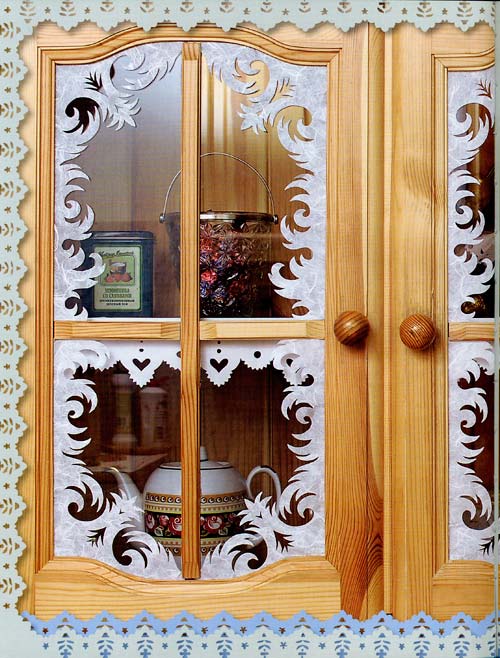
If the main part of the window window can be decorated with "snowflakes" and "sunshine", then in its edges there will be very impossible patterns of paper in the spirit of fantasy works of Santa Claus, which so resemble the paintings of the winter fabulous forest. Similarly, you can decorate not only windows, but also glass doors, and furniture - buffet, bookcase, etc.
What you need to work
■ Thin white paper Handmade (its name is designer).
■ Cataca, copy paper, dense paper - for template.
■ Scissors are better if they are small. Little scissors are distinguished by greater maneuverability. But the patterns will have to cut very intricate.
■ Simple pencils, soft and solid.
■ double-sided tape, or double-sided film, or a hube, cooked from starch - to glue the pattern on the glass.
Procedure for performing work
Pattern from "Inea"
Option first
■ Using the tracing and copy paper, transfer the pattern (Fig. 1) on the paper from which you want to make a template: Cement attach to the pattern of the pattern given in the article, and circle it with a soft simple pencil; Then put the paper for the template, on top, "face" to it, - copy paper and tracing. After that, a well-sharpened solid simple pencil circle the drawing. Cut it with scissors. The template is ready.

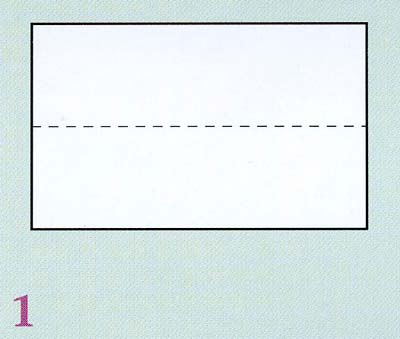
■ 2. Take a rectangular sheet of thin white handmade paper, the dimensions of which correspond to the sizes of decorated glass. Fold the sheet in half, connecting the narrow parts (Fig. 2).
Very soon the long-awaited holiday is the New Year. And today the festive atmosphere of this wonderful day reigned today in your house, you can make interesting patterns on the windows with your own hands on the windows. The advantage of such a decoration is that it will delight not only households, but Iporate. New Year's patterns on the windows give a special mood, bringing a certain component of the magic and fairy tales with you.
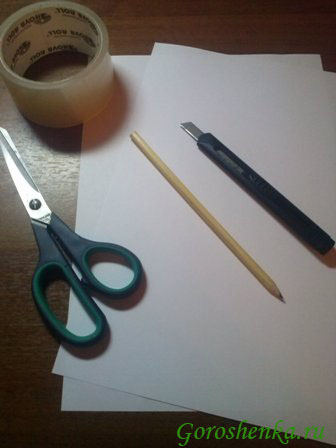
So, we will need:
·
Scissors.· Normal white paper.
· Stationery knife.
· Scotch (To fix the pattern on the windows).
And, of course, stencils for creating a composition. Link to free download Images are at the end of the article.
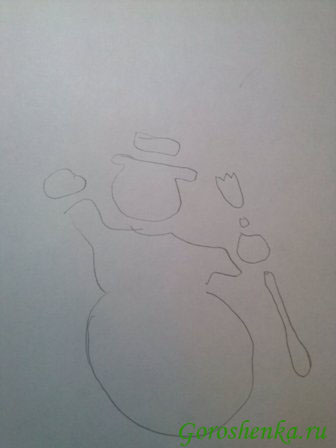
At the first stage of operation, you need to draw the pattern you want to see on your windows.

At the next stage of work on the decoration of the windows, you should cut the hardware. From the sides it is better to cut with scissors, but with internal patterns it is necessary to work the stationery knife.


From the remnants of paper you can create christmas sprigs. They first need to be needed with a pencil, and then cut down the contour. For more graceselasts, cut the heads at the twigs.

The complexity of the patterns is dependent on your abilities and, of course, fantasies. You can cut christmas decorations of different sizes and forms, angels, candles, ourselves christmas trees And many other interesting things. Also, empty space can be filled with conventional asterisks or snowflakes. And now beautiful patterns of paper on the windows are ready to delight everyone around.
Download new Year's stencils can
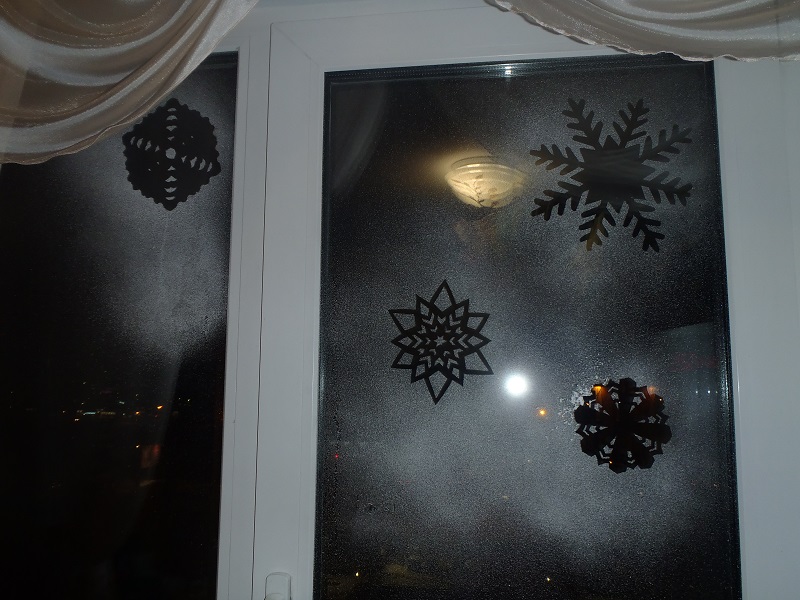
The atmosphere of fairy tales in the house before the New Year and Merry Christmas is very important. Especially if there are small children in the house. And the atmosphere can be created very simple - even small details will give the house of festive. And today we want to offer you several options for decorating windows that will be relevant to the entire winter season. So, even if on your windows, frost has not yet picked up, it's time to do everything with your own hands!
We draw frost patterns
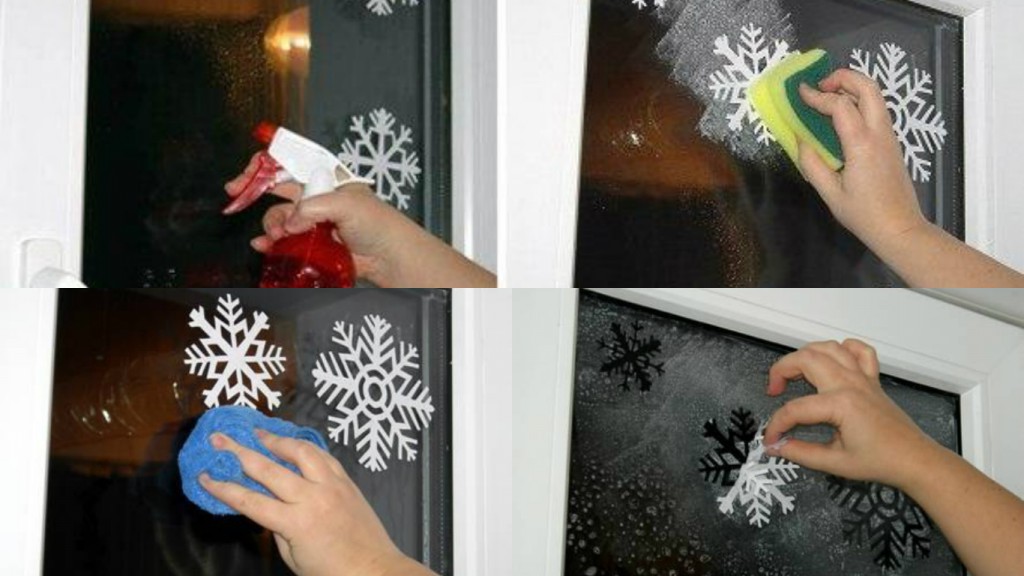
To draw beautiful snowflakes on the windows, Christmas trees and other winter motifs, take white toothpaste, bowl with water, sponge, sprayer and paper stencils The drawings you want to transfer to the window.
Make a soap solution from a small amount of water and toothpaste. In the usual clean water, plunge the templates so that you can hook them into the window. Now we apply a solution with a toothpaste, painting the stencil patterns. Around the main drawing, you can spray a solution with a sprayer. When the pattern snacks a little, remove the stencils. Ready! By the way, all this beauty is easily washed off with a damp cloth.
Some templates For patterns. You can print and cut them

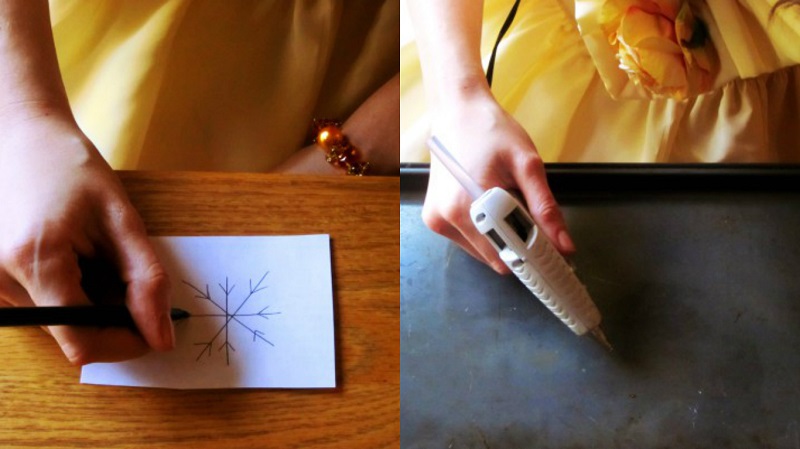
Snowflakes from silicone glue or volumetric paints
And this is another version of snowflakes. Make them with silicone glue on paper, let dry, separate the snowflake from the paper and stick to the window. Handsomely!

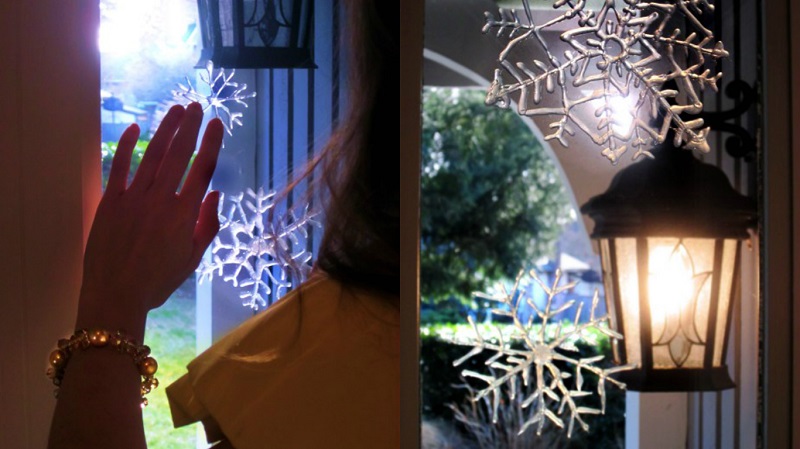
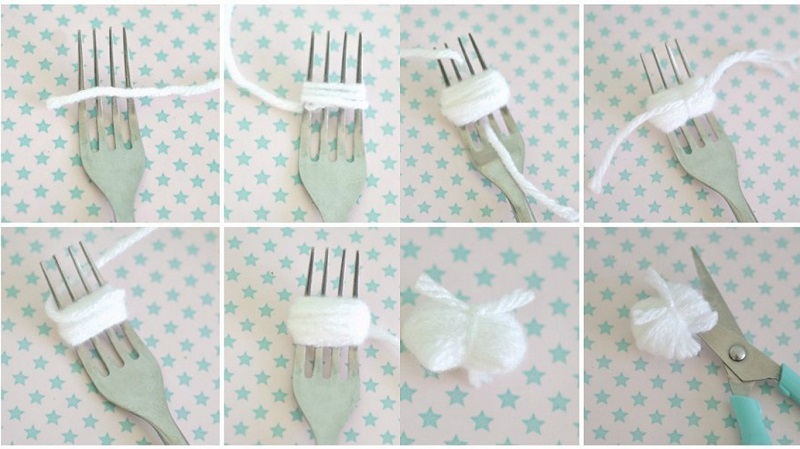
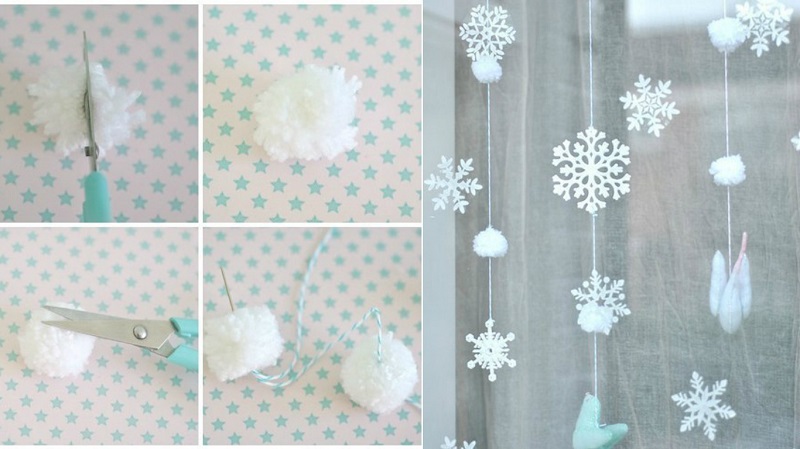
We make garlands from paper snowflakes and yarn
If you love ordinary paper snowflakes, make it beautiful garlands On windows using pumps from yarn.

Knitted snowflakes
And one more option of cozy snowflakes - knitted snowflakes. By the way, such snowflakes will serve you not one year.


It is difficult to find a person who would have at least once admired in the winter course the view of the frozen moisture on the glass. Amazing frosty frosty pattern on the window, it turns out, you can create with your own hands. And it is not so difficult.
Anyone can try to make a simple or more intricate winter composition even inside the dwelling: on a glass interior door, a wardrobe sash or a mirror. And for this you do not need frost and moisture.
There are several ways to create in your home. Let's try to figure out what you need and what skills will be required from the artist.
Natural frosty pattern on the window
Winter divorces on the glass is, in fact, the other, which is formed under certain conditions on the branches of trees, wires and any other surface. This happens when the temperature decreases below zero degrees. The moisture in the surrounding air freezes, goes into a solid state and in the form of ice crystals it is settled on the surface turned down.
The same thing happens with windows. Apparent smooth glass actually has minor scratches and cracks. They settle dust particles. Ice crystalline falling on this inhomogeneous and unequal surface, especially when exposed to wind gusts, form a unique frosty pattern.
Unfortunately, with the advent of the Sun or Heat, this beauty disappears. Modern plastic windows exclude the possibility of frosty divorces. Their double-glazed windows are reliably isolated, they are not mistaken from the inside and do not allow the internal space freezing.
But can you stop a person with artistic inclinations who wished to create a frosty pattern in his summer? Of course not!
Frosty pattern: imitation
If there are no two main factors - moisture and glass cooled to negative temperature - the occurrence of a natural hoarfrost on the window is impossible. Learning the reasons for the formation of frost patterns, you can try to create them in summer. 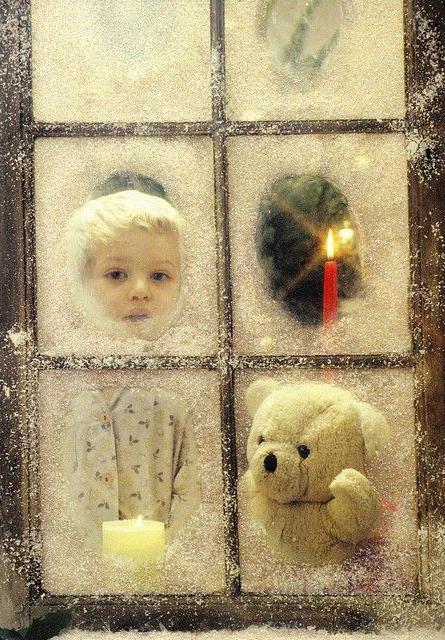
For help come chemical reactions Crystallization of certain solutions. Methods for formation of frost patterns are known using magnesium sulfate (other names: Magnesia, bitter or can be used for these purposes (known as antichlorine, hyposulfit, photographic fix).
These chemical compounds are not hazardous substances, they can be purchased at a pharmacy or in chemical reagent stores, and when complying with the minimum security requirements, use for decorative purposes to mimic a frost pattern.
You will also need a drawing brushes, you can use cotton discs, sponge or other suitable items. To accelerate the evaporation of moisture, it is convenient to use a hairdryer.
Chemical frost
To create a frost pattern with the help of 50 mg of this substance dilute in 100 g of beer and this solution on a purely washed and dried window draw a brush divorce. After drying (it is possible to accelerate the process with a hairdryer), magnesia crystals will be shown on the surface.
Another variant of the working solution is the same magnesium sulfate, but instead of beer, boiled water is used and a tablespoon of diluted gelatin is added. Used brush, sponge or rag tampon. The solution is applied by chaotic and disorderly movements on low fat glass.
Frosty patterns on glass with sodium thiosulfate are formed after evaporation of moisture from the working solution prepared from 40 g of this substance dissolved in a glass of water. The chemical pattern in this case will be white, more dense, opaque, reminiscent of snow. 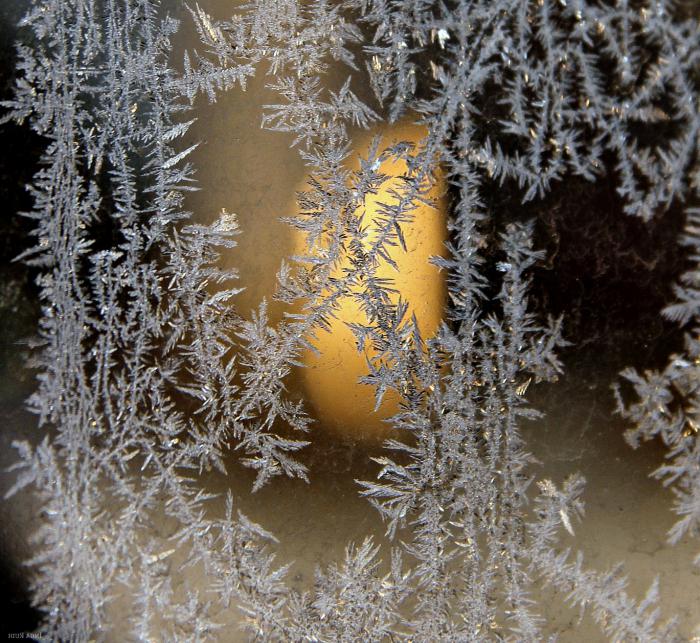
The technique of creating a picture is selected individually. After multiple samples, you can develop certain skills. You need to try to portray frosty divorces, "feathers", curls, improvised snowflakes. The solution after an unsuccessful attempt can be easily removed with a damp cloth and repeat the creative process again.
Carbon black
Previously, in Soviet times, frosty patterns on the glass were obtained using the surface, it was necessary to remove gloss, to treat it to light mats with sandpaper or sand with abrasive. The essence lies in the fact that the tile or granulated joinery gluing tile or granulated carbon black and the pile and granulated jaunde glue, shrink and bakes it unpredictable.
If such a composition, heated before the fluid state in a water bath, apply to 3 mm on a glass-processed glass, then after a day it will begin to dying. The composition of the non-repeated patterns will form a network of non-refined patterns to the surface. After completion, the dot particles gently sweep the brush.
The glass for such an intimate should be chosen not subtle, otherwise it will simply bent and deforms the tension force of the drying joinery glue. The working structure is applied to a smooth horizontal surface and leave it for a day.
Such a frosty pattern remains forever. Wipe from dust and washing the glass after the exposure to the joinery glue should be carefully - the sharp face of the drawing can hurt the skin.
Painting toothpaste
Not everyone will decide on the painting of window windows, arguing this in the absence of artistic abilities or reluctance to wash the windows from the paint. But with the help of such a material, you can get lightly light pictures. Frosty toothpaste patterns are safe, this technology is even available to children. 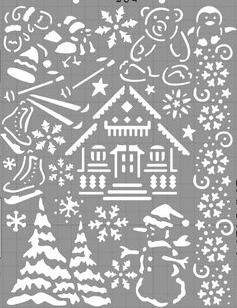
The glasses after unsuccessful creative processes are easy to clean and even better shine after that. And creative abilities can be limited only by simply spraying of a dissolved toothpaste from the spray gun.
The main thing is to decide, and understood the simplicity of the venture, you can try to paint the glass with a tassel (better with tough bristles) in the style of frosty frosty. The smears are applied, starting from the corner and moving towards the center. To simplify, you can keep at hand a suitable image of a natural frost pattern or any abstract picture.
Winter pattern on template
For people who do not want to draw, but they want to decorate their windows with artificial frost, there is an easy way to create frosty patterns with your own hands. Stencil with the finished composition will be the best solution For those who never took a brush and paint.
Pattern template can be purchased in the store or make it yourself. This will not be difficult if you cannot immediately set the target for the imitation of realistic winter divorces. You can download your favorite composition from the Internet, but it is better to draw it personally, especially together with the child. 
You can start with a simple snowman, a simple image of the Christmas tree, different animals, suitable stars. After transferring the pattern to dense paper, the contours are neatly cut. The template is applied to the glass or gluing with scotch and apply a solution of toothpaste, diluted to a creamy state.
If you add some watercolor or gouache paint to it, you can get more opportunities to implement ideas. For applying, use kitchen foam sponge or brush. Use as a background as a stencil, you can not only a sheet with a cut, but also the image itself, causing the coloring composition around it.
With a small child who got used to taste everything, you can arrange funny drawing. Frosty patterns can be made quite safe if used to create sugar powder. 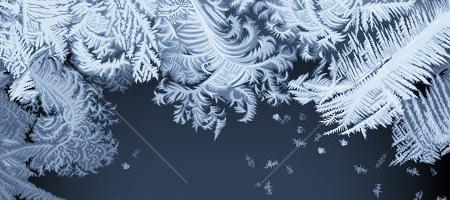
Cold on sterile glass It can be on the adhesive basis from diluted with honey, sucrose, fructose or any delicious syrup. If the baby really likes the result, it can even eat homemade frosty patterns.
The stencil is applied to the washed glass, flashes edible adhesive composition, then a powder or a soft brush is applied to powder. granulated sugar. It can even make a child. Safety fascinating process Complied with, kids will be delighted. And they can try to taste the drawing without a feet after removing the stencil.
Artificial snow
There is another simple way to create frost on any surface. Frosty pattern on a window using a stencil can be quickly and easily applied with artificial snow. Caller with this composition is better to choose from the discharge of non-sliding flakes.
To better pick up the winter composition associated with new Year holidays. Snowflakes and all sorts of fabulous characters acting in winter are suitable.
The glasses are washed away and dry wipes so that there is no condensate or wet divorce left. Before use, the spray can thoroughly shake. The side of the template should fit tightly to the glass so that it is possible to get clear frosty patterns. Stencil is better to attach scotch.
Spray the composition from a distance from 15 to 40 cm, depending on the desired effect of the density of the frost. After applying the snow, its surplus is removed with a dry cloth, the stencil is gently removed. 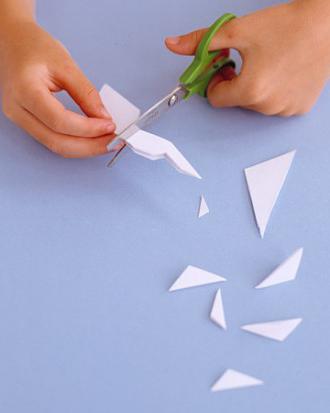
Snowflakes for windows
Frosty pattern on the glass is not necessarily an orientable unique picture. For many people, a simple snowflake on the window is a symbol of winter and New Year holidays.
It is possible to start creating frosty patterns for children from the manufacture of homemade paper masterpieces. Material can serve any paper, but traditionally for these purposes napkins were used. They are already folded in four layers. It remains to make another fold diagonally, so that it was the middle part of the snowflake, take scissors and start creating.
You can cut the pattern by templates or come up with your pattern. Find out in advance what happens for the snowflake, quite difficult. Only after removing unnecessary parts and deploying a paper sheet can be represented and understand how one or another intricate pattern turned out. Snowflakes can be decorated with sequins, and you can cut them out of foil.
Frosty patterns can do with their own hands, the main thing is that it wants to highlight and spend some time and strength. Mood, impressions and positive emotions are guaranteed.