Probably everyone will agree that the simplest branches from trees are very beautiful and available material for making various crafts. It is worth noting that making crafts from tree branches is easy, because they come in a wide variety of sizes and shapes. And even small children can make fun products from dry branches and roots with their own hands.
Simple children's crafts from branches
Together with your children, you can make funny caterpillars from branches with your own hands. Children will enjoy this process, because they are done easily and quickly.
Materials:
- twigs;
- plastic eyes;
- yarn;
- scissors;
- glue.

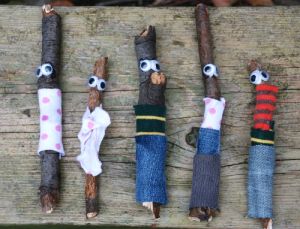
For children, toys made of wood are much more useful than toys made of rubber or plastic, so you can make funny dolls.
Materials:
- branches of different sizes;
- plastic eyes;
- scraps of fabric;
- glue.
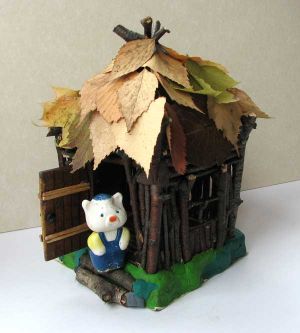
"House" made of branches
A child will be able to place his favorite animals or dolls in such a house.
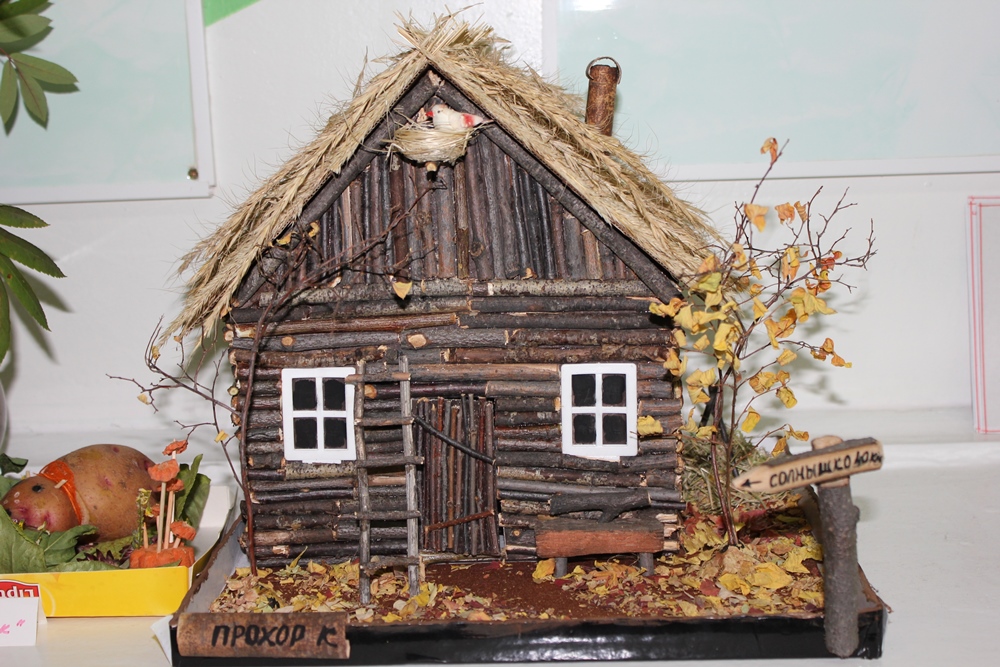
Materials:
- dry twigs;
- thick cardboard;
- dry leaves;
- plasticine;
- beads;
- matches.

The house is ready! Such ideas can be used for children to create crafts in kindergarten.
Door wreath made of natural materials
Autumn is the right time to implement ideas for making crafts from branches with your own hands. Door wreaths made of twigs and leaves came into fashion. They can be a wonderful decoration for any home.
Materials:
- flexible branches;
- Pine cones;
- foam;
- sackcloth;
- acrylic paints and spray;
- branch with berries;
- hot glue.
- First of all, flowers are made from pine cones and painted with paints.
- The base will be foam rubber, which is wrapped in burlap.
- Now use hot glue to glue the flowers to the wreath. Flowers are located as close to each other as possible.
- The branches and sprig with berries are placed at the back of the wreath and glued with hot glue.
- You also need to make a loop on top of the wreath; to do this, take a bright ribbon and fold it in half.
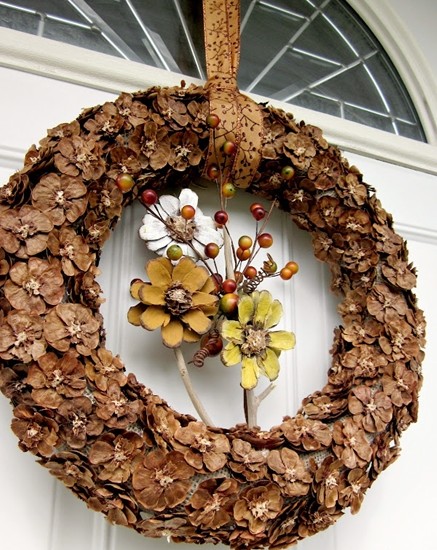
You can make a wreath like the one in the photo yourself for children for the Autumn Festival.
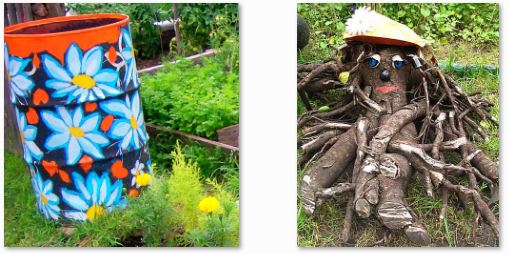
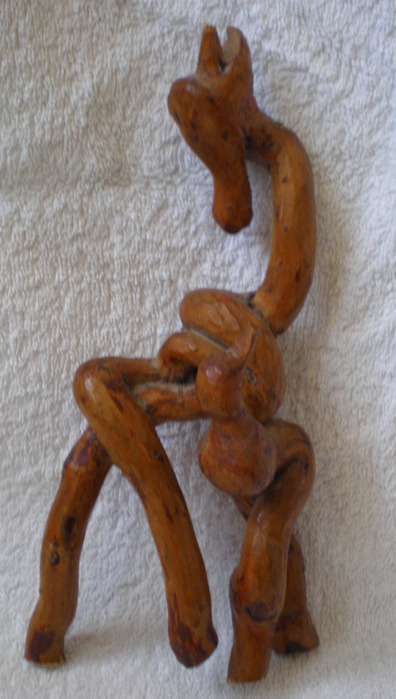
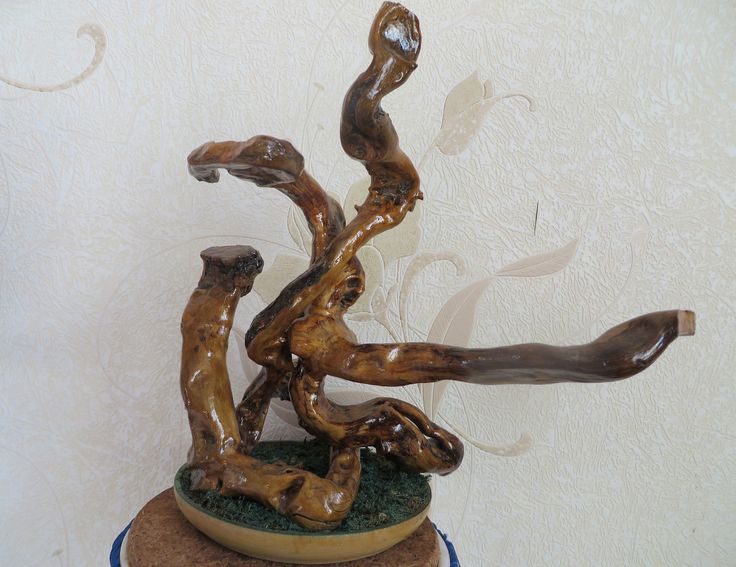
Crafts made from tree roots
Amazing ornamental materials include tree roots. It must be said that you can always make some kind of interesting craft. You need to look carefully at the root and turn on a little imagination. This work is creative, and therefore there are no recommendations for production.
However, there are tips for working with roots.
- There is no need to use huge roots in the work; they are difficult to process.
- All roots that were taken for crafts must be washed and dried before work.
- The peeled root should be left in a bag for several days so that it dries thoroughly. You need to dry it this way to avoid cracks.
When the root dries, you need to use your imagination and look for some image in it. When ideas appear, you can prepare tools for processing.
Tools:
- "jamb" knives;
- jigsaw;
- hacksaw;
- stand.
For ready-made roots, you will definitely need a suitable stand; if you have ideas for creating the image of Leshy, then the stand can be made from a tinder fungus.
There is no need to be embarrassed if it turns out that one of Leshy’s arms or legs is larger than the other, because that’s the whole idea. If possible, the root should be trimmed as little as possible, try to make it look as if nature did everything itself.
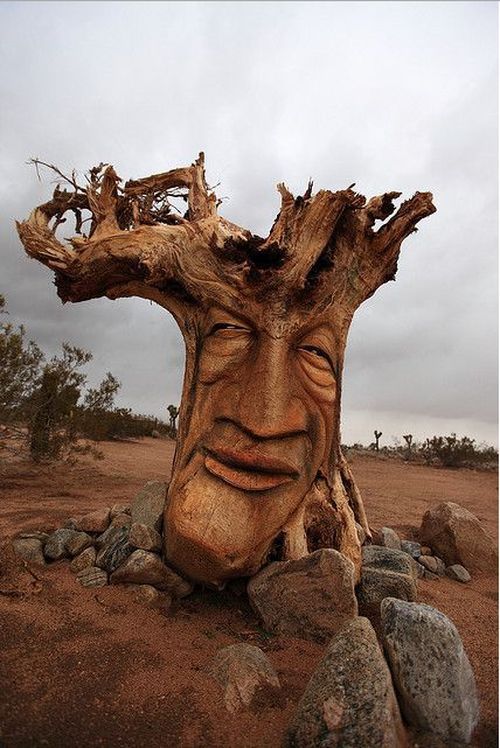
These images, as shown in the photo, can be created from tree roots.
The whole family can create crafts from tree branches, making sure to involve children in creating unusual images with their own hands. When working with such natural materials as branches and roots, you need to show imagination and the ability to see something fabulous in the simplest.
Below are video examples for inspiration:
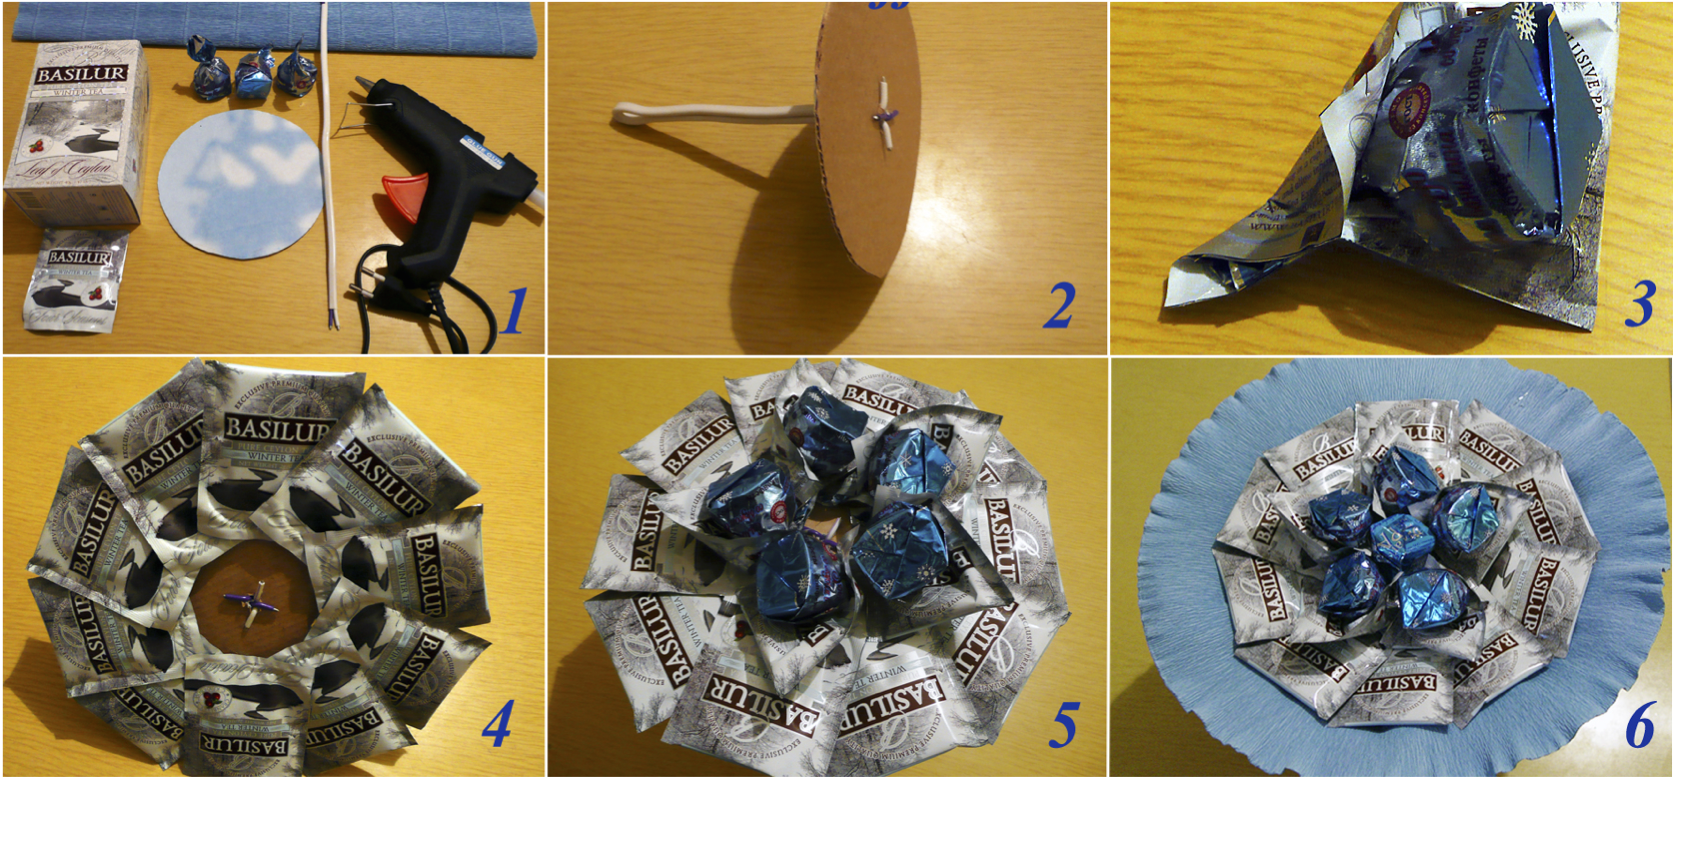 Making your own bouquet of tea and sweets
 Master class: DIY felt brooch
DIY crafts made from tree branches are very popular today. They are used as room decor; they complement the interior of an apartment, dacha, or cottage.
This could be a tablecloth, stand, napkin, vase, candlestick, decorative baskets, lamps, paintings and much, much more.
Simple crafts will help you decorate a room without repairs or costs, add a touch of individuality to the room, and create coziness. We invite you to familiarize yourself with interesting ideas for inspiration.
How to make a lamp quickly and beautifully
Making a lamp from tree branches with your own hands is not difficult. Turn on your imagination! Look around, you will probably be able to find a branch in a forest or park with a bizarre shape.
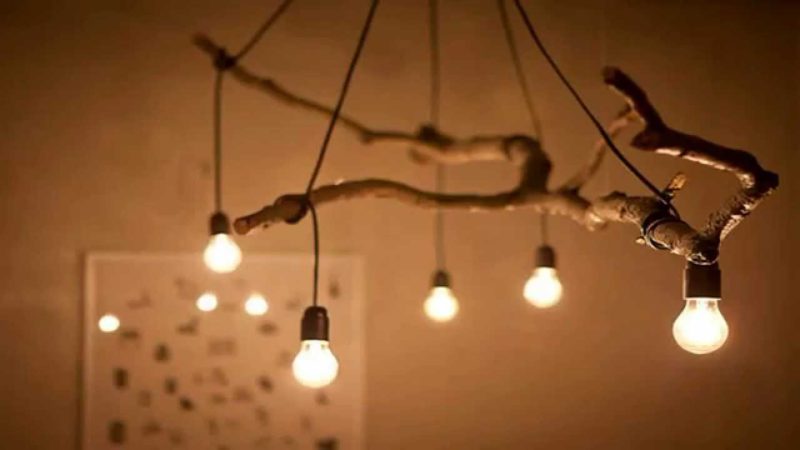
It can be used as a base for a future lamp. Decorate the branch with a light bulb or lampshade in vintage style, hang the structure in a seating area (for example, above a sofa or coffee table) and enjoy.
Please note: For floor lamps, you need to make a reliable leg from branches - a flowerpot or bucket will do, you can use a wooden stand with a hole for the trunk or pour cement into a container (in the same flowerpot), and then carefully remove it from there.
Small pieces of tree branches can be formed into a sphere using glue to create a unique hanging lamp self made.
Candlestick made of bark and branches
You can make a stylish candlestick that will decorate the interior of any room, be it a living room or a children’s room, yourself. For this:
- use a knife to make holes in the birch bark;
- insert a candle in a glass inside.

Note: Before starting work, wash and dry the branches thoroughly. It is better to choose straight branches, without knots and resin. An excellent option is pine or spruce branches.
You can make a “pallet” from small branches: tie several branches with thick thread, and attach several candles (preferably thick ones) on top, mounted on small metal stands “on legs.” “Legs” can be inserted between the rods.
Wreath of branches and cones
Decorative wreaths made of branches, leaves and more natural material It is usually customary to hang on front door houses or apartments. Such crafts look original and easily fit into any design.
So, we will need:
- Pine cones (prepare 2-3 large pine cones and 20-25 small ones).
- A piece of foam rubber more than 30 cm long.
- Thermal gun.
- Sackcloth.
- Acrylic paints.
- Garden secateurs.
- Several small branches.
- A beautiful ribbon for making a buttonhole.
Stages of work:
- You need to make “flowers” from pine cones. To do this, take a garden pruner and, moving upward from the middle of the cone, begin to cut them. When all the flowers for the wreath are ready, paint them acrylic paints in your favorite color.
- A piece of foam rubber is the base of the wreath, wrapped in burlap and glued with hot glue.
- We begin to glue the flowers from the cones onto the foam base.
- Glue a couple of small branches to the back of the wreath to decorate the wreath. We attach a ribbon loop to the top.
- The wreath is ready.
Wood is a noble and pliable material for crafts. Photo frames, boxes, all kinds of decorative elements for the wall... nature itself gives us ideas for creativity, we just need to be able to discern its beauty and unusual shapes.
You can see beautiful ideas for crafts from branches in the following video:
Interior items from natural materials Now very fashionable and popular. It’s especially nice to show off to your friends decorative items you’ve made yourself. This article offers several master classes where you will learn how to make trees with your own hands.
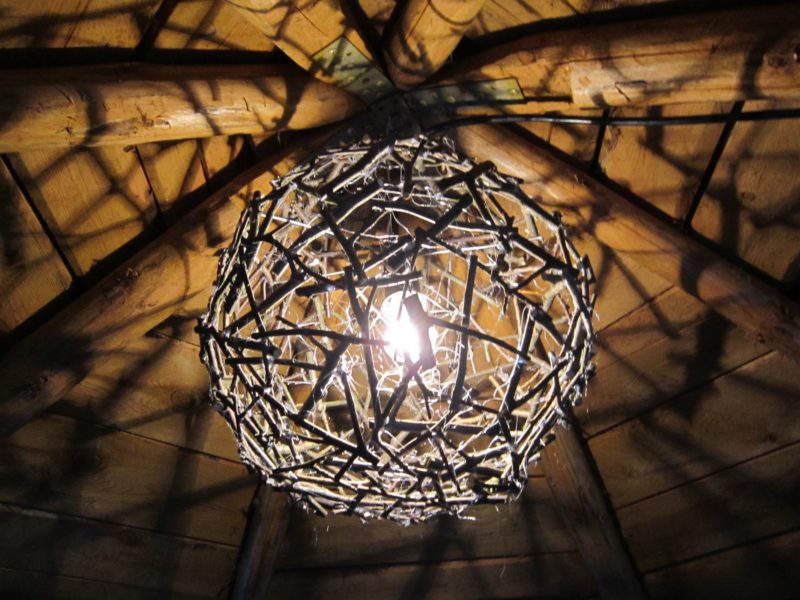
Preparatory stage for creating a chandelier from branches
Your home environment will become more fabulous if the ceiling is decorated with an unusual chandelier. Famous designers have been working with natural materials for a long time, creating real works of art. Crafts from a tree branch with your own hands can be different, but to create a chandelier you will need the following consumables:
- dry tree branches;
- wood glue (preferably
- ball according to the size of the desired chandelier;
- varnish, paints of metallic colors;
- pruner;
- metal chain.
Making a chandelier
It’s not difficult to make crafts from dry tree branches with your own hands, the main thing is to follow the technology:
What will be required for the branches?
DIY crafts from tree branches for the garden or home are made in the same way. Of course, in the case of outdoor items you will have to spend money on varnish and to create a table you need to prepare:
- a thick, forked branch for a table leg;
- branches of various thicknesses and boards;
- different numbers of sandpaper;
- jigsaws;
- tape, marker, wood glue;
- small and large screws;
- wood putty;
- varnish and epoxy resin.
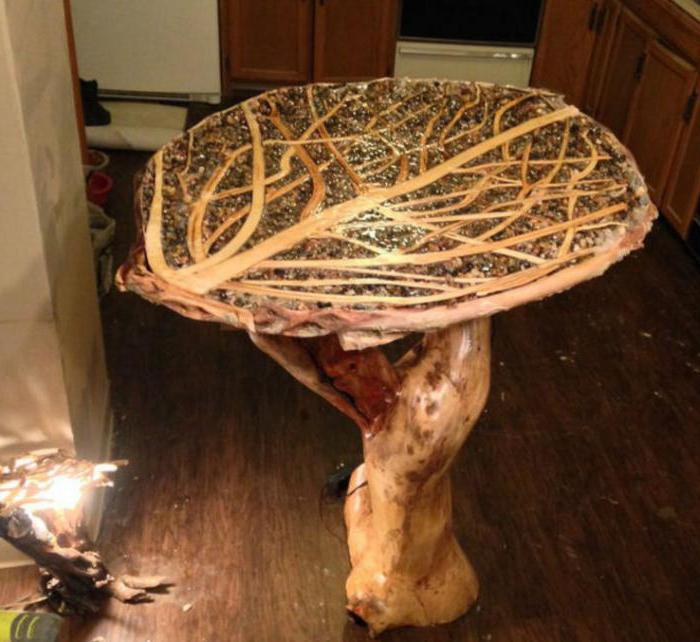
DIY table: stages of creation
Crafting a tree branch with your own hands in the form of a table will require time and attention:
- Select a thick branch that will branch into two or three branches. This will be the table leg on which the tabletop will be attached.
- Process the selected base, remove the bark, saw off unnecessary knots.
- Next you need to sand the leg. For rough, initial sanding you will need coarse sandpaper. For finishing work, use fine-grit sandpaper.
- Trim the base so that the branch is stable and the area under the tabletop has a perfectly flat surface.
- A very difficult and important stage is the manufacture of the tabletop. A simple option: cut a tabletop from a board, process it, apply a wood pattern to the surface, and varnish it.
- There is a more interesting option - to assemble a tabletop from tree branches. To do this, you need to clean the branches, remove all excess, cut them lengthwise so that the branches retain their shape but become flat, and fasten them together, giving them the shape of a tree.
- Sand the resulting workpiece thoroughly.
- Next, lay everything out on the countertop and cut it to the desired shape. Glue the branches to the tabletop and secure with small screws.
- Attach the tabletop to the base.
- At the next stage, it will be useful that you cleared it from the branches at the beginning of the work. After slightly moistening and cutting to size, it can be secured to the end of the tabletop using self-tapping screws and glue.
- All screw caps should be closed
- Let's start decorating the tabletop. Wash small pebbles and dry thoroughly. Next, fill all the spaces between the branches on the tabletop with it and level it out. Pour epoxy resin to create a smooth, even surface.
- After the resin has dried, the tabletop is ready. Apply varnish to all other parts of the table, and the table is ready.
Cherry branches in a vase
A DIY craft made from a tree branch can look like a full-fledged item or an exquisite composition. For the second option you will need the following raw materials:
- cherry branches;
- bowl or lampshade;
- newspapers;
- PVA glue, heat gun;
- knife, pruning shears, scissors.
Technique:
- Using the papier-mâché technique, we make a round blank for a vase.
- When it is completely dry, use a sharp knife to carefully cut it into two halves and stretch out the shape. Cut through the neck. Glue the two parts together again.
- If a flat bottom was not made when making the base, then you can glue the legs to the bottom using pieces of twigs.
- Cut the branches into sticks up to 25 centimeters long. Next, use a glue gun to attach the sticks to the papier-mâché base one by one.
This way you can decorate clocks, hanging flowerpots and other items.
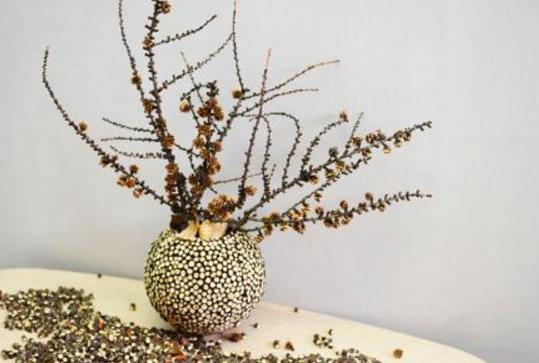
Decorative branch for a vase
Tools and materials:
- a dry twig of a beautiful shape;
- vase;
- corrugated paper;
- a roll of twine, scissors;
- hot glue gun;
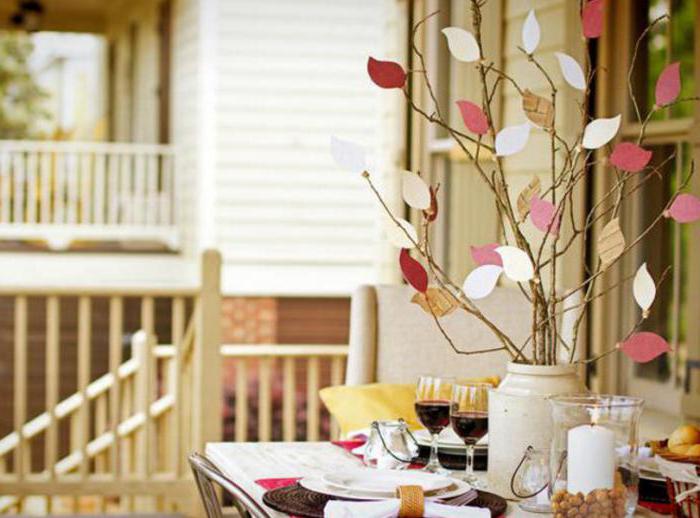
Technique:
- From cardboard, cut out a template of a leaf of any tree that you imagine in your composition. Using this template, cut from corrugated paper as many leaves as needed. The color of the paper can be green if you want a summer tree, or red and yellow if you want an autumn tree.
- If necessary, cut off excess with pruning shears, giving the desired shape to the branch. Carefully, without leaving any unpainted gaps, paint the branch with gold paint. Dry.
- Glue the leaves to the golden branch, wrap them with twine, and grease the ends with glue.
- Place the finished branch in a vase.
Anyone can make crafts from tree branches with their own hands. Photos of products prove that such items can transform the most boring interior.