Power supply is playing important role in a person's life. It is supplied to every home or institution using power cables. And then the internal wiring provides electricity to individual rooms. Cable laying and installation is carried out using different methods. Each method has special requirements. For example, the room temperature should be from -20ºС to +40ºС.
Wire Installation Basics
The main point when performing electrical installation work and not only is the availability of design documentation drawn up by government agencies. Cable installation must be carried out in accordance with certain requirements, which depend on the location and installation conditions.
For example, a special type of cable is used for outdoor and underground. The design engineer is responsible for designing and searching for installation sites for electrical networks. At the same time, he must take into account not only safe installation options, but also the personal preferences of the customer. Let's consider the methods of laying cables in detail.
Outdoor
Experts say this is the cheapest and fastest way. If the wire gets damaged, repairing it does not require much effort. The cable is installed on the walls using special brackets. This method is not particularly popular, so you can rarely see it.
Hidden wire routing
Before installing the cable, it is necessary to groove the walls.

This process consists of making the width of which depends on the type of cord being laid. This method gives the room not only a neat appearance, but is also quite safe. It has its positive and negative aspects. The benefits include:
- no wires on the walls;
- inaccessibility for children and animals;
- protection of the wire from moisture and mechanical damage.
Installers note only one drawback of this method. There is a high chance of bumping into a cable during the drilling process. To prevent this from happening, it is necessary to have a power supply project. Damage to the wire makes it difficult to repair.
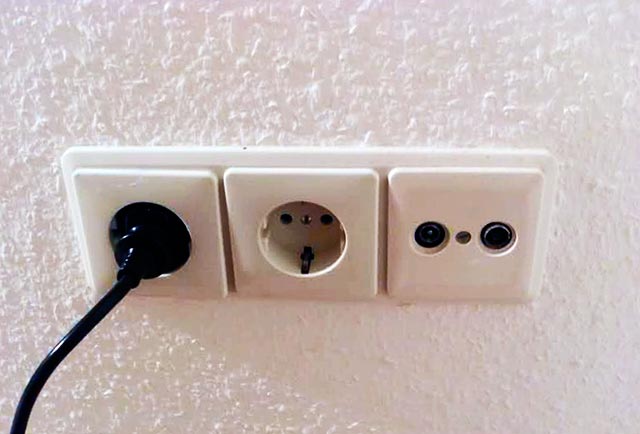
Gasket in box
Installation of wires and cables using this method can be found in office premises, country houses, shops and businesses.

There are two types of boxes: with an opening lid and sealed. To give a more pleasant appearance, additional corners and tees are purchased. This method does not take much time and effort. The size of the box depends on the amount of wire being laid. If necessary, you can easily reach the cables and carry out repairs.
Underground installation
Installing a power cable in this way requires significant funds for excavation work. The cable can be laid through a special tunnel or simply buried. However, the degree of its protection depends on the power supply project.

The operating conditions of the cable should also be taken into account. Earthworks performed manually or using machinery (depending on how deep the trench is needed).
Air laying
Electrical cables are installed over the air from pole to pole in two ways:
- on porcelain insulators - connection from the pole to the house occurs using a porcelain insulator;
- using a stretcher - laying and installation of the wire occurs using a lanyard, cable, tie and clamps. The first device is used to attach the cable and adjust the degree of tension. Its size and thickness depend on the weight and length of the cable. To deliver it to the top of the pillar, they use a belt and claws.
Gasket temperature
Any cables are laid only at positive temperatures, regardless of the type of insulation and voltage. If it becomes necessary to install at sub-zero temperatures, the soil should first be warmed up. Why do they do this?

Paper insulation is impregnated with a special oil, which, under the influence of negative temperatures, loses its viscosity and lubricity. If it is not heated, cracks may appear where the cable bends. In addition, the cable compound will not lubricate the paper, but will stick together, which will lead to its rupture. In any case, negative temperatures will affect the destruction of the material, and, consequently, will lead to a decrease in electrical strength.
It is allowed to lay cables indoors without heating. Moreover, the temperature range is from minus twenty to zero degrees Celsius.
Installation of cable sleeve
Let's look at the most popular types of these elements and their purpose.

They will protect the coupling from mechanical damage. Another type is sling couplings. They serve to limit differences in levels of power cables that have impregnated paper insulation.
Conclusion
In order to provide a building or structure with electricity, it is necessary to correctly lay power cables. There are many methods for this, such as underground and aerial. There are also ways to install indoors. Installation of cables occurs after drawing up project documentation. This procedure is carried out by design engineers. The whole process is controlled government agencies in the field of electricity supply. Various types of connectors serve as connecting elements. They can connect both cables to each other and be attached to various electrical appliances of high and low power.
So, we found out how electrical cables and wires are installed.
Replace the old one or pave new wiring
in apartments and private houses is a complex and time-consuming task. However, if you decide to upgrade electrical network in your home, you will be forced to deal with the work of laying cables. Let's look at the most common and popular methods of installing and distributing electrical wiring in residential and non-residential premises. Features of the choice of materials and method of cable laying.
Features of electrical installation
To carry out this work, various methods are used, the choice of which is influenced by the following factors:
- Electrical wiring installation location.
- Operating conditions of the premises.
- Individual preferences of the owner of the premises.
Laying wiring in corrugated pipes
It is advisable to use corrugated cables to lay electrical cables along the floor, walls and ceiling. Such electrical wiring can be hidden or open.
Corrugation is a corrugated pipe, for the manufacture of which metal or polyvinyl chloride is used. Inside this pipe there is a metal wire that helps pull the cable inside the pipe.
Today, the use of polyvinyl chloride corrugations for laying electrical cables and other wires in interior spaces buildings. And this is not surprising since plastic pipes, compared to metal ones, weigh less and have a lower cost.
Residential, technical, administrative and industrial premises are perfect for using corrugated pipes. The material from which the corrugation is made acts as an additional insulator for the electrical cable. In addition, it has the ability to self-extinguish - this prevents spontaneous combustion, which can be caused by a short circuit.
Corrugation is used for wiring different types cables having different diameters, since in production it has several variations with different sections: 16 mm, 20 mm, 25 mm, 32 mm, 40 mm, 50 mm, 63 mm. It is suitable for pulling power electrical cables, as well as cables related to information networks.
PVC corrugated pipe can be used exclusively for laying cables indoors, since the material it is made of is very sensitive to ultraviolet sun rays, does not like temperature changes and high humidity.
However, there is a class of corrugation that is used for laying in open space.
Laying cables in the corrugation is carried out by two people, since it is inconvenient for one person to do this. First, a piece of wire is pulled out of the corrugated pipe. After this, a hole is made in the cable winding, into which this wire is threaded and carefully twisted.
The corrugated pipe is leveled, so it is convenient for one person to hold the corrugation by one end, while another person stretches the cable and pulls the steel wire out of the corrugated pipe. After the final stretching of the cable, it is connected to the corrugation using electrical tape in order to secure the structure.
The corrugated pipe is attached to the walls of the room with clips, which have different diameters, so they can be easily matched to the diameter of the pipe. This method is often used to lay cables in suspended ceilings or plasterboard partitions. When laying a corrugated pipe on the floor under a pre-made concrete screed, it is necessary to purchase a special corrugation - reinforced, capable of withstanding heavy loads.
Laying electrical cable in a trench
Overhead and underground methods are used to lay electrical power cables between buildings, and cables that provide outdoor lighting in suburban areas and country houses.
Using the air laying method is advisable in cases where there is a small distance between objects.
Laying electrical cables underground is more suitable for long distances or when installing outdoor lighting systems. The underground method is more aesthetically pleasing, since there are no garlands of wires hanging over people’s heads. However, this method has the following limitations:
It is prohibited to lay electrical cables in trenches when high level groundwater. If it is a swampy area, groundwater reaches a level of one meter or more.
It is prohibited to lay a cable in a trench if the soil contains a large amount of substances that can damage or disrupt its sheath.
The negative impact of stray currents, which sometimes occur in soils, on electrical wiring has been proven.
Do not install electrical cables in very mobile soils.
If there are no contraindications to laying the cable in a trench, the following work begins. First, carry out careful markings on your plot of land. It is necessary that the cable is located at a distance of at least 1 meter from trees, and does not pass under parking lots, areas where a sewage truck enters, or under areas with increased loads on the ground.
After marking, the following steps are taken to lay the electrical cable in the trenches:
- A trench is dug according to pre-made markings. In this case, the minimum permissible trench depth will be 0.7 meters. However, the optimal depth is 0.8-0.9 meters.
- The dug trench is cleared of all kinds of materials and substances that could have an impact harmful influence on the cable sheath: from glass, stones, iron objects, wire and others.
- The bottom of the trench is lined with sand, the layer of which is approximately 10 cm.
- The absence of short circuits in the current-carrying conductors is checked - between them and the armor. A megohmmeter is used for this.
- Work is underway to protect the cable. For this purpose, it is possible to use various materials: corrugated plastic pipes, metal corrugated pipe or metal double-wall pipes. The choice of protection is influenced by the size of the budget and the preferences of the owner of the site. It is necessary to pull the cable through the selected protective material. When using polyvinyl chloride corrugation, additional protection with cases is required for places where the cable comes into contact with large and hard objects, as well as objects that can damage it. The cases are made as follows: the asbestos-cement pipe is sawed in half, and then the halves are put on the cable.
- The cable is laid at the bottom of the trench. It is better to do this without tensioning the cable, but laying it in waves - a loose position of the cable is recommended.
- Next, cover the cable with a 10 cm layer of sand.
- A 15 cm layer of soil is poured onto the sand layer and compacted a little.
- Then you need to lay a warning tape over the cable.
- After this, the trench is completely filled with soil, and a small slide is made.
- The cable is checked for short circuits.
The following electrical cables must be purchased:
VVG cable– at small powers and cross-sections.
Cable AVBBShv– used for medium and high power. It is flame retardant and armored - galvanized steel strips are used for armoring. This armored copper cable has a high cost.
After the electrical cable has been checked using a megger, you immediately need to remove the charge from it. This is done by connecting the wires and armor and shorting it all to the ground.
When performing this work, be sure to follow safety precautions: use a rubber mat, rubber boots and gloves. It is not recommended to carry out this work alone - do it with a partner. If the test was successful, the electrical cable is ready for use.
In what cases is it necessary to use pipes for laying cables?
The use of pipes for installation of electrical wiring is recommended for rooms with increased level humidity and sudden changes in temperature. This applies to bathhouses, basements and unheated buildings. Another indicator to use steel pipes is the presence of a high fire hazard in premises - an example can be considered completely wooden house.
In this way, the electrical cable is laid in:
- Residential premises;
- Industrial premises;
- Production workshops;
- Other buildings and premises in which there is the presence of high mechanical loads, caustic chemicals, vapors and gases, as well as in cases where dust or explosive substances may get into the wiring.

Features of installation and laying of electrical cables.
In order to lay cables outside buildings, they most often use plastic, asbestos-cement, steel and other pipes, which protect electrical wiring from mechanical damage and also prevent aggressive soils and stray currents from affecting it.
If the cable is laid in a pipe in a residential area, one of two methods is used:
- Hidden. When planning installation in a groove, the pipe is mounted directly into the groove into the walls or floor, after which this place is plastered.
- Open. This method involves attaching pipes to walls using brackets or clamps.
Pulling the electrical cable in pipes that are laid vertically is done from the bottom to the top.
To connect pipes, welding is used; connections can be made with sleeves and cuffs without sealing in dry rooms. Special threaded couplings are also used to connect pipes. The turning points are fastened with elbows on the thread. To avoid damage to the cable when pulling it on the sharp edges of the pipes, these places are lined with plastic bushings.
In order to avoid the accumulation of condensate on the pipes, and to allow condensate to accumulate from their surface, you need to install them with a slight slope.
How to properly lay electrical cables in trays
Using this method of installing power cables is advisable in cases where:
- Electrical room;
- Technical floor of buildings;
- Basement;
- Pumping station;
- Compressor station;
- Passage between shields;
- Or another technical room.
Power cable laid in open trays has the following advantages over cable laying in pipes:
- The cost of trays is less than the cost of pipes.
- It is easy to check the serviceability of the cable, since the covers from the trays can simply be removed.
- Sections can be easily replaced or cable added if necessary.
- The cable does not need to be pulled - it is laid mechanically– this allows you to avoid unwanted abrasion of its shells.
Why are electrical cable channels practical?
Sometimes you may encounter a situation where the room is completely finished, but suddenly the need arises cabling throughout the room. Or, a completely wooden house has been built, in which it is necessary to carry out electrical cable wiring. In both cases, you can find a good solution: lay the cable in a cable channel - this is an open installation method. The cable channel is an electrical box.
The most aesthetic option for open wiring is to lay the cable in a cable channel.
Quite often, cable channels are made white, but if you want it is possible to find different colors imitating wood. This way the box will become visually invisible on wooden walls. The box can be made of plastic, steel or aluminum.
When installing an electrical cable in a cable channel, you must perform the following work:
- Remove the lid from the box and attach it to the wall using dowels. This job will be difficult if the wall is very uneven.
- Lay the cable. There is no need to secure the cable in the box.
- After laying the cable, temporary covers are removed and permanent covers are installed on the box.
The cable channel is laid in two-meter sections. If the wiring is long, in order to temporarily secure the cable, temporary fasteners are installed at certain intervals, in the role of which are pieces of the cover.
In the same way, the cable is laid in the baseboards with a cable channel provided in them. Cables for landline telephones, the Internet, a computer and a television antenna are pulled through such a plinth.
How to properly lay a cable in a sewer?
Cable ducting consists of:
- Inspection wells;
- Pipes;
- Installation devices.
By laying a cable in the sewer system of the urban jungle, you get a guarantee of its safety. The cable is laid into an existing sewer system or a new system is created by workers of a special organization, who must first obtain the necessary permission.
Laying cables in sewers is the most reliable method in cities, since it guarantees that the cable will not be damaged by workers during excavation work, and the cable is reliably protected from negative external influences. To do this, it is recommended to use a special cable for laying underground.
All methods for laying electrical cables, which are described above, are good at certain stages of installation and starting conditions. You just need to remember that before choosing one or another method and starting to lay the cable, it is better to consult with specialists who can recommend specific types of cable that are suitable for you, or will suggest the most acceptable installation methods.
In most cases, when installing electrical wiring, it is hidden under a layer of plaster. This method is safer and more reliable: after all, wires embedded in the wall are reliably protected from mechanical stress, moisture and corrosion. This method of laying also has disadvantages - it will be impossible to move it to another place, and it will be difficult to determine the location of the cable in the absence of a diagram.
What comes first, plaster or wires?
When to do the electrical wiring - before or after plastering? - This is a dispute between an electrician and a plasterer. It is more convenient for everyone to first complete their part of the work without any interference. But if you do the repairs yourself, or one technician does it, then the procedure will be as follows:
- The walls are cleaned of old finishes. Lines are drawn on them along which the wires will pass, the installation locations of socket boxes and junction boxes.
- Under thick wires and corrugation, grooves (grooves) are laid along the entire length to exit points: switches, sockets. The use of corrugated channels is mandatory when the walls are made of combustible materials. They are also used to make it possible to pull out and replace the wires. Laying cables in plaster is allowed without corrugation.
- Thin wires can be laid directly over the surface without gating, if a layer of plaster mortar hides them.
- Next, the electrical wiring is laid and fixed to the wall.
- The walls are plastered with or without beacons. The ends of the wires protruding from the channels can be wound up and covered with film.
- After the walls have dried, use a hammer drill with a crown to drill out spaces for sockets, distribution boxes and switches. This is done after plastering, because otherwise it is not clear to what depth they will be installed.
- Then the final finishing is done - wallpaper or decorative plaster. After this, sockets and switches are inserted.
But there is one point in favor of the fact that all electrical work should be carried out after the walls are plastered. If grooves are laid in the walls, then it is much easier to do this over a layer of plaster, for example, on the second or third day, when it has not yet completely dried. Drilling concrete or brick will take longer, and there will be more dust.
Electrical installation rules
Compliance with generally accepted building codes and requirements - the key to the safety and durability of electrical wiring. Therefore, before preparing wall studs for cables, you need to familiarize yourself with the rules for electrical installations (PUE). The location of the wiring is determined by the following points:
- 15-20 cm higher than baseboards;
- 20-30 cm below the ceiling and beams;
- from the corners at a distance of 10 cm;
- in the area of heating pipes, gas pipes with an indentation of 50 cm.
This also applies to television cables.
It is better to purchase wires in coils. In this case, the cables will be solid, and there will be no need to lay spliced and insulated connections under the plaster.
Electrical wires are laid hidden in walls, floors or corrugated pipes. When laying in a non-combustible surface, including plaster, the absence of corrugation is allowed.
According to the PUE, aluminum wires can only be used with a cross-section of 16 mm2 or more. Smaller sections - only copper. This is due to the fact that aluminum has higher electrical resistance than copper. Under heavy load, it heats up and can melt.
Depending on the installation conditions, the following types of wires are used:
- VVGng: fire-resistant, non-flammable, for laying under plaster;
- VVGng-LS: mainly under plasterboard, for protection against mechanical influences it is placed in PVC boxes; its analogue can be the gray cable NYng-LS with a layer of rubber, more expensive, easy to install, not very convenient for grooves, since it has a round rather than flat cross-section;
- PVA: stranded, white, can only be used as an extension cord or when connecting electrical appliances directly to an outlet.
In old wiring, a 2-wire cable is used, and in new wiring, a 3-wire cable is used. Chandeliers with two-key switching require 4 wires.
Chasing walls for hidden wiring
 Before starting work, a diagram of the location of all switches, power appliances, sockets for them and distribution boxes is drawn up, and the location of the lines along which the gating will be carried out is determined. Such a diagram must be stored in paper or electronic form, so that in case of redevelopment, moving switches and sockets, installing hanging structures (shelves, sconces, hangers), etc., the wiring will not be damaged.
Important! Please note that, according to the rules, load-bearing walls It is not allowed to groove or make through holes in them. Therefore, all wiring should pass only under a layer of plaster.
Marking begins with the locations of panels, sockets, switches and lamps, and then a route for the wires is outlined. All pipes must run strictly horizontally and vertically. Marking for them is done with chalk, pencil or marker using a plumb line, laser or regular building level.
Inclined lines are allowed only in attics and stairs, provided that they run parallel to the inclined surface. In this case, searching for damage on straight lines will take a minimum of time, and the likelihood of accidental damage to the cable, for example, when driving nails for shelves or pictures, will be minimized.
Wall chaser- a rather expensive tool, so the grooves for wiring are usually made with a grinder and a hammer drill. First, two grooves are prepared using a grinder with a diamond wheel, and then the excess plaster is chipped between them with a hammer drill. The size of the groove is determined according to the dimensions of the wiring; usually a depth of 20-25 mm is sufficient.

Using junction boxes in typical wiring private houses and apartments are optional. They are installed for convenience when dividing lines into separate groups. Junction boxes are mounted on gypsum mortar so that they protrude slightly onto the thickness of the future layer of plaster.
For the socket boxes, recesses are made, which are partially filled with gypsum mixture to fix the wires. Their ends are tucked in, and the excess is trimmed so that 10-15 cm remains.
It is more convenient to install socket boxes in blocks at once. It looks more aesthetically pleasing, and they are more convenient to use. For their installation, latches (cable channels) are used. The holes are drilled in one row with a distance of 1-2 mm, the partitions between them are then removed. Socket box covers are installed last, only after finishing is completed - wallpapering or painting. In rooms with high humidity, moisture-proof sockets with grounding are used.
How to secure a cable in a groove
All cables must be firmly secured before plastering. This can be done using dowel brackets for which holes are drilled in advance using a hammer drill in the grooves. The dowels should fit in freely, but it is more difficult to pull them back out, since their clamps become wedged.

According to SNiP 3.05.06-85, the distance between the fastening points of bundles of wires is made at least 0.5 m, single cables - 0.9 m. When covered with dry plaster - up to 1.2 m. When turning the route and at the end points, they are additionally secured on both sides of the bends.
You can also secure the wire in the groove with ordinary putty. To prevent it from sagging and falling out until the mixture hardens, it is temporarily fixed with pieces of corrugation, inserting them across the channel as a spacer. For more information about this method, watch the video:
How to cover the grooves
After laying the cable in the grooves, they are covered with a solution so that the electrical wiring is completely hidden. This option is acceptable for brick houses and slab buildings. For wooden houses from logs and timber, this method is undesirable, as it is a fire hazard. Cover the grooves the better the same mortar that will be used for plastering. In a new building without finishing, use cement plaster. It will securely secure wires in concrete, aerated concrete or brick walls.
So, let’s look at the sequence in which I seal the grooves after laying the wiring:
- The channel is first cleared of dust using a vacuum cleaner or a wide brush. Remove large debris with a brush first.
- Before laying the cable, they must be primed with a wide brush, otherwise, due to poor adhesion of the solution, cracking and loss of the solution may occur.
- To prevent the wall from absorbing moisture from the solution, it is moistened before puttying.
- Gypsum or cement-sand plaster is spread along the entire length of the channel. Alabaster should not be used for these purposes - it sets too quickly, forming lumps on the wall. The solution should be thick, this is not a fine finish, smoothness is not really needed here. Try to fill in any gaps when hiding the wire.
- A spatula is carried along the distribution, removing excess mixture.
Milling aerated concrete instead of grooves
 A great way to route wires into a wall is to create narrow channels using a cylindrical router bit.
Pros:
- The channel is made according to the thickness of the wire, for example, VVGng. There is no need to additionally fix the wire in the wall, just insert it.
- There is no huge amount of dust.
- No need to connect the hose from the vacuum cleaner.
- The lightweight tool ensures mobility: you only need a screwdriver with a cutter attachment.

How to find wiring under trim

Sometimes when making repairs you need to know where the electrical wiring runs under the plaster. For example, if you are going to drill a wall and are afraid of damaging the cable. Or you need to find damage to the wiring. Also, when you are going to move the location of sockets and switches, a wiring diagram will help you locate the wires.
But if the diagram has not been made before, then you can determine where the hidden wires are in several ways:
- we already know that according to SNiP, cables are always laid only along straight horizontal or vertical lines, strictly at 90°; therefore, they can only go from sockets or distribution boxes in this direction;
- Electromagnetic waves can be detected using instruments called finders; The most common and inexpensive are electrostatic devices, but they are used only in dry rooms in the absence of metal structures; electromagnetic devices, metal detectors, multimeters or scanners are more reliable;
- in small areas you can use indicator screwdrivers with LEDs or light and sound alarms;
- Using conventional radios or microphones is ineffective. If you hear interference from the electrical wiring, the error will be large, +-15 cm;
- You can find wires without devices by examining the wall - if the grooves are not sealed carefully, small protrusions are visible on the wall (without wallpaper). This also applies to panel houses. In them, cables often ran at the junction of wall and ceiling slabs.
To determine the location of cable damage, there is effective way. This video shows how to locate a short circuit using a radio.
We hope you found this article helpful. Leave your comments and questions in the comments below.
Disguising cords running around the room is quite simple. The main thing is to use your imagination a little, using available tools and some design techniques. Next, we will proceed as follows - we will separately analyze how to hide wires from a TV, computer, and even lamps on the wall!
TV and Internet
It is not difficult to hide the network cable and television wires running around the room from view. It is best to use a special electrical skirting board that will run through the entire house to the bedroom or living room. If you don’t want to buy a new baseboard, you can carefully disguise a bunch of wires using special designer things, like a picket fence, as in the photo below:
In order not to pull the Internet cable from front door to the bedroom, it is recommended to install a Wi-fi router at the entrance to the apartment (in the hallway). In this case, the connection to the network will be wireless and you will not have to run the cable between rooms, through doorways and thresholds.
In addition, you can hide television wires in a cable channel, which is quite easily attached to the wall with self-tapping screws. Today there are many that will suit the color not only ordinary apartment, but also in a wooden house.

If the repair has already been done, then the most the best solution There will be the use of decorative elements - beautiful clips that will decorate the wires from the wall-mounted TV running along the floor and wall. You can also see an example of this method of solving a problem in the photo:

If you want to hide the cords from the TV during repairs, we recommend making a special niche for them in the drywall or, conversely, assembling a box:

In order not to damage the walls, you can hide the TV and Internet cable in the baseboard if you do it as shown in this video:
How to carefully remove the cable?
Well, the last way is to cut a groove in the wall behind the plasma and run electrical wires along it. However, this is the most time-consuming option and is best avoided. Imagine that the TV will need to be hung on another wall, and you will have to think again about how to hide the antenna cable.
As for other household appliances - an air conditioner, a stereo or even a home theater, using the ideas listed above, you can disguise hanging wires using the same method. The cable from the air conditioner is most often hidden in a cable channel, and the wires from the home theater are run above the baseboard, secured with special clips.
Computer
Computer wires really spoil the interior of a room, and if you get a little creative, you can hide them quite nicely.

The first idea is to disguise all the cords from the monitor, system unit and modem under the table cover, securing them with clips on self-tapping screws or double-sided tape. This idea is clearly shown in the photo example:

You can see another simple way to hide everything unnecessary under the table cover in this video lesson:
How to remove unnecessary cords from the “computer”?
Don't want to spoil the table? You can hide the wires from your computer equipment in a shoebox, decorating it in an original way to match your bedroom interior.


You can find out how to make such a box with your own hands by watching this video:
How can a shoe box be useful?
Besides this original idea It is considered to be the purchase of a special cover for the extension cord, which is quite simply attached to the desk lid.

If the cord from the speakers bothers you, you can easily hide it in an appropriate case that is attached to the back of the table.

All unnecessary cords, including charging, can be beautifully removed from the table using ordinary clips, as in the picture below:

Another idea is to thread the whole bunch of wires through a hose. In this case, the chaos under the table will hide in one single shell, which will not spoil the interior of the room or even the office so much.

Using all these tips you can disguise electrical wires and make workplace more neat. There's nothing complicated about simply placing cords and cables in a box or securing them under a table! In addition to the fact that in this way you will put things in order computer desk, and masking also allows you to protect the cords from dogs and cats that like to chew on chargers, headphones, etc.

Lamps
If all the wiring from the chandelier is hidden in the lamp body, then hiding the cord is a little more difficult. If the wall is bare, you can decoratively hide the hanging wire by extending it and making a design on the wall. You can see an example of such an idea in the photo:


If you are thinking about how to hide the wires from the sconce during repairs, it is best to connect the lamp from distribution box, and not through the outlet. In this case, all electrical wiring will be hidden under the plaster and wallpaper, and the interior will not be damaged. Do you want to do without gating? Then hide all the extra ones in the cable channel running along the wall.
Hide the power supply from LED strip can be in a special box that is mounted under the ceiling and can be used in the kitchen or in the living room.
That's all I wanted to say about this issue. We hope that you have gained ideas for yourself on how to hide wires from a TV, computer and other household appliances so that it is beautiful.
Unfortunately, wireless technologies have not yet become widespread in offices and homes. This means that the pile of annoying wires on the desk won’t go away anytime soon. Here are some tips to help you get rid of clutter and hide cables from prying eyes.
Classmates
1. Hide the extension cord from chargers in a box- The extension cord with chargers constantly gets in the way on the table or under your feet, collects a lot of dust, and also looks unaesthetic. Dealing with this problem is very simple: take a nice box, make a few holes in it and hide all the wires and cables there.


- There are also ready-made solutions, for example Plug Hub from Quirky. This is a box made of hard plastic with a rubberized bottom. There are three holes on top for cables, and inside there are three fasteners that can be used to wrap cords that are too long. The Plug Hub can be placed on the floor or mounted on the wall.

2. Secure the wires under the tabletop
- To secure the wires and extension cord under the table, you will need binders and screws (their length should be at least a quarter less than the thickness of the table top, otherwise they will go right through and the table will be damaged). First of all, attach an extension cord under the tabletop, preferably in the middle of the table or closer to the wall.

- Then secure the binders in the required places using screws. Connect everything you need to the extension cord and collect the wires with clamps. Visually the table has become much cleaner and neater.

- There is a simpler option if you don't need to hide large number wires To do this you will need a construction stapler. To prevent the long wire from the lamp from dangling under your feet, carefully secure it with paper clips at the table leg.


A small extension can also be secured with paper clips. For thicker wires, it is better to use special clamps (for example, these).
- Stapler clips aren't your thing? Regular zip ties will do. Secure the wire to the table leg with zip ties. Wires that run along the floor can be covered with plastic or a board that matches the color of the floor.


- The extension can be secured under the tabletop using wide Velcro: secure it to the back of the tabletop with screws, and then attach the extension. To prevent the wires from dangling under the table, run them through cable channels - they can be purchased at any hardware store. You can fix the channels themselves with electrical tape or a regular plaster.
- Organizing them correctly will help you get rid of tangled wires.

First, collect cords from phones, players, game consoles, and tablets throughout the house.

Then take boxes (preferably prettier ones), place cardboard dividers inside them, label the location for each cable (so you don’t get confused later) and lay everything out neatly.

To prevent the wires themselves from getting tangled, use regular cable ties.
 4. Keep all necessary wires at hand
We can’t hide all the cables in a box: we need some of them almost constantly.

The solution is simple: secure them to the edge of your desktop so that you can reach out and connect the device to your desktop if needed. the right wire. Sugru will help us with this - plasticine-rubber and one of the most irreplaceable things in the household.
Roll Sugru into small balls and secure them to a table support. Then use a utility knife to remove some of the plasticine (be careful, try not to deform the balls too much).

Life hack: to prevent the plasticine from sticking to the blade, first rinse it with soapy water.

Then adjust the shape a little with a sushi stick or toothpick to create neat hollows (they should be slightly wider than your wires).

Everything is ready, you can fix the cables.
- There is an option for those who know how to work with wood. A small block with holes will help organize all the wires on your desktop.

- The simplest solution is to pass the wires through binders attached to the tabletop.

5. Don't hide wires
Seriously, if you get creative with it, cables can be an interesting decorative element. For example, you can secure the wire to the wall using special clamps. Why hide a wire when you can attach a bird to it?