And today we’ll talk about stripes in individual rooms - this gallery contains detailed recommendations for choosing and 36 photos of interiors with examples for your collection of ready-made solutions.
First, a little about why these particular rooms were chosen.
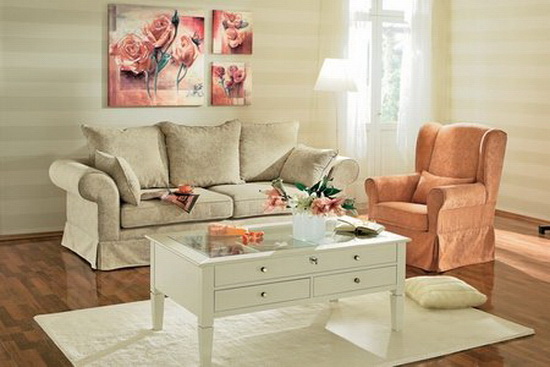
For the living room, hall, kitchen and office you can safely use general recommendations from part 1. There are also many pictures with examples of these rooms. But the bedroom, bathroom and children's room are “areas of special attention.”
Bedroom- this is the room where we relax, so what looks good and impressive in the living room, hall or office, here can interfere with a good rest.
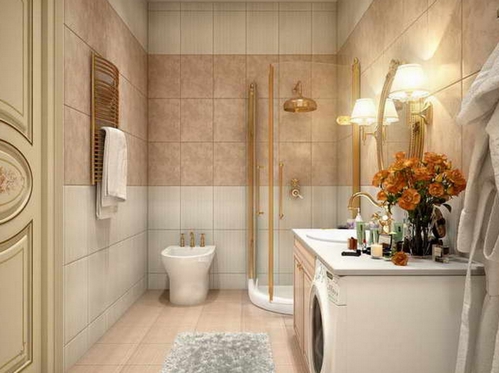
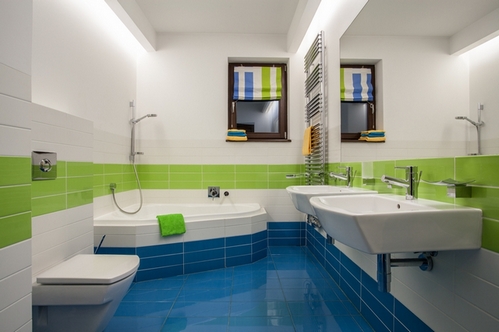
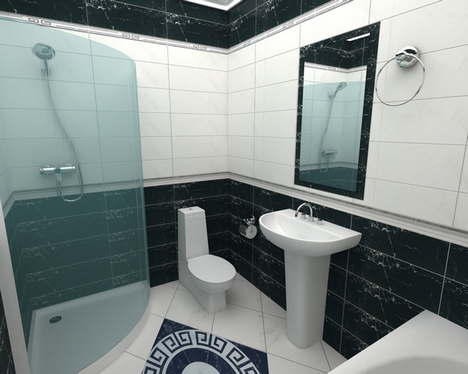
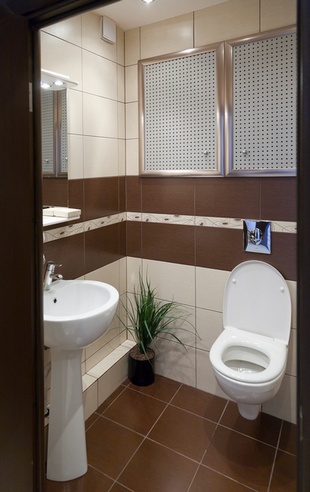
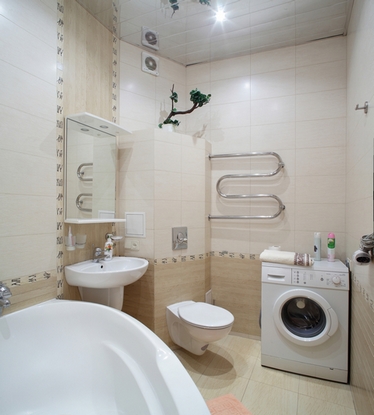
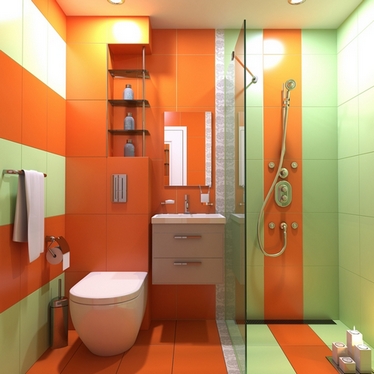
Concerning bathroom, then, as a rule, its dimensions leave much to be desired. And stripes, or rather, their imitation using tile decor, will help achieve visual expansion this small room.
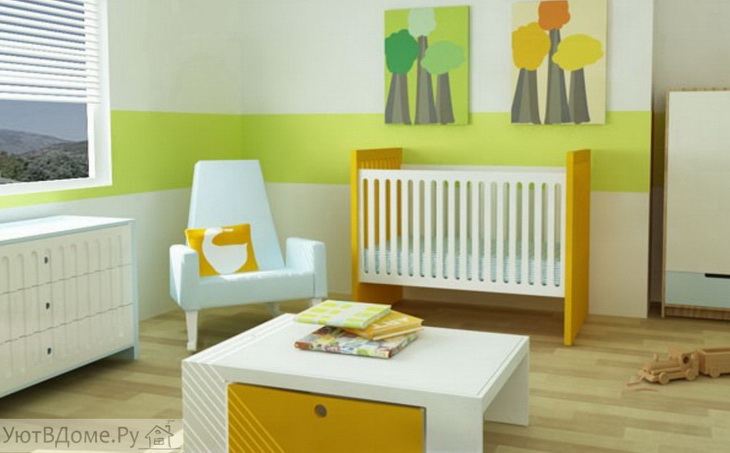
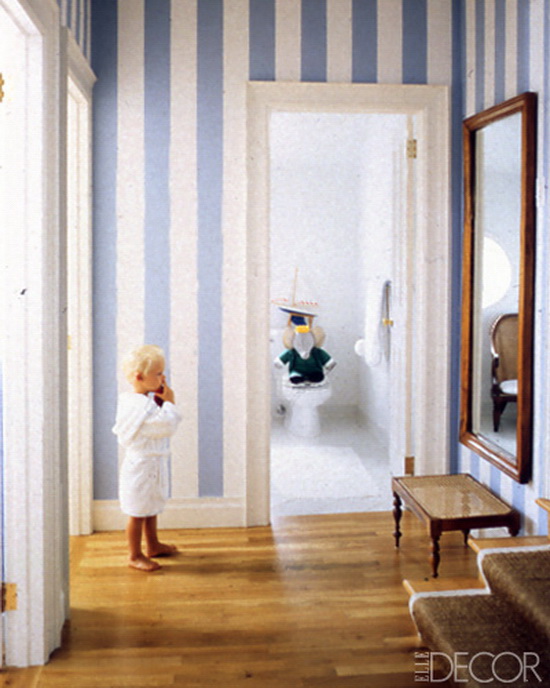
Children's chosen for two reasons. Firstly, because here, too, a certain measure of the use of strips is required: according to color scheme and by the number of striped parts. And, secondly, this room has several functions, some of which (for example, a place to study) can be “indicated” by the decor of the walls: in our case, stripes. But you will learn about this in Part 3- it will talk specifically about stripes in children's rooms - for different ages. Do you want to know more? Continue to the first section of this part. It concerns the bedroom, and the second section is about stripes in the bathroom.
__________________________
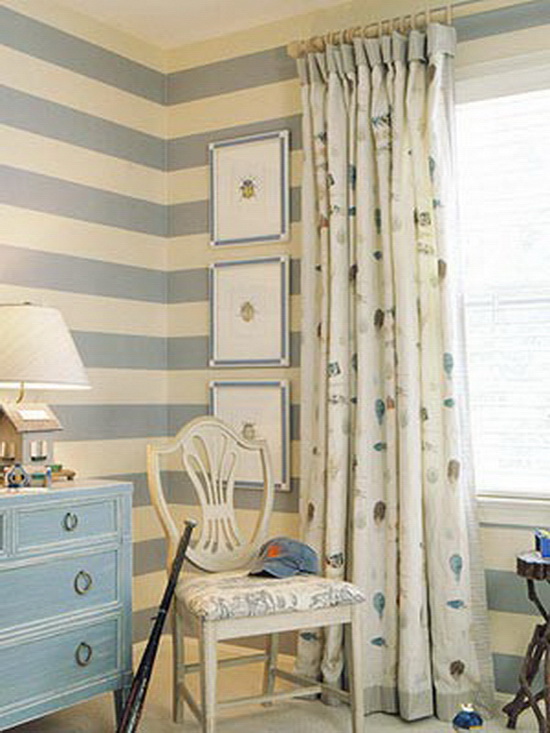
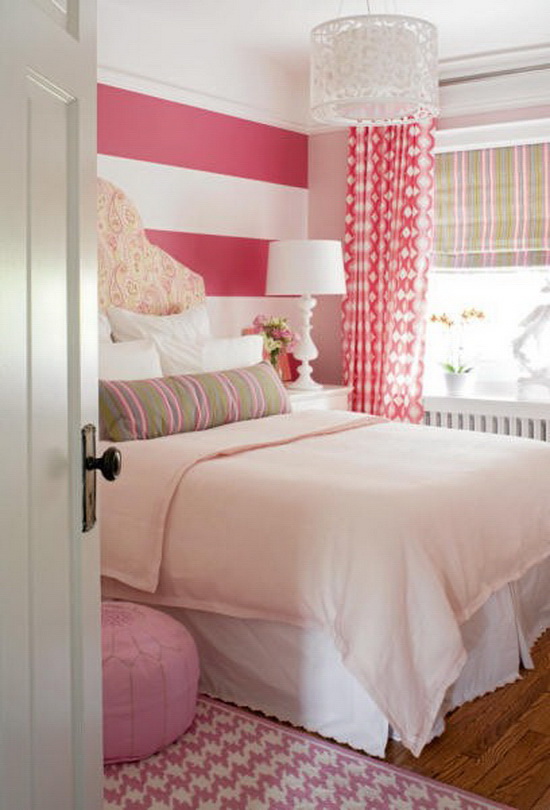
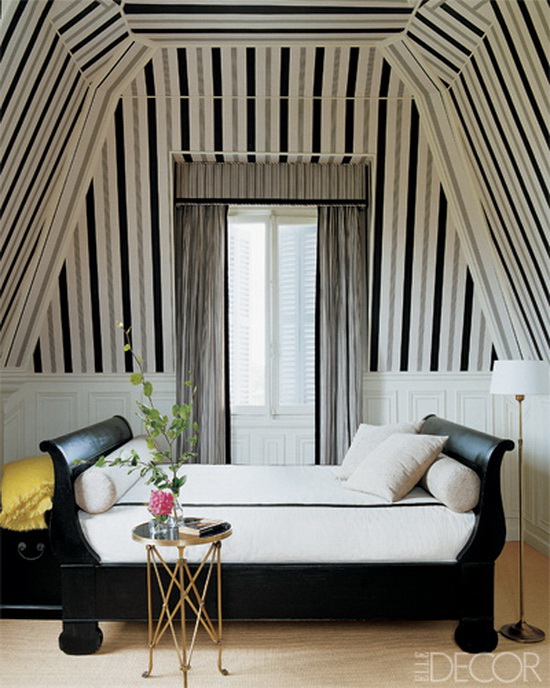
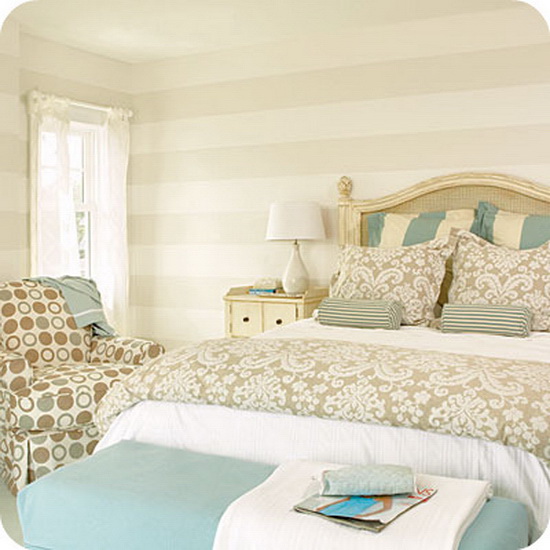
Stripes in bedroom decor
If you like stripes, then it would be good to remember that there is no place for annoying contrasts. At least in large quantities.
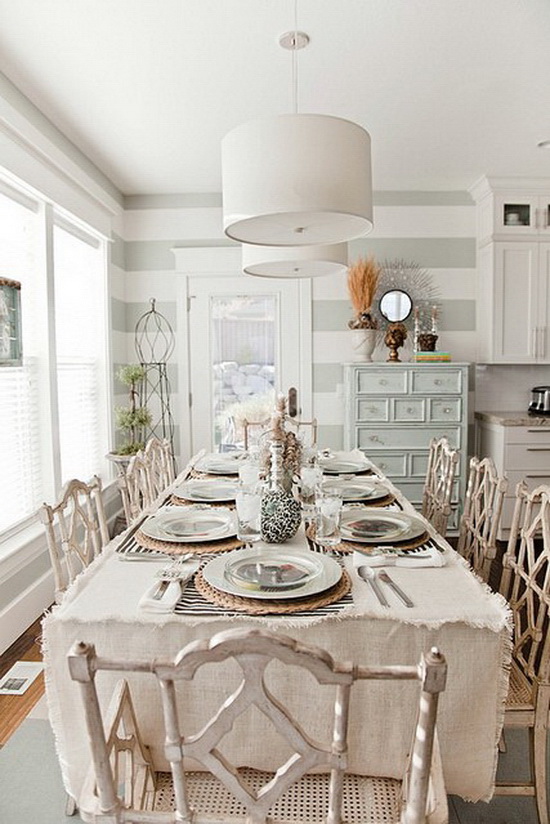
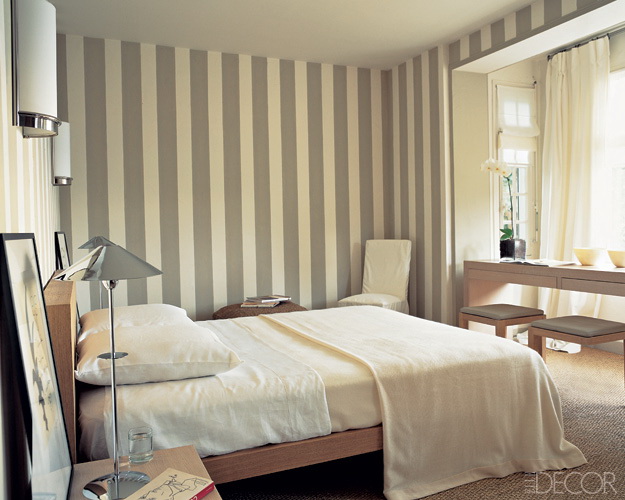
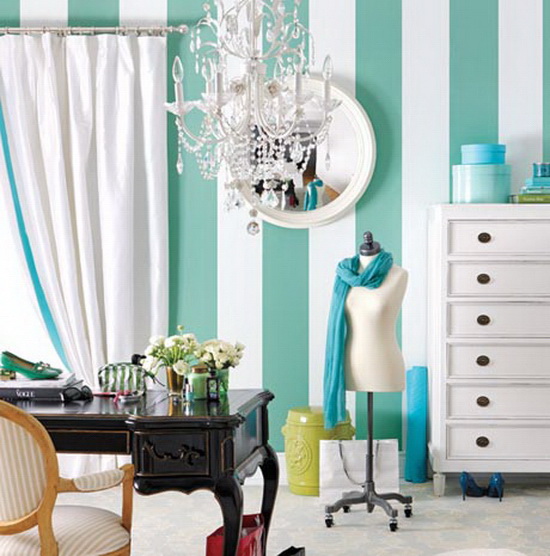
If the strip is planned for the entire surface of the walls in the bedroom - a combination of light and pastel colors is best suited for this.
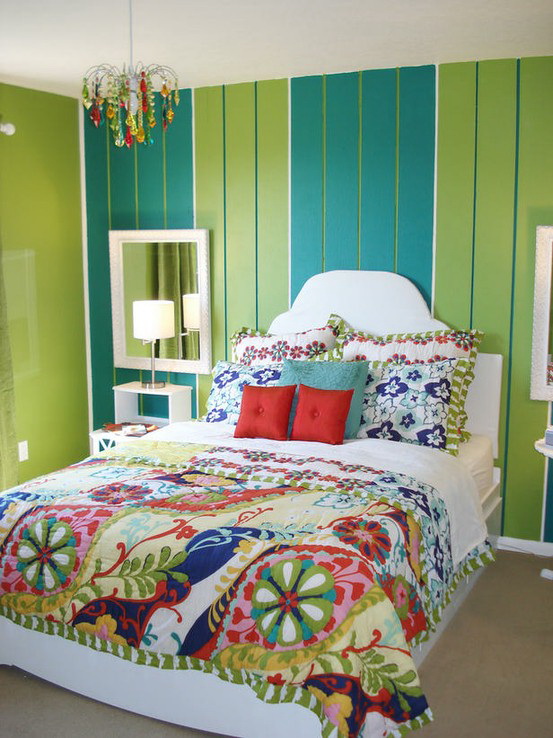
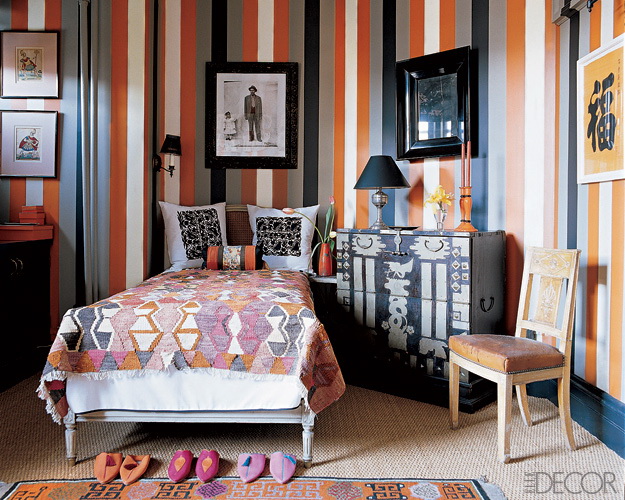
If you like more bright shades and energetic contrasts, - choose a separate area that you want to highlight with such decor, for example, the wall behind the head of the bed.
If you generally prefer subdued tones, but the strip is required to visually “stretch” the wall (remember us?) or is necessary to diversify the color scheme, then you can use the “soft option” - wall moldings. a similar effect can be achieved for the floor (although it will not be too significant)
Also using stripes you can emphasize the chosen interior style. Pastel shades well suited for classics, especially next to stylish furniture. Shiny thin stripes are an element of glamor. Matte in natural shades - country. The combination of white, blue and yellow stripes, especially when supported by wicker furniture and accessories, is reminiscent of summer and beach style.
The width and color scheme of the stripes can accurately indicate the gender of the owner of the room. This does not mean, of course, that there is no place for stripes of cool gray-beige shades in a woman's bedroom. Everyone has the personal right to use what they like. But there is a proven fact that woman's face and the body looks much fresher and younger when surrounded by warm shades of pink and peach.
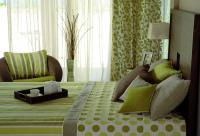
If you like the strip, but in limited quantities, think about it about bed linen with this pattern. The stripes look even more beautiful on it than on the walls. In addition, this is a softer version of its use. But if you like striped bed linen, it would be more appropriate to make the walls plain.
Do you want to stay in touch with us every day? Welcome to our Planet of Inspiration VKontakte! Take a look, scroll through! Like? Join and get inspired every day!
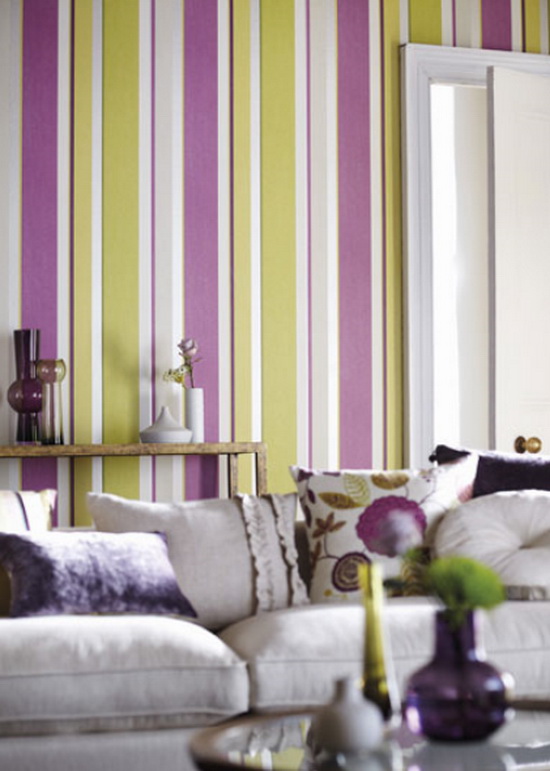
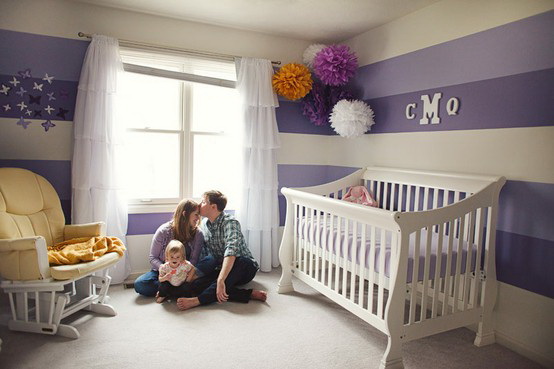
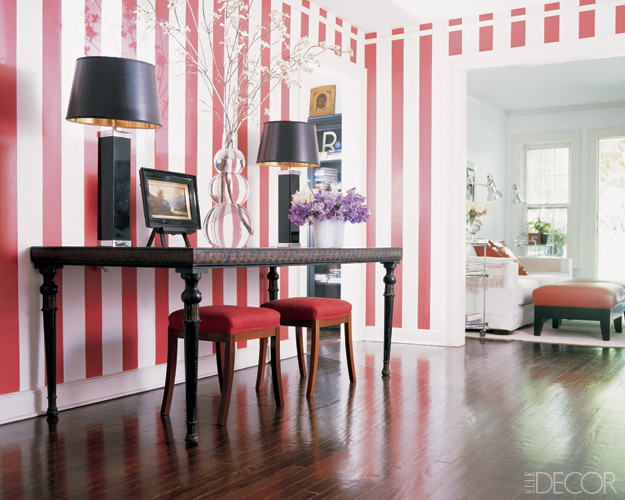
If you like stripes in large quantities, That In the bedroom the combination with white is very appropriate. Moreover, each option bears the influence of the color that is paired with white.
fresh spring mood, option 1 |
fresh spring mood, option 2 |
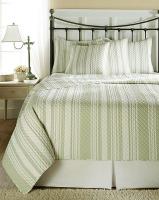
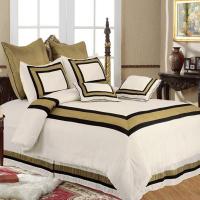
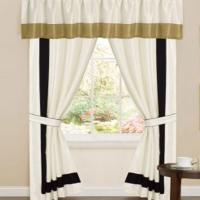
And a little more about stripes - for lovers of bed linen with this pattern. The choice of one collection of fabrics for bed linen and curtains looks especially fashionable and elegant.
|
|
|
They look no less interesting in the bedroom and individual small striped elements or architectural wall elements that imitate it. They can be chosen for a variety of patterns and effects in the bedroom, designed in the same color scheme.
__________________________
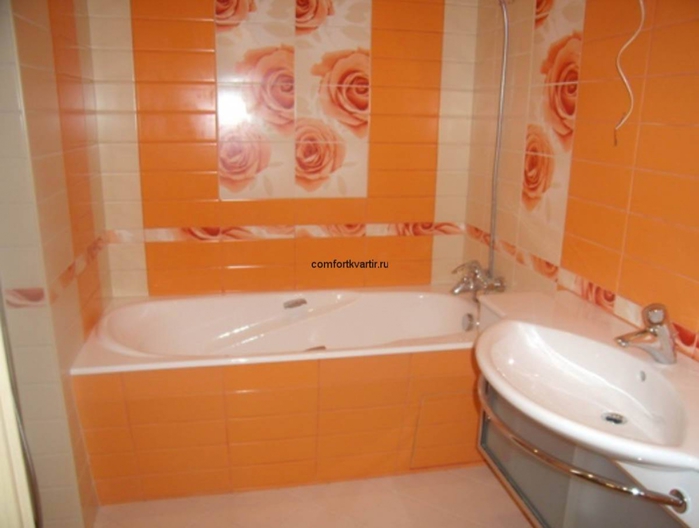
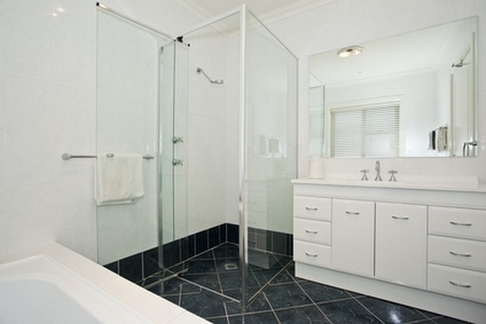
Stripes in bathroom decor
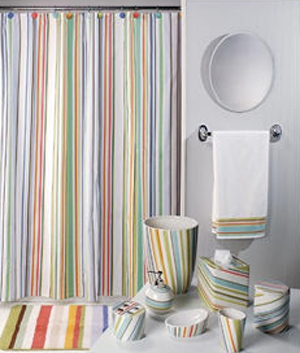
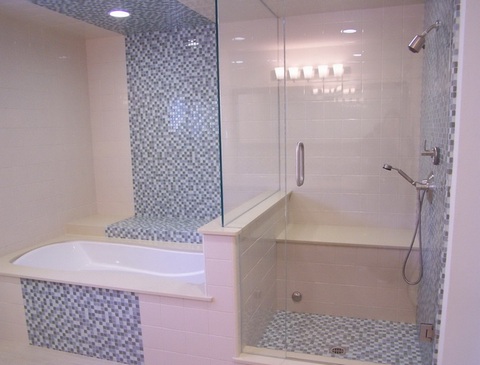
In the bathroom, you can create a stripe pattern using friezes, mosaics and contrasting tiles. This will at least add variety and effectiveness. And if a visual increase in volume is required, this option will be very effective.
By the way, I’ll share the method, how you can save on frieze and decor(after all, they are sold individually and greatly increase the cost square meter tiles, and installation of friezes is considered separately).
So, you give up friezes and decors and simply purchase tiles from the same collection, but in a different (harmonious with the main) color in a proportion of approximately 25% of the total quantity (i.e. 3/4 main tiles + 1/4 contrasting or more dark).
Then you create “stripes” of the second tone tile, breaking the monotony of the main tile. This option looks most impressive: approximately 3-4 rows wide in the mirror area + one row on other walls or in corners. It will turn out impressive, but much cheaper than buying a “traditional gentleman’s set.”
By the way, before purchasing, you can make a “layout on the walls” - indicating in the picture the main tile and the contrasting tile. This way you can more accurately calculate the required amount of both.
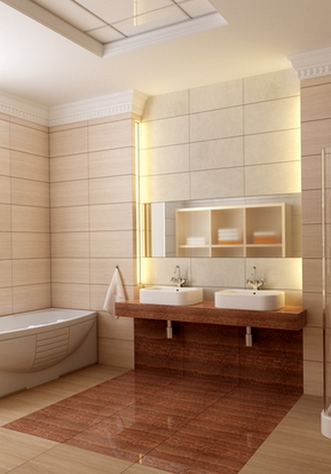
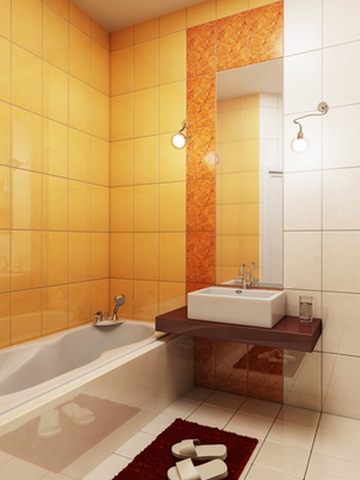
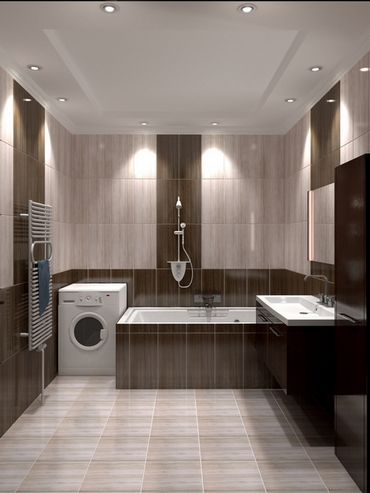
Now look at a few examples of laying tiles in the bathroom in the form of stripes: above each picture there is a description of the effect. Additional options Tile layouts can be viewed on our website.
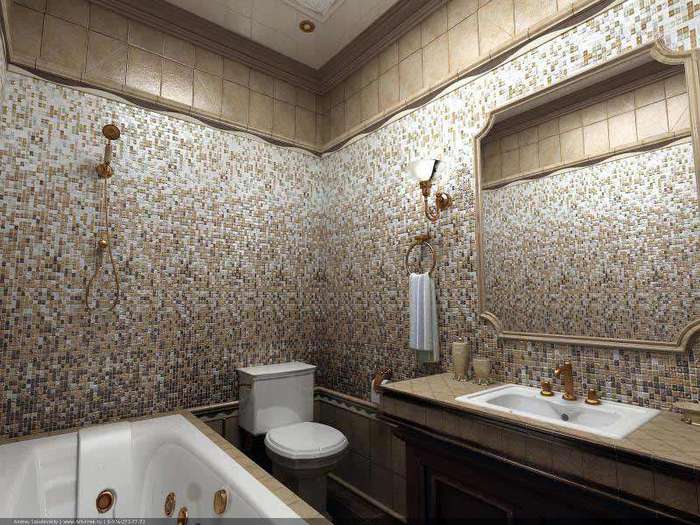
Ceramic tiles have been and remain the most the best material for finishing bathrooms and toilets. It is not only practical, but also beautiful. The choice today is huge: a variety of sizes, many colors, and an abundance of decors. I would like to take the opportunity and create something different in the interior of my bathroom - not like everyone else’s. Covering walls with tiles of the same color is a boring solution. The combination of colors not only ensures the originality of the interior - this scheme also has another advantage: proper layout of the tiles allows you to make the room more comfortable and even correct its shortcomings.
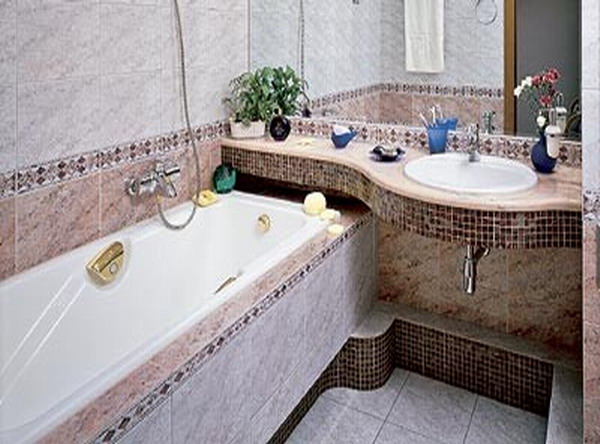


How to combine two or three tile colors so as to achieve not only high aesthetics, but also favorable visual effects? Firstly, it is necessary to objectively assess the “possibilities” of the room: is it high or low, spacious or similar to narrow corridor? You need to immediately decide what nuances you would like to adjust. The tile layout is selected in accordance with the goals.
If there are several basic patterns for laying out tiles in the bathroom and toilet.
Options for laying out tiles in the bathroom and toilet
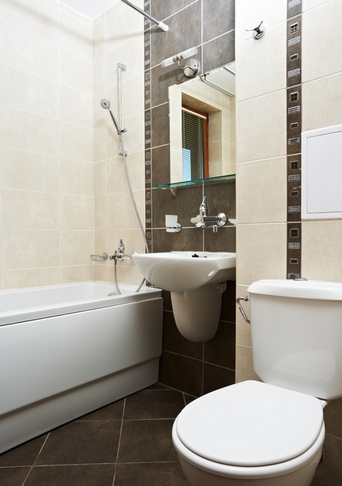
1. By type of wall panel. This is a classic solution that is suitable for any bathroom, regardless of its size and style. It makes the room look a little smaller, but adds volume. The scheme is simple: about a third of the height from the floor, the wall is tiled with darker tiles, and higher up to the ceiling - with light tiles. The joint can be decorated with a decorative border.
Floors with this layout can match the color of the “panel” or contrast with it - it’s a matter of taste.

A bold interpretation - light bottom and darker top. This tile layout is suitable for narrow and very high rooms. A light “panel” along the bottom will visually expand the room, and the upper part will seem to dissolve.
If the room is very high, you can raise the “panel”, that is, lay out an area not from the floor, but from half the wall or even higher, with contrasting tiles.

2. Horizontal stripes.
The top "panel" mentioned above can be classified as this type of layout. Horizontal stripes can be narrow, created from decors, or wide, consisting of several tiles.
The strips can be located on the lower third of the wall, in the middle or under the ceiling. There can be several horizontal stripes, and in different colors.
Panel type plus horizontal strip under the ceiling

This tile layout visually expands the room, adding volume and creating a feeling of order.
Popular scheme for a bathroom in a modern style:dark floor, light walls and wide strip in the color of the floor, located somewhere at half the height of the wall or slightly higher/lower.
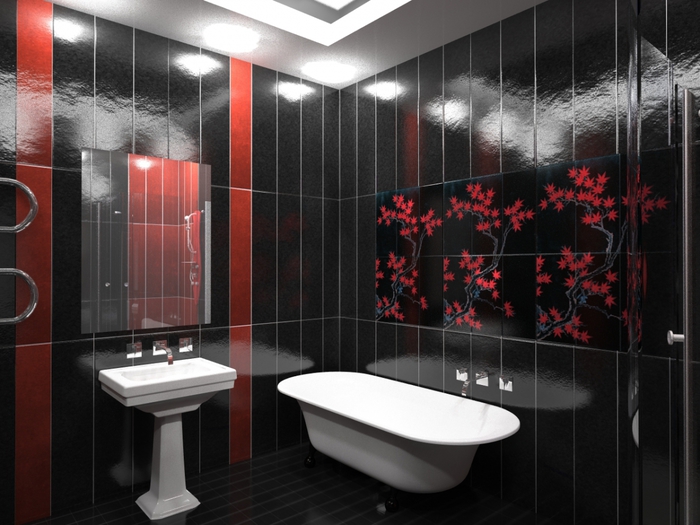
3. Vertical stripes.
This tile layout visually increases the height, adds some monumentality to the bathroom and toilet, but makes the room narrower in appearance. Therefore, this scheme is not recommended for bathrooms that look like a corridor.
.
However, if you combine two types of layouts - horizontal and vertical stripes- the narrowing effect can be avoided.

Like horizontal stripes, vertical stripes can be wide or narrow. The length and location of the strips vary:
1. Strip from floor to ceiling
2. Strip “hanging” above the floor
3. A strip that breaks before reaching the ceiling
4. Several stripes starting and ending at different heights.
Vertical stripes, especially multi-level ones, are the pattern most often used for modern-style bathrooms and toilets.
4. Floor with a “border”.
The tiles used for the floor extend onto the wall. In other words, a strip identical to the floor is laid along the bottom of the wall, one or two tiles high. A simple scheme that makes the room visually a little wider, but lower.
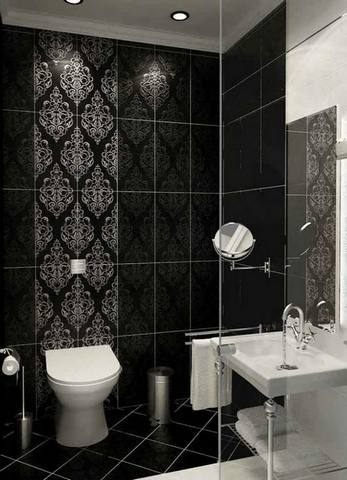
5. Accent fragments.
This tile layout is very popular today. However, it is not suitable for every bathroom.
The scheme involves the use of background tiles to cover most of the surfaces, while functional areas are highlighted with contrasting or decorative tiles(panel). This allows you to zone the space and organize it. However, in small rooms such accent pieces can create disproportions.
For example, a high strip behind the toilet in a narrow toilet can visually narrow it even more, making the bathroom look like a pipe. If you select several areas in the bathroom, “confusion” may occur.
You should not emphasize more than two or three areas in a bathroom, even a very spacious one. You can, for example, create accent pieces in the washbasin area, shower corner and a heated towel rail.
To prevent the vertical accent section of tile from increasing the height of the bathroom, it should not start from the floor. Or, conversely, touch the floors, but do not bring the “focal” element to the ceiling.

The accent fragment is made of tiles with a diagonal arrangement: it stands out not only in color, but also in structure
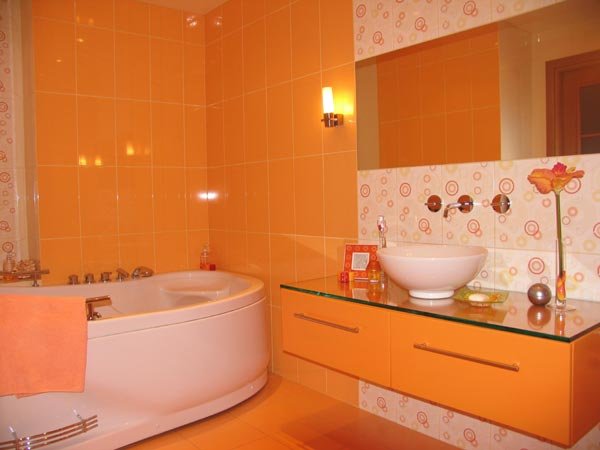
6. Equality of colors.
According to this scheme, two or three primary colors are introduced approximately evenly, but do not mix with each other. One half of the bathroom is finished with one tile, the other half is finished with another, etc.

In this case, the layout of the tiles is carried out taking into account the location of the elements: for example, the half where the bathtub is installed is tiled with tiles of one color, and the wall opposite it and the areas adjacent to it are tiled with another. The shower area can be highlighted with one color, the washroom with another, and the “locker room” with a third.

The floors can be tiled with tiles of both colors, arranging them in a checkerboard pattern or joining them approximately in the middle.

7. “Patchwork” or “Kaleidoscope”.
This pattern involves combining tiles of several colors, alternating randomly or orderly. This is a solution for creative people with strong nervous system who easily perceive “creative disorder”. A cheerful environment in the bathroom or toilet will charge them with positive energy and create a cheerful mood


8. "Splashes".
The main part of the wall is tiled with calm, monochromatic tiles, while several noticeably prominent tiles are introduced, randomly located against this serene background. Accent tiles really look like splashes or drops of color. This effective technique is best used only in spacious rooms. IN small bathroom walls with “splashes” will create a feeling of disorder.

9. Layering.
We gave this name to the scheme, which implies the use of several of the listed templates in one room.
Two types of layouts were used: panel type and three accent fragments
Two types of layout: panel type and emphasizing the area behind the washbasin
Layering patterns: an equal combination of two primary colors, an accent fragment and horizontal stripes
For example, in the bathroom the following combined layout can be used: a “panel” along the bottom of the wall, several narrow horizontal stripes, accent pieces behind the washbasin and heated towel rail.
The larger the room, the more templates can be layered on top of each other. And vice versa: in a compact room it is better to stick to one or two schemes, nothing more.
These are just a few of the possible options layouts. Tile is a “flexible” material in terms of design and allows you to create all kinds of geometric patterns and designs on the floor and walls: rhombuses, ladders, “ziggurats”, triangles and much more. Remember that than smaller room, the simpler the tile layout should be.

![]()
Separately, it is worth mentioning the tiles with which the so-called “screen” for the bath is lined . How to include this section in general scheme? It is best to clad the frame in accordance with the basic layout template. So, if a decision is made to lay a “panel” along the bottom of the wall, then the frame into which the bathtub is built can be “sheathed” with this “panel”, that is, covered with the same tiles. If the walls are decorated with vertical stripes, the bath frame is lined with background tiles and complemented by a similar strip, which can extend to the floor and wall. Using the “equality of colors” pattern, the box under the bathtub is lined with tiles corresponding to this half of the interior. In addition, the frame can be accent, background or merging with the font itself.
Currently, stripes are not just a fashion trend in clothing, but also the main trend in interior design. It is used very often simply as a decorative technique that sets a certain rhythm, making the interior more dynamic and lively. Stripes in the interior are alternation contrasting colors, attracting attention.
Striped walls
Such “strokes” on the walls, like stripes, can be used in almost any interior. Neat stripes on the main wall of the room or on all walls not only look elegant, but also allow designers to experiment with the visualization of space.
The stripes can be completely different - moderate, sophisticated, intricate, fantasy. The most important thing is to choose a design that is suitable specifically for your room, so that every detail looks harmonious, like a picture painted by the hand of one artist.
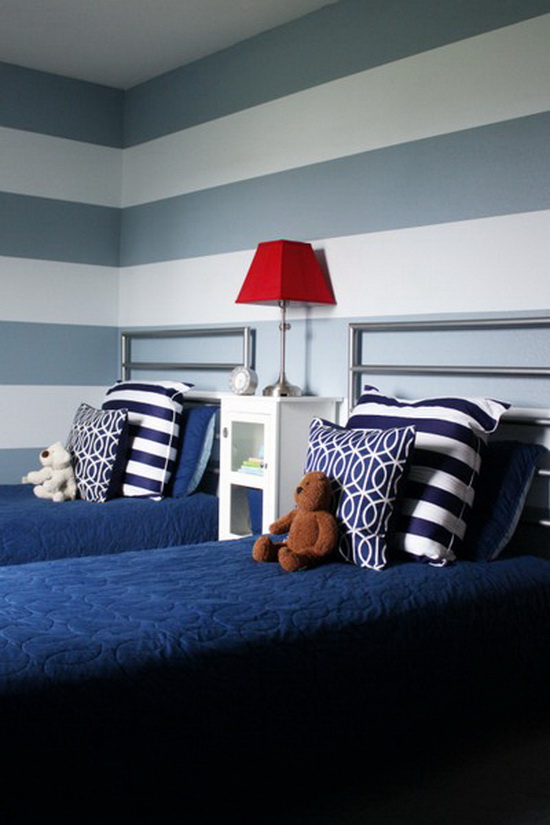
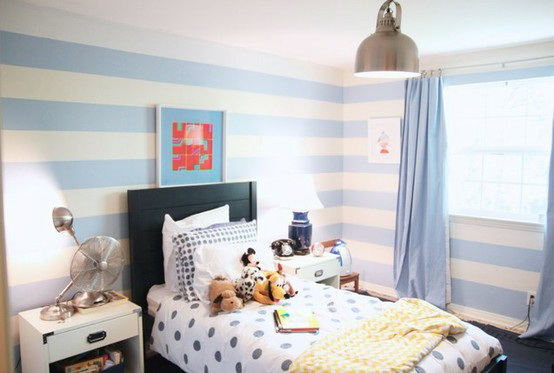
One of the most common design solutions is using blue stripes in the bedroom. This graphic linearity goes very well with the straight lines of your furniture. You can also use striped patterns in bedding.

Wide stripes will bring a modern spirit to the interior of the room. For these stripes, you can use paints in matte or metallic shades.
The success of any design project involving striped walls depends on the correct choice of color. Here is an example of a very effective combination - olive greens and a light emulsion of a gray metallic shade complement each other perfectly.
- And in order to achieve an even “dividing line”, you can use adhesive tape.
- Moreover, first apply the metallic sheen, and then paint. When painting, brush from the center of the tape to the center of the strip, but not vice versa.

Choosing strips for walls
Vertical stripes on the walls will bring symmetry to the room, and will also visually “stretch” it in height, while horizontal stripes, on the contrary, will make the room wider, but the ceiling will visually appear lower.
Wide and at the same time contrasting stripes They look not just elegant, but also sophisticated and uncluttered. Moreover, the greater their width, the more insignificant the visual “compression” of space will be.

Remember that narrow stripes at a certain distance they can merge into one color, so they may not be noticeable. Wide stripes, on the contrary, will attract attention and will look impressive and fashionable. In this case, the colors of the stripes can be either from the same color range or contrasting.
If you want to use wallpaper for painting, then your walls must be perfectly smooth, otherwise with such a design you will only emphasize all the shortcomings.
If you want to implement an idea like this in your interior, then remember that they are combined with almost all interior items, with the exception of those few styles that, by definition, do not have straight, even lines.

If you wish, you can “check out” only one wall(the stripes should be wide and not contrasting), then such a design will make your interior more solid. The interior will look harmonious if it contains wallpaper in the same color scheme or stylish accessories.

How to paint striped walls
- In order to make your walls striped, you will need: masking tape, matte varnish, paint, a small brush, and a roller.
- First, you need to mark with a pencil on the wall where you will have the stripes, then apply masking tape so that the pencil marks are subsequently painted over.
- After this, apply matte varnish with a narrow bone. This is done to secure the tape. The varnish will also help prevent paint from getting under the tape.
- Then, between the strips of tape, you can safely apply the paint with a roller.
- Take your time! Remove the tape only after the paint has completely dried to avoid drips.

Striped walls - photos in the interior: stripes and stripes are different
When creating your interior, do not be afraid to experiment. Sometimes the bravest design solutions They look especially elegant and beautiful!


Stripes in the interior are a universal technique for visually changing the space of any room. With their help you can achieve the most incredible effects, let's look at them in order.
When do we need “stripes” or how to use stripes in the interior?
- Working with geometry. If you need to expand or narrow, stretch or compress the space visually. It is quite easy to choose various accessories and furniture for striped walls; they will suit many
- Creating a background. If you think that the room looks too poor and the interior needs detailing, then one of the simplest techniques is walls with stripes.
- Emphasis. When there is a need to draw attention to a specific area of the interior or distract from other nondescript ones. Contrasting alternating lines immediately appear in visual focus.
Several groups of stripes can be distinguished: vertical, horizontal and inclined (“diagonal”). Often, they perform exactly opposite functions in design. We will look at each of these groups and illustrate them with photo examples.
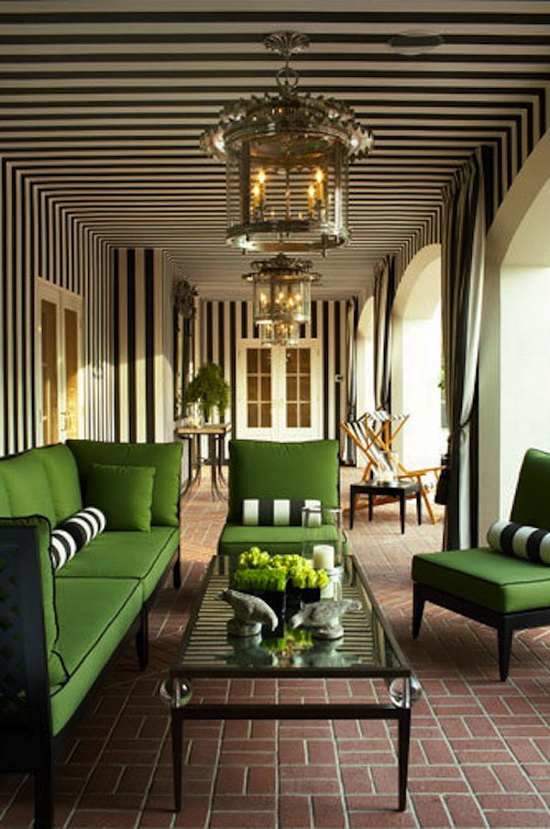
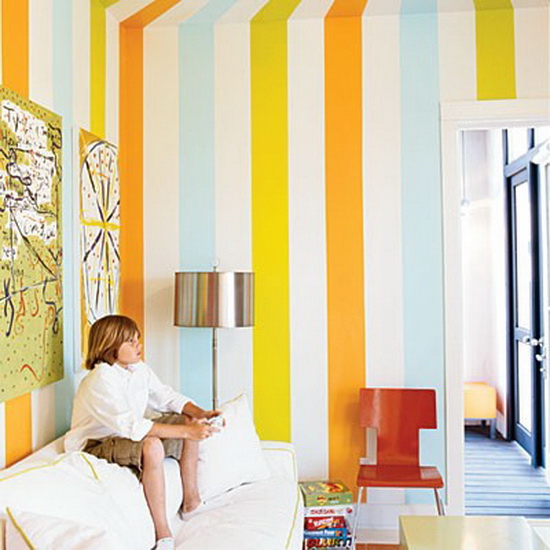
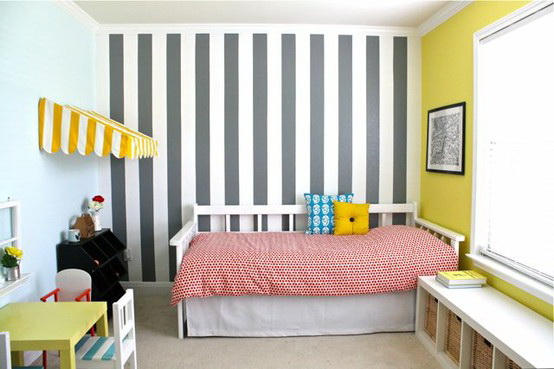
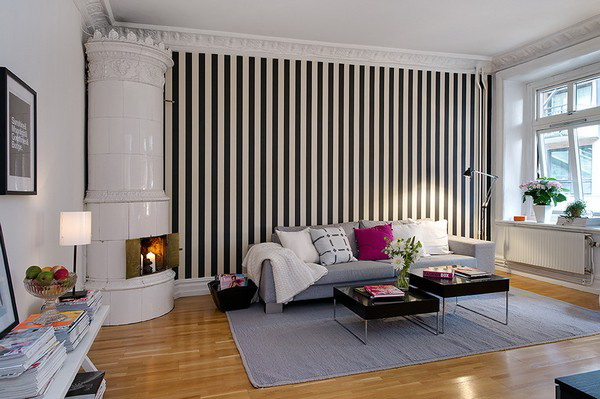
Vertical stripes
Vertical lines have always been a favorite tool in the hands of architects of majestic buildings. In the interior, they convey a feeling of strength, make it taller, and narrow the room. Provided that the color scheme and size are chosen correctly.
The fashion for walls with striped wallpaper (or fabrics) first appeared at the end of the 19th century. Today it is considered a classic technique to decorate a wall with thick vertical lines of monochrome shades. And contrasting bright combinations appeared much later.
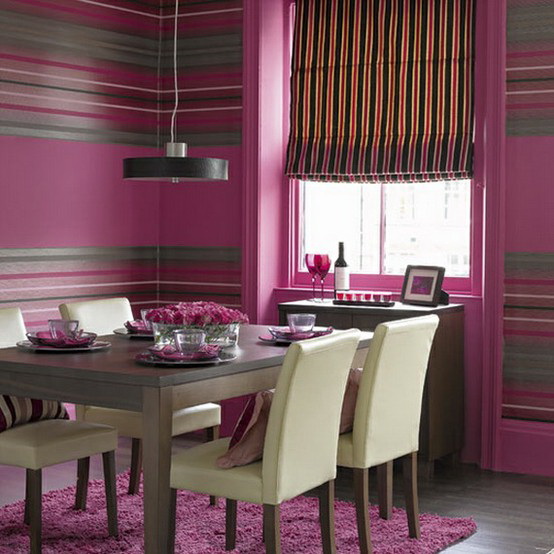
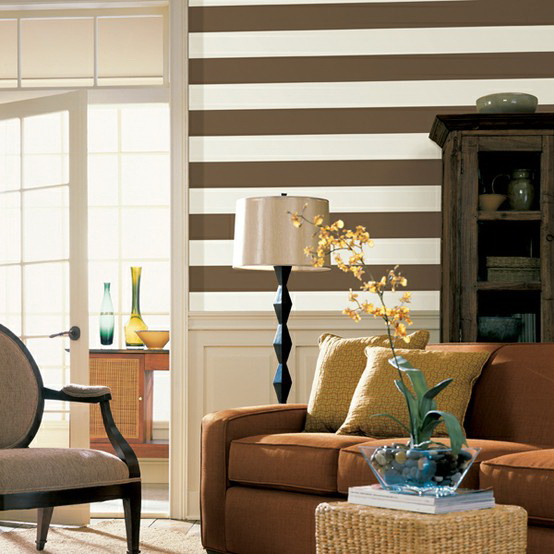
Walls with vertical stripes are great for decorating hallways or living rooms. The walls in the hallway look very harmonious with stripes in brown and beige tones: alternating light and dark, wide and narrow.
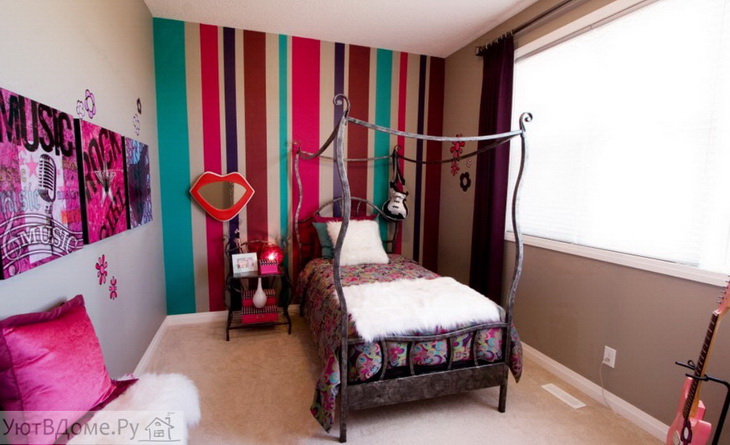
A combination of red, green, lilac and yellow narrow stripes is suitable for hallways in country or pop art style.
In living rooms it is best to use more restrained colors. But if you want to liven up a monochrome interior, you can create an accent wall of bright lines.
Also, rich stripes of rich colors will look extravagant in monochromatic bathrooms. For bathrooms in classic style It is better to decorate the walls with stripes of two shades of the same color. Or use soft light shades of blue and vanilla.
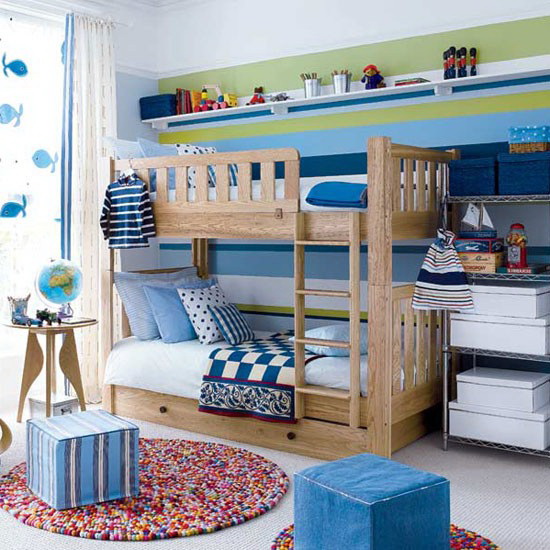
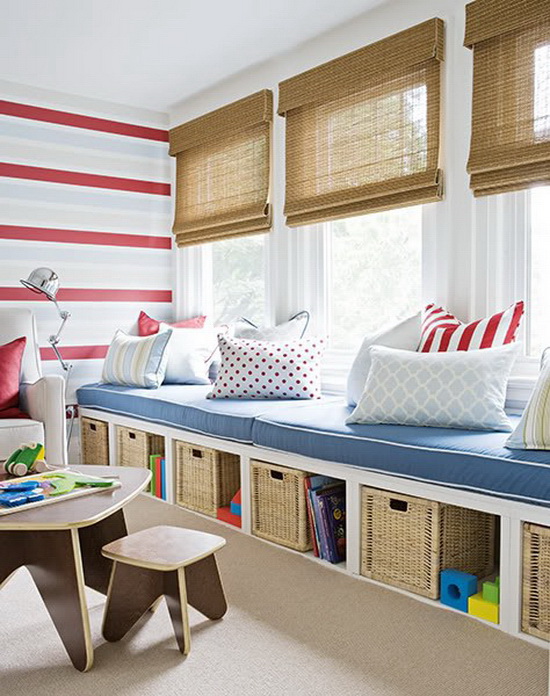
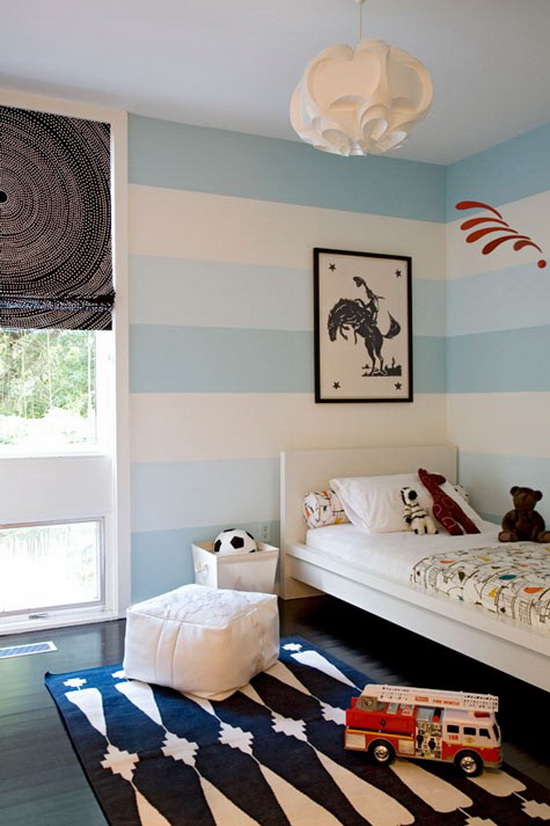
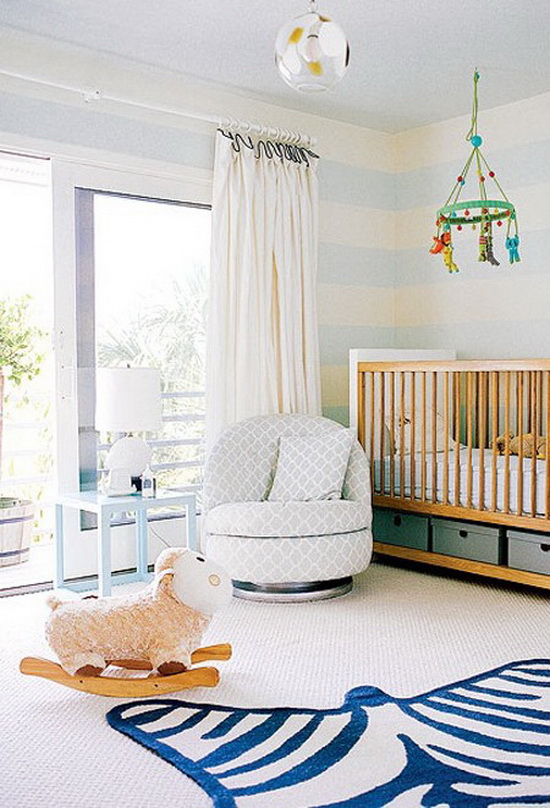
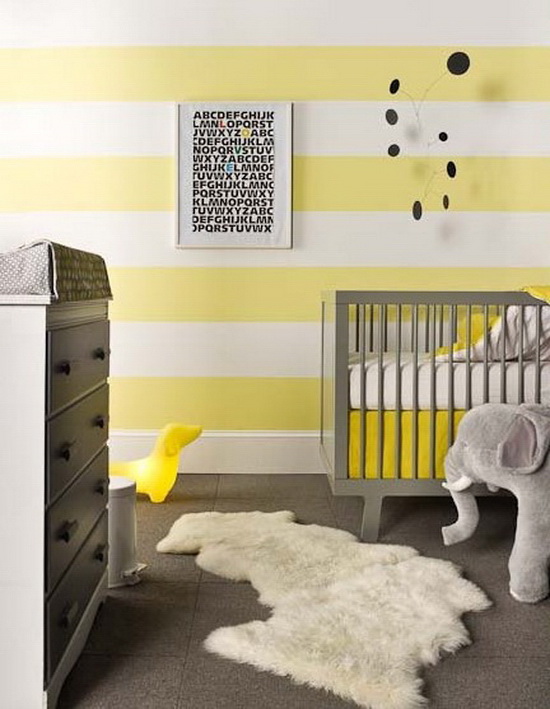
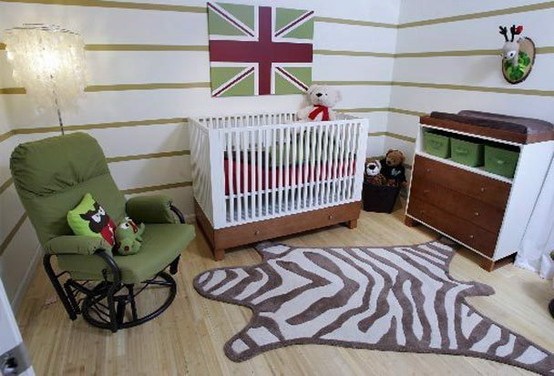
In children's rooms, stripes can be bright red, combined with furniture and other attributes. For children such bright options don't seem provocative.
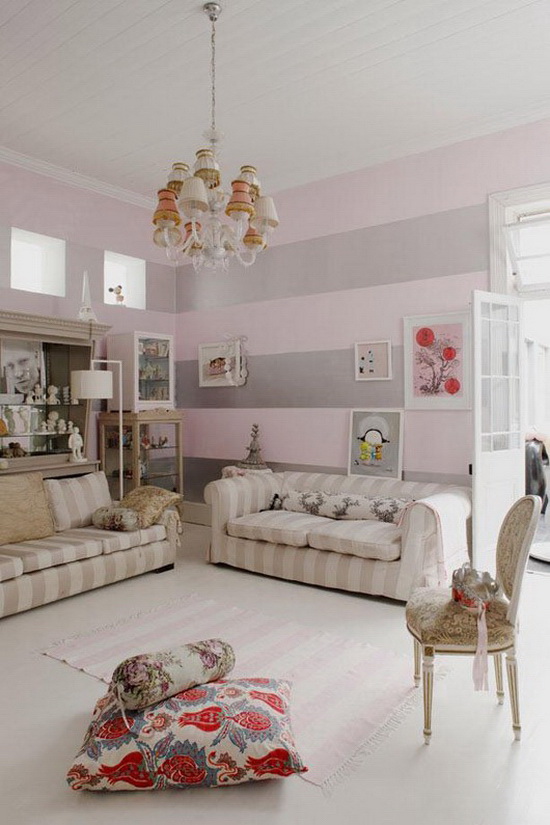
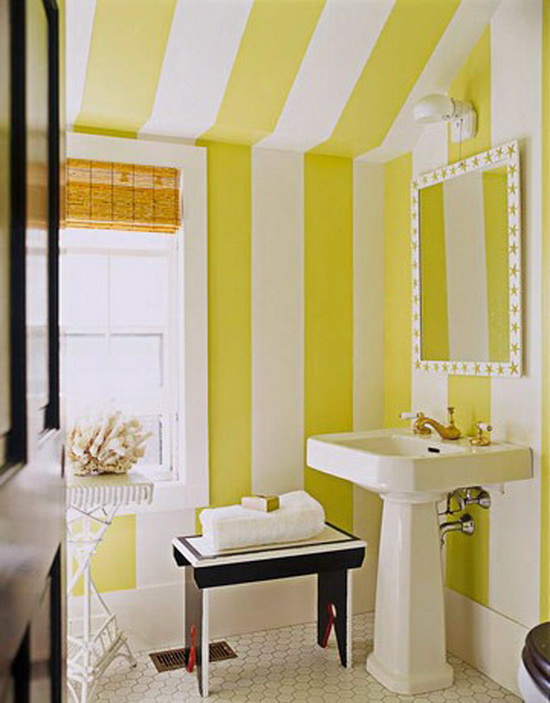
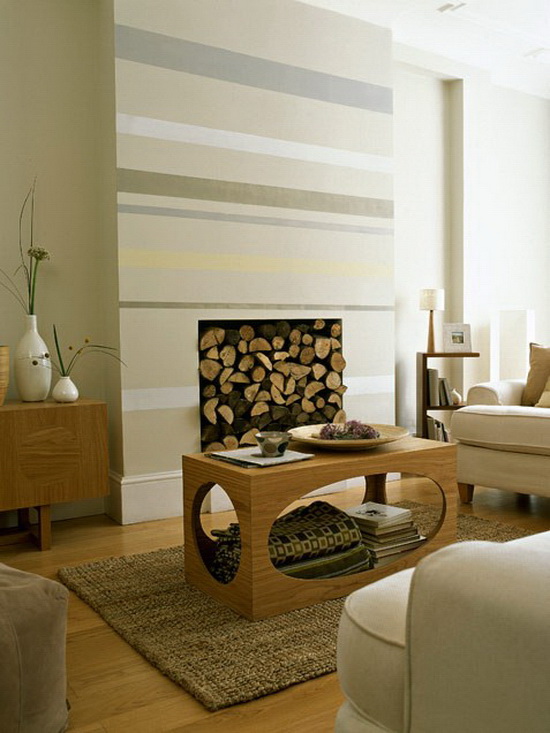
Horizontal stripes
Horizontal lines visually expand the area of the rooms, but at the same time make it lower. Therefore, they must be used carefully so as not to create the illusion of ceiling pressure. The wider the stripes, the lower the room appears.
However, horizontal lines are not always able to expand the room. If two opposite walls are decorated with stripes of the same size in contrasting colors, the space will narrow, as in an office corridor with red stripes.
But if there are openings in the walls, then the abundance of stripes is not scary: they are interrupted in place of the arches and do not allow the room to become smaller.
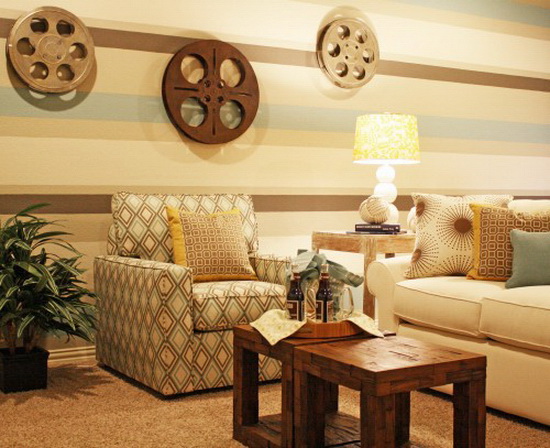
The most acceptable option for interiors in which it is important to maintain a calm atmosphere is stripes of soft shades and tones. In the office area it is appropriate to use neutral shades: beige and white. Light gray and white or white and brown tones look good in the living room. Such walls add lightness and make the design unobtrusive.
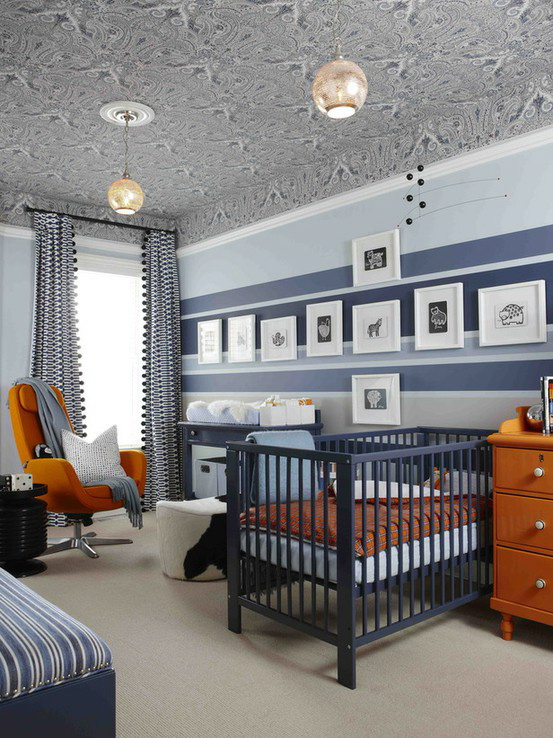
High ceilings in nurseries can cause fear in a small child. Therefore, an excellent solution is to decorate the upper part of the wall with lines of different sizes and colors. This will reduce the height and add originality to the interior.
A great option is partial strips of different sizes on the wall. It is important not to use many shades so as not to overload the interior. A wall with black and white stripes, narrow and wide, looks great. A round mirror refracts lines, transforming space.
Oblique and combined strips
Combined stripes they can create a visual relief in the room. Combining vertical and horizontal stripes in the interior will help hide various construction defects in the walls, modify the room, and create an accent.
The smooth transition of vertical stripes from the top of the wall to the ceiling turns them into horizontal ones and changes the shape of the room.
Combining yellow plain walls with a striped black and white ceiling in the nursery makes the interior of the room bright and original.
Lovers of extravagance will appreciate the zigzag lines on the walls. However, designers do not recommend getting carried away with such design in residential premises. This method is more suitable for newfangled cafes or clubs. In a room, therefore, it is better to design one accent wall, for example, behind the sofa in the living room or the lower part of the wall, combining it with a pattern on the floor.
Decorating methods using stripes
You can create stripes in the interior using a variety of methods:
1. Wallpaper. The simplest and least expensive option is to use striped wallpaper.
2. Painting. Painting walls with stripes is not an easy process. First you need to apply the base color, then use masking tape to delimit the lines.
3. Textile decor. Not only walls or ceilings can be striped. If the interior of the room is made in the same color scheme, you can choose striped textile accessories to match it. A white living room with red and white striped curtains and pillows looks great. Companions have been selected for them: red lampshades, candlesticks and decorative plates.
In a bedroom where the walls are covered with wallpaper with floral white and blue patterns, canopies over beds with blue and white stripes will fit harmoniously.
4. Large Modular pictures, prints and photos. Excellent design idea for youth styles - use a photograph on the wall in the form of horizontal stripes.
5. Textured finish. Stripes can be not only smooth, but also have texture and volume. For this purpose, textured plaster, gypsum and other materials are used. Textured stripes with flutes will create the effect of an antique style if used to decorate the columns.