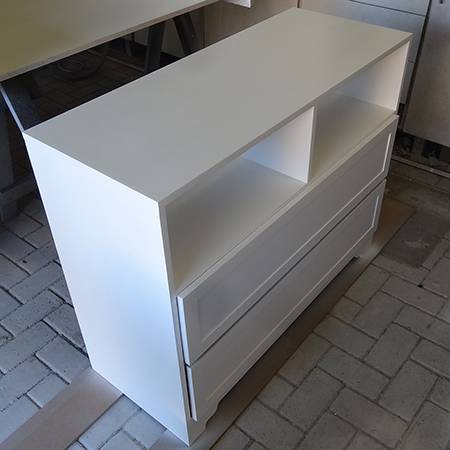
Loved chest of drawers with your own hands. All sizes are provided, and step-by-step assembly.
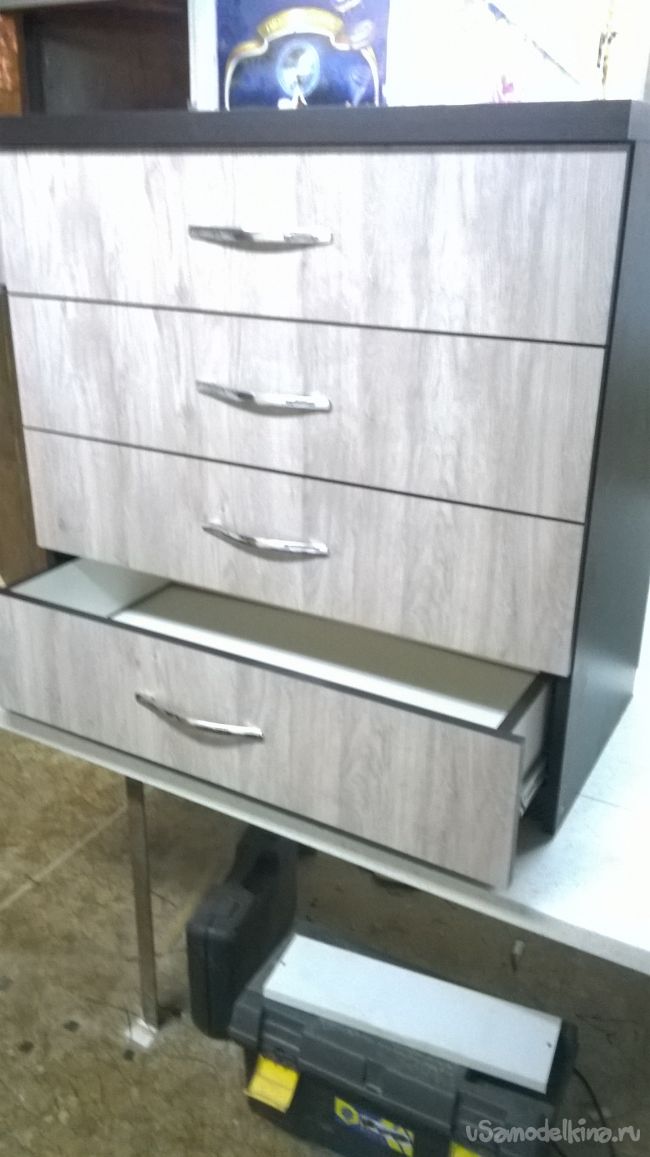


You will collect your cheaper cheaper than on the market and four times cheaper than in the store. I'll explain everything step by step. The main thing is not to be afraid, everything is simple. The material is ordered on any furniture factory.
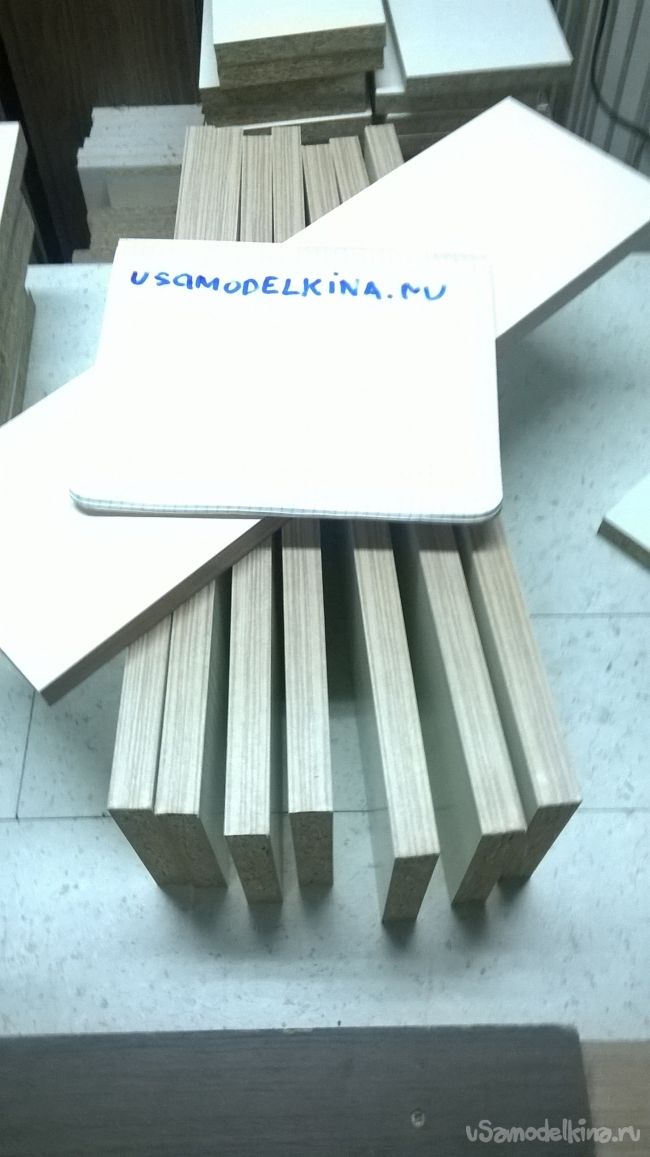
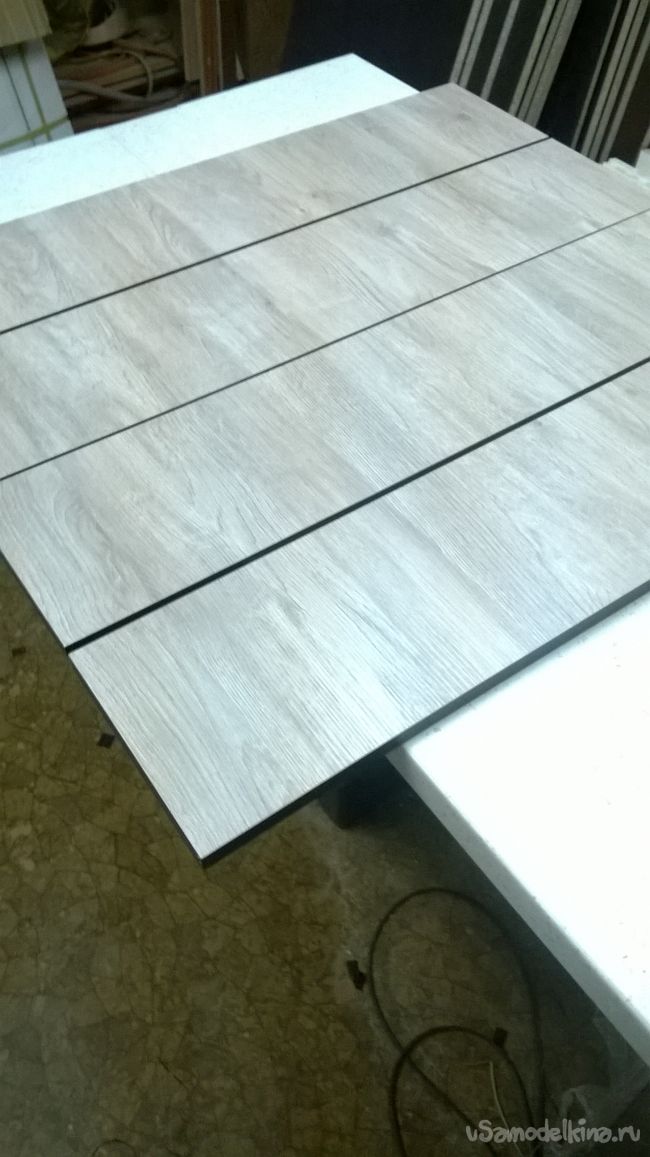
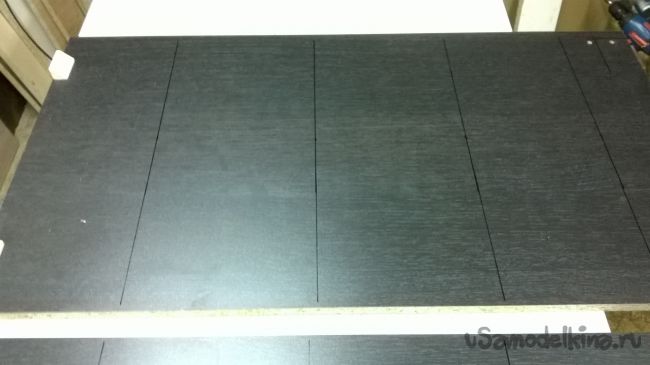
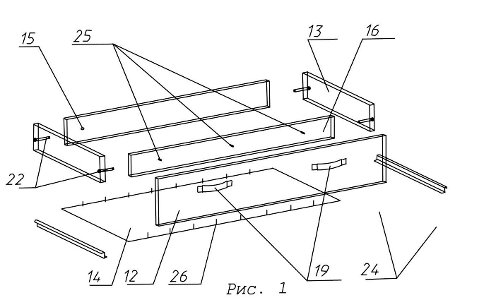
These are the size for the cutting of the chipboard 18 mm.
White
804 * 130 8 pcs.
450 * 130 8 pcs.
Texture (who choose)
864 * 460 2 pcs. -Bocks
864 * 90 2 pcs. - Jumper
864 * 50 1 pc. - Cocol
904 * 500 1 pc. -cap
904 * 100 1 pc. - Watching the lid.
400 * 100 2 pcs. - Dwoing the covers
896 * 196 4 pcs. -facade
Dimensions for DVP
835 * 445 4 pcs. - Drawer (white color)
895 * 845 1 PC. -What wall (does not matter)
We will need from the tools
Electric drill
Screwdriver (or cross screwdriver)
Drills for 4.5 mm, 2.5-3 mm
Furniture hexagon on 6 mm
Awl
A hammer
Construction kitchenage
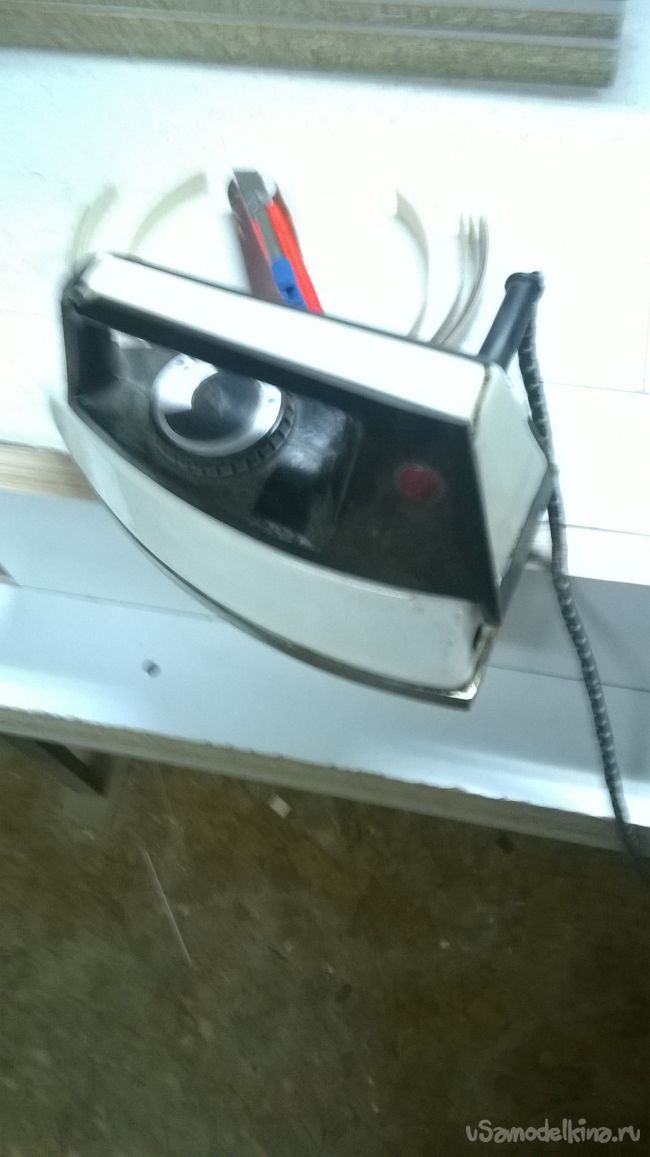
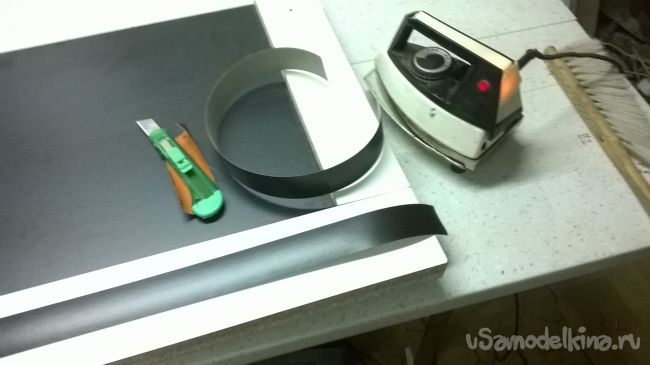
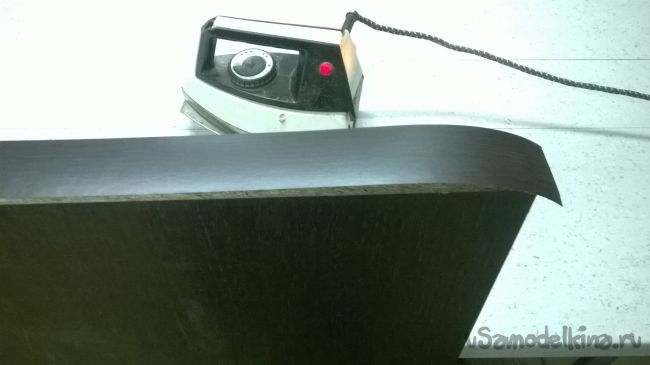
Iron (for cloak edge)
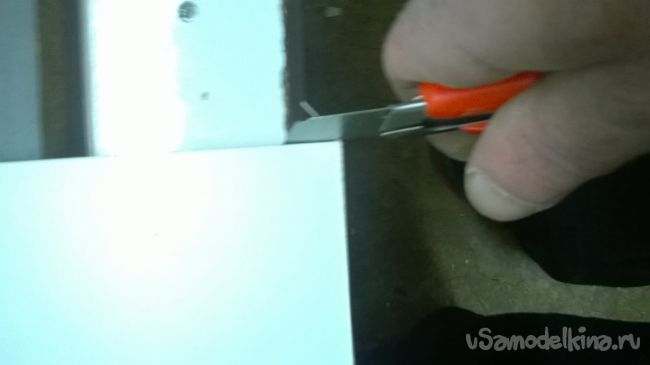
And stationery knife
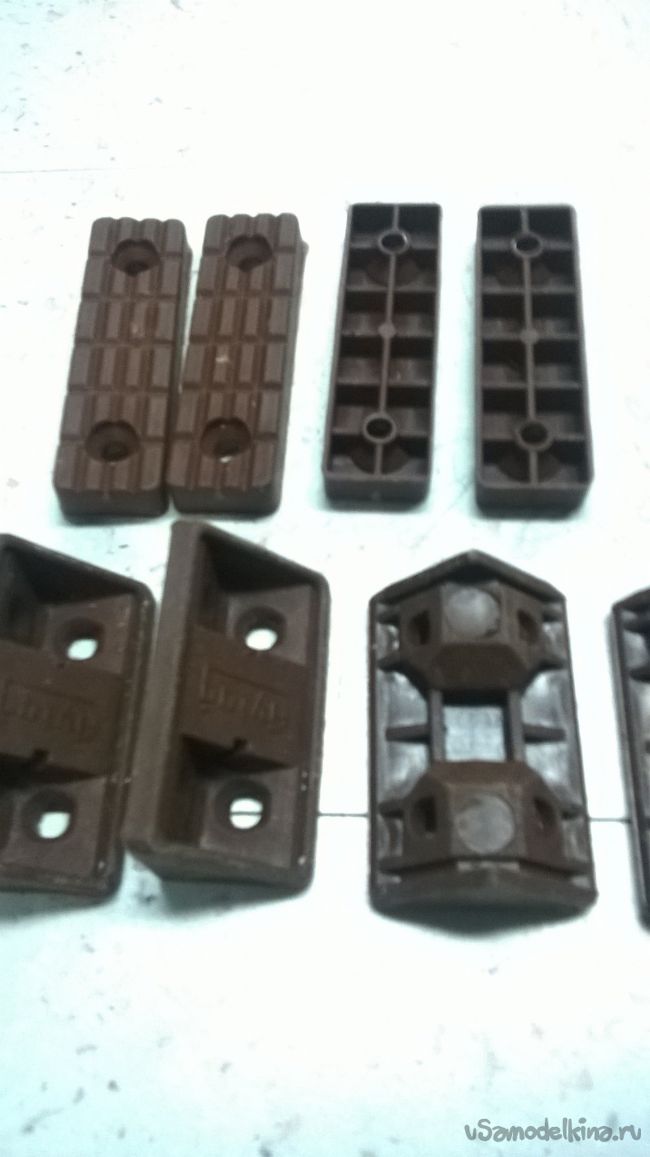
Furnitura
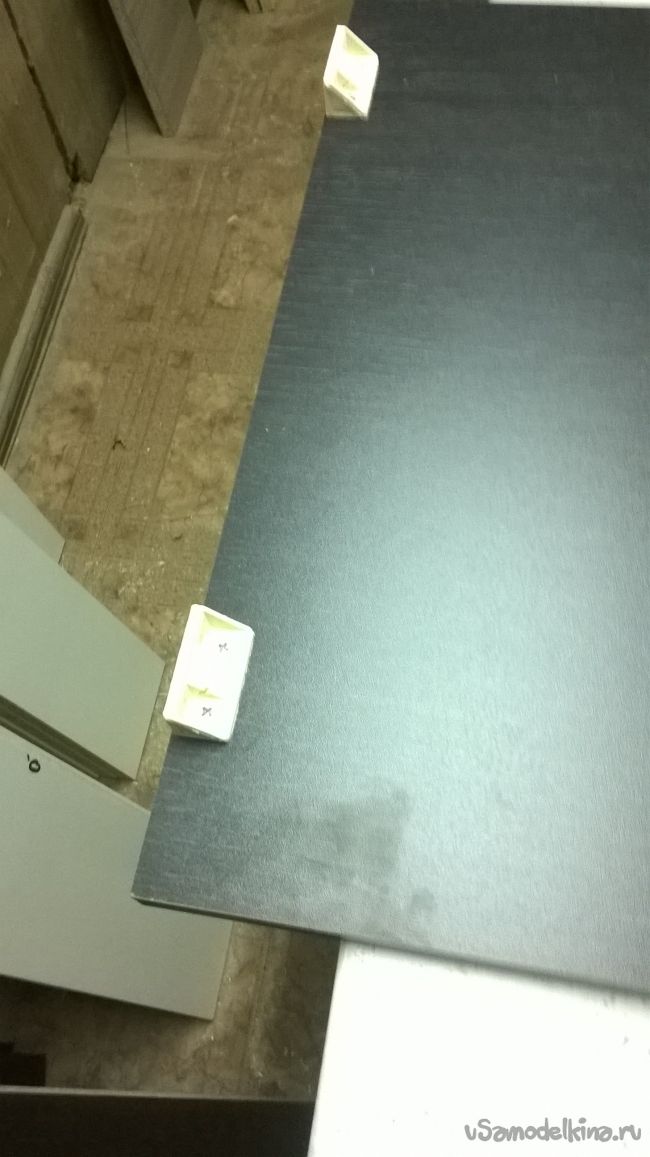
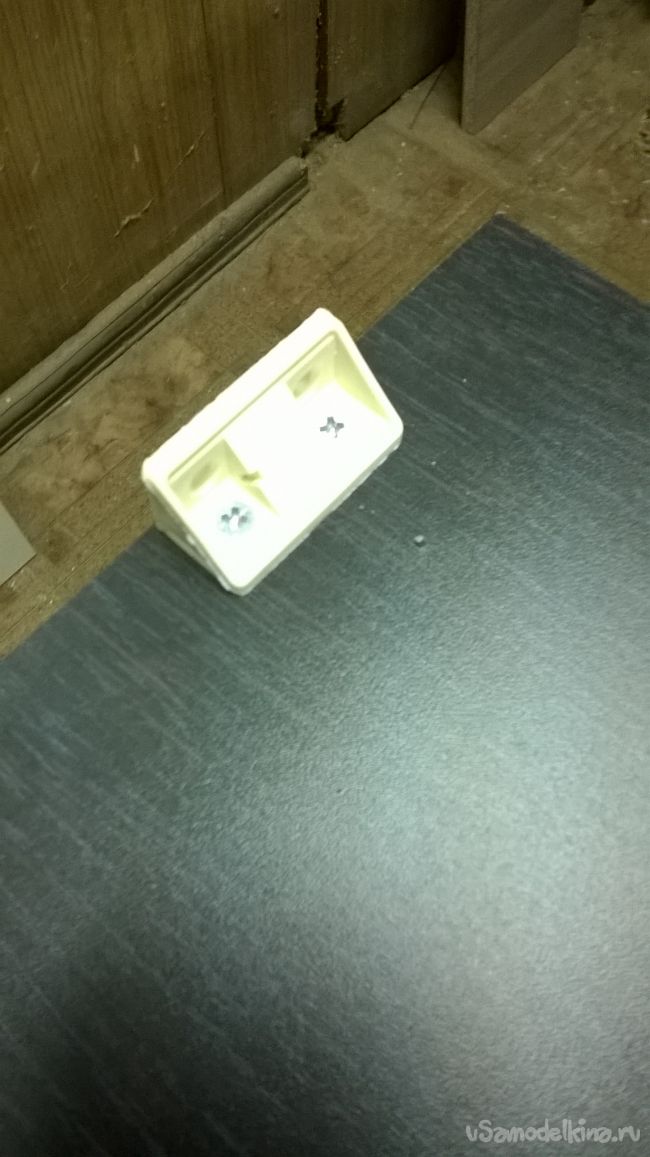
Plastic Corner 4 pcs.
Santer 4 pcs.
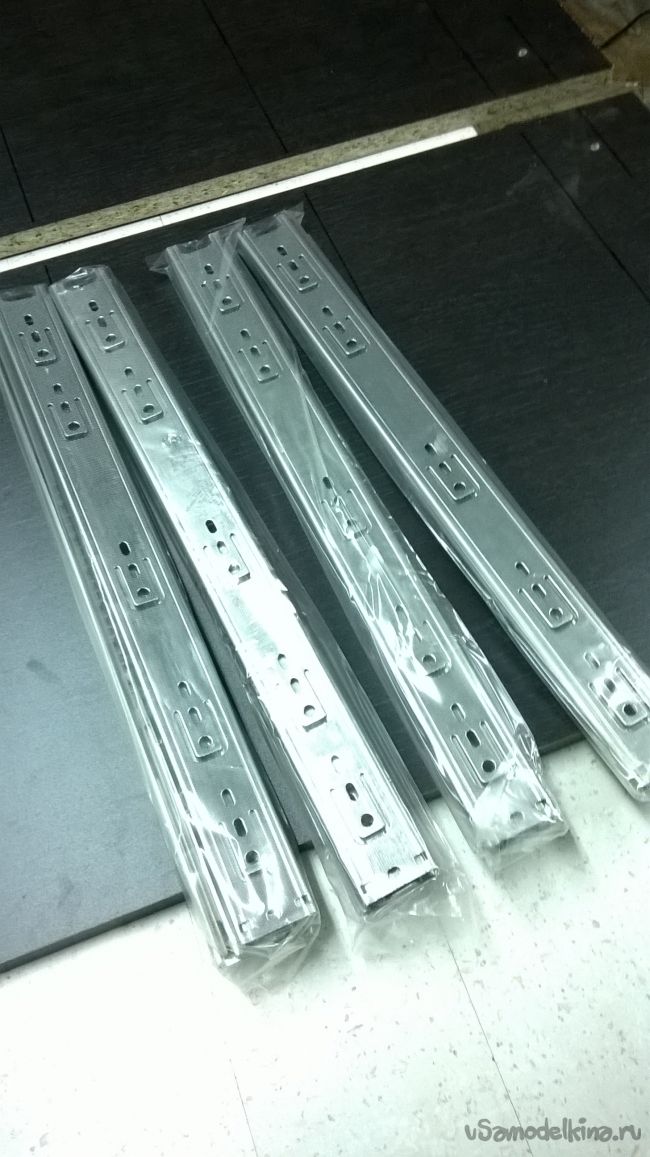
Ball guides at 450 mm, 4 sets
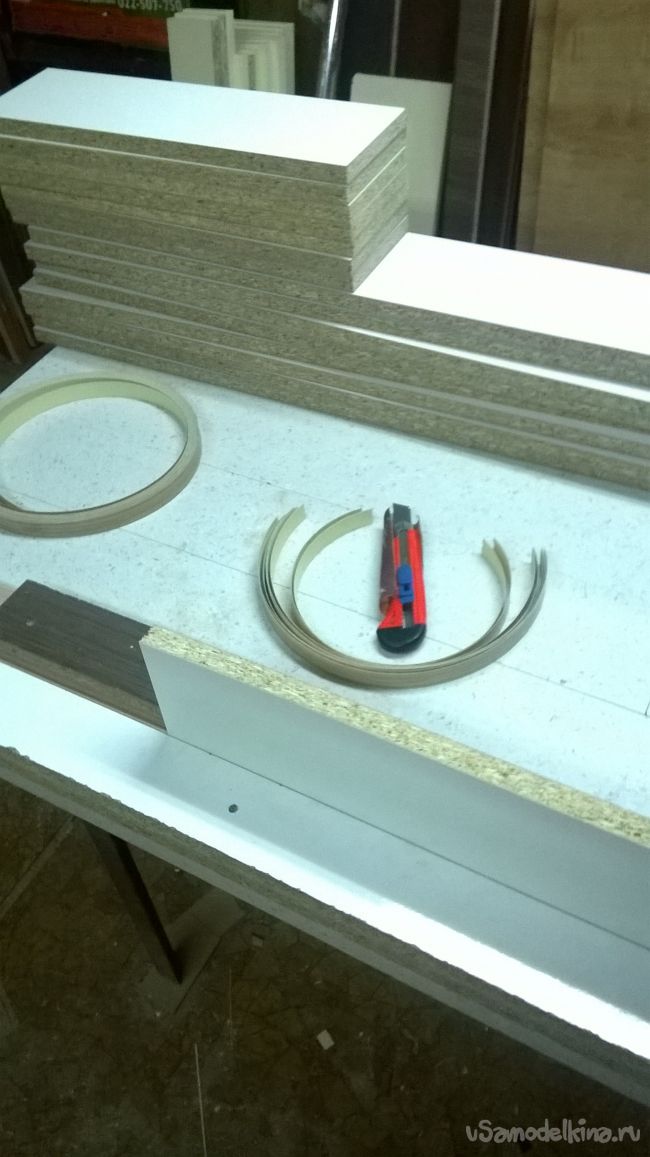
Edge for PHSP paste (narrow-25 meters wide, wide for lid - 2 meters)
The color of the edge is selected under the color of the chipboard, from which the chest of chest
Four handles, screws for handles for 40 mm 8 pieces
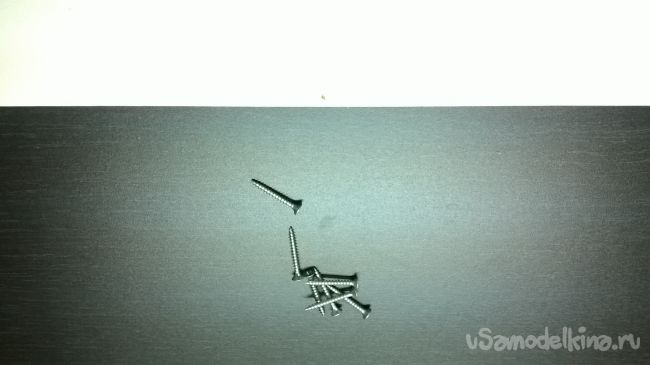
Furniture self-tapping screws for 16 mm 32 pcs, 30 mm 19 pcs.
Furniture screed (confirmant) 22 pcs.
Furniture cloves for 20 mm (to clog the rear wall and bottom)
Materials
For boxes (white laminate, it is the cheapest)
Dimensions 804 * 130 mm 8 pcs. , 450 * 130 mm 8 pcs
DVP (bottom box) 835 * 445 mm 4 pcs.
Cover (pick it yourself)
Dimensions 904 * 500 mm 1 pcs., And fillers for duding, dimensions 904 * 100 mm 1 pc., And 400 * 100 mm 2 pcs.
Sidewines (under the color of the lid). Size 864 * 460 mm 2 pcs.
Cocol 864 * 50 mm 1 pc.
Jumpers 864 * 90 mm 2 pcs.
Fiberboard (rear wall) 895 * 845 mm 1 pc.
Facades of the door (under the color of the lid) dimensions 896 * 196 mm 4 pcs.
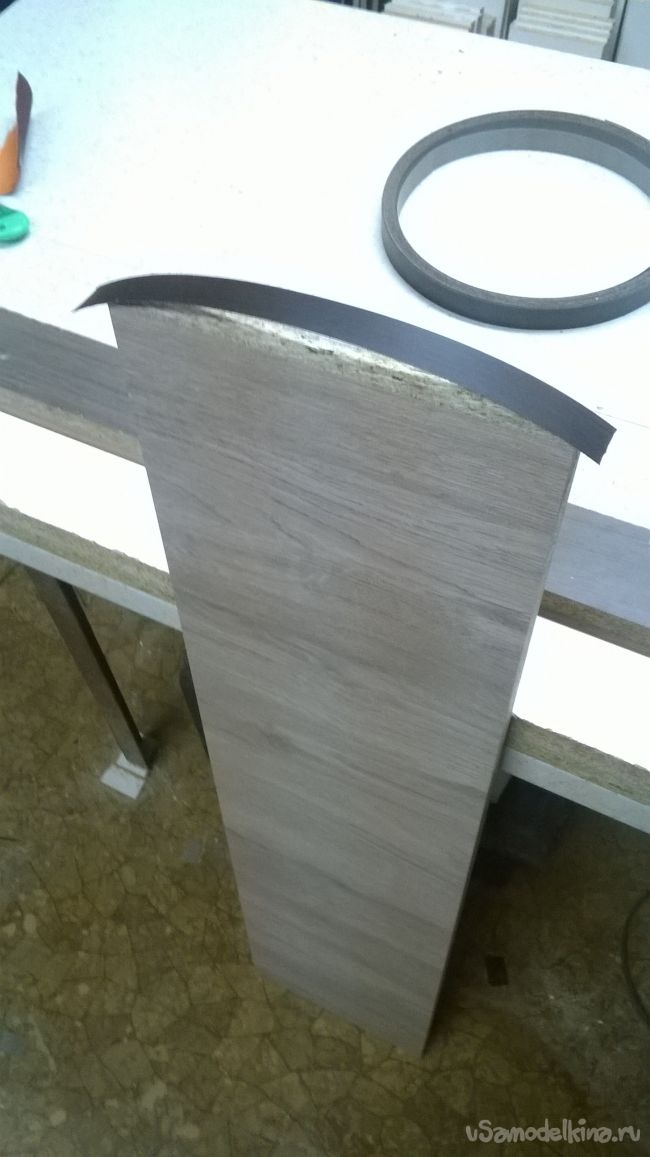
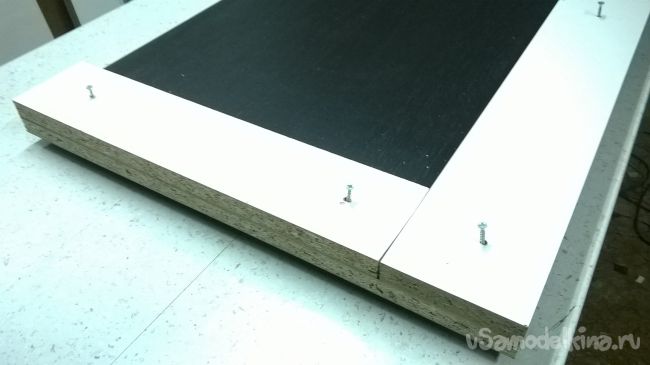
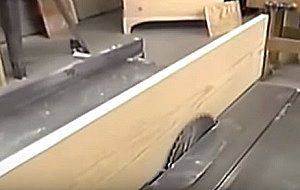
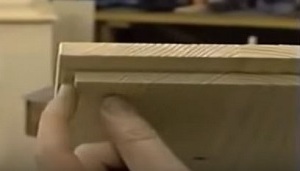
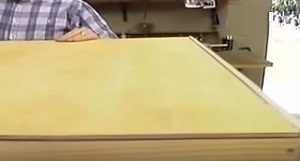
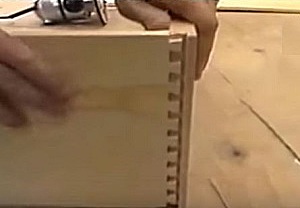
So, let's begin. To begin with, we glue the edge with an iron, the edge is glued to all parts on one side longitudinally. Passing the iron from behind slightly rubbed a cloth for better adhesive hitch. Then carefully cut off the surplus edge by the stationery knife. Facades we glue from four sides, in a circle.
Facades we glue from four sides, in a circle.
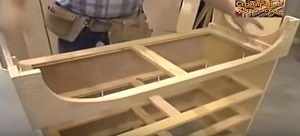
After the sickness of all the details, let's start collecting the boxes themselves.
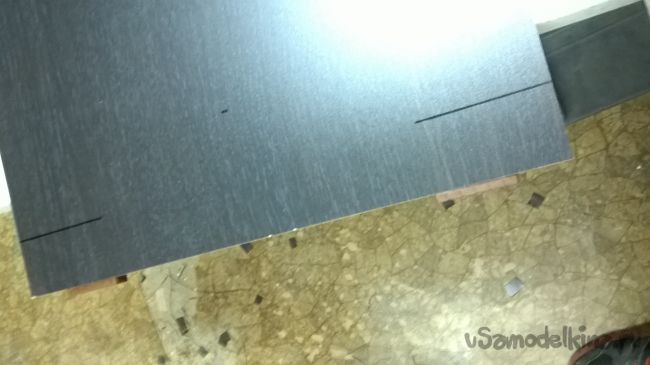
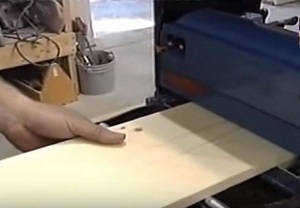
Take the details of 450 * 130 eight pieces, and make the markup on both sides.
We drill holes with a diameter of 4.5 mm.
We start the assembly. We adjust to our drilled part other than 802 * 130 mm and drill them together.

And we are tightened by their furniture screed.
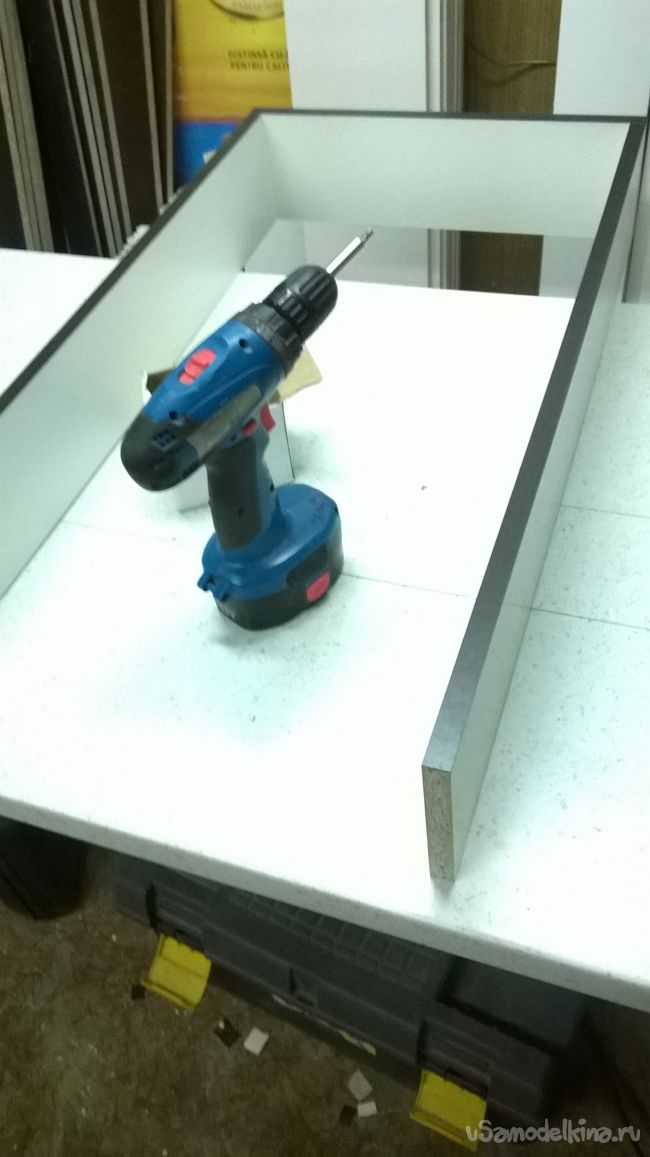
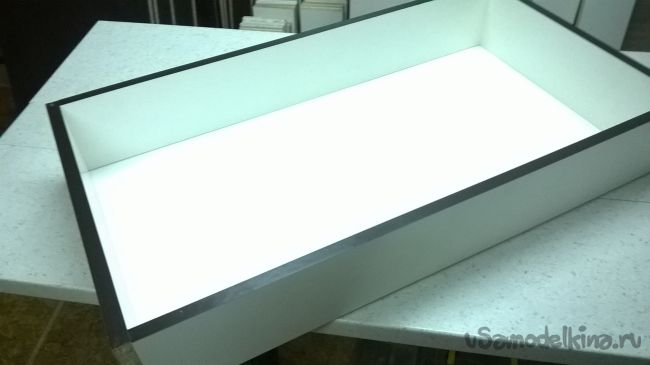
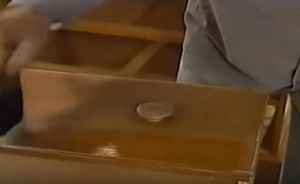
It turns out such a box.
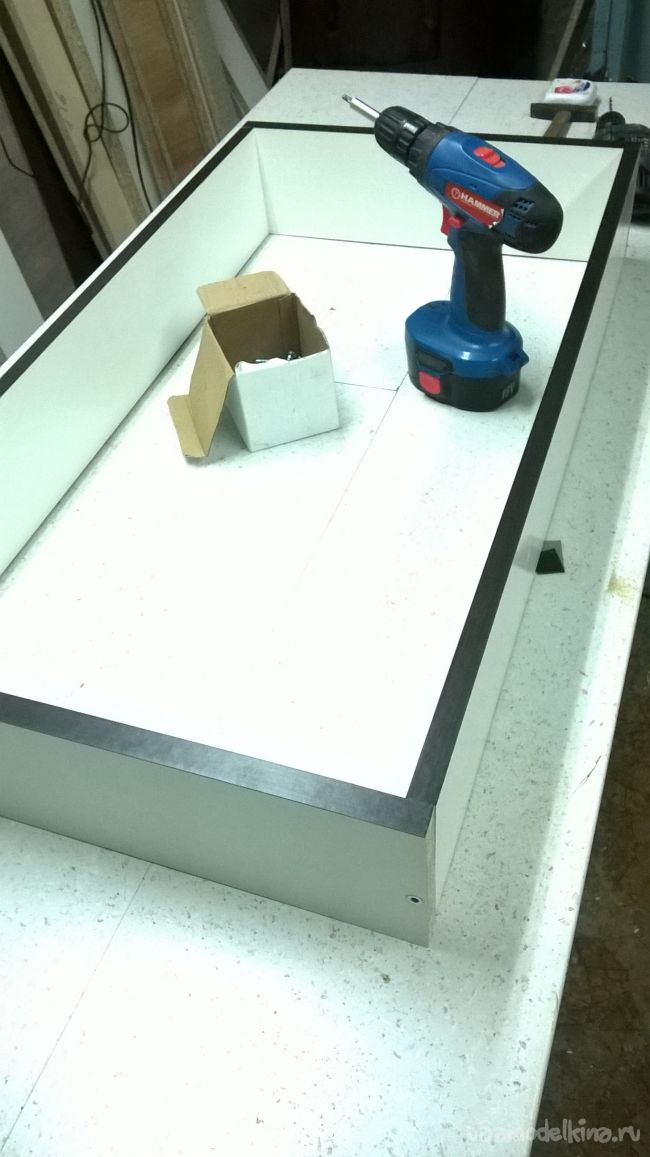
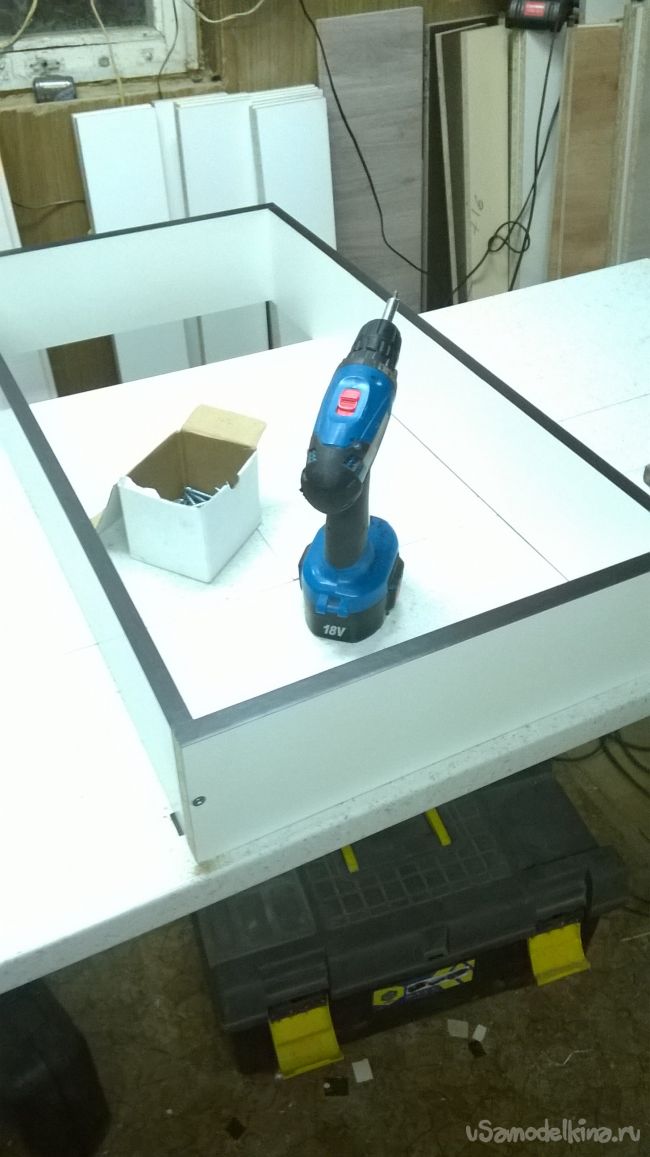
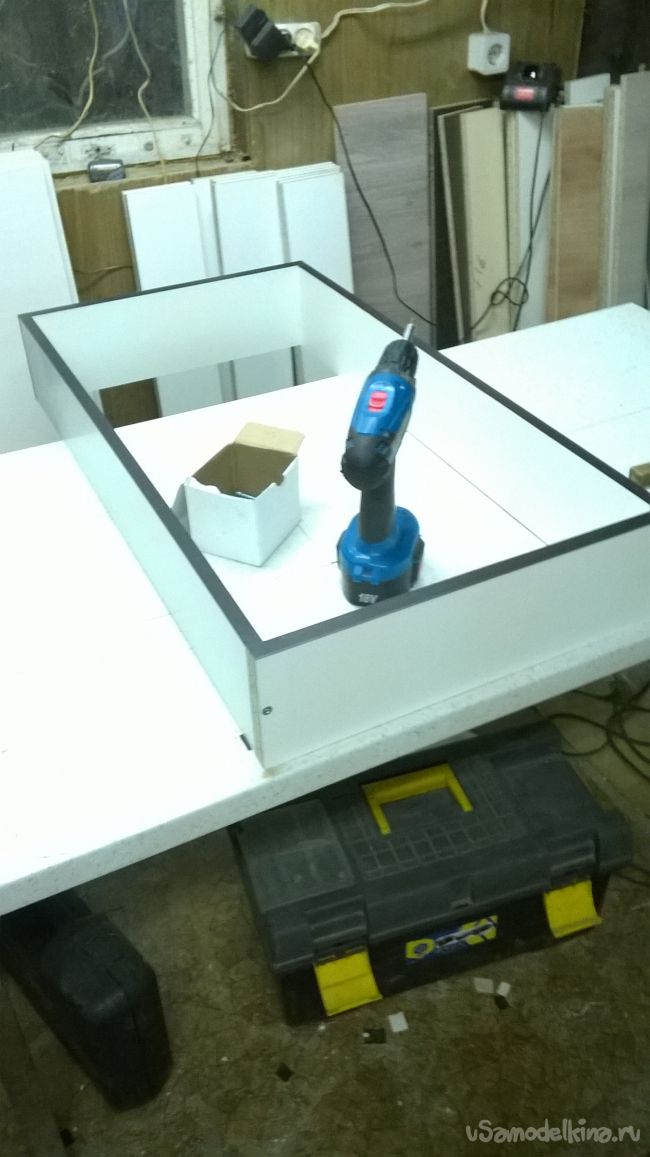
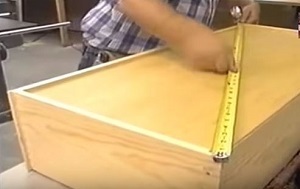
Now it snaps down the bottom, it is unforgettable to check the diagonal.
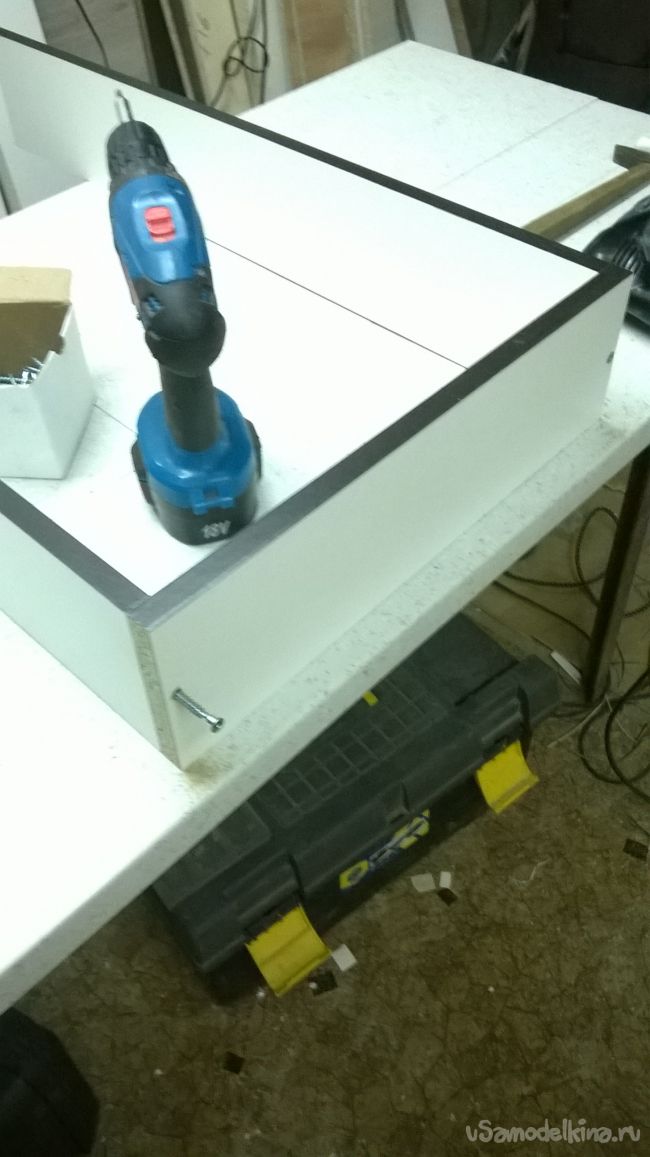
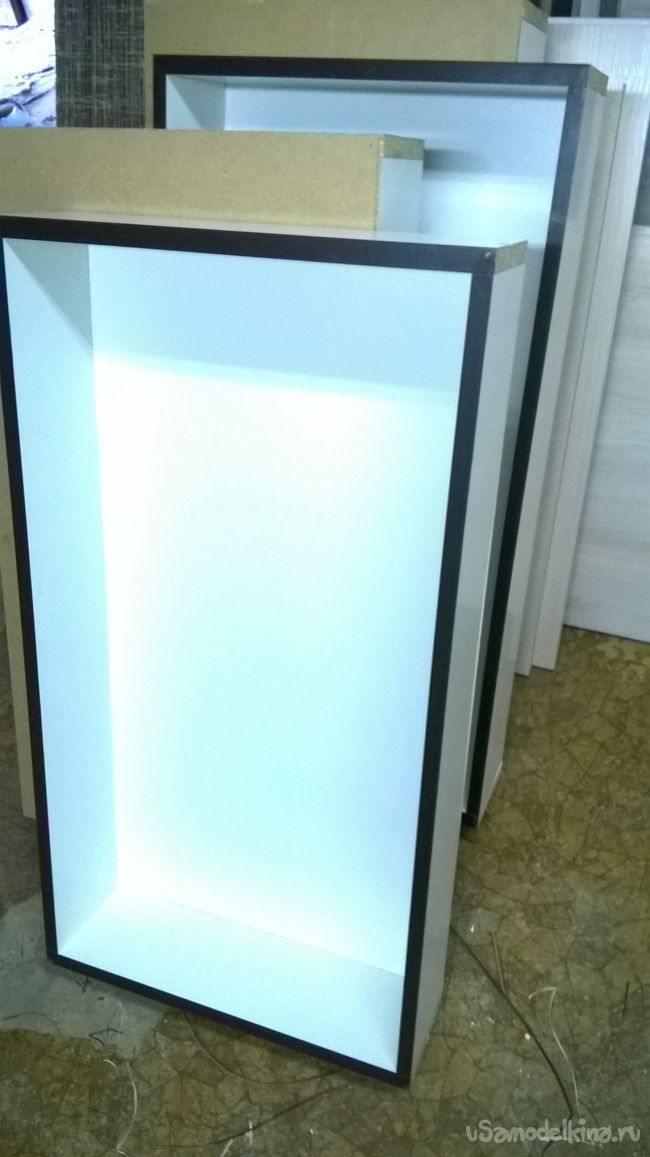
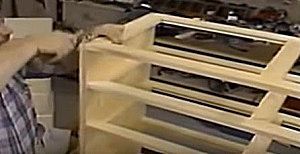
In this way, we collect all four boxes.
Boxes are almost ready.
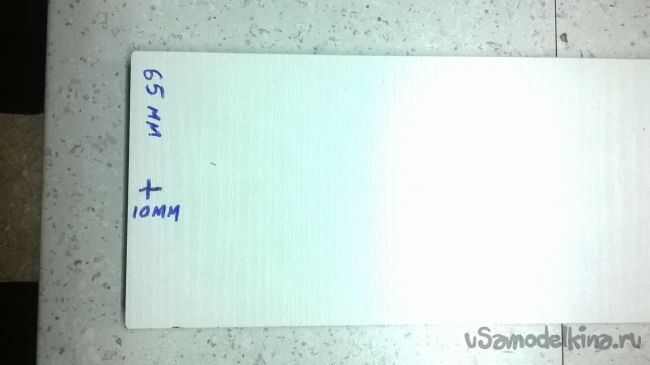
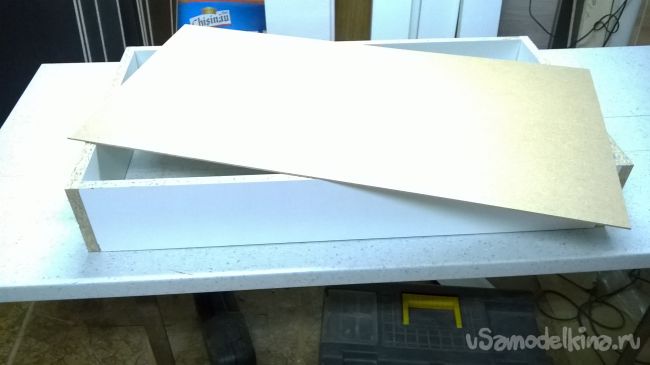
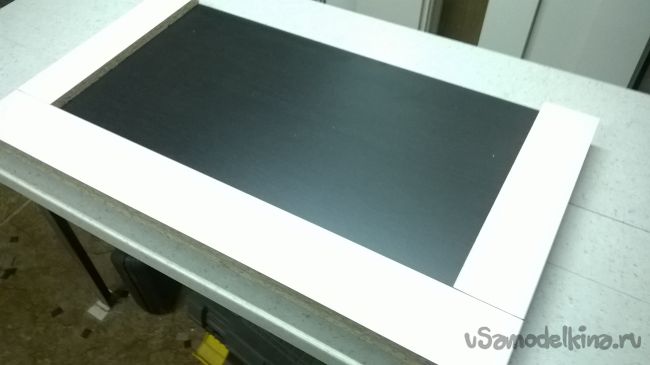
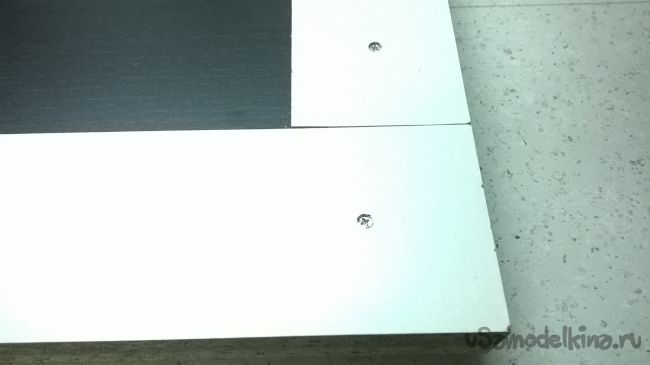
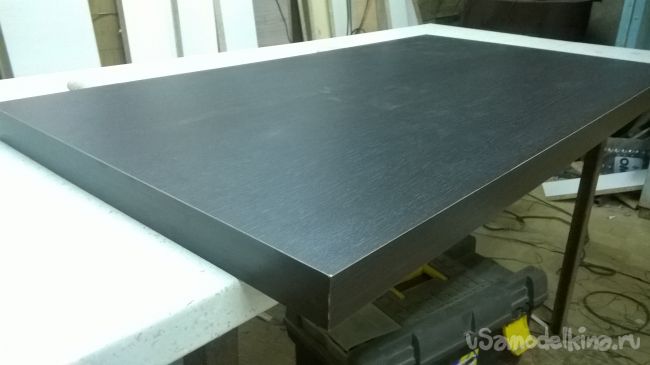
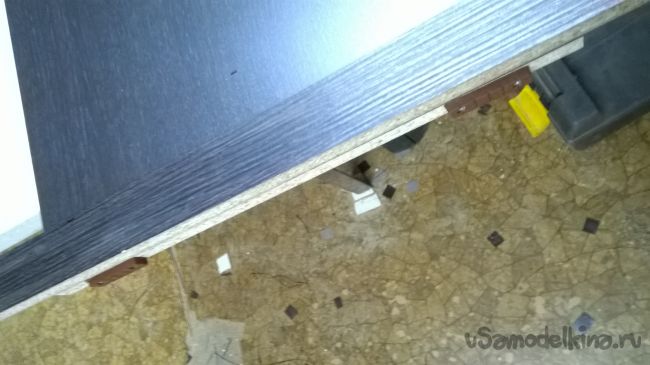
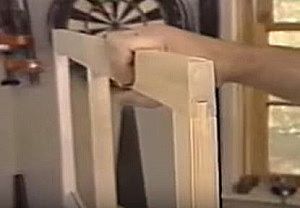
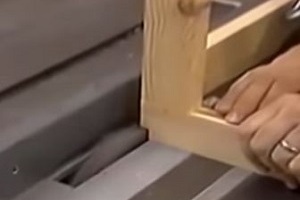
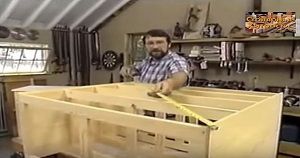
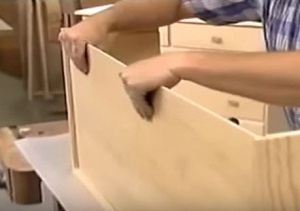
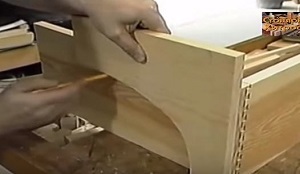
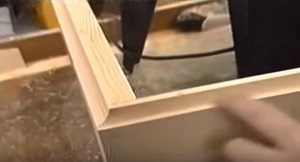
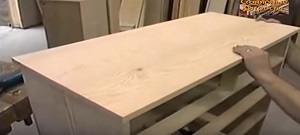
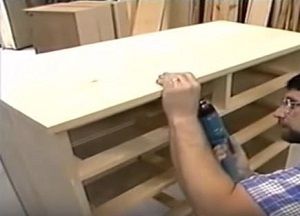
We will deal with the lid. Watch the lid face down and start the splicing.
We hold the lid with our thrakeers 904 * 100 and 400 * 100 on the sides.
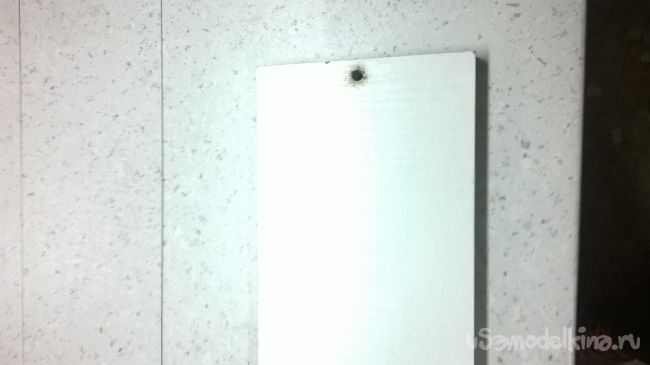
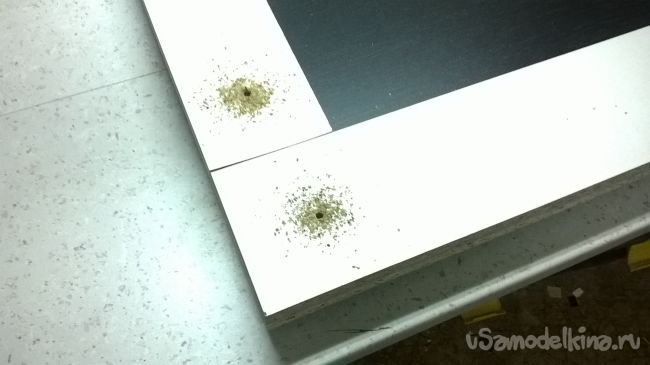
We drill holes by 4.5 mm only not until the end for about 10 -15 mm depth, so that the self-tapping screw is well. Self-tapping screws should be 30 mm.
![]()
Spin.
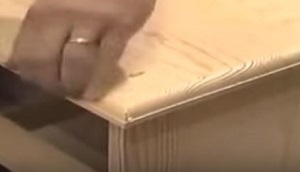
We also glue the edge (only wide) from three sides.
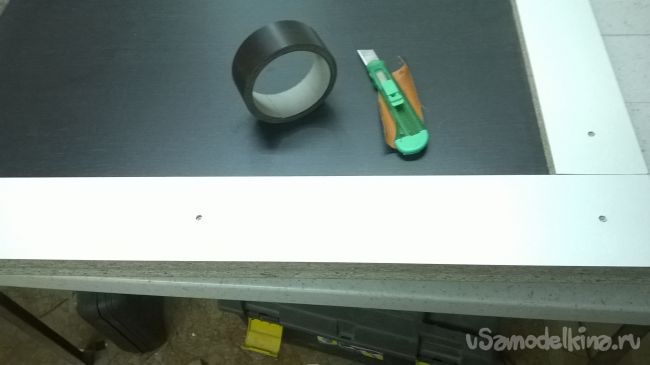
That's what should happen.
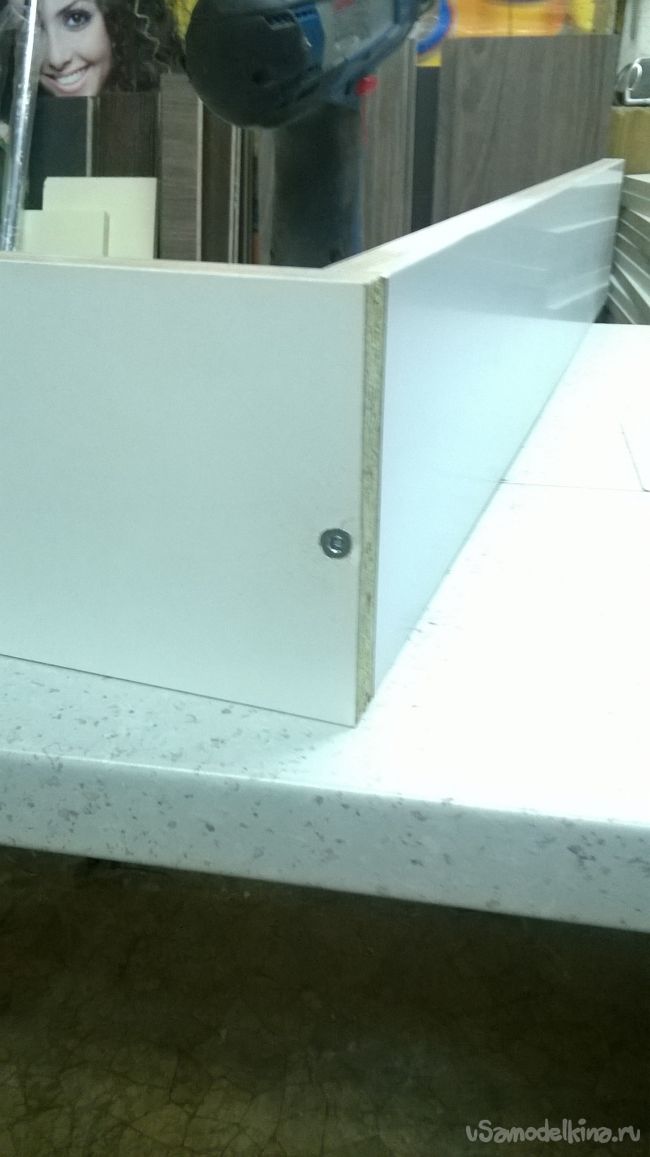
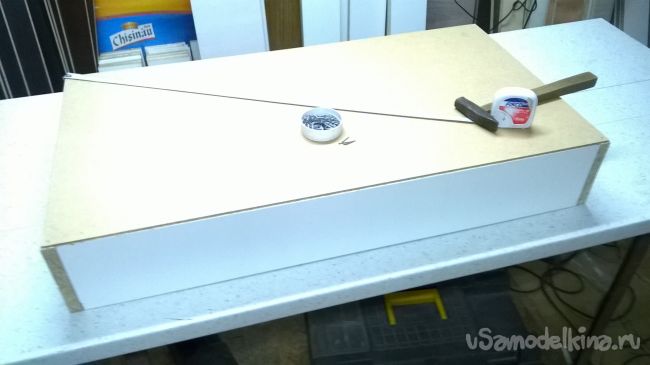
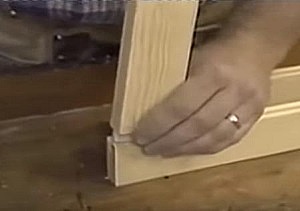
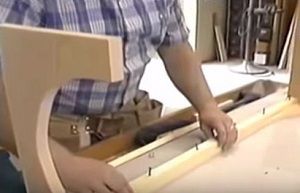
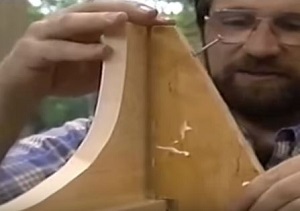
Take the sidewalls of the chest. To begin with, we will decompose their mirror, face down, and the edge outward.
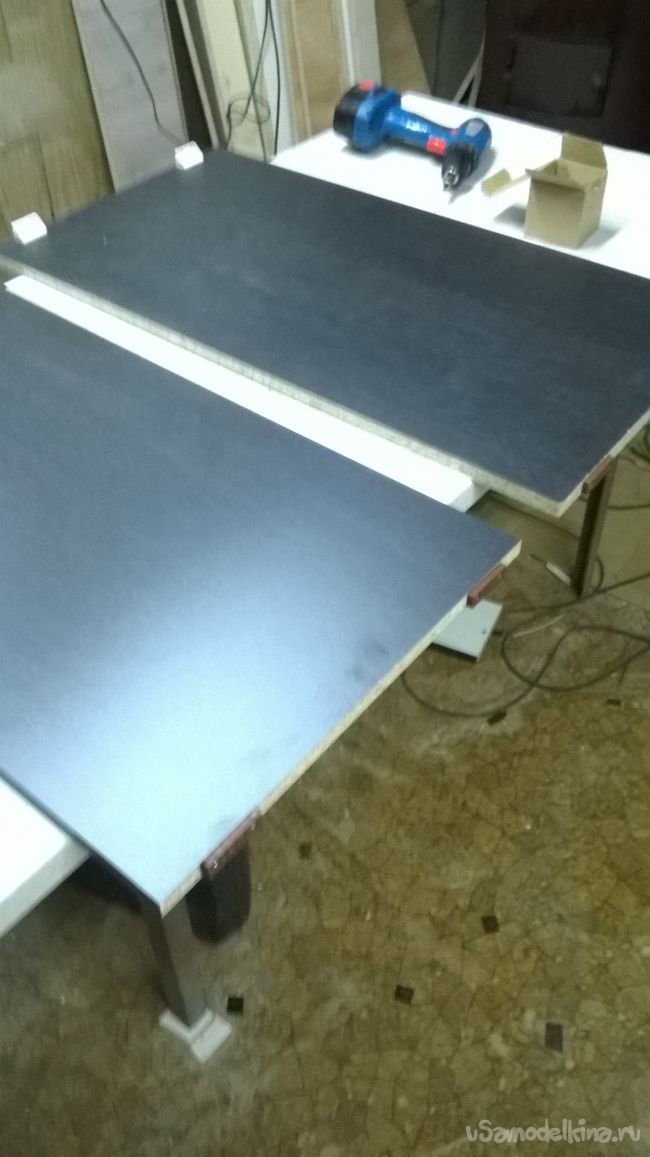
Bottom is both two scoops, and from above two corners.
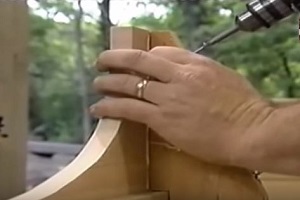
We place the marker the position of the lower jumpers, for this we take our base and apply it on the plane from the bottom of the sidewall and read.
I turn over the base on the edge and we substitute it from the side of the edge, and read it.

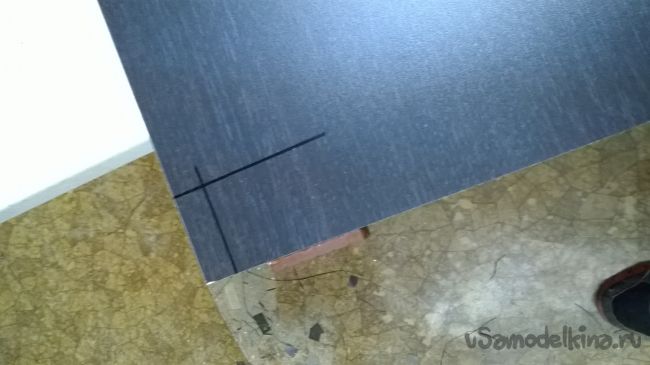
On the other hand as well.
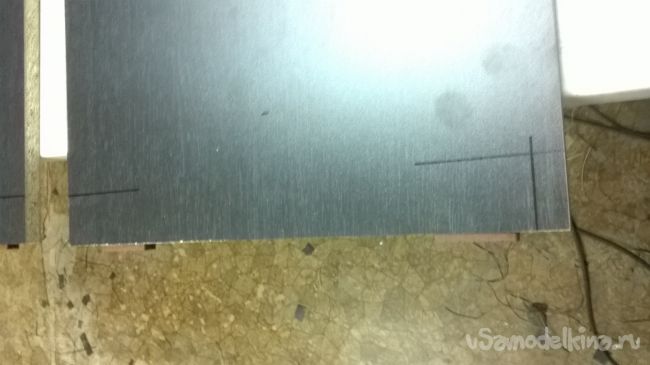
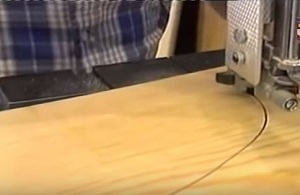
Then the drill by 4.5 mm we drill the holes through, retreating from the lines of about 10 mm.
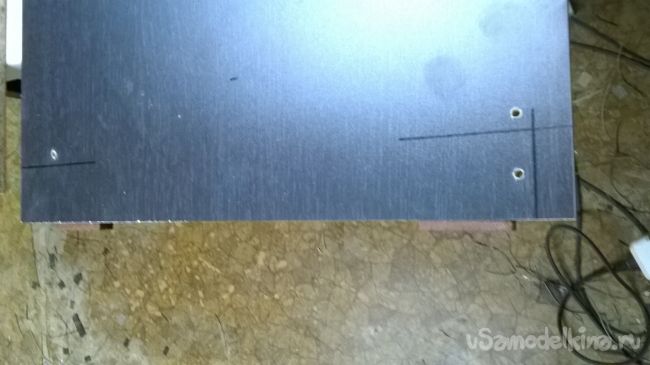
Place lines for guides.
Take the top:
170 mm.
380 mm.
580 mm.
760 mm.
Follow the four lines to the carbon marker. On both sides.

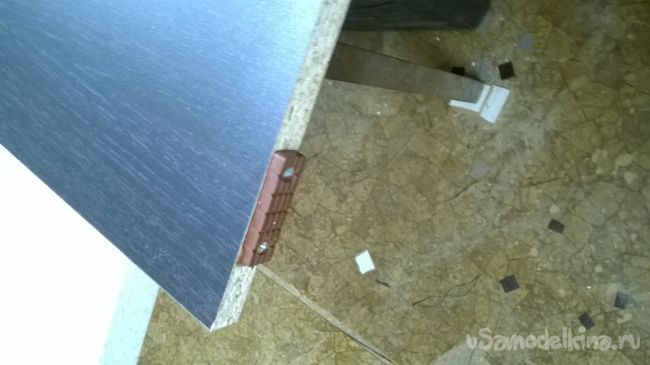
Now with the help of sequel and roulette, we note our marks. From the edge (from the edge side), I measure 40 mm and a selection make a puncture, a label for fastening the guide.
Details Author: Egrowing
The chest of drawers is a small, comfortable piece of furniture with a tabletop, drawers for storing clothes or bed linen. In Russia, the chest is also known as "hidden" or "shaf". His origin, the chest is the chest and secretor. The use of firmly entered at the beginning of the XVIII century.
To date, make a chest of drawers with your own hands by almost every man. Moreover, if he kept a screwdriver in his hands, a hammer, a drill, a saw or a screwdriver.
Why do it yourself if you can buy in the store?
The most common material for the manufacture of furniture is LDVP. Working with this material does not represent any particular difficulties. The main thing is to be careful when transporting and drawing. In stores, the Dresser from LDVP will be 2-3 times more expensive. Moreover, it can be considered as a small "quest".
Design and choice of place
Before designing the design, it is necessary to determine the place where the chest of drawers will be. Special attention should be paid on the plinth, sockets and other items that can interfere. In principle, under the plinth, you can block the corners from both sides a bit - the problem is solved.
It is also worth determining the dimensions: the height 800 per 800 or 1200 mm is the optimal option. Do not do the chest of drawers too large.
Before designing it is useful to spend on thematic logs
Details of the Chest
This chest will stand on legs, so the dimensions are given taking into account the overhead.
Main settings:
- lDSP thickness - 16 mm;
- the thickness of the melamine edge is 0.5 mm.
Dimensions of all parts in millimeters:
- 800x500 - the top cover of the chest;
- 816x475 - sidewalls 2pcs;
- 800x475 - bottom;
- 797x205 - 4pcs drawers facades;
- 768x80 - Top tie 2pcs;
- 160x450 - sidewalls 8pcs;
- 160x710 - front and rear walls of drawers 8pcs (size taking into account the roller guide);
- 418x80 - Coupling strips for boxes 4pcs;
- 827x795 - rear wall of the dwarf;
- 737x445 - bottom of chipboard or chipboard (10 mm) for boxes 4 pcs.
The rear wall and bottom for drawers can be made from the Fiberboard or LDSP (10 mm), but if you put a 10 mm plumbing plank for the boxes for drawers.
Coupling stacks of boxes will give extra rigidity. It will not allow the bottom to progress under the severity.
Silk
The leaf of the LDSP has dimensions of 2440x1830x16, so it is hardly possible to cut it at home, the more so there will be chips around the edges. For cutting, format-cutting machines are used. It is reasonable to give a sheet with a list of all parts and sizes in a company dealing, cutting wood.
Furnitura
While drinking the necessary details, buy the following accessories:
- Roller guides for boxes - 4 sets, 450 mm long. Included there is a left and right side, they are not interchangeable. You can replace the "Full Clear" rollers. They are more reliable.
- Confirmates 5x70, packing 100 pcs. All major details are attached to the confirmates.
- Self-tapping screws 4x30, small packaging.
- Melamine edge. Clause around the perimeter of the details. Sold in roll.
- Legs, 6 pieces. Four along the edges and two in the middle.
- Pens for boxes 4-8 pcs. You can make either one in the middle or two along the edges. Depends on your preferences.
Tool:
- Drill screwdriver;
- Two wood drills - 5 and 8 mm;
- Cross and hexagonated bits for confirmates;
- Construction angle with a measuring line;
- Roulette;
- Pencil;
- Iron for edging stickers;
- Knife for cutting edges at the edges;
- Small sandpaper, dry rag;
- A vacuum cleaner.
Preparation for assembly
Before collecting the "body" you need to stick the edge. To do this, attach the edge of the adhesive base to the end and spend several times the iron. Iron must be heated by 3/4. After repeat the same wet rag for good fixing. Strong edges remove the knife. The faces are grouped by sandpaper. You need to be extremely careful with laminate!
If the campaign for furniture stores in search of the chest you need was not crowned with success, then nothing else remains, except to make a chest of drawers with your own hands. With certain skills and the minimum needed tool set, this is not particularly complex. But now you are absolutely free in choosing the size of the chest, accessories and colors, which will be perfect to approach your interior.
How to make a chest of drawers with your own hands
The price of the issue is also important: make a chest of drawers with your own hands - it will save several times about the purchase in the shop of the chest similar to the size, quality and consumer properties of the self-made product.
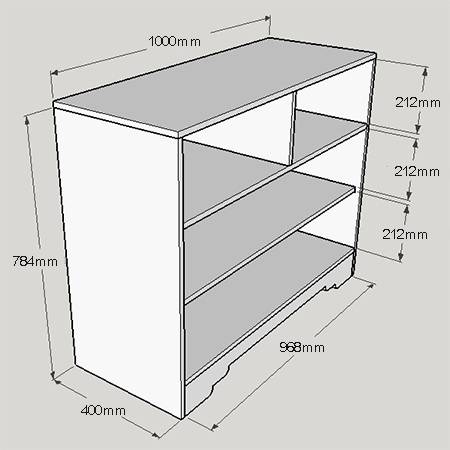
Overall dimensions of the chest: 1000 x 800 x 400 mm.
Material for manufacture with your own hands of the chest is the MDF plate 16, 12 and 3 mm thick.
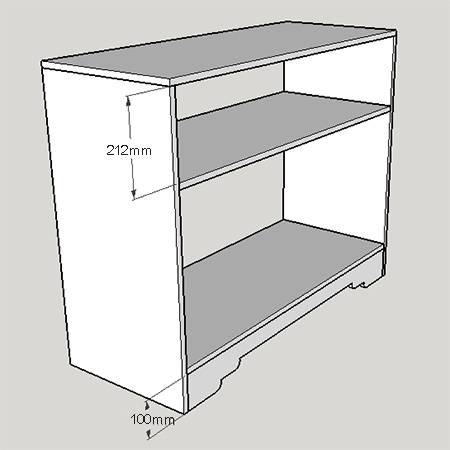
The main elements for the manufacture of the chest:
• Top 400 x 1000 mm, MDF 16 mm - 1 pc.;
• sidewalls 400 x 784 mm, MDF 16 mm - 2 pcs.;
• Upper shelf / base 400 x 968 mm, MDF - 16 mm - 2 pcs.;
• Middle shelf 381 x 968 mm, MDF 16 mm - 1 pc.;
• Upper shelf divider 212 x 400 mm, MDF 16 mm - 1 pc.;
• Lower apron 100 x 968 mm, MDF 16 mm - 1 pc.;
• Frontal drawer panel 215.5 x 963 mm, MDF 16 mm - 2 pcs.;
• Rear wall of the drawer 197 x 963 mm, MDF 12 mm - 2 pcs.;
• Drawer sidewalls 197 x 369 mm, MDF 12 mm - 4 pcs.;
• bottom drawer 381 x 963 mm, MDF 12 mm - 2 pcs.;
• Decorative boxes of boxes, MDF 3 mm - strips of 40 mm wide;
• Rear wall of the upper shelf (optional) 234 x 990 mm, Masonite 3 mm - 1 pc.
Note: If you are not going to make decorative lining on the front panels of the boxes, then increase the width of the middle shelf by 3 mm (i.e. its dimensions will be 384 x 968 mm).
The entire dresser, if in the description is not specified other, is assembled using screws 4 x 45 mm, which are pre-drilled by the guide holes with a diameter of 3 mm at a distance not closer to 50 mm from the edges of the product.
Assembling Karcas Komoda
1. Secure the top of the chest to the sidewalls, and then, retreating from the bottom of each sidewall to 100 and 116mm, spend on the internal surfaces of each of them parallel lines, thus tagging the base of the base.
2. Fasten the base of the screws of 4 x 45 mm, after drilling the guides and making the crushing under the countersunk heads of the screws.
3. Make a template with your own design for the bottom of the lower apron. Cut the apron with an electroller, and attach it to the base.
4. Having retreated from the top ends of the sidelines, make marks at a distance 212 and 228 mm to install the upper shelf. Secure the shelf.
5. We place the place of installation of the upper shelf divider, having measured from each side of the top 492 mm and spending parallel lines. We are in the same way the upper shelf, measuring from each side of 476 mm. We establish a divider, fixing it with screws with top of the chest and divider.
6. We place a place to install the middle shelf, measuring 212 mm from the bottom surface of the upper shelf. Please note that the rear end of the medium shelf was on the same level with the rear ends of the sidewall.
Assembly of domestic boxes
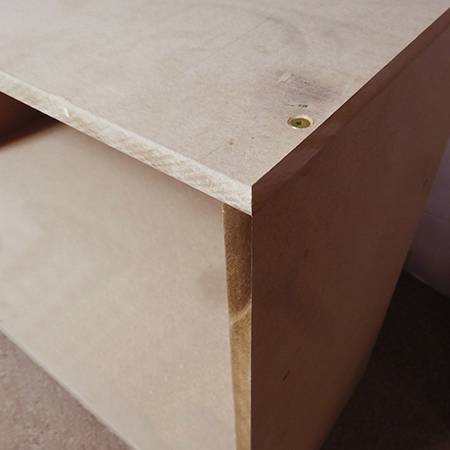
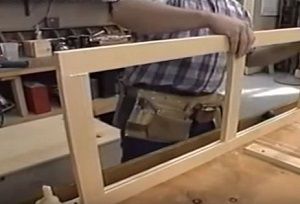
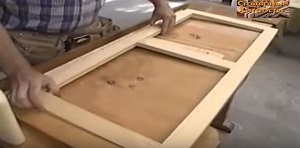
1. At the top to the bottom and fix the sidewalls and the rear walls of the boxes.
2. Install the front panels of the boxes.
Attention!
The lower end of the front panel of the bottom of the bottom must be set flush with the bottom of the box.
The top end of the front panel of the upper box should be set to be flush with the upper ends of the sidewall.
![]()
3. If you decide to install decorative mdf's mdf overlays, then cut them out in size and glue. For example, you can use glue Moment Installation Supersensile Plus MV-100.
Final duster finish
1. Fill all the holes from the screws with a putty with a wooden filler. Let dry.
2. Treat № 120 all irregularities special attention on the cropped edges. Make the final grinding of the skin No. 240.
3. You can paint the chest of drawers with an ecologically neutral acrylic enamel on a water basis, putting the paint in 2-3 layers with an intermediate drying.
4. If you decide to install the rear wall of the upper shelf, then pre-process and paint it, dry, and then screw into place.
Well, how to make a chest of drawers with my own hands, I told you. Dare.
By the way, if you reduce this chest of drawers in height (for example, remove the open shelf), then it will perfectly fit into the middle tier installed in the three-tiered bedroom, the drawings and a detailed description of the manufacturing process of which is available on the site.
The chest of drawers is a very popular object of furniture, which is not coming out of fashion for several centuries in a row. Its design varies depending on the interior styles, but the point still remains the same - comfortable in operation, a compact, but a spacious cabinet with a worktop on top.
To answer the question of how to make a chest of drawers with your own hands, first of all you need to decide which it should be in height and width, as well as how many drawers need to be owned. Therefore, first of all, a sketch or a drawing is made, in which all sizes are affixed, taking into account the place, which can be assigned to the similar cabinet tumbler. Based on the developed drawing, calculations are made essential materials, their purchase is carried out.
Dresser can be made of natural wood or chipboard. High-quality wood and its processing will cost, of course, more expensive than the woody composite, but it is not only an environmentally friendly material, but also more durable than the pressed stove of chips and glue.
If the task is set to perform a really beautiful and convenient piece of furniture, it is very important to choose high-quality material and make it from it, precisely in size, all the details that are needed well, before smoothness, process and fit together.
However, the first step is still chosen by the model of the chest, depending on its purpose and growth of the owner, so that the capacity and the convenience of operation combined.
Chests are manufactured in various versions, depending on the purpose of using them. And in order to determine the choice correctly, it is advisable to consider several models.
Standard linen dresser
Traditional dressers have always been intended for storing linen and small clothing items. Unlike massive cabinet designs, they occupy a small area and look quite aesthetic. Therefore, this piece of furniture is quite popular and today.
"Classic" type of linen chest
Its convenience lies in the compact storage of various things separately from each other, which makes it easy to find them. The dresser for linen can be equipped with a different number of drawers having a width of the design, there may be from two to six, but there are other models in which a larger number of lower-size retractable lockers are provided.
And, of course, the "useful area" becomes a tabletop where the interior decoration items are asked.
Dresser Penal
Dressers may have different shapes and heights. Since the hallway usually has a small area, it will be more suitable for a compact narrow and high penalty, which is also quite spacious.
There may be stored post-season shoes, various treatments for her, as well as hats and scarves. For all these items, one way or another, it is necessary to find a place, and it may well be such a comfortable piece of furniture as the chest of drawers.
Dresser for children's room
Dresser for the children's room can be called a necessity, as it is able to replace several pieces of furniture at once. A special design with a folding panel has been developed, which opens if necessary and closes, so as not to interfere with the use of retractable boxes.
In such a chest, you can accommodate a large number of children's accessories and necessary items necessary for the baby, distributing them in boxes. Since this piece of furniture is compact enough, it will not clutch the space of the children's room, which is very important for the child.
This furniture accessory will not be superfluous and then when the kid will grow up, because in the dresser you can store not only clothes, but also toys. If the cabinet is initially finished in gentle pastel children's shades, then as the child grows it to other, more "adults" colors.
Dresser with an open shelf for living room or bedroom
This version of the chest is perfect for the living room. You can install the TV, and the open cabinets are used to store books that you want to have at hand. In the closing boxes, various little things are perfectly hidden, which are always quite a lot in any house.
In the bedroom, this dresser will become an excellent bedside table, suitable for storing linen, setting the night light and other frequently used accessories in this room.
It is quite suitable for a similar design and for the bathroom, but in this case, for its manufacture, it is necessary to choose exactly natural wood, which is to be treated with moisture-repellent compositions.
Of the information, how many functions are able to perform this piece of furniture, and how comfortable it is in operation, it suggests a logical conclusion that the dresser can be considered a necessity for most homes and apartments. If a desire arose to make it yourself, then before starting to work, it is necessary to get acquainted with the process technology to be able to really appreciate your own forces.
Example of preparation, processing of parts and manufacturer
From how accurately made and processed parts, the quality and appearance of the finished product will depend on the most direct degree, so it is necessary to consider the nuances of this process.
Details for each model are made according to a specific drawing, and their connections can be different. The table below shows the various moments of processing wooden parts and assembly of the design of the chest, which often cause questions. By the way, the example above can also be considered as a "sample to follow the imitation", to fit the model-shown model of the chest under its dimensions.
The dresserly shown in the table is made of a natural board and a bar with a thickness of 20 mm, using plywood inserts with a thickness of 10 mm.
| Illustration | Brief description of the operation |
|---|---|
 | The edges of the board must be perfectly smooth, for this they are cut, processed on a fugoval machine. |
 | Even better, if there is a raysmovy machine, passing through which the boards acquire the perfect accurate size in thickness. You can, of course, spend this process and manually, but it will take much more time and strength. So it makes sense to get billets to contact the joinery workshop. |
 | To obtain one-piece panels from the board, they glue them and tighten into clamps, leaving in such a position until the glue becomes complete. In order not to damage the wood with clamps, the collecting panel is plated by a bar, and clamps are installed on it and tighten them. |
 | Grooves and spikes in bars are cut with a milling mill with a special nozzle. The machine can be professional stationary or manual, but the skill of working with it will be needed anyway. |
 | The illustration shows the connection of two bars on the principle of "groove-spike". Thus, frames are collected, of which in some designs it consists of a framework for pull-out drawers. |
 | The compound of frames of the frame is carried out on the joinery glue and is necessarily tightened in clamps until complete burials. |
 | The frame in the process of its assembly must be constantly checking on the evenness of direct corners. This is performed by the coated and the diagonals. |
 | To check the rectangles of the structure and the qualitative subsequent embroidery of the connecting nodes, the frame is placed in a special template, assembled from plywood and a bar fixed at right angles. By writing the frame on the template, in its compounds at an angle are driven by one thin nail. |
 | In the side walls that make from previously glued into shields and dried boards, the groove is cut on the edge with a milling mill, the so-called quarter. It will help connect the details densely, which will make the design more rigid. |
 | Then, the grooves are placed on the side walls and rolls into which the frameworks under the boxes will be pasted. The grooves are cut with a milling and pouch the chisel. The beginning of the groove should be located at a distance of 15 mm from the edge of the panel. |
 | In order for the frame tightly in the groove, the angles equal to the size of the groove depth and the distance of its remoteness from the edge are cut on it, in this case - 15 mm. |
 | Next, the grooves are missing with glue, and frames are tightly installed. |
 | The top frame installed on the glue into a quarter-cut-cut side panels is additionally fixed with cloves or thin self-pressing in a step of 100 ÷ 120 mm. |
 | The illustration shows the fixation of the frames on the design. |
 | When the glue in the design is driving, it is rotated and placed down the front side. When turning, the design elements can be somewhat shied somewhat, so rectangle must be monitored, measuring the diagonal. They naturally must have the same length. |
 | The next step of plywood with a thickness of 10 mm is cut out the rear wall of the structure, its edges are processed. Then it is placed in the selected quarters of the side panels. The sheet is fixed to the walls of cloves or self-stakes, whose caps should be dried into wood. Then, the dresser is raised and installed on the bottom panel. |
 | In this model, the space between the two upper frames should be divided into placement of two boxes. For this, the middle of the front part of the chest is determined, and the vertical cut of the board is installed in this place. Such a jumper will become not only a separating element, but also make the design more rigid. The partition is fixed in the desired marked place by self-draws through the upper and lower frame, with a mandatory preliminary mining of thin holes under fasteners to prevent the appearance of cracks. |
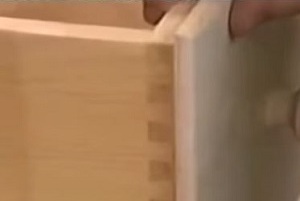 | Next, you can move to the manufacture of drawers. The most difficult thing in this process is a toothed corner connection, which manually shape will be practically impossible, so without a machine with a special milling nozzle can not do. |
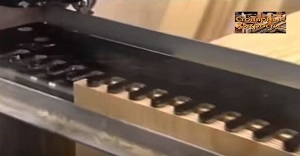 | Before starting to cut the teeth, a quarter is cut in the edges on the edge for accurate docking of two panels. They are fixed in a special clamp located on the edge of the working workbench. One board is stacked horizontally, another vertically, online to each other in the selected quarter. The edges of the boards are shifted relative to each other to the teeth. Then they are clamped from above the template for which cutouts will be made. |
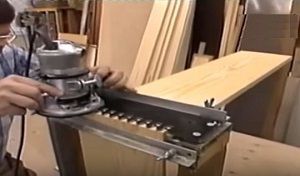 | Cutouts are carried out by a mill with a selected configuration of the selected configuration - direct or type "swallow tail". |
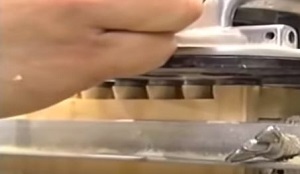 | In this photo, you can consider that the connecting teeth are cut into the cutter simultaneously on one and another board. Thus, after it is inverted from the panel connected panels, and the edges are combined, teeth and grooves must be perfect to each other. |
 | In addition to spikes, for angular compounds, to assemble the design in all three boxes of the box and in the front wall, the grooves mill in which will be installed with a plywood panel of the bottom. |
 | The next step is to assemble the walls of the drawer. Shipping teeth are combined with each other and gently stick to a wooden hammer. |
 | After that, the bottom part is moved to the walls of the walls, and then the front part of the drawer is installed. |
 | Further, control of the levels of angles is controlled - for this, the diagonal of the box is measured. Then the plywood bottom is fixed to the front board of the box with the help of carnations. |
 | Then, the front panel is fixed on the front wall of the box, to which the selected handles are screwed. |
 | If you plan to raise the chest on the legs, connected by an arcooked jumper, as shown in the illustration, then for the convenience of marking, you must first make a template. |
 | For the manufacture of legs, three boards are first sealed on the corners with a toothed (spike) compound. Then on the facade board is marked by the template. Next, two arcs are connected by a straight line, which is drawn up by a ruler (horizontal level). |
 | In the same principle, and using the same template there are marked and on the side of the base. |
 | Then, on the designated lines, neat cuts are made using jigsaw, and then their edges are processed. |
 | When the legs are cut and connected, on the upper edge of the resulting design, it is glued, and then screwed the bar with self-taps, which will create the necessary platform for installation of the box of the chest with an internal frame. |
 | Further, the top edge of the stand under the chest must be made - it is treated with a curly cutter. |
 | Then, the chest of dresses again so that the legs can be fastened to the lower frame. The design of the legs is frozen first on glue, and then screwed by self-tales. |
 | On the back side of the chest to the legs is glued, and then the triangular brazer is screwed, with the cut-off of it under the bar, fixed on the lateral legs. |
 | The upper edge is screwed to the side leg, and the bottom to the frame frame. This ensures the stiffness of the design of the coaster stand. |
 | The next step is cut and tryable. In the frame under it there are places where the holes are made and the holes, through which the panel will be fixed to the frame frame and sidewalls using the ducts inserted into it. |
 | Further, the countertop is fixed on the upper frame of the structure from below, self-draws having a length of 5 mm less than the total thickness of the tabletop boards and the frame under it. |
 | The tabletop panel can be processed in advance or after it is fixed on the walls of the chest - the edges of the boards on both sides curve the cutter and grind to perfect smoothness. |
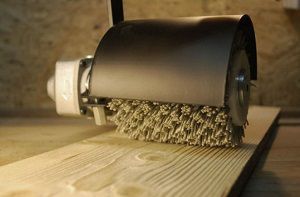 | If the product is planned to be left in natural form, without staining, then if you wish, you can select the texture of wood using a special brush with a metal pile. |
 | If you plan to paint or varnishing, this process is produced in several layers on water based. |
The resulting example demonstrated an assembly with compounds, which traditionally longly applied to the manufacture of various wardrobes made of natural wood. But it should be noted that such operations are only amenable to experienced masters, armed, to everything, a special tool of professional class. However, in our time, the task can be easily simplified if you purchase various fasteners that are presented in a large assortment in furniture accessories stores.
"Classic" chest of drawers with six boxes
This version of the chest is made of boards and plywood with a thickness of 19 (20) mm, with its manufacture, you can safely rely on the instructions, the data in the above table.
Details of construction
For the manufacture of this model of the chest, the following materials and details will be required:
| the name of detail | Detail size, mm | Number, pieces |
|---|---|---|
| Details for the trader travelery | ||
| Facade of the base (board) | 90 × 89 × 787 | 1 |
| Rear base (board) | 19 × 89 × 445 | 1 |
| Sidewalls bases (board) | 19 × 89 × 445 | 2 |
| Base timing (board) | 32 × 32 × 89 | 4 |
| Facade Foundation Foundation | 19 × 64 × 800 | 1 |
| Sidewalls apron base (board) | 19 × 64 × 470 | 2 |
| Rear Plank Founding Apron (Board) | 19 × 64 × 673 | 1 |
| Sidewalls (plywood) | 19 × 432 × 1029 | 2 |
| Rear wall (plywood) | 19 × 743 × 1029 | 1 |
| Front and rear layers supports for drawers | 19 × 89 × 743 | 12 |
| Side Stackers Supports for Boxes | 19 × 89 × 235 | 12 |
| Front Planck Apron | 19 × 89 × 724 | 1 |
| Back plank apron | 19 × 89 × 572 | 1 |
| Side straps Apron | 19 × 89 × 337 | 2 |
| Racks of facial frame | 19 × 38 × 1029 | 2 |
| Polozia | 6.4 × 19 × 425 | 6 |
| Facial frames | 19 × 38 × 686 | 7 |
| Angular struts | 19 × 89 × 89 | 4 |
| Cap | 19 × 470 × 800 | 1 |
| Details for making boxes | ||
| Decorative facades | 19 × 146 × 711 | 6 |
| Side walls | 19 × 114 × 419 | 12 |
| Front walls | 19 × 114 × 654 | 6 |
| Rear walls | 19 × 101 × 654 | 6 |
| Bottom part (plywood) | 19 × 406 × 654 | 6 |
| Guide Planks | 6.4 × 19 × 419 | 12 |
And this table shows the connecting and fittings for the assembly:
| Name of elements | Elements size, mm |
|---|---|
| Surpes with countersunk heads | 6 × 44. |
| Wooden copper | 6.4 × 31.8. |
| Surpes with countersunk heads | 6 × 19. |
| Finishing nails | 22 |
| Screws for wood | 64 |
| Finish nails | 55 |
| Surpes with countersunk heads | 6 × 32. |
| Handles - at your discretion | 12 pcs. |
Base of the chest
Drawing number 2 - assembly of the base of the chest.
- Details for the base of the chest are manufactured in the size shown in the table and in the drawing. Facade and side elements that form legs, in this model have curvilinear forms, so they are placed on the template and plucked by the jigsaw. This process is described in detail and is shown in the above table. Figure cuts are made only from the front and side of the base, the rear panel consists of a whole board.
- Assembling ready-made elements is made on corner bars. The bars are glued to the front edges of the side panels and on the edges of the back plank. Then they are fixed to the panels with screws with secret heads flush.
- Further, the rear edges of the sidewall are missing with glue and fastened on bars screwed to the rear sheet, and also twisted.
- The facade of the base is glued to sidewall bars and is screwed at the last turn.
- When the basis is assembled, it must be pulled in clamps and control the evenness of the angles with the coated and measuring the diagonals.
- A frame must be laid on the base, called apron. Four strips for forming a frame are cut into size, one side of the slats is processed by a cutter that gives a semicircular shape to the edge of the board. Then, the edges of the planks, from which the front part of the apron will be formed, are cut at an angle of 45 degrees.
- Ready parts must be fixed to the base with glue. The glue is applied to the end of the base elements and corner bars. Further, alternately, the planks are stacked on the jammed surface. Their ends in the corners are also labeled with glue, and after that, the apron presses to the base of the clamps until the glue drying.
Making framework
While glue on the ground will dry, you can do the frame assembly.
Drawing number 3 - side wall of the chest.
- The sidewall panels are cut from the prepared boarding panels on the specified dimensions. Then, markup is made, with a support for the presented drawing, and the folds are selected on the edges of the parts, and then the grooves in which the folder frames will be installed. How these works are also shown and described in the first table.
The rear wall is made of plywood at the specified sizes.
- Next, the manufacturer is made, which will become supports for drawers. From the board, the slats corresponding to the dimensions are cut. The finished parts are collected in a single design with the help of the waders, which are placed on the glue - as it is performed, clearly can be seen in the drawing and in the table. The lower support frame is fixed to the planks of the apron, and the remaining frames for drawers consist only from the details of the supports. Collecting the frame on the glue, its diagonals are measured and compared, and then the structure is tightened with clamps. In the middle of the collected frame with the help of 19 mm screws, having a hidden heads, poloz is fixed.
- The next step in the grooves, carved in the sidewalls, faders for drawers are installed on the glue. They are moving into space of grooves as far as they stood on the same level with the front edges of the side panels.
- By installing all the frames in the sidewalls, you need to fix the rear wall of the chest, which will give the structural stiffness. The plywood wall is attached to the sidewalls with glue, and then fixed with finishing nails, with a size of 22 mm.
Fastening the frame on the ground
- The next step of the frame of the chest is fixed on the apron of the base. Work should be done carefully and only after full of glue grazing to prevent the design of the design.
- The frame is mounted on the foundation of the base, and its rear wall should be placed flush with the basis. From the front part and on the sides of the design, the apron should perform relative to the sides of the frame of 19 mm. By doing fitting and making markup on the apron, the frame is removed from it. After that, glue on the markup is applied on the apron, then the frame is installed in place and fixed to the apron of 64 mm long with screws.
Installation of anterior frame
- From the board, the side and transverse plates of the facade frame are made, according to the sizes in the table. The connection of these parts is carried out with the help of the waders, which are placed on glue.
- The distance between the cross should be 165 mm, as they will continue to be fixed on the front end side of the reference frame under the box. After the frame is ready, it is fixed to the sidewalls and frames on glue and nailed with finish nails with a length of 50 mm.
Countertop Chest
- The dresser's countertop is cut on the specified dimensions from glued together into the shield of well-processed boards. The edges of the shield are processed by a semicircular cutter - they must match appearance The edges of the apron of the chest.
- Further, in the upper corners of the frame, angular struts are installed, representing rectangles. They drill two holes for screws with a size of 32 mm, which are razed, and expand to the form of an ellipse. The struts are fixed in the corners of the frame with glue and screws.
- After the glue dries, you can mount the worktop on top of the frame. It is placed in such a way that her back side is to lie with the back wall of the frame, and the overhangs of the front and side sides were equally out of its limits.
- The countertop is fixed from below, it is fixed through the holes bonded in a 32 mm screwdriver. The glue during installation of this panel is not used, as it should be able to move slightly in the splashed holes when the temperature and humidity changes in the room.
Chest boxes
Drawing number 5 - assembly of drawers of the chest.
- The walls of the boxes are made of prepared processed boards according to the sizes given in the table.
- At the bottom of the walls, the grooves are cut into which the bottoms of the boxes made in size from plywood are cut.
- In this model, the chest of boxes of the boxes are connected on the corners not toothed thorns, but by the removal of the grooves, as represented on the drawing drawing. The walls began to be fastened with glue, and then tightened with self-tapping screws. After the rear wall is connected to the side, the bottom is set, and then the front wall of the drawer is mounted.
- Next, it is necessary to process the facade panel, which is fixed on the front wall of the box. To do this, its edges are processed by a mill, which will round the corners of the board. The facade panel is first fixed on glue, and then screwed up with 32 mm from the inside of the drawer. Before fixing the handles to the boxes, the layout of their location is made, and the holes are drilled at the desired points through which the mounting screws or screws are screwed in the handle from the inside of the box.
- After the box is almost completely ready, with outside Its bottom part, in its middle, two guides are fixed at a distance from each other at 22 mm. These parts are fixed on glue and pressed clamps to full burned. After that, the drawer is performed. It is installed so that the bands of the frame be located between the two guide drawers. If there are problems with the easy stroke of the box, then you need to turn off the poloz or guides, slightly expanding the distance between them.
Such drawers for this model need to do six, and, by collecting each of them, it is necessary to carry out the fitting, installing them in the framework of the chest. It is necessary to ensure that they do not simply move freely by polishes, but also beautifully served among themselves.
After the final assembly and installation of the boxes, you can proceed to finishing operations.
Chest of Five Boxes
Such a model of the chest can be made of natural wood or chipboard. If you plan to install this piece of furniture in the nursery or bedroom, it is best for the manufacture to choose all the well-processed boards.
The design of this version of the chest differs from the previous one by the fact that the boxes are equipped with modern metal guides, which eliminates the sufficient complex process of manufacturing and assembling frame support frames.
To make this version of the chest, you will need to make the following details, relying on this drawing:
| the name of detail | Detail size, mm | Number, pieces |
|---|---|---|
| Countertop (cover) chest | 900 × 530 × 15 | 1 |
| Montup (support under the lid) | 858 × 80 × 10 | 2 |
| Base | 858 × 500 × 10 | 1 |
| Sideways | 784 × 500 × 15 | 2 |
| Cocol | 858 × 50 × 10 | 1 |
| Facade of a small drawer | 442 × 181 × 15 | 2 |
| Facade of the Big Drawer | 886 × 64 × 15 | 3 |
| Side walls of the drawer | 450 × 131 × 15 | 10 |
| Front and rear wall of a small drawer | 364 × 131 × 15 | 4 |
| Rear wall | 801 × 131 × 15 | 6 |
| Separating panel between small boxes | 484 × 164 × 15 | 1 |
| Rear panel for fastening the separation panel and reference rail. But if the back wall is made of plywood, then this element is not needed in the design. | 858 × 164 × 15 | 1 |
| Bottom of a small drawer (Fiberboard) | 448 × 394 × 15 | 2 |
| Big Drawer (Fiberboard) | 448 × 831 × 15 | 3 |
| Rear wall of the chest (plywood or fiberboard) | 732 × 888 × 10 | 1 |
| Pens | At its discretion | 8 |
| Guide | 450 | 10 sets |
Cabinet assembly occurs in such a sequence:
- On the sides of the sidewalls of the chest, marking places is made:
- where the grooves for installing the bottom part will be cut;
- installations flush with the walls of the supporting planks under the tabletop;
- slice of the rear lower corner under the plinth so that the chest can be installed close to the wall;
- Lines for fastening guide boxes are made according to the following drawing and table with dimensions:
| Designation in the drawing | Necessary size, mm |
|---|---|
| N-1 | 160 |
| N-2 | 343 |
| N-3. | 526 |
| N-4. | 693 |
| N-5. | 144 |
- Next, the grooves are cut on the markup.
- After that, all elements are cut on the size specified in the table - the dummy box will be collected. This is a bottom panel, two support plates, the rear wall of the design, the base plate and the separation item, which is installed between two small boxes.
- On the lines of markup on the sidewalls are fixed.
- The bottom panel moves to the lower grooves to the rear edge.
- From above, the sidewalls from the front and the rear edge in the grooves are stacked and the support planks are fixed. After their installation, the design will receive sufficient stiffness for further work.
- Further, the posterior wall closes the plywood. It is screwed by self-drawing or nailed.
- Now you need to find the middle of the supporting slats and the rear wall, since the separation panel with the guides for drawers fixed on it will be recorded on this line. It is fixed through the support planks and the rear wall by self-draws.
- The next step is under the bottom panel in the facade part, the basement plank is fixed between the side walls. It can be fixed on metal corners, setting them from the inside, or with the help of a wanking, scoring them through the side walls.
- From above, the entire design is closed by a table top, which should be laid in the thief with the rear wall, and the front and side skes must have the same width.
- Next, all parts for drawers are manufactured. They are assembled by the same principle as in the previous embodiment, but the exceptions are mounted on their side walls roller guides, which are mounted according to the drawing.
Dresser with a table for a child's swaddling
This dresser can be called multifunctional, as it will serve as young parents not only for storing a large amount of baby clothes, but also an excellent place to massage, dressing or felling a child for a walk, as well as an ironing surface. All these features become performed due to the fastening on the tabletop of the sides and the folding part, with which the horizontal surface of the chest becomes almost twice as much.
For the manufacture of this model of the chest, having a total dimensions of 960 × 600 × 450 mm, it will be necessary to manufacture the following details:
| the name of detail | Detail size, mm | Amount |
|---|---|---|
| Countertop (cover) | 600 × 460 × 15 | 1 |
| Back Plancot Countertops Fencing | 100 × 555 × 15 | 1 |
| Side Planck Fence | 100 × 410 × 15 | 2 |
| Folding side plank | 100 × 380 × 15 | 2 |
| Flap cover | 600 × 265 × 15 | 1 |
| Side panel | 800 × 430 × 15 | 2 |
| Tightening plank | 75 × 563 × 15 | 2 |
| Rear wall (team, plywood) | 735 × 295 × 10 | 2 |
| Facade of the box | 177 × 595 × 15 | 4 |
| Side drawer | 100 × 400 × 15 | 8 |
| Rear wall drawer | 100 × 505 × 15 | 4 |
| Bottom drawer | 535 × 400 × 10 | 4 |
| Roller guides | 400 mm | 4 sets |
| Decorative handle | - | 8 |
| Connecting bar | - | 1 |
| Santer | - | 4 |
| Eurovintages (confirmation) | 7 × 50. | 28 |
| Screw | 3.5 × 16. | 32 |
| Screw | 3.5 × 30. | 8 |
| Shkant | 8 × 35. | 16 |
| Nails | 35 | 50 ÷ 70. |
| Eccentric with stock | d-25. | 2 |
How to make the details of the chest and collect them into the overall design - has already been described above. In this model, as in the previous one, the movement of retractable lockers is carried out with the help of metal roller guides fixed on the walls of the box and on the sidewalls of the boxes.
Therefore, in this case, it is only possible to focus on the manufacture and installation of elements that neither in any of the above models are the side strips and the folding design of the table.
According to the above drawings, the lateral slats of the fence and folding strips are manufactured. The side edges of the details are placed along the laid radius and are cut into the jigsaw.
According to the table, the tabletop is cut on the table, the folding cover and the rear wall of the fence. All items need to be well treated with a milling mill, rounding their ends.
Before installing a tabletop on the box of the chest, the stationary enclosing and folding structures are mounted on it.
To connect the posterior and side walls, the grooves are cut into the vertical edges of the back wall. They are inserted and additionally recorded by self-drawing on the back side of the side strips, which will be installed inpatient. Then, this design is fixed along the edges of the table top with the help of glue and ducks.
At that time, the glue will dry, the folding part of the table is made. To do this, at the edges of the folding panel there are places to which the planks will be secured. When closing, the folding panel must completely overlap the side and rear wall installed on the tabletop. Therefore, before installing, you need to thoroughly measure the place where the fastener screw will be installed.
Having determined this point, in the side and folding bar, the holes are drilled in which the screw with a mortise-fitting nut - an eccentric, allowing the folding design to be freely open and closed. After that, there is a test of the folding detail of the chest, and if everything went successfully, the countertop can be mounted on the ready-made box.
The tabletop is installed on top of the walls of the box and is fixed with the help of the wanks glued into the ends of the sidewall.
Retractable drawers are assembled by the same principle as in the previous version of the chest, and the parts for them are manufactured in the size shown in the table.
It is impossible to call the manufacture and assembly of the chest with a simple process, since all its parts must be manufactured and processed with extreme accuracy. For this, of course, you need at least minimal experience in working with woodworking tools. However, everything can be learned. And if there is a big desire to start working with a tree to make various furniture items from it, it is worth trying their strength in this exciting craft.
And in conclusion, a very interesting video, in which even an unprofessional, but still really the wizard shares its secrets and conducts a detailed analysis of the mistakes made by him in the manufacture of the chest of errors.
Video: Dresser with your own hands - "Laying the flight"
The assembly of the chest may be pretty delayed if you have no experience. However, problems can be avoided if you follow the applied instructions, but what should I do if the instruction on the assembly of the chest was too laconic or vice versa, too confusing and incomprehensible? In this article, we will consider the most common algorithm and try to prevent everything in the most accessible form.
Packaging of the Chest
Dressers are usually supplied in disassembled form in a compact, but rather heavy packaging. In case the packaging is sealed with scotch, it is recommended to open it with a stationery knife, the blade of which should be directed by tangent to avoid damage to the parts inside the parts.
Inside the package contains the shelves and walls of the chest, as well as minor parts and accessories, which are usually in the sealed package or zip-lock, as well as instructions for assembling the chest and configuration data.
At this stage an important point It is the inspection of all surfaces for the presence of marriage or other mechanical defects. In addition, you should make sure that the grade of the chest is complete and in place all small details.
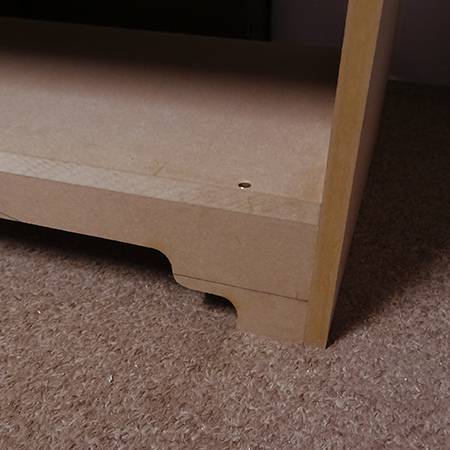
Assembly of the base of the duster
The base of the chest consists of several parts: this is the bottom, the lid, the side walls and the back plank. The back plank is usually done from the fiberboard or organity (however, depends on the model of the chest), but to deal with everything else will not be particular problems.
The assembly of the chest, with his own hands, it usually begins with the fact that the lid and bottom are installed fasteners to which the side walls will be fixed. As fasteners are used and stocks of eccentrics; The first are clogged with the hammer and the holes for them are somewhat wider, the second, respectively, is twisted with a screwdriver or a screwdriver, and the holes for them are already. After the shelves and rods occupied their positions, preliminary preparations for the assembly of the chest are completed.
Assembling boxes
This is a somewhat more laborious process than the assembly of the very foundation. The boxes are usually several, and therefore it is important not to get confused in the components of their details. The box consists of the following parts: facade, side walls, bottom. Grouple all parts so as not to search and not to try out of the total stack: if there are five boxes, then there should be five stacks, if four, then four ... The assembly principle is the same: the ducks and eccentrics.
Important remark. When you, weigh the hammer, plant the surfaces on the specks, to avoid dents and chips on the front sides, it is recommended to use wooden bar as a gasket - it should be applied to the shock to the shock and beat it, and not directly on the walls or lid of the chest.
Handles are also attached to the boxes. The configuration of the handles may be the most diverse, and therefore, for the correct installation, you need to be credited with the instruction that comes with the chest.
Installing boxes, completion of assembly
Pages for guides are installed on the inner side walls of the chest - how many boxes do you have, so much should be pair of grooves for guides. The guides themselves are mounted on the lower corners of the boxes. Both those and other elements are installed with the help of ebovints.
Further, fasten the legs to the bottom of the chest, and then to one of the sidewalls secure the bottom, as well as the lid of the chest. This assembly scheme of the chest is the most convenient, since we still have to install the back wall, which is a sheet of fiberboard or organitis. For the rear wall, there are usually grooves, where it can easily come. We set the second side wall and tighten the eccentrics and the bolts where it is necessary.
![]()
Since the boxes are already collected, then you just need to put them in place. In case all guides are installed correctly, the boxes easily will be extended and start.
Check the entire design to stability on a flat surface, make sure that there is no distortion anywhere, and all the details are adjacent to each other tightly and without gaps, and also check the degree of ease with which the boxes are extended and driven.
Drawers should pay special attention: whether they are not cling to each other, whether one box uses the other.
After that, it remains only to put the plugs on the eccentric hats and the assembly of our chest will be fully completed.