Many craftsmen, when renovating a bathroom, are wondering how to make a shower cabin from tiles with their own hands. Plastic pallets do not always fit into the interior, and the dimensions of some bathrooms do not allow them to accommodate a factory-made shower stall.
Options for creating a shower cabin from tiles with your own hands can be very diverse. You can choose any shape and size of the tray, which will allow you to easily fit it into even the smallest bathroom, while saving space.
Before installing shower cabins, it is necessary to thoroughly prepare the area where the structure will be located. It is better to place it in close proximity to communications in order to avoid future problems with pipe routing. If there is a need, at the initial stage of the project, the old floor in the shower is dismantled and a place is made for a new one: a concrete slab covered with mineral wool and roofing felt is installed, and a concrete screed is poured on top. Before installing the pallet, the floor must be thoroughly waterproofed, for example, with bitumen mortar or mineral mixtures. For communications, polymer or profiled membranes can be used.
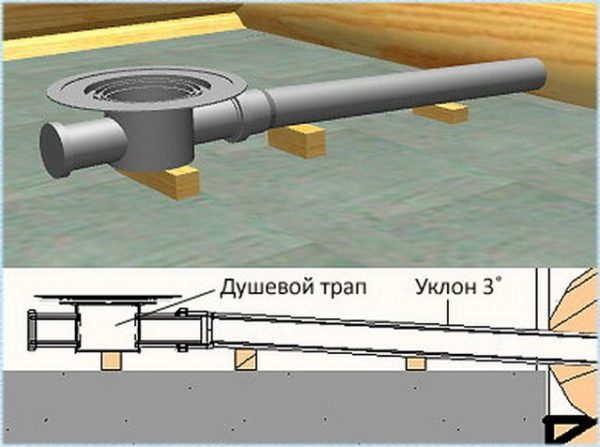
When developing your shower cabin project, you need to pay attention to the fact that for normal water drainage, the pan will need to have a slope. In addition, the pipes located under the structure must also be raised using, for example, wooden blocks, so that the water actively flows towards the sewer, otherwise a constant musty smell will remain in the bathroom.
Choosing material
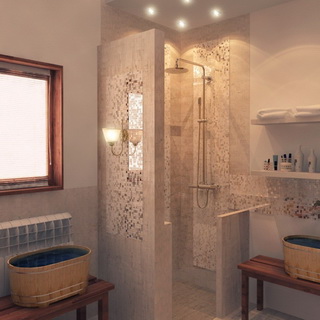
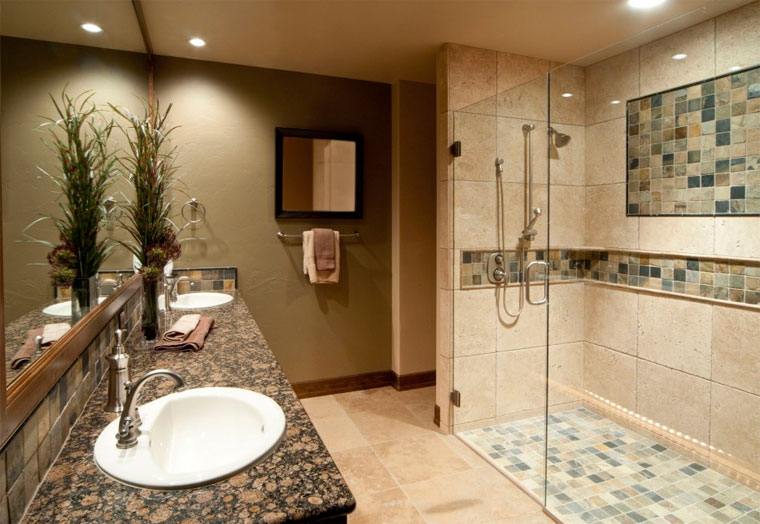
Shower trays can be made from the most different materials: cast iron, acrylic, concrete, natural stone or brick. The easiest to install are acrylic trays, they are usually angular or square and are sold at plumbing centers. They come complete with doors or a screen, and the walls can be tiled with the same tiles as the rest of the bathroom. In general, a shower enclosure made in this way is not much different from a factory shower stall. The only difference is that it has more room for the decorator’s imagination: the finishing tiles are chosen solely in accordance with your taste preferences.
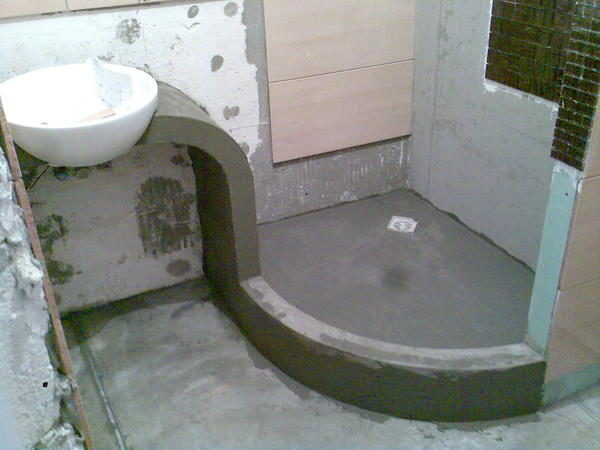
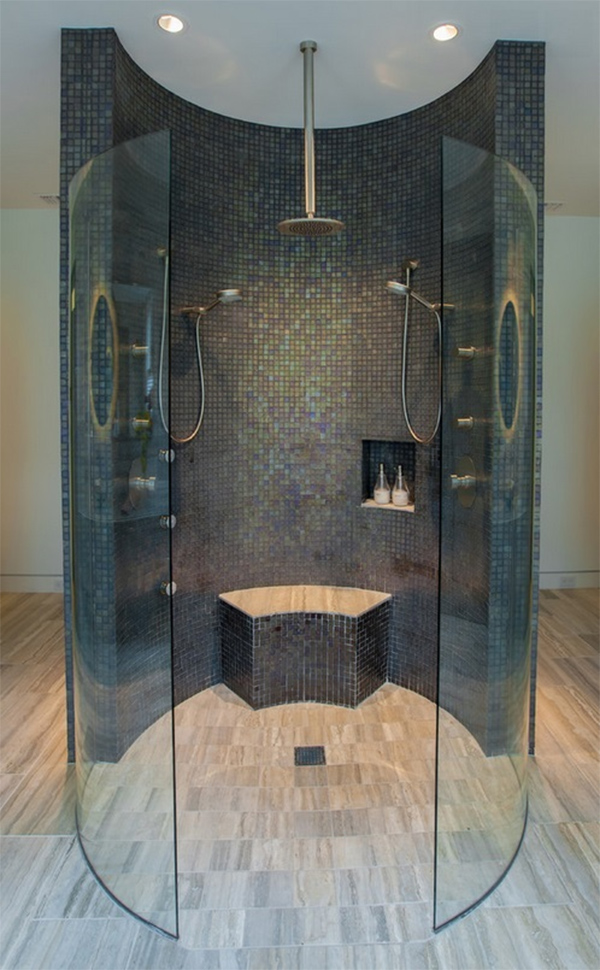
However, a built-in shower with a DIY shower tray can fit seamlessly into a bathroom of any size and style. In this case, only you set its parameters and shape. Don’t forget to decide on the height of the sides: if a tiled shower cabin is installed on the ground floor of a private house or in a bathhouse, then if you wish, you can even build your own mini-pool. Such a structure should be erected on a wooden floor with caution, since when filled with water it will have enormous weight, and the ceiling may not be able to withstand such a mass.
Before starting construction work, determine the dimensions of the future pallet; the optimal shower room would be approximately 90x90 cm. The minimum possible dimensions are 70x70 cm, however, plump and tall people will feel uncomfortable in such a stall; even a fragile woman will have difficulty sitting down or bending over in it.
In addition, if there are small children, elderly or disabled people in the house, then it is necessary to take this fact into account when arranging the shower: it is worth making the sides low, smoothing sharp corners and equip the floor of the pallet with anti-slip tiles.
Stages of making a shower
To install the pallet you will need the following materials:
- brick;
- concrete or cement, self-leveling mixture;
- trowel and spatula;
- paint brush;
- drill with mixer attachment;
- sand;
- roulette;
- level;
- drain - a plumbing device for draining water.
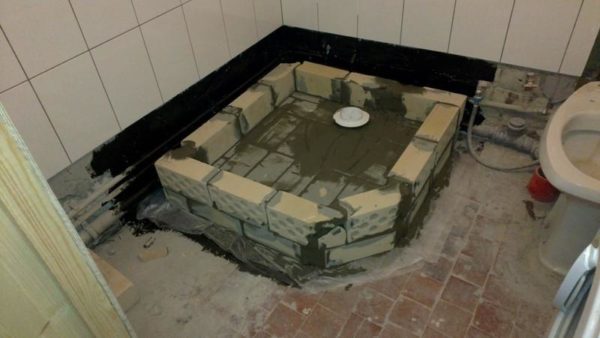
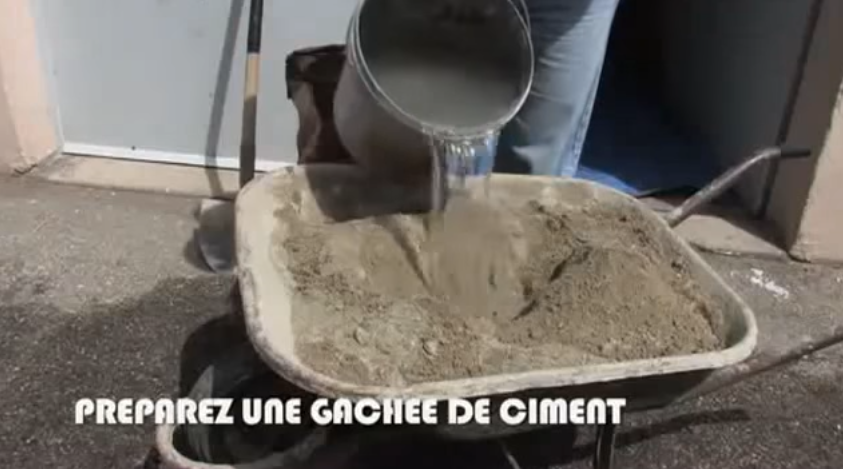
The perimeter of the pallet is laid out on a prepared and waterproofed brick base. Bricks should be laid using a special mixture or cement-sand mortar: 1 part cement is added to 3 parts of clean sand. We install a drain in the place for draining the water, connect it to the sewer pipe and fix it. The angle of inclination of the floor towards the drain must be at least 3°.
The formed contour of the pallet is filled with concrete screed, using a trowel to level the walls. After drying, the resulting structure is coated a second time. waterproofing solution. Then you need to prepare the surface of the tray for the tiles by applying a self-leveling mixture and sealing the seams with mastic.
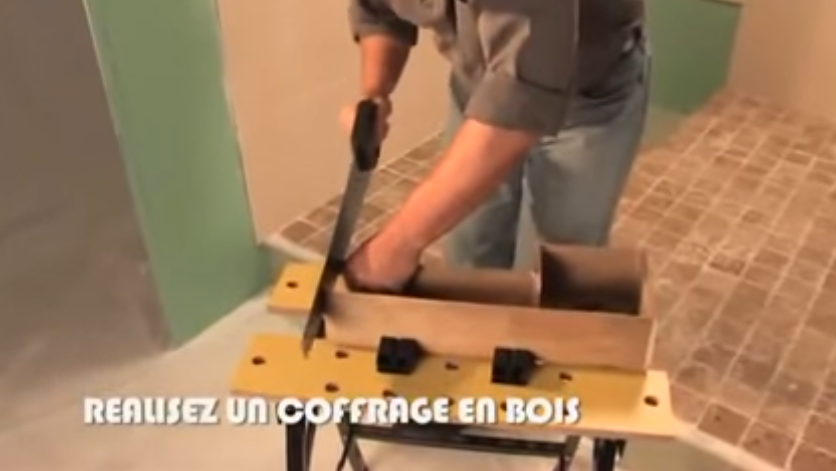
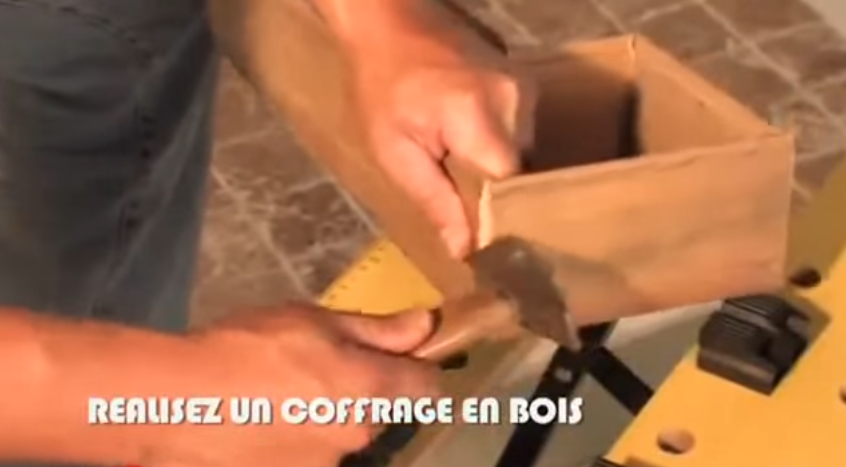
If you decide to make a pallet from concrete, then you will need to make formwork - this is a structure made of boards into which mortar is poured. After the resulting base of the pallet has dried, you need to remove the wooden structure and screed the bottom, ensuring that it slopes towards the ladder.
Shower tiles
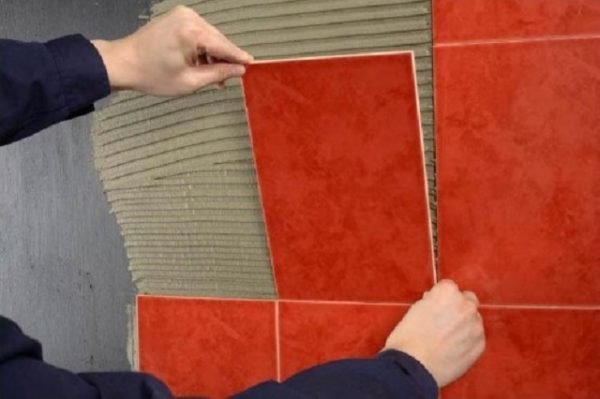
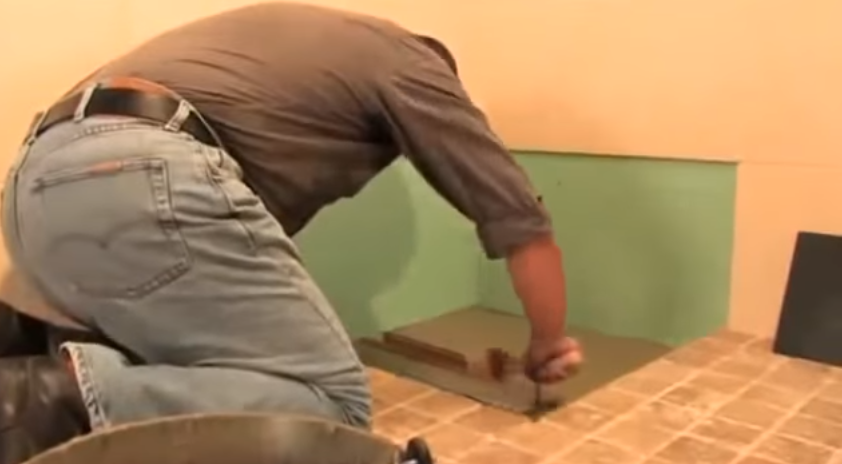
The final stage is cladding. Laying tiles in the shower is the most creative stage of the job. Choose a tile or mosaic pattern and a matching grout color. Do not forget that the tiles are laid from one corner using a special tile adhesive solution. After tiling the shower, use a special rubber spatula to rub the seams; excess material will need to be removed with a damp cloth. After finishing work, you need to thoroughly wash the tiles and wipe them dry.
So, the tray for the bathroom is ready, you can choose a shower mixer, install plumbing and doors. In the resulting shower stall, you can place a washable curtain on a special cornice attached to the ceiling, or a glass door, which you can choose to suit every taste: from frosted, colored or corrugated glass, with a pattern or pattern applied by sandblasting. Whatever form of pallet you choose, there are many construction companies that carry out individual orders for the manufacture and installation of shower doors.
Shower in wooden house: difficulties in arranging a durable structure
Arranging a shower room in a wooden house is a task that is simple only at first glance. When implementing it, we will have to solve a number of problems related primarily to the properties of wood. However, if you have the necessary knowledge, a solution can be found in almost any situation.
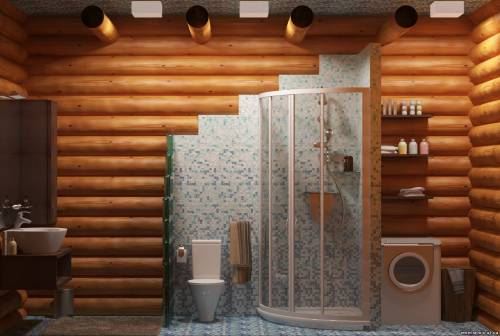
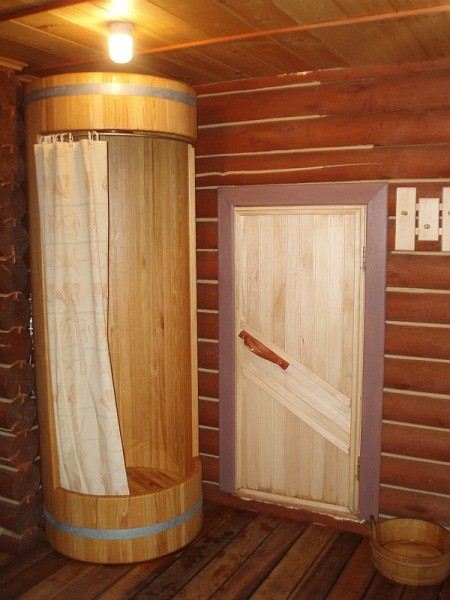
Even in a wooden house you can make a comfortable and practical shower
Possible options and their features
Before making a shower in a wooden house, we need to decide whether we will purchase a ready-made stall or spend time and effort, but equip a corner for hygiene procedures ourselves. Each of these options has both pros and cons.
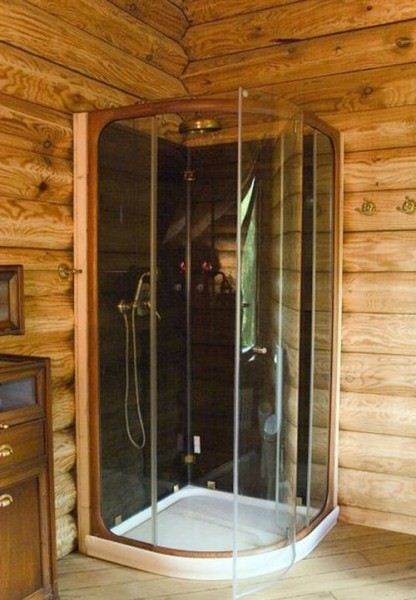
A finished booth and a tile “apron” are a simple but expensive solution
- Installation (provided that all pipes have already been laid) takes several hours.
- You can use the booth within 24 hours after installation.
- The product is airtight, which minimizes the effect of moisture on the wooden cladding and frame.
- High price of equipment.
- Most cabins come in fairly compact versions, so it won't be too spacious inside.
- When parts become worn out, it will be very difficult to replace them.
- All work can be done with your own hands, which will save on labor costs for craftsmen.
- Independent design makes it possible to build just such a structure that will fully meet our requirements.
- Design and construction work takes quite a long time.
- To work, you need to have the appropriate skills, as well as purchase the necessary equipment.
- Low tightness leads to the fact that wooden structures are constantly exposed to moisture.
As you can see, the installation of a shower in a wooden house, both according to the first and second options, has its own characteristics. The choice here is entirely yours, and below we will look at an approximate algorithm of actions in both cases.
Open wall option
Installation of a finished cabin
If we bought a ready-made shower stall, then we can install it quite quickly. As a rule, the product comes with enough detailed instructions, therefore, to successfully complete the work, it will be enough to simply follow its recommendations.
We carry out installation work as follows:
- First, let's prepare the room. We connect water supply and drainage pipes to the installation site, and treat all wooden parts with a moisture-proof compound.
Note!
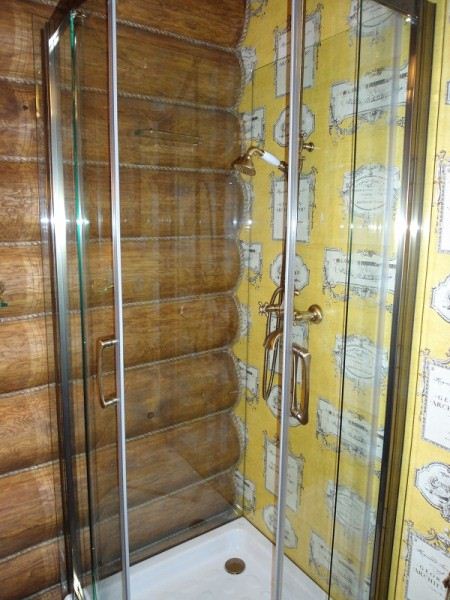
Some corner models are produced without rear curtains: the calculation is that the structure will stand close to the wall.
In this case, the wooden paneling must be protected by tiling or installing shower screens made of glass or polycarbonate.
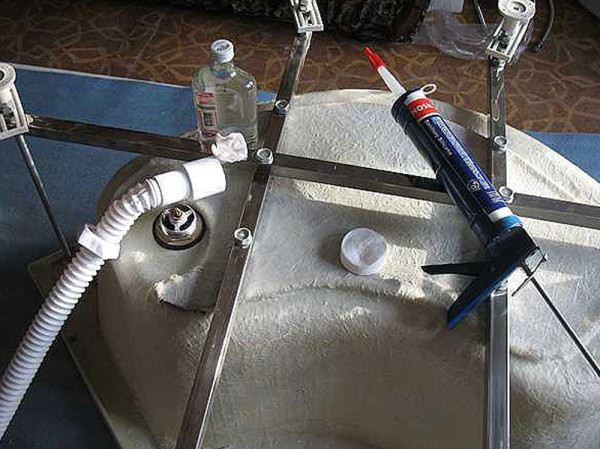
Attaching the legs to the pallet
- We attach the legs to the cabin pallet. We place the pallet on a wooden floor and align it horizontally by rotating the adjusting screws.
- We attach from below sewer pipe to the drain hole. If the booth is located in close proximity to the riser, you can use flexible corrugation.
- We attach the lower guides for doors and fixed curtains to the pallet. We fix the guides with screws, and then seal the joint with silicone.
- We fix the back panel on the wall, and then connect plumbing equipment . faucet and shower head.
- If necessary, connect the power wires(they are usually used to operate a radio, fan or space heater).
Important!
All wiring in the bathroom is laid in a hidden way.
And since the work is being carried out in a wooden house, we must lay the wires in closed cable channels made of non-flammable material.
- After this, we fix the vertical supports and glazing(or polycarbonate panels).
- At the final stage, we hang the doors on hinges or install sliding panels on the guides.
- We seal all joints. after which we leave the booth open for at least a day.
As you can see, the design is quite airtight, so the toilet and shower can be placed in a room lined with wood.
It is much more difficult to make a booth from scratch, and we will talk about this in the next section.
Construction of a shower
Laying communications
A construction shower in a wooden house is a rather complex design. Ideally, work on its arrangement should begin at the stage of finishing the room itself.
What do we need:
- We install additional supports under the floor in the place where the shower tray will be located. If the finished floor is supported by joists, then we lay a number of racks here that will prevent the wooden beams from sagging.
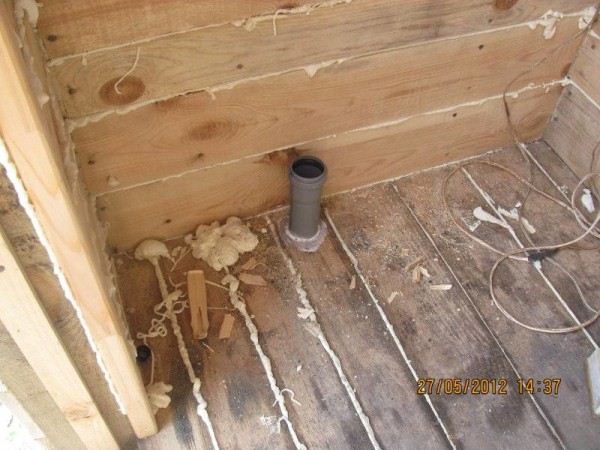
The photo shows the outlet of the drain pipe
- We also lay the drain pipe in advance. We bring one end of it into the room, and pass the second through a hole in the foundation or base.
- The next point is ventilation. It must be quite effective, because otherwise high level humidity will cause wood damage by mold fungi, premature failure of load-bearing structures and finishing.
Note!
Natural air draft is usually not enough, so in ventilation duct an exhaust fan is built in.
In this case, the influx is ensured either through work wall valve(rarely used, as it allows cold air to enter), or due to a gap in the bottom of the door.
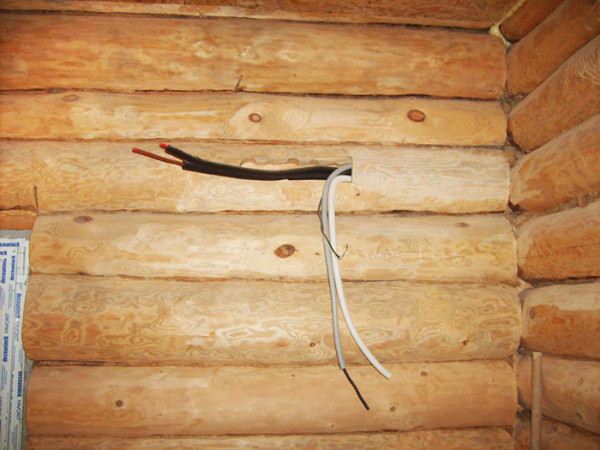
Output of wires in cable channels
- We lay water supply pipes and wires for the water heater and fan under the wall cladding. As we noted above, the wiring must be laid in non-flammable casings.
Preparing the base
To make a shower corner with your own hands in a wooden house, you need to spend a sufficient amount of time and money to protect the base from moisture.
We proceed as follows:
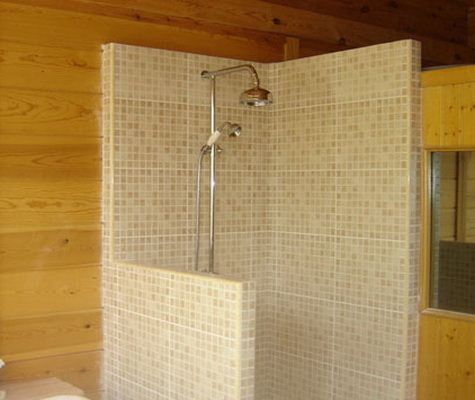
Tile fencing
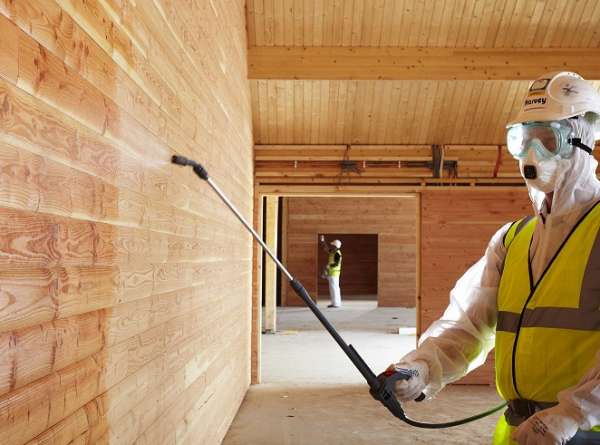
- We treat all wooden parts with hydrophobic and antibacterial impregnations.
- We carefully level the walls of the nook, and then line it with ceramic tiles. We grout the seams between the tiles with a silicone-based compound, which will allow us to prevent liquid from seeping into the wooden base.
- We also tiled the area of the floor directly in front of the shower. If a pallet on supports will be used, then we lay the tiles under it as well.
- When installing the pallet on a flat base, carefully level the floor underneath it. For leveling we use cement-sand mortar, which we pour onto wooden base with a laid moisture-proof membrane.
Floor leveled under a pallet
- If the drain will be done simply in the floor, then we form a drain from inclined planes. There should be a drain hole at the bottom of the drain, which we protect with a grill. We cover the surfaces with tiles containing abrasive particles that prevent slipping.
Advice!
In this case, it is worth making a small threshold between the room and the shower itself by laying bricks on the floor and tiling them.
The presence of such a threshold will reliably protect the floor from moisture.
Completion of work
The shower room itself in a wooden house is simply equipped with your own hands:
- If the design provides for this, then we install a tray on the tiled area of the floor, which we attach to the drain pipe.
- If a tray is not provided, then you can put a grate of sanded slats on the floor - it will be more pleasant to step on it than on tiles.
Original decoration of a shower room in a wooden house. Naturally, you can’t do without water-repellent impregnations.
- To conclusions water pipes, fixed in the wall, we connect the mixer and shower.
- We install vertical posts on the sides, to which we attach side walls made of polycarbonate, translucent plastic or tempered glass.
- Inside we attach a shelf for soap and other hygiene items to the wall.
- We install a door on the front part or hang a curtain made of thick polyethylene.
Conclusion
A shower room in a wooden house can easily be made with your own hands at an acceptable cost of time and money. The main thing here is reliable protection of wood from moisture, so you definitely can’t do without special impregnations, tiles and well-functioning ventilation. This article will help you understand the nuances, so study it carefully before picking up the instrument.
http://gidroguru.com
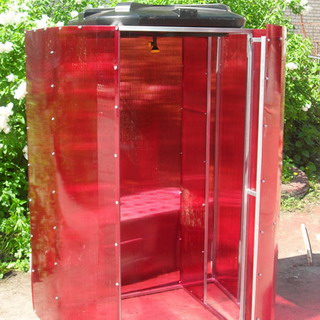
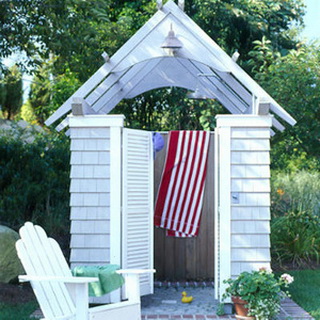
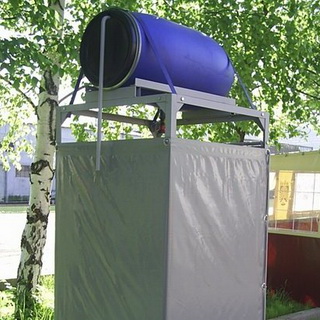
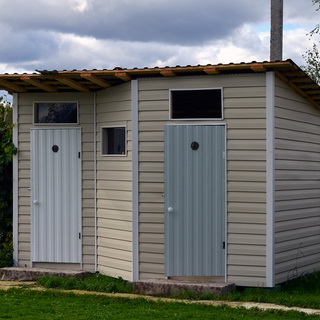
When finishing a summer shower, performing external work, it is important to choose a material that is resistant to precipitation. It is also desirable that the exterior decoration be successfully combined with other country buildings. When decorating a shower in a country house, the same materials are used inside as for showers located in the house. Among the leading ones are plastic panels and traditional tiles.
How to decorate the inside of a shower
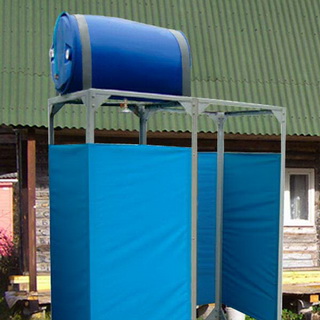
So as not to disturb the interior summer cottage, it is recommended to decorate the cabin for the summer shower in the same style as the rest of the garden buildings. For external upholstery, you can use any material: moisture-resistant plywood, fiberboard, plastic or wooden lining, etc.
It is advisable to insulate the booth using polystyrene foam. They need to fill the entire space of the frame. The polystyrene foam pad must be covered with plastic film using a construction stapler. Interior finishing can be done on top of the film.
Finish the interior country shower Can plastic panels, very convenient to use. They are able to reliably protect wooden parts from rotting.
Recently, materials with waterproof properties, such as PVC film, oilcloth or linoleum, have become especially popular when decorating showers in the country. These materials can be fixed with slats coated with protective layer varnish
The wooden parts of the shower stall should be carefully treated with drying oil and then painted. Thanks to this, you can extend the life of the entire structure. However, it is not advisable to paint the wooden walls inside the cabin.
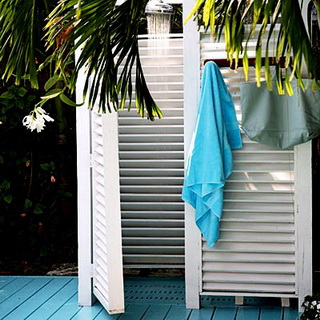
These photos of the interior decoration of a summer shower show the whole variety of modern finishing materials:
Summer shower tiles
The most practical material for interior decoration The walls in the summer shower stall are tiled. It must be laid out to a level that exceeds human height by 40-60 cm. This is necessary so that the upper boundary between the tile and the wall is less exposed negative impact moisture. Tiles can be glued to walls using a special tile adhesive, but they are often laid on cement mortar.
Before tiling the inside of the shower, the adhesive before laying must be diluted with water in the proportion indicated on its packaging. You should not dilute all the glue at once; it is better to do this as you lay the tiles. It is best to start cladding from the bottom of the wall. To prepare cement mortar, it is necessary to mix 1 part of cement grade M 500 and 4 parts of clean sifted sand. Then add water to the consistency of thick sour cream.

The procedure for using mortar and tile adhesive is the same. Using a special notched trowel, apply glue or cement mortar to the tiles, and then press the tiles tightly to the wall surface. When tiling a shower, be sure to always have a soft rag on hand to remove any excess adhesive or grout that protrudes from underneath the tiles. The remaining tiles can be used to cover a concrete or brick shower floor. You should remember that there is a need for a high threshold between the washing compartment of the summer shower and the dressing room so that water does not flow into it.


During wall covering tiles You can drill holes for further installation of shelves for shower accessories, and also install a rod for a curtain separating the washing compartment from the dressing room. In the locker room, it is recommended to make hooks for clothes and hang a mirror, if space allows.
Exterior wall decoration for shower
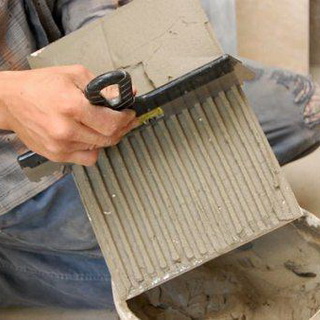
After the construction of a brick summer shower for finishing the walls on the outside, the walls can be plastered. It is recommended to start plastering from the top. To do this, moisten a small area with water and, using a grater, carefully apply first a less thick layer of solution, and then a thicker one.
![]()
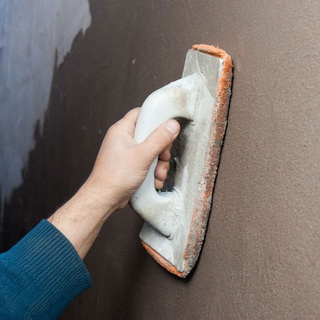
The thickness of each layer should not exceed 5 mm. The plaster must be applied evenly over the entire surface, otherwise it will not dry at the same time, and the layer will be uneven.
After a few minutes, use a trowel in a circular motion to grout the plastered surface until it becomes even and smooth. If the solution has already hardened and will not rub well, then it needs to be moistened with water by sprinkling the surface with a matting brush. This process must be repeated in the same sequence until the work is completed.
Plastering the corners of the walls must be done using a wooden strip attached to them. Approximately 7-10 minutes after applying the solution, the lath should be carefully removed, the corner should be corrected and rubbed.
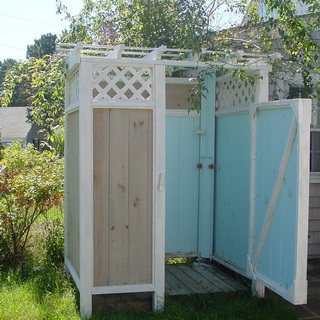
Here you can see photos of the shower finishing inside and outside:
3649 0
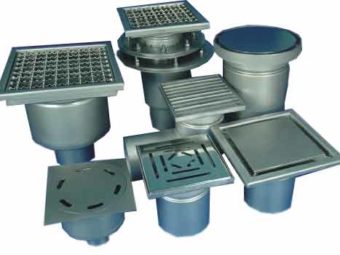
Available in implementation a large number of various trays for shower cabins. They are quickly installed, affordable for the vast majority of users, and quite practical to use. But experienced plumbers do not recommend installing such devices in bathrooms.
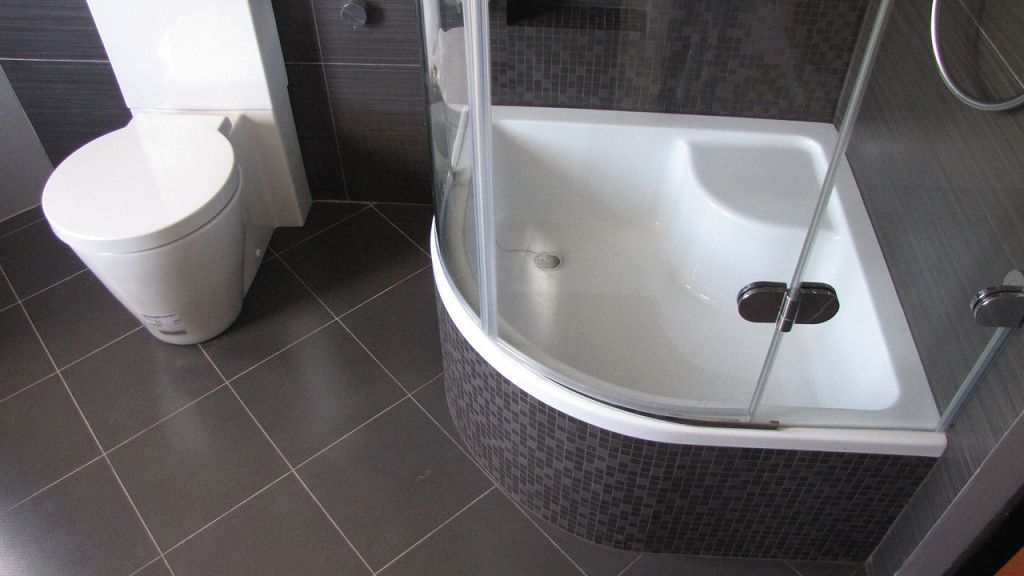
Cladding the walls of a room does not present any problems; the technology is common and no different from the widely used one. Some difficulties may arise during the installation of floors. Each type of drain has its own characteristics, but there are general recommendations for all.
The water is removed into a drain or channel. The drain is located approximately in the center of the shower; the channel is installed near one of the walls of the room. As an example, we will look at the most common option for a shower without a tray - the drain (drain) is located in the middle of the shower.
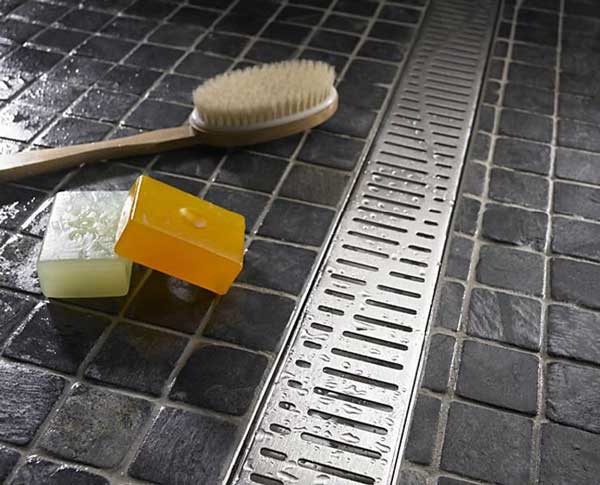
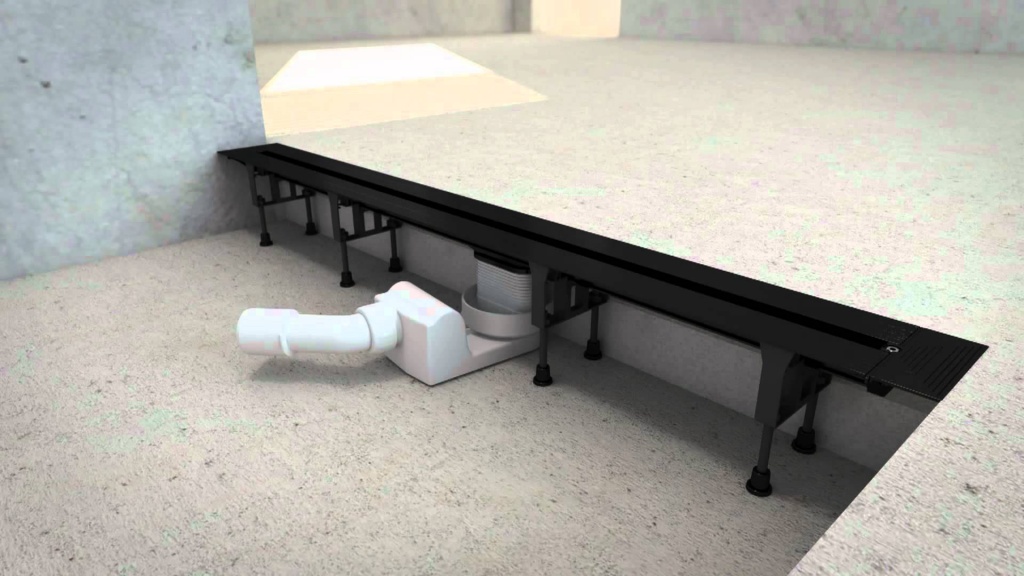
Table. Types of shower drains
| Kinds | Description |
|---|---|
| Products made of plastic are resistant to aggressive environments, lightweight, durable and easy to clean. They are suitable for installation in any sanitary areas, in apartments and private houses. |
| Not only the body, but also the decorative grille is made from stainless steel. |
| A horizontal cast iron drain is mounted in the floor, the connection with the cast iron pipe occurs horizontally. The ladder has a grate. |


Marking and preparing the base
This is a very important stage of construction; it is difficult to correct mistakes; you must carefully carry out all recommended operations.
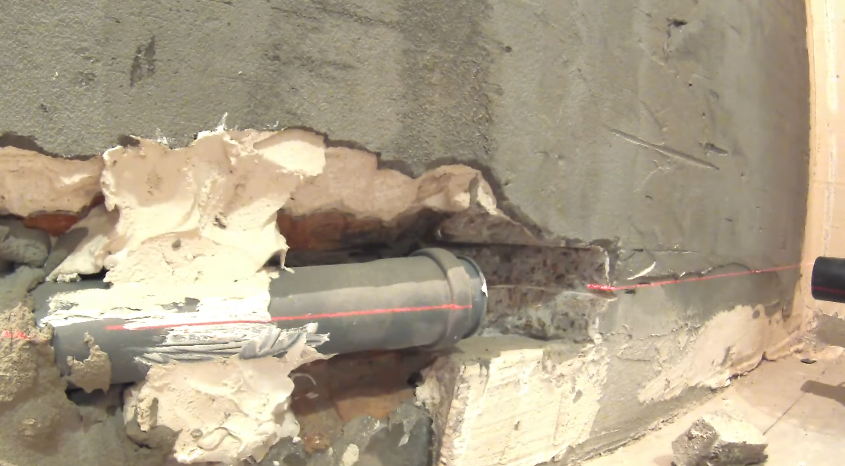
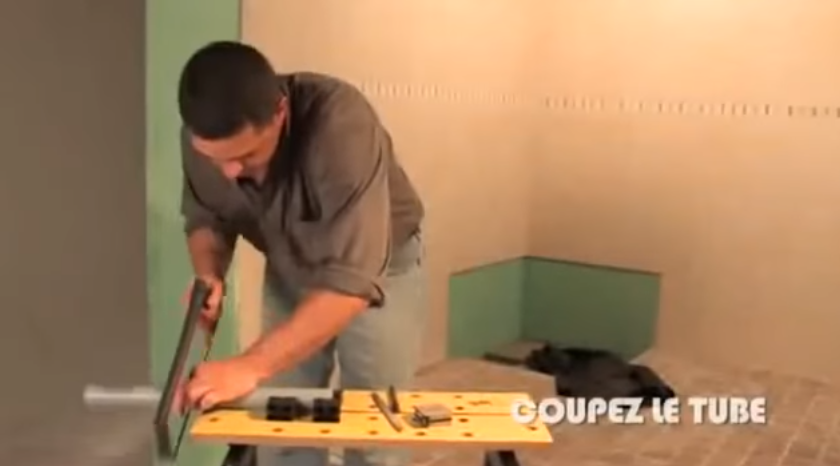
Step 1. Connect the sewer to the location of the shower compartment. For installation, the wall will have to be tapped; the diameter of the pipe for draining water in the shower is sufficiently 50 mm. The pipe exit from the wall should be located in the center of the area; to achieve this position, the plastic pipe should be cut.

Practical advice. It's not worth pursuing high precision. The fact is that the socket connection of the elbow makes it possible to slightly adjust the position of the outlet hole. The limits of fine adjustment are ± 1–1.5 cm, this is quite enough to eliminate mistakes.
Step 2. If there is no screed for floor coverings in the room, then determine the level of the zero mark. The front part is located at the zero mark ceramic tiles, all dimensions below are indicated with a minus sign. Those on top are indicated with a plus. This applies to all indications of the level of arrangement of architectural elements during the construction of various buildings and premises; such standards apply in construction drawings.
Step 3. Install the laser level and adjust it so that the beam is in the middle of the sewer pipe located in the wall.
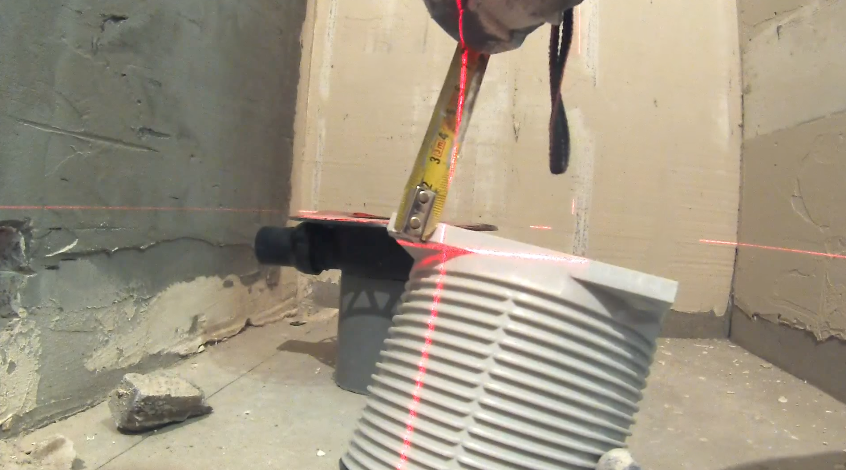
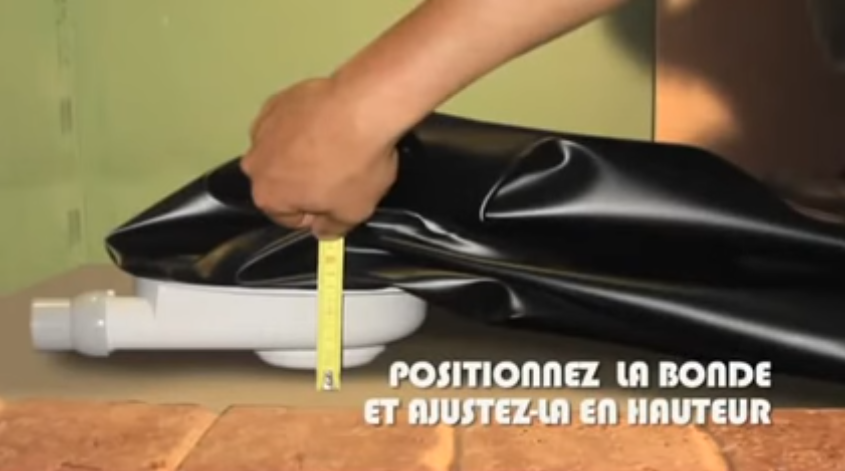
Place the ladder at the intended installation location and adjust its position so that the axis of the inlet pipe is slightly higher than the beam. For example, if it is located at a distance of one meter, then the height difference should be approximately one centimeter.
Practical advice. Don't make the slope too big, the water will drain away just fine. And the large slope of the floor tiles causes a deterioration in the comfort of taking water procedures.
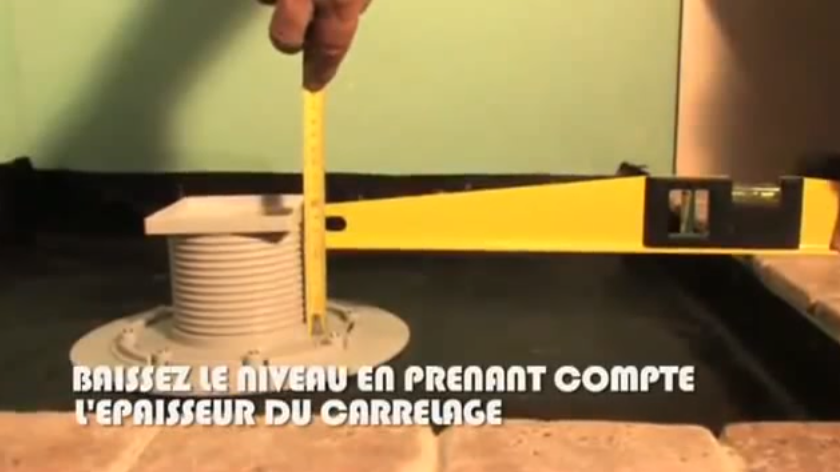
When setting up the ladder, consider the height of the glass when assembled drain device will be slightly higher due to the upper platform. The thickness of the top platform of the glass is approximately a centimeter. Make a mark one centimeter above the beam on the wall; this will be the level of the drain hole of the drain being installed.

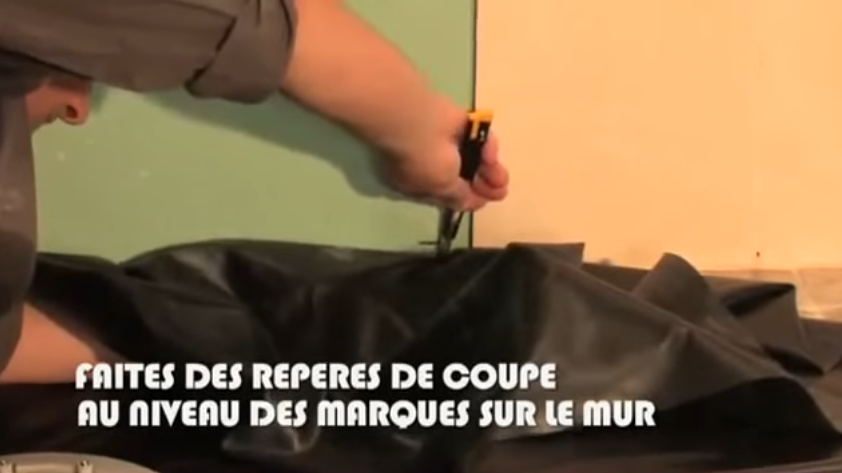
Step 4. Make marks above the beam at a height of approximately 2.5 cm to tilt the surface. The mark indicates at what level the ceramic tiles will lie against the wall of the room. The same marks should be made along the entire perimeter of the shower stall. The thickness of the ceramic tiles is within five millimeters; it can be ignored; it will not have any noticeable effect on the quality of the pallet. The total thickness of the screed will be slightly more than twenty centimeters. This indicator needs to be known to determine the amount of cement-sand mortar for pouring and screeding the base.
Step 5. Make marks with a pencil along the beams of the laser level, and then mark lines on them with a rope and blue.
How to make a base
Specific materials and technologies must be selected taking into account the overall thickness of the concrete. In our case, the layer height exceeds twenty centimeters, which is quite a lot. To simplify and reduce the cost of work, we offer the following technology.
Mark lines on the wall along all layers; there is no point in following them exactly, but such marks will be useful for orientation.
Important. Before pouring the solution, be sure to waterproof the joints between the floor and walls. Use any existing materials and technologies for this. Practitioners recommend using liquid mastics and special waterproofing tapes made of non-woven materials. Their cost is insignificant, and their efficiency is at the appropriate level.
Before starting pouring, you should carry out a set of special construction measures to connect the drain; we will discuss them below. The base must be completely hardened before the top tile can be laid.
How is the drain connected?
Before you start construction works, carefully study what parts the ladder consists of. This knowledge will help you correctly resolve issues that arise during pouring and avoid mistakes when marking.
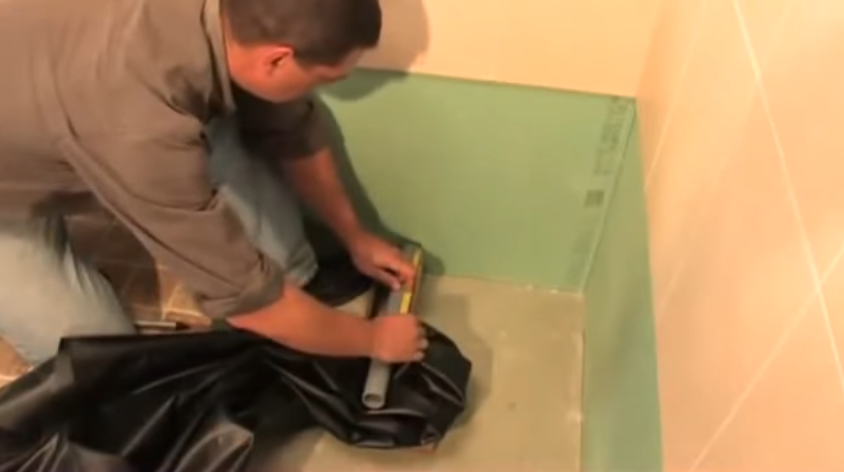
Step 1. Using a tape measure, determine the exact location of the ladder.
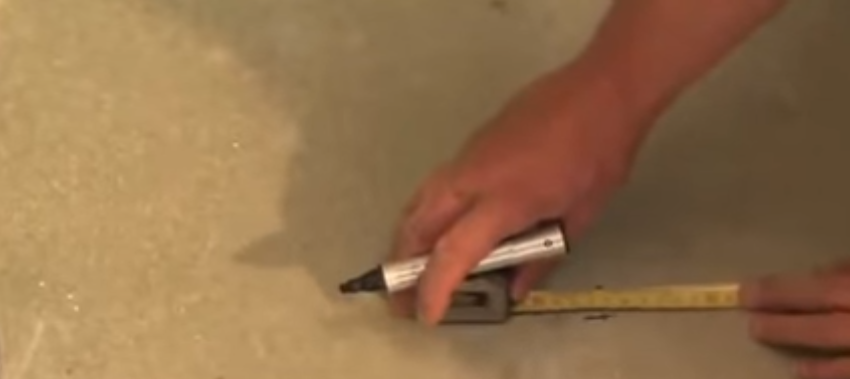
It is advisable to install it in the middle of the shower, but with certain adjustments. We have already mentioned above that the edges of the ladder must rest against the edges of the tiles, otherwise great difficulties will arise when cutting them. And the cut tiles in the center of the floor look very ugly.
Practical advice. If the tiles in the room have already been laid, and only the area under the shower remains to be completed, then the position of the drain must accurately take into account the location of the tile joints.

Cut tiles should be placed near the walls, where they are not so noticeable. If you cannot match the position of the outlet pipe of the drain and the sewer pipe, this is not a problem. Due to the rubber seals, the device can be slightly moved in one direction or another.
Are these adjustments not enough? The problem will have to be solved by bending plastic pipes. How to bend them? Gently heat the plastic pipe with a hair dryer around its entire circumference, constantly monitoring its temperature with your hand. Once the plastic becomes soft, begin to slowly bend the pipe in the desired direction. Make sure there are no sharp bends. Hold the pipe in the desired position until the plastic cools. In order to speed up the cooling process, the pipe can be cooled with a wet cloth.
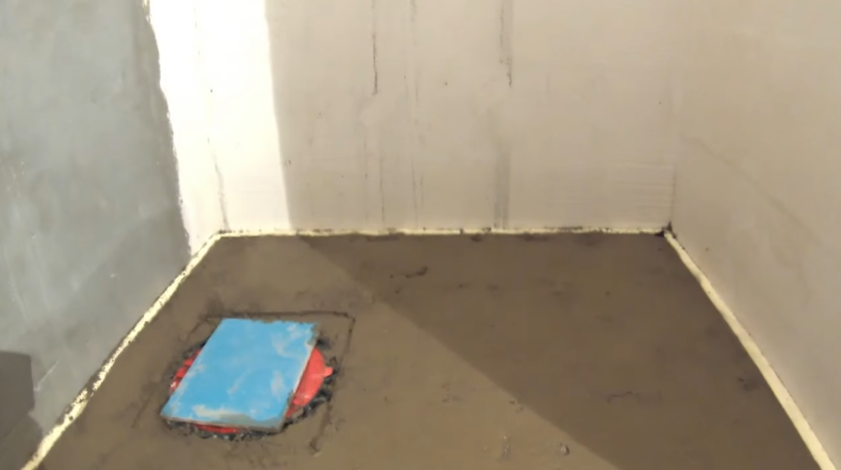
Step 2. Make formwork for the ladder. It can be made from OSB board, plywood or moisture-resistant plasterboard. Before production begins, temporarily connect the assembled drain to the sewer pipe and install it in place. Take the dimensions of the formwork. The distance between it and the elements of the ladder should be only a few centimeters. This technological distance is required to facilitate the final installation of the drain.
Knock down the formwork with small nails or self-tapping screws; the height of the formwork should be several centimeters higher than the diameter of the pipelines connected to the ladder.
Step 3. Place the assembled formwork on the ceiling, check its position using the lines drawn on the wall. To prevent the structure from moving during concrete pouring, it is recommended to fix it. You can drive several nails or dowels around the perimeter, the main thing is that the formwork does not change its location during work.

Step 4. Prepare a cement-sand mortar. If possible, use expanded clay as additional fillers; if not, then fill with one solution. Pour it in turn on each side of the formwork and carefully level the plane with a trowel.

Step 5. Check that the filling is correct and allow time to harden. The time depends on the composition of the solution used; in most cases, work can be continued a day after the end of pouring.
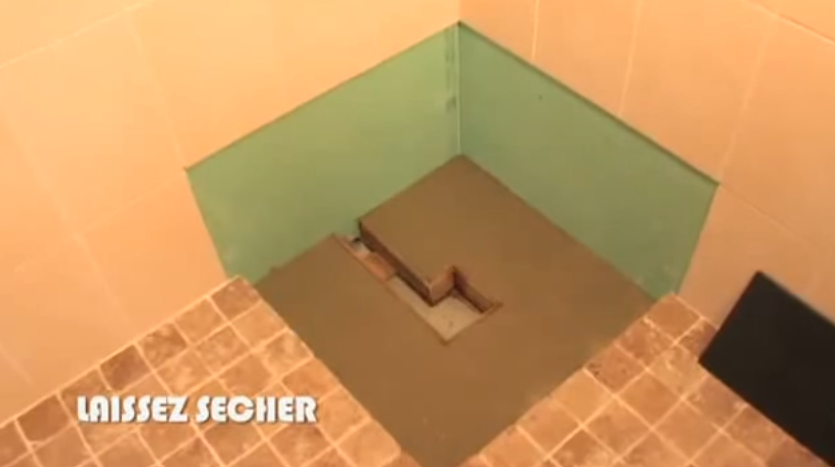
Step 6. When the solution has hardened, dismantle the formwork. To do this, use a hammer to carefully beat off the formwork parts one by one, trying not to damage the fill. If during dismantling it is discovered that the solution has often not reached the minimum strength, stop dismantling and wait another day.
Important. If the room is very warm and dry, then the solution should be moistened generously with water every day. Without water they cannot flow optimally chemical reactions, the solution will never gain the planned strength.
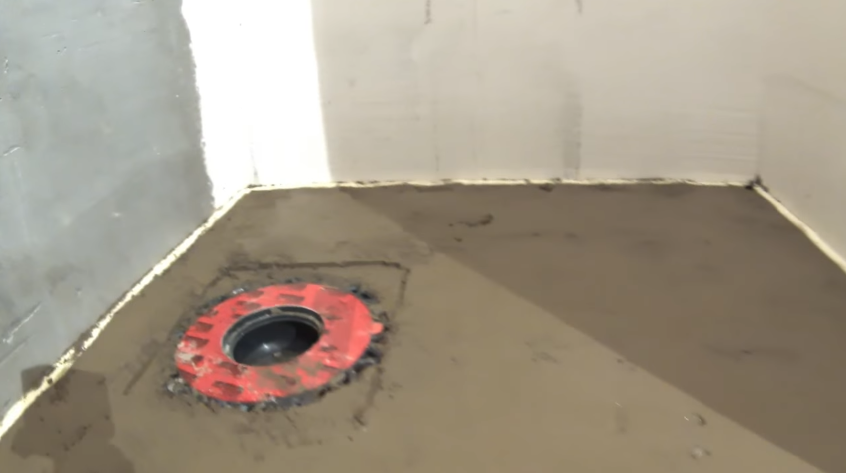
Step 7 Install the ladder in the prepared place and check its position.
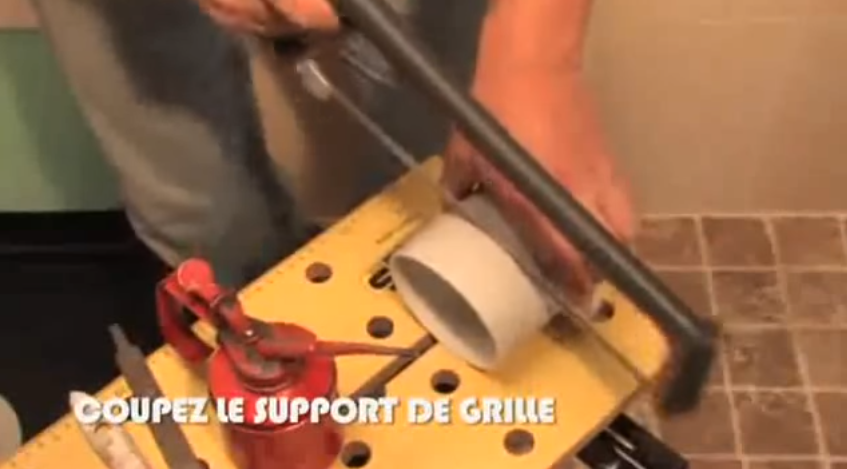
Most devices have height-adjustable legs, which greatly facilitates installation of the equipment. Connect the drain outlet pipe to the sewer pipe. The device includes plastic pipe for these purposes. Measure the required length and cut.
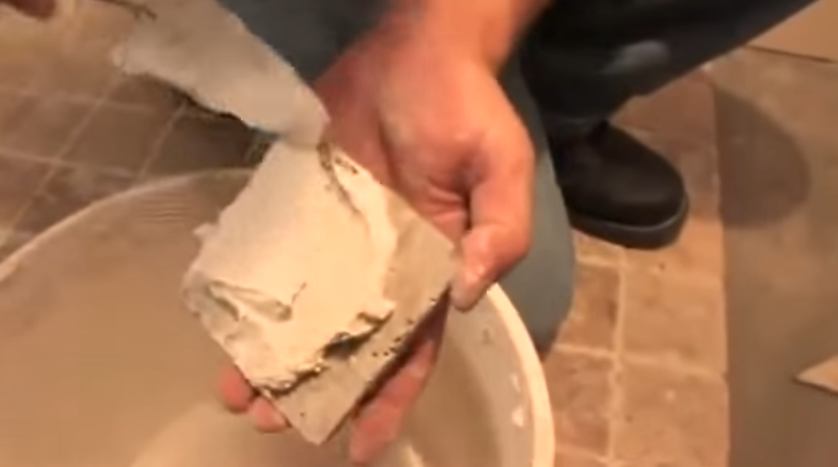
You can cut with a grinder with a metal disc or a hacksaw. After cutting, be sure to remove the burrs and make a chamfer. Burrs are cut off with a sharp knife; they can be chamfered with a grinder. Hold it in one hand and carefully press the end of the pipe against the flat surface of the disk with the other. Rotate the pipe constantly until a chamfer is formed. There is no need to be upset if the width of the chamfer is not the same around the entire circumference; this parameter has no meaning. The chamfer is needed only to ensure that the rubber seal is not damaged when connecting the elements. Before joining, the surfaces should be moistened with soapy water or any oil used.
Practical advice. In some models of drains, the pipes are connected with glue, this somewhat simplifies the installation process. There is no need to make chamfers; the ends of the pipes are lubricated with glue and inserted into each other.

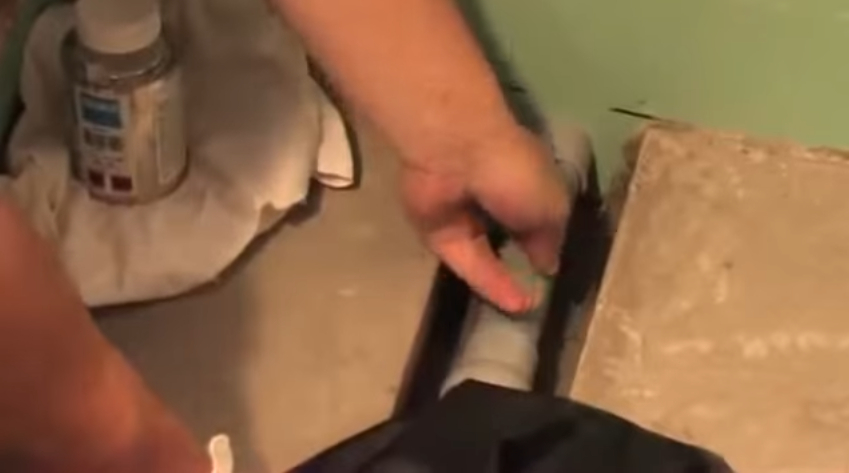
Applying glue (on both sides of the pipe)
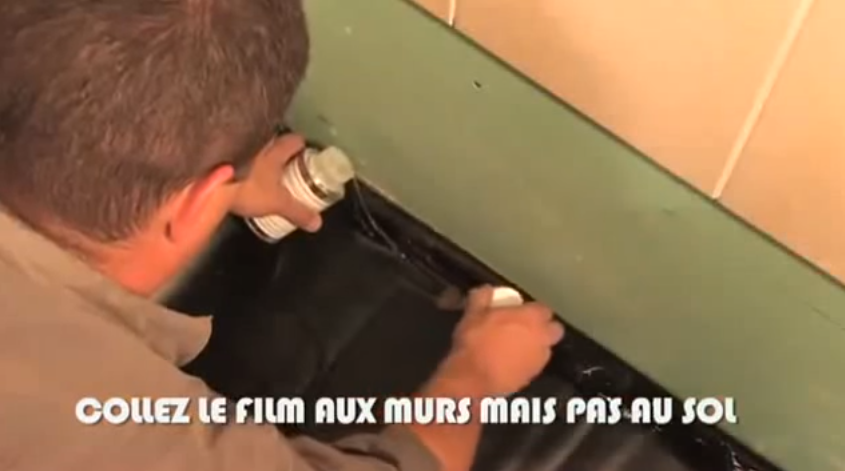
Step 8 Cover the surface with waterproofing. It can be purchased separately, but there are options for completing devices with waterproofing. Level the surface of the material, be sure to bend it at the junction of the floor and walls. The height of the hem should be 1–1.5 cm lower than the plane of the ceramic tile.
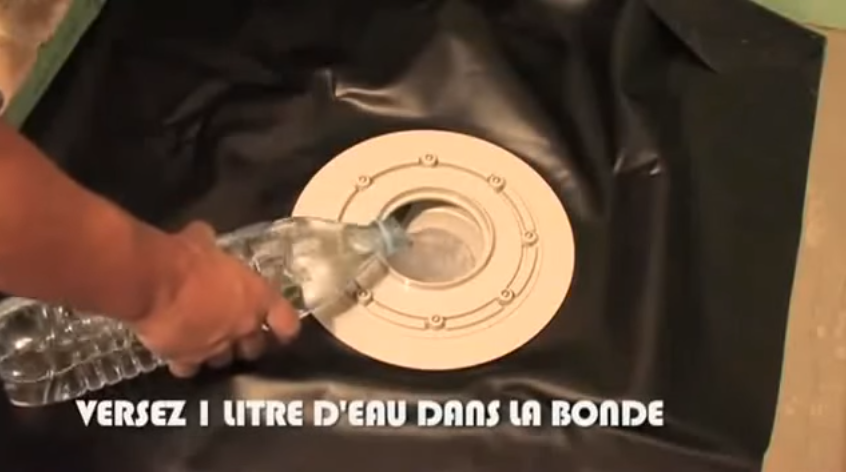
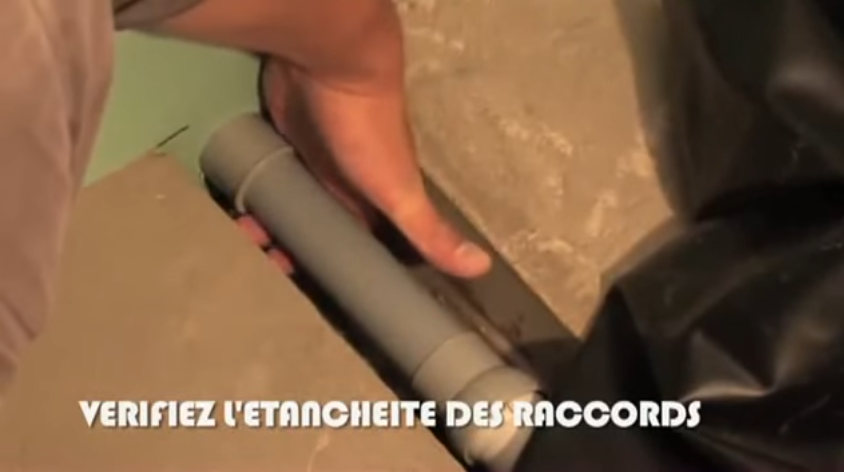
Step 9 Check the connections for tightness. To do this, pour water into the drain hole, wait a little and inspect all connections. The water should completely go into the sewer pipe, and the surface under the drain elements should remain dry.
Step 10 Cut off excess waterproofing taking into account the height of the hem. Make marks at the extreme points and use the end of a mounting knife under the ruler to remove excess. Attach the bends to the wall with waterproofing mastic and allow time to dry completely. The length of the overlaps at the corners must be at least 10 cm.

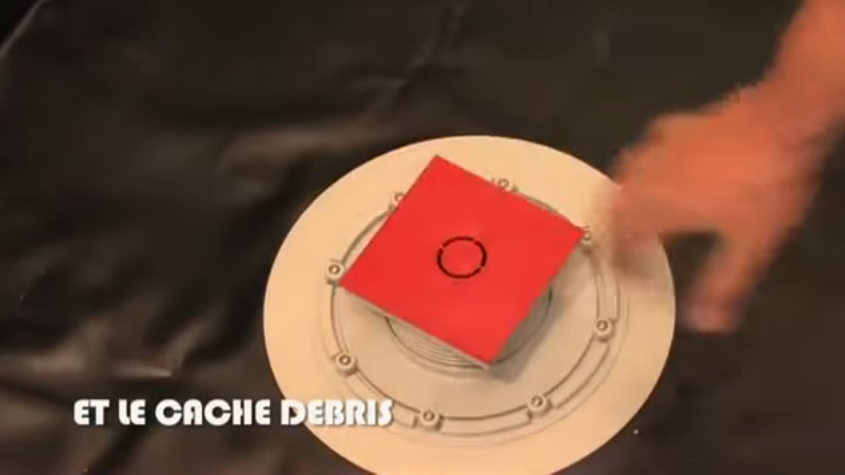
Step 11 Insert a plastic cup into the drain.
Manufacturers specifically make its height with a margin, which allows, if necessary, to reduce the element. Using a level, determine the slope of the floor plane and adjust the glass to the required height to ensure the required value. Cut with a hacksaw, remove burrs with a file or knife. Lubricate the outer surfaces of the glass with oil, put on the rubber o-ring and insert the element into place. Cover the hole with a temporary cover. It prevents the solution from getting inside, and is removed after laying the tiles.

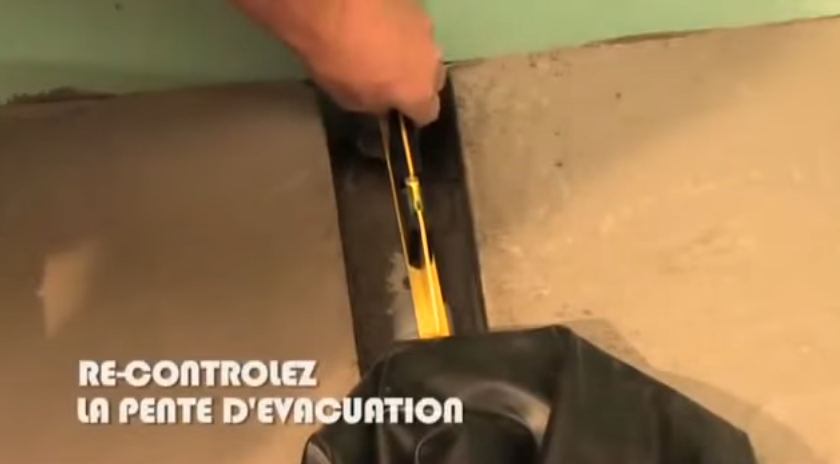
Step 12 Place marks on the bent waterproofing that will be used to make a screed for the base of the ceramic tiles. Do not forget about the slope, check the markings several times for correctness.

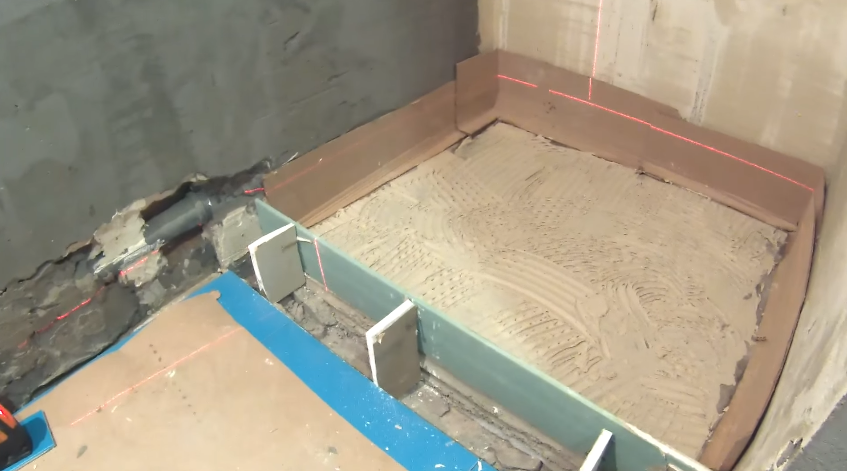
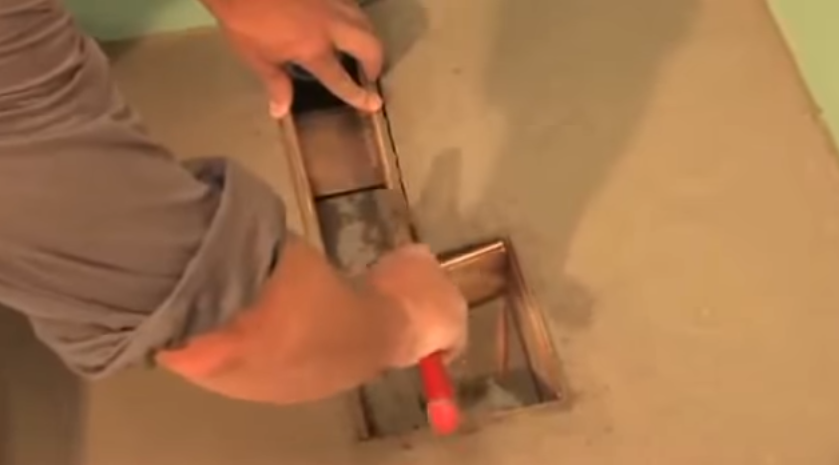
Step 13 Prepare the screed solution and pour it gradually onto the waterproofing. Use a trowel to level the surface. This is the most difficult operation for beginners. The point is that you need to simultaneously make a slope and divide the square into four identical segments.

How it's done?
- When leveling the mortar, pay attention to the marks on the wall. This is the first line of control. The second is the edge of the ladder; the screed should be about a centimeter below the upper plane.
- Using a level, check the horizontality of the screed along all edges of the area, correct deviations if necessary.
- Using the tip of a trowel, draw straight lines from each corner of the ladder to the corner of the floor. If it’s difficult with your hand, then use any long, straight ruler.
- Using a trowel, slowly remove the mortar on each segment in small portions, trying to remove any existing curves. Keep in mind that you will have to work by eye, do not rush. If you see mistakes, then sketch out the solution again and start all over again.

Don’t be discouraged if it doesn’t work out the first time, over time you will gain experience and the work will go much faster. At the finish, you can use a special grater; it has one end in the shape of a triangle. If you don’t have such a tool, then select any strip according to the length. The dimensions of the slats should be 1–2 cm smaller than the distance from the ladder to the wall. Place the bar in the center of the segment, let one end rest against the ladder, and slowly move the other to the left/right and level the surface in this way. A small bump near the wall is then leveled with a grater. Everything is fine - leave the base to harden.
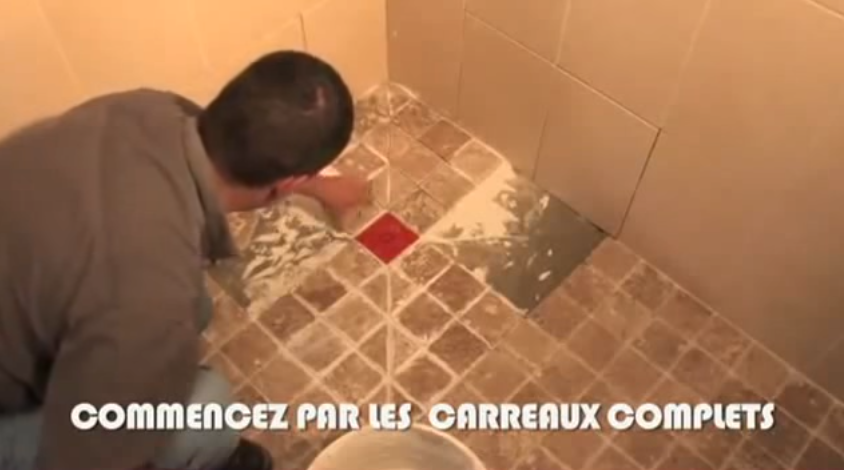
Laying finishing tiles
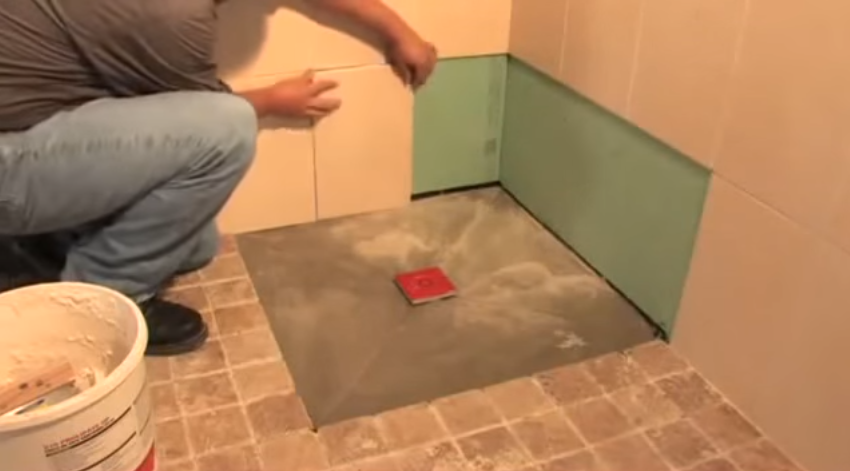
If the base is made with high quality, then there will be no big problems with laying the tiles. Before laying tiles on the floor, finish the areas of the walls adjacent to the floor. The technology is ordinary; to maintain the same width of the tile joints, use standard crosses.

Step 1. First, the second tile is laid. Its angle should lie at a distance of 2–3 mm from the line dividing the square into segments. The distance depends on the width of the seams and is selected in each case individually, taking into account the characteristics of the materials.

Step 2. Continue laying the entire tile up to the second boundary of the segments.
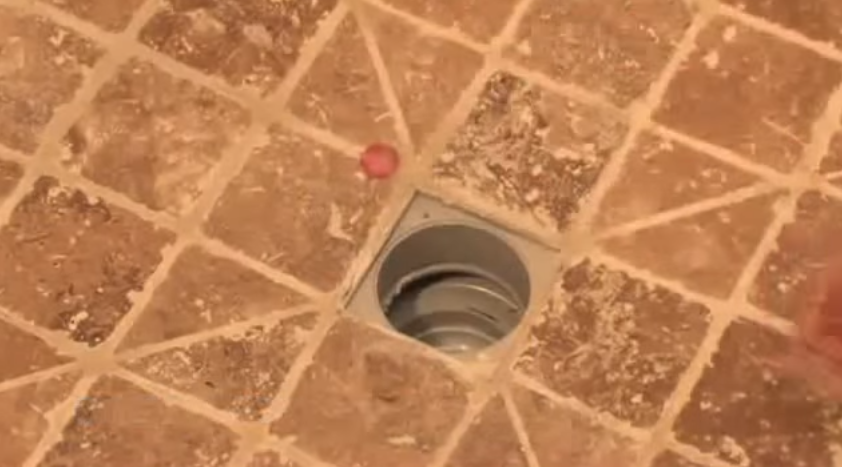
Step 3. Measure the dimensions of the tiles that need to be cut as accurately as possible. Use a cutter to cut off the excess part, check the cutting is correct.
Step 4. Place the cut tile in place and check its position. If it is difficult for you to immediately correctly size the tiles, then first make templates from cardboard. This slightly increases the time it takes to lay tiles, but it allows beginners to avoid annoying mistakes.

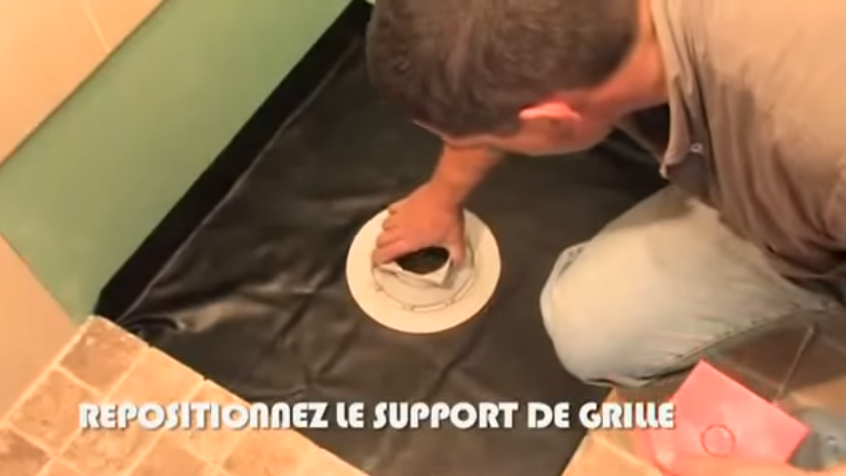
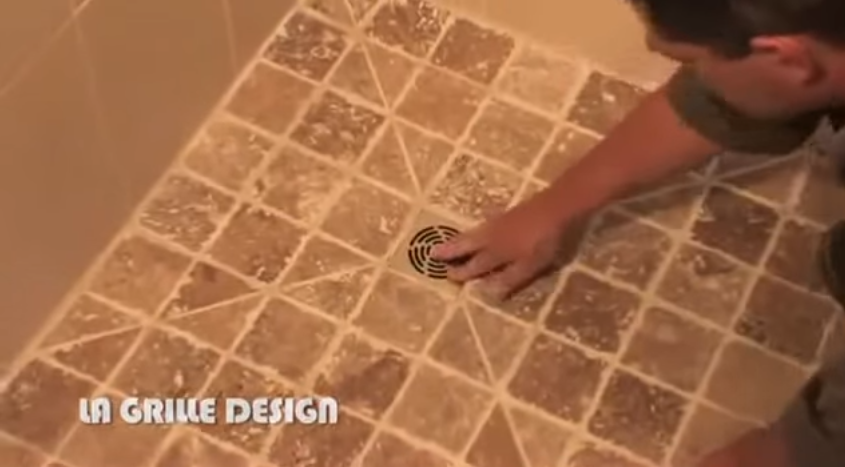
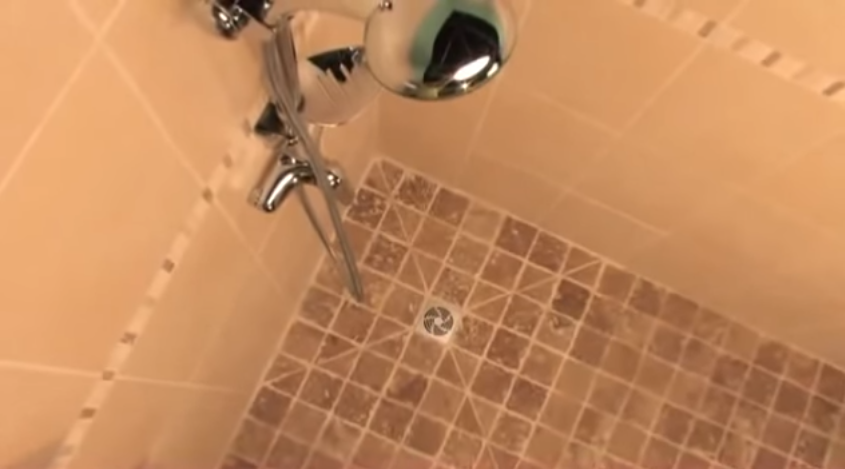
Using the same algorithm, lay all the tiles and seal the seams with grout. Remove the protective element and install the ladder grille. The next day the glue will harden and you can use the shower for its intended purpose.
Video - Laying tiles in a shower stall