Original si usor de facut Ghirlande de hârtie de Crăciun Can fă-o singur . Decorarea casei tale cu ghirlande este o rezoluție grozavă de Anul Nou, deoarece în fiecare an poți să faci o nouă ghirlandă de casă și să decorezi vacanța în stiluri diferite. Decideți ce ghirlandă de hârtie vă va fi mai ușor de realizat cu propriile mâini și nu ezitați să intrați în luptă... Ghirlande de Anul Nou realizate din hârtie cu propriile mâini vă vor ajuta să vă plonjați în atmosfera de vacanță...
Ghirlande simple de Revelion DIY din hârtie colorată
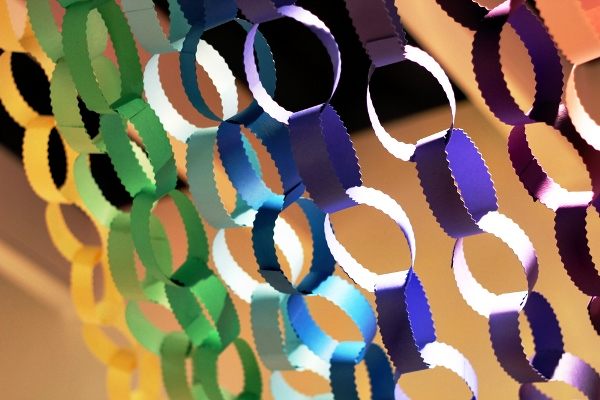
Ghirlandă de Crăciun DIY realizată din inele de hârtie colorată
Această ghirlandă clasică este cunoscută de toată lumea ca LANT. Fă unul ca acesta Meșteșuguri de Anul Nou Cu siguranță chiar și un copil o poate face. Clasa de master nu necesită o descriere detaliată, așa că uitați-vă la fotografie și nu ezitați să vă faceți propria ghirlandă.
Acesta este aproximativ genul de meșteșug pe care îl veți obține în forma sa originală.

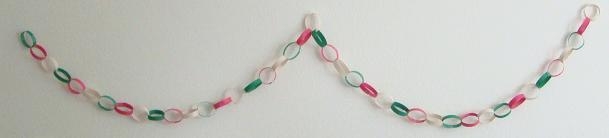
Și așa arată lanțul de hârtie pe perete:
Ghirlande verticale de Crăciun DIY din hârtie
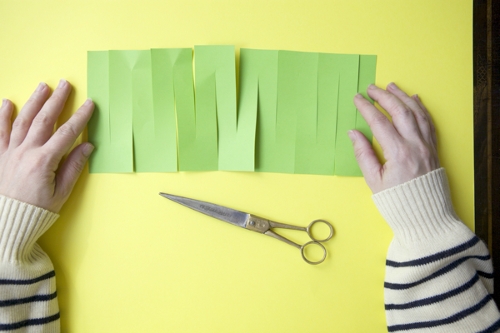
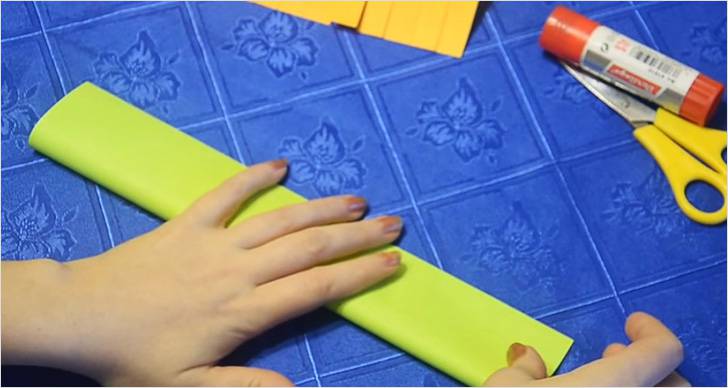
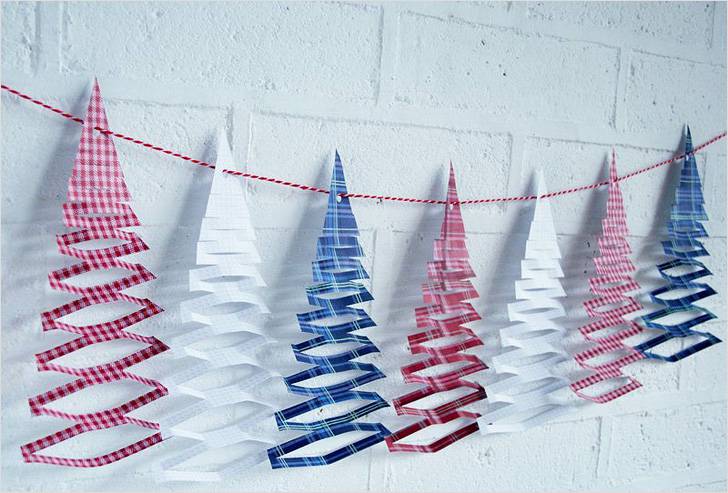
Puteți crea o ghirlandă de hârtie care nu este greu de realizat, dar destul de eficientă în cel mai scurt timp posibil. Pentru a face o astfel de meșteșug, trebuie să te înarmezi cu hârtie colorată, foarfece și lipici.
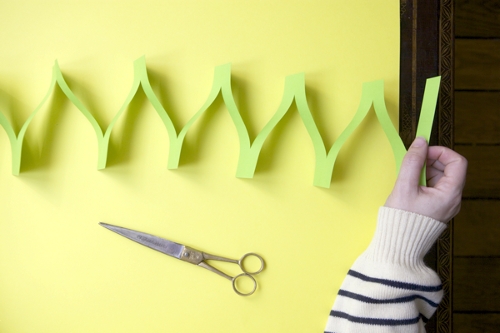
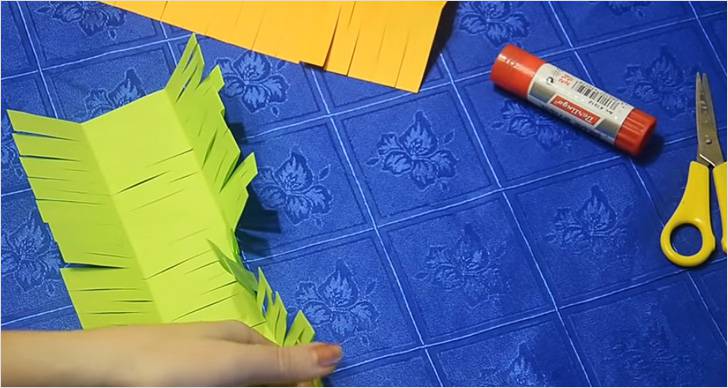
Ar trebui să primești așa ceva.
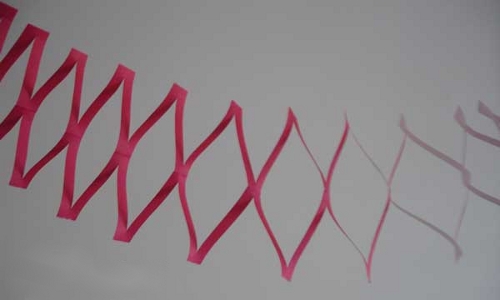
Puteți îndoi o bucată de hârtie în jumătate și puteți face tăieturi similare. Drept urmare, veți obține o ghirlandă mai complexă.
Ghirlande de Craciun din hartie DIY VIDEO
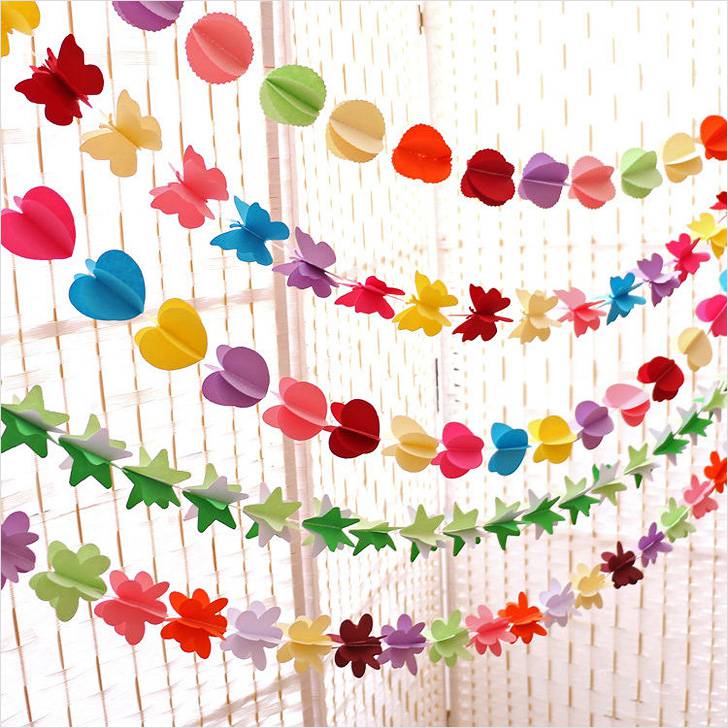
Uite ce frumos arată camera festivă, decorată cu ghirlande de hârtie.
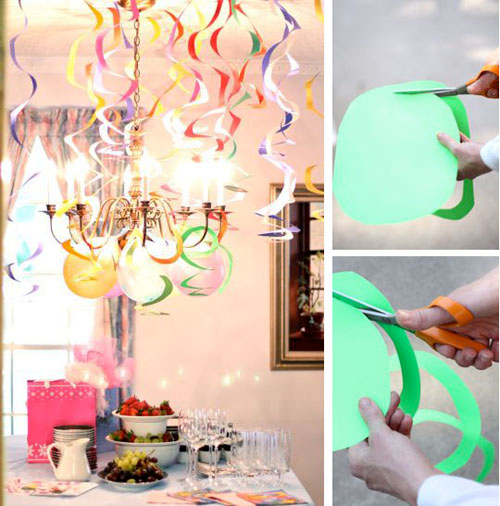
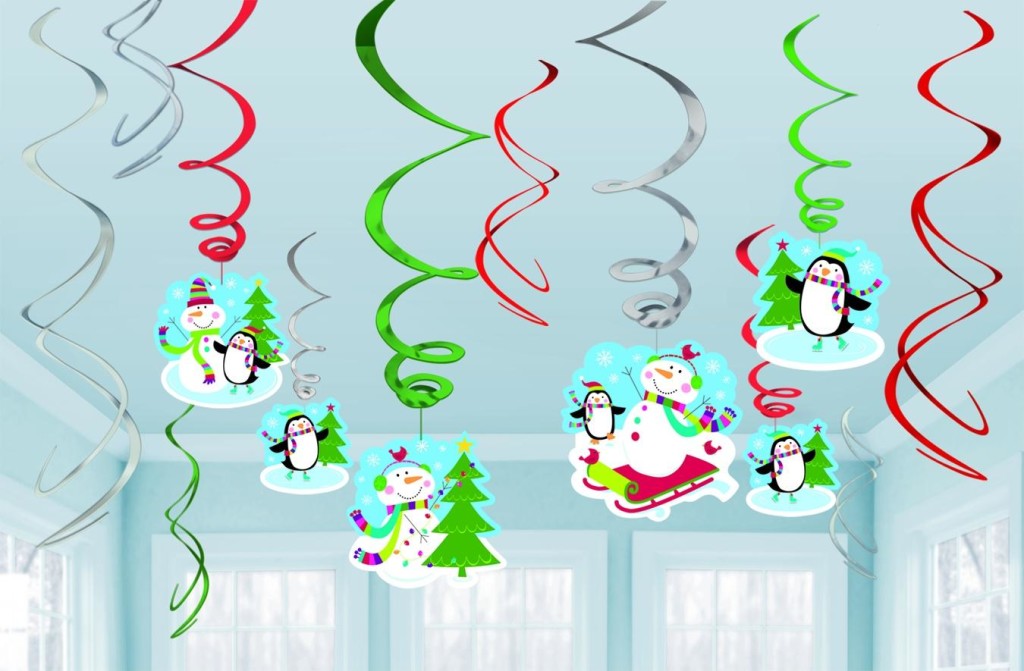
Ghirlande de Crăciun în spirală DIY din hârtie colorată
Puteți face și o ghirlandă de Crăciun în spirală. Rotunjiți marginile și tăiați o foaie de hârtie în spirală. Cum se face asta - uită-te la fotografie:

Ghirlande de Crăciun DIY din carton colorat
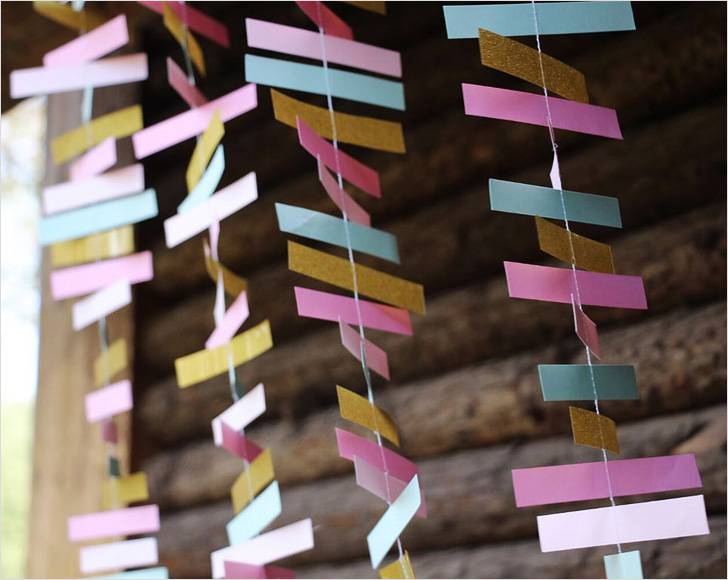
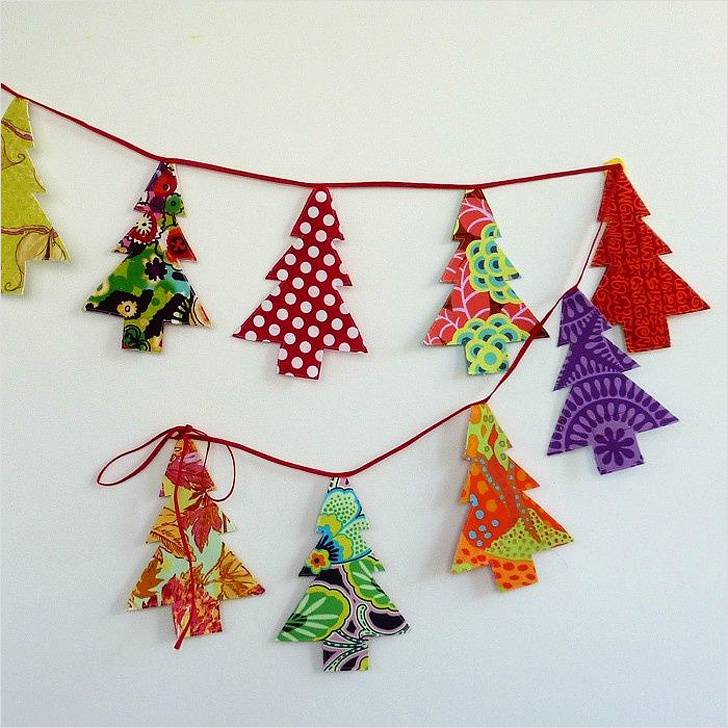
Puteți obține ghirlande simple și originale de Revelion din carton, tăiate în fâșii și atașate de un fir. Puteți fixa benzile de carton folosind o mașină de cusut sau manual cu un ac și ață. Principiul de funcționare este următorul: piesele sunt așezate una lângă alta și cusute cu ață. Pe maşină de cusut va fi mai ușor și mai rapid.
Pentru a face o astfel de ghirlandă, puteți folosi benzi de plastic - semne de carte, care sunt vândute la orice magazin de papetărie.

Când ghirlandele sunt gata, fixați un capăt la un candelabru sau un râu și atașați o greutate mică la al doilea. Acest lucru este necesar pentru ca ghirlanda să nu atârne prea mult. Puteți folosi o bucată de plastilină, un buton sau orice alt obiect mic ca încărcătură.

Această ghirlandă de Anul Nou poate fi atârnată poziție verticală- decorul va arata foarte interesant.

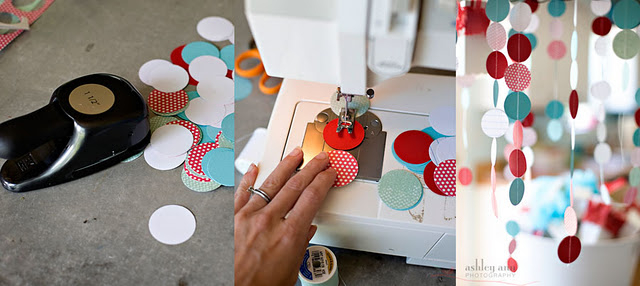
Cele mai simple ghirlande de hârtie DIY
După cum ați înțeles deja, ghirlandele frumoase de Anul Nou din hârtie pot fi făcute foarte repede. Următoarea clasă de master bun pentru asta dovada. Principiul este același ca în lecția anterioară... Tăiem cercuri folosind un „perforator” special sau le desenăm cu o busolă și le decupăm. Și apoi le coasem împreună pe o mașină de cusut. Folosind același principiu, puteți realiza o ghirlandă textilă originală.
Sperăm că ideile noastre vă vor ajuta bijuterii originale pentru vacanță și îți poți decora casa în cel mai bun mod posibil. Noroc!
Când amintim de sărbătorile de Anul Nou, toată lumea are asociații cu un brad frumos împodobit și ghirlande multicolore neobișnuite. Cum să faci o ghirlandă frumoasă de Anul Nou cu propriile mâini?
În ajunul Anului Nou, vitrinele magazinelor strălucesc cu culori și lumini strălucitoare, iar modelele festive decorează ferestrele aproape tuturor clădirilor. Printre cele mai frumoase decoratiuni de Anul Nou se numara ghirlandele. Aceste elemente decorative pot fi găsite în birouri, cafenele, magazine și case.
Ghirlandele achiziționate în magazin și articolele lucrate manual sunt folosite pentru decor. Ghirlande făcut singur Par mai interesante și mai originale decât omologii lor cumpărați din magazin. Ghirlandele festive fac posibilă decorarea rapidă a spațiilor pentru sărbătorile de Anul Nou.
A face ghirlande nu este dificil; tot ce trebuie să faci este să înșiri elemente frumoase pe un fir.
Ghirlandele sunt considerate accesorii tradiționale de Anul Nou sunt variate și arată atractiv - atât în designul pomului de Crăciun, cât și în diverse elemente interioare: pe pereți, ferestre, perdele.
Utilizați o varietate de materiale atunci când faceți o ghirlandă - orice aveți la îndemână. Dacă dai dovadă de imaginație și de o abordare creativă, poți realiza decorațiuni de Anul Nou cu adevărat unice.
Ghirlande de Crăciun DIY, foto
Important! Bijuteriile cumpărate din magazin nu vor provoca o asemenea admirație precum produsele realizate manual, iar timpul petrecut și eforturile depuse sunt compensate sută la sută de frumusețea și originalitatea produselor rezultate.
Decorarea brad de Crăciun Cu ghirlande lucrate manual, poți surprinde oaspeții cu capacitatea ta de a crea lucruri frumoase din materiale simple și de a decora un copac de conifere într-un mod neobișnuit pentru vacanță. Un brad impodobit cu ghirlande de casa va deveni in centrul atentiei si va aduce o atmosfera magica in casa ta.
Decideți asupra conceptului de design pentru frumosul brad de Crăciun verde și începeți să creați ghirlande originale de Anul Nou. Alege un stil specific de decorare și paleta de culoriși în conformitate cu acestea, alegeți materiale pentru lucru.
Ține minte că toate elementele decorative din design Pomul de Anul Nou trebuie combinate între ele. Nu uita de armonie Decor brad de Crăciun cu componente interioare.
Ghirlande de hârtie
Cel mai simplu și rapid mod de a împodobi un brad este să folosești ghirlande de hârtie. Pentru a crea astfel de accesorii, puteți folosi nu numai hârtie, ci și carton. Alege culoarea, configurația și dimensiunea materialelor din care vei realiza ghirlanda la discreția ta.
Pentru a realiza aceste elemente decorative, puteți lua reviste lucioase inutile, precum și desene tipărite de pe Internet și imagini corespunzătoare temei de Anul Nou.
Ghirlandele realizate manual sunt de obicei realizate conform schemei clasice: hârtia este tăiată în fâșii lungi și conectată cu lipici într-un lanț comun.
Chiar și copiii pot fi implicați în realizarea de bijuterii colorate ei vor fi captivați de o astfel de activitate. Realizarea decorațiunilor de Anul Nou în compania copiilor este mult mai interesantă și distractivă, așa că dacă aveți copii mici în familie, nu ezitați să-i implicați în procesul creativ.
O altă opțiune simplă este o ghirlandă făcută din cercuri de hârtie. Nu îți va lua mult timp să faci un astfel de decor.
Mai întâi, tăiați o mulțime de cercuri din semifabricate de hârtie groasă și apoi înșirați-le pe un fir sau pe fir de pescuit.
Ghirlande simple DIY din hârtie colorată, foto Decorațiile volumetrice arată deosebit de impresionante: conectați două cercuri împreună, tăindu-le astfel încât să se formeze o figură încrucișată. Va dura ceva mai mult timp pentru a crea accesorii similare dacă fixați nu două, ci trei sau patru cercuri în fiecare verigă a ghirlandei.
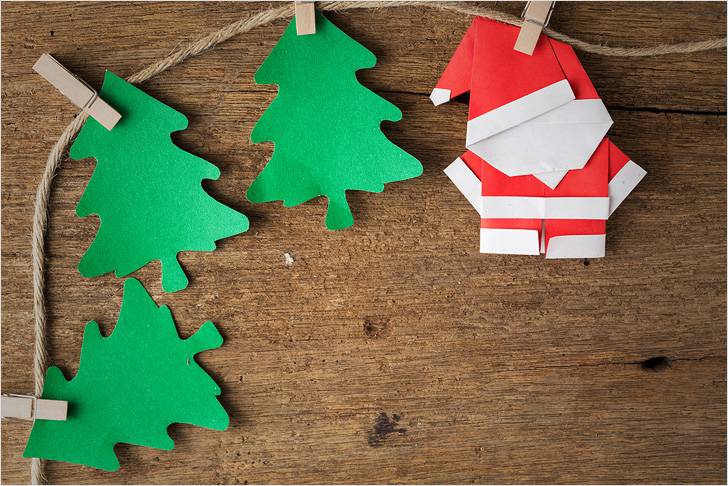
Din hârtie puteți face legături pentru ghirlande de diferite configurații. De exemplu, fulgii de nea de hârtie, micuții Moș Crăciun și iepurașii sunt ideali pentru tema de Anul Nou.
Folosește vopsele pentru a decora ghirlanda culori strălucitoare, scânteie. Figurile pot fi decorate cu margele și chiar transformate într-un bulgăre de zăpadă artificial din vată.
O altă opțiune presupune realizarea de mini-funde voluminoase din hârtie care diferă ca culoare. Legați centrul fiecărei funde cu fire sau panglici și, pentru ca figurile să-și păstreze configurația, lipiți-le.
Ghirlanda, formata din fundite mici colorate, se potriveste bine cu elementele decorative traditionale pentru brad realizate sub forma de fundite clasice.
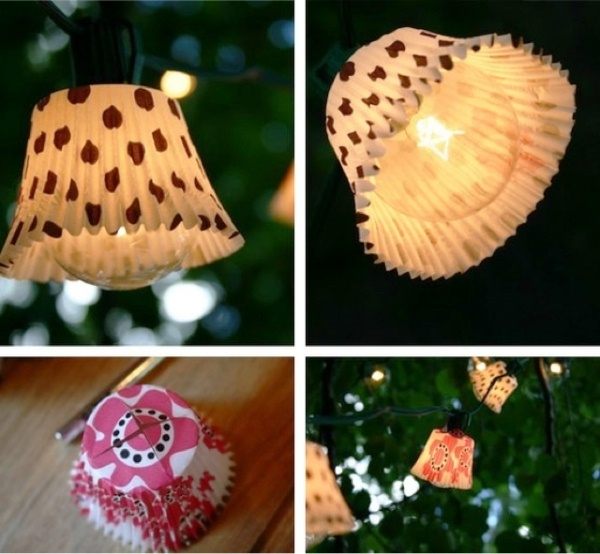
Dacă crearea de legături pentru ghirlande mari pare a fi o mulțime de lucru, o alternativă este să folosiți căptușeli pentru produsele de copt preferate de mulți oameni - cupcakes. Aceste căptușeli au un model în relief și arată foarte plăcut din punct de vedere estetic. Doar fixați elementele împreună și decorați-le.
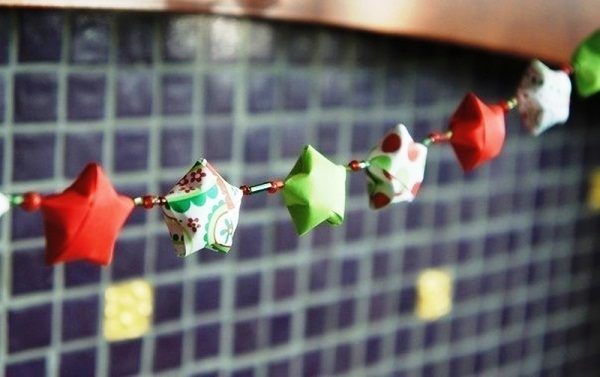
Ghirlandele realizate în stil origami devin din ce în ce mai populare. Chiar dacă nu aveți abilitățile de a realiza astfel de meșteșuguri și nu sunteți puternic în lucrul cu ac, veți putea realiza figurine originale simple pentru proiectarea unui copac de Anul Nou.
Una dintre cele mai ușoare opțiuni sunt stelele tridimensionale realizate din benzi de hârtie. Astfel de produse vă vor permite să vă decorați bradul de Crăciun într-un mod neobișnuit. În fotografie puteți vedea cât de originală arată o ghirlandă de stele DIY:
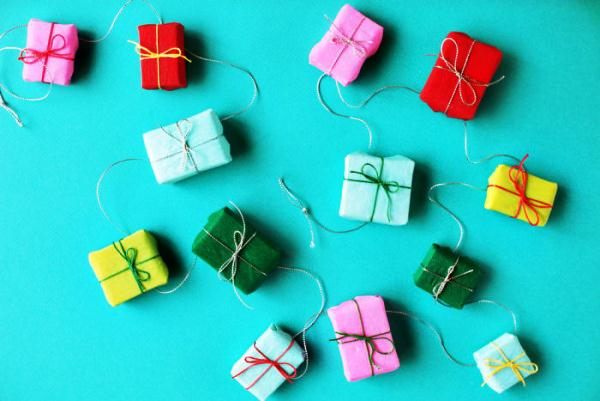
Mai sunt multe idei interesante despre crearea de casă a ghirlandelor de hârtie pentru pomul de Crăciun. De exemplu, pune surprize în mini cutii din hârtie strălucitoare și combină-le într-un lanț lung.
Sau faceți analogi de pompoane din hârtie subțire. Astfel de decorațiuni vor face designul copacului de conifere colorat și vor adăuga splendoare.
Ghirlande textile
Fire groase, bucăți de țesătură, panglici, pâslă, fire rămase - aceste materiale pot fi folosite pentru a face ghirlande de casă de Revelion.
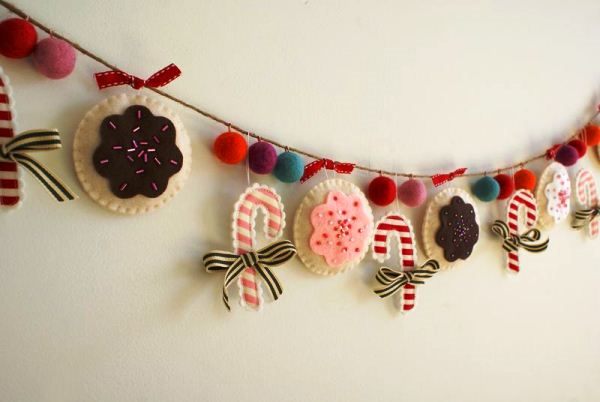
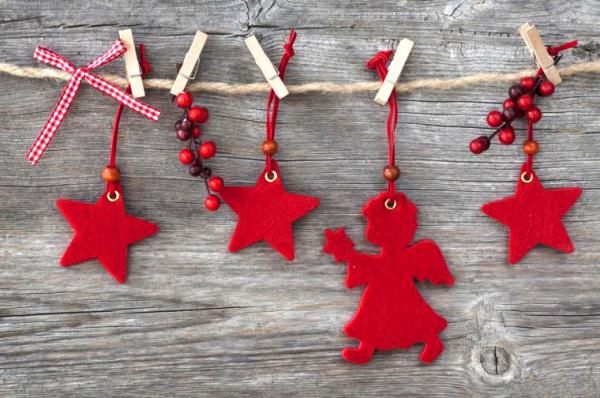
Cel mai simplu mod este să faci figuri plate de Anul Nou. Cele mai populare sunt ghirlandele multicolore din fetru. Link-urile pentru astfel de ghirlande sunt figurine ale personajelor de Anul Nou. Ghirlandele formate din bile de Crăciun de pâslă, imagini cu îngeri și iepurași vor adăuga originalitate designului bradului de Crăciun.
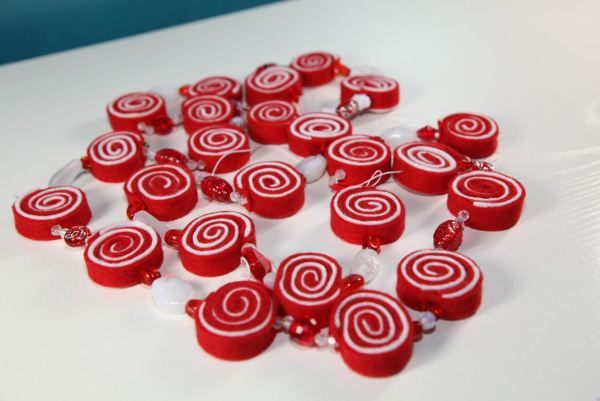
Decorul original din pâslă va fi realizat din material de două culori: stacojiu și alb, tăiat în fâșii lungi și răsucite în formă de bomboane. Lipiți figura astfel încât să nu-și piardă forma.
Bețișoanele de bomboane din pâslă sunt făcute folosind același principiu, doar dungile sunt subțiri.
Elementele decorative care au o configurație tridimensională arată și mai interesante. Dacă nu vă grăbiți, coaseți figuri mici într-un stil similar și conectați-le împreună cu fire.
În plus, puteți decora figurine din material textil folosind nasturi culori diferite si margele.
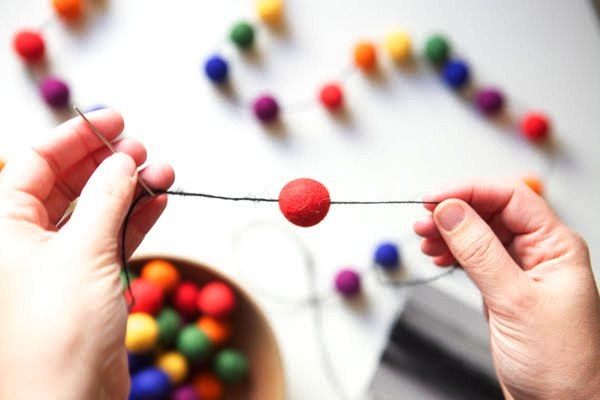
Ghirlandele din stofă sunt, de asemenea, grozave pentru decorarea unui brad de Anul Nou, deoarece astfel de produse fac atmosfera din casă mai confortabilă. De exemplu, bile de pâslă din lână din pâslă în diferite culori vor ajuta la ca interiorul să fie mai confortabil. Pentru a face astfel de mingi ai nevoie de fire de lână (chiar și resturile vor fi de folos), lână din pâslă și colanți de nailon.
Din fire se formează o minge, apoi este acoperită cu lână (în mai multe straturi). Bila formată este înfășurată în colanți (pot fi așezate mai multe bile în același timp) și se leagă noduri pe ambele părți. Următorul pas este să așezi colanții cu bilele învelite în ei maşină de spălat, trebuie să fie activat și setat temperatură ridicată. Datorita actiunii apei incalzite, bilele vor capata configuratia ceruta.
O ghirlandă de bile voluminoase poate fi făcută în alt mod - din fire groase colorate. Legați firele într-un mănunchi, trageți-le din minge și tăiați-le astfel încât fiecare lungime să fie aceeași.
O altă variantă: luați baloaneși umflați-le, înfășurați-le cu fire și apoi tratați toate suprafețele cu lipici. Așteptați până se usucă și scoateți bilele. Folosind aceasta tehnica vei realiza elemente decorative usoare; Ele pot fi, de asemenea, formate într-o ghirlandă în diferite moduri.

O ghirlandă similară poate fi făcută pentru a decora un șemineu: pentru a face acest lucru, coaseți șosete mici (de preferință roșii) din material pentru cadouri mici. Decorează șosetele cu vată, ploaie strălucitoare sau panglici, combină elementele și atârnă-le astfel încât să fie amplasate pe aceeași linie.
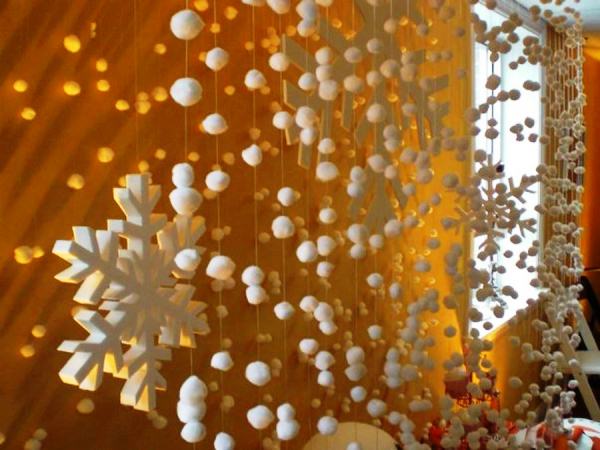
Unul dintre cele mai potrivite materiale pentru realizarea unei ghirlande volumetrice este vata. Fulgii de zăpadă din bumbac, norii, mingile conectate între ele sunt grozave pentru decorarea pereților.
Ghirlande originale pentru brad
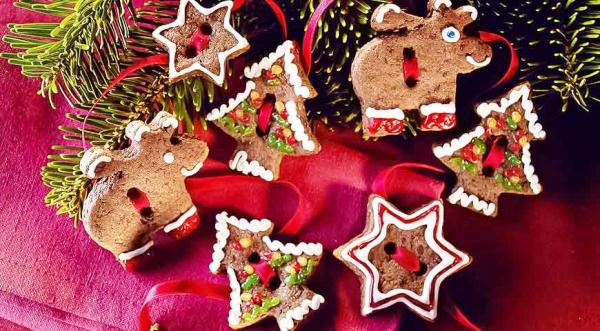
Pentru producerea volumetrice Ghirlande pentru pomul de Crăciun Se pot folosi și alte materiale, de exemplu argilă polimerică sau aluat de sare usor de facut. Decorați figurinele după gustul dvs. - și fixați-le împreună cu fire trecute prin găurile prefabricate.De mare interes este ideea de a crea ghirlande din dulciuri - de exemplu, din prăjituri. Principalul punct în realizarea unui astfel de decor este decorarea fursecurilor într-un stil festiv de Anul Nou. Pentru a împodobi bradul de Crăciun, puteți folosi și fructe (mandarine, mere mici), prăjituri de turtă dulce, dulciuri și alte delicii comestibile.
O ghirlandă de conuri obișnuite sau colorate este ideală pentru un pom de Crăciun. Realizarea unui astfel de decor necesită un minim de timp și nu trebuie să depui mult efort. Pentru a atașa conurile, faceți bucle din fire sau panglici sau luați cârlige. Acoperiți conurile cu sclipici argintiu și zăpadă decorativă.
Puteți face o ghirlandă neobișnuită trecând un fir prin agrafe de rufe colorate. O altă idee este un decor realizat din bobine goale de ață vopsite cu vopsele.
Folosind sârmă este ușor să faci figuri în formă de inimioare, stele și alte elemente. Astfel de produse vor străluci frumos pe bradul de Crăciun la lumina becurilor electrice.
Dacă aveți spumă acasă, faceți din ea bile de diferite dimensiuni și treceți-le printr-un fir de pescuit. Așezați ghirlanda pe bradul de Crăciun astfel încât dimensiunea biluțelor să crească spre fundul bradului.
Există o mulțime de idei pentru a crea ghirlande de casă, care au un aspect strălucitor și neobișnuit. Bijuteriile ca cea din fotografie sunt făcute din margele vechi și alte bijuterii:
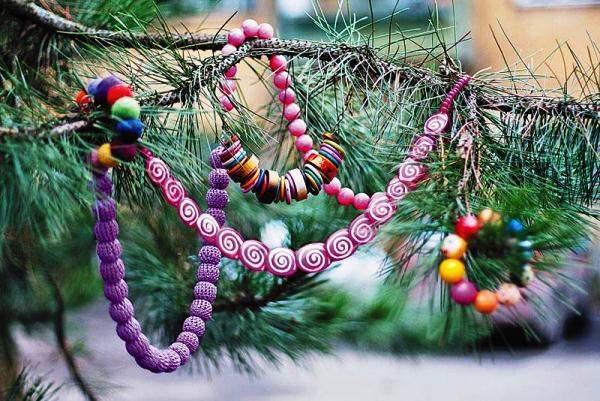
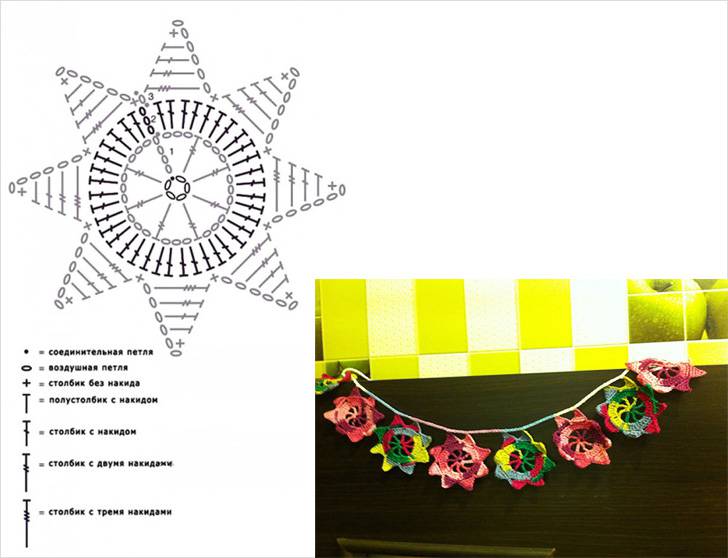
Ghirlande ale căror legături sunt făcute în formă de flori arată foarte frumos. Și fac flori din panglici.
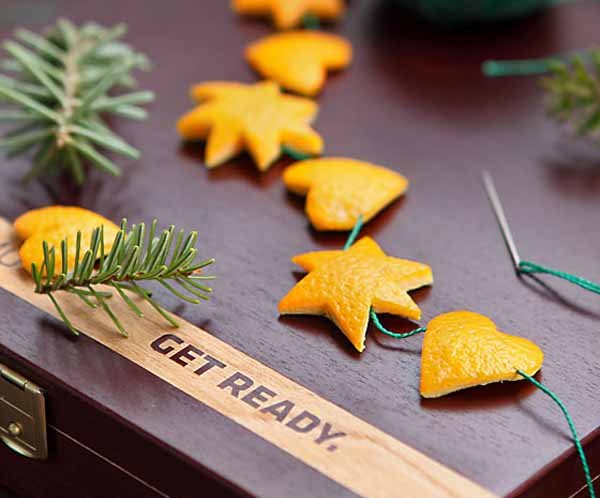
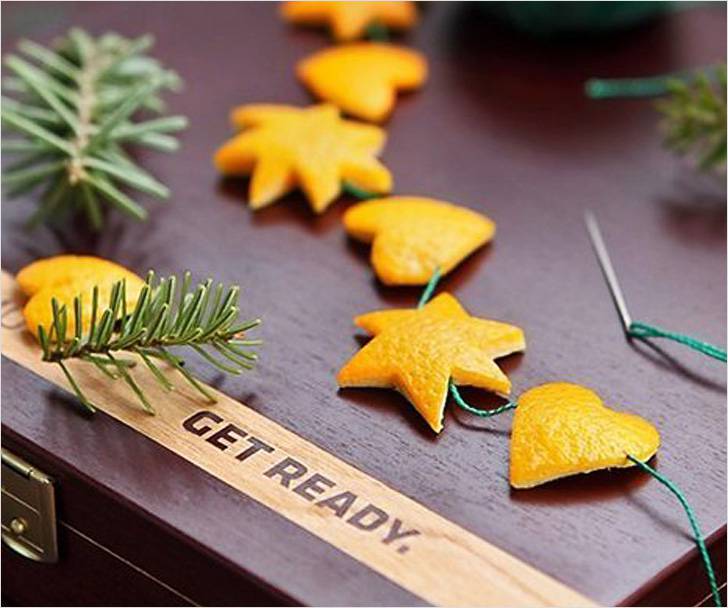
O ghirlandă de brad de Crăciun de casă poate fi făcută chiar și din coji de citrice. Coji de portocală luminoase, sculptate complex, vă vor însufleți decorul de Anul Nou.
Pentru a decora șemineul și zonele individuale din cameră, se folosesc jucării obișnuite care sunt agățate de pomul de Crăciun. Sunt înșirate pe un fir de pescuit.
Ar fi potrivit să folosiți fructe de pădure rowan ca elemente ale ghirlandei. Și dacă le combini cu ramuri de conifere, vei obține un decor excelent și o modalitate de a sublinia atmosfera de Anul Nou în orice parte a încăperii.
Citește despre cum să faci tu unul frumos: idei originale la crearea unui pom festiv al fericirii.
Pentru a decora anumite zone ale unui copac de conifere, se folosesc ghirlande, constând din monede, figuri în miniatură ale foliei lor și clopoței mici.
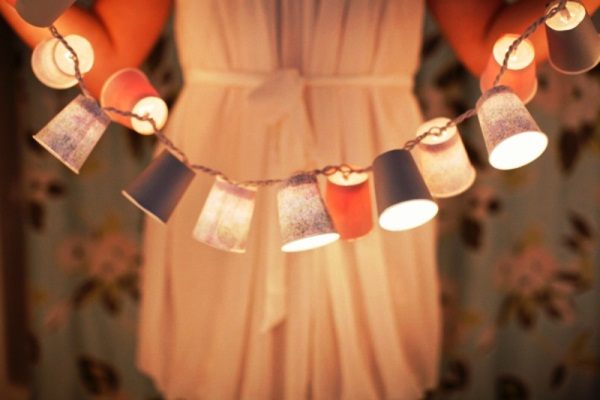
Puteți decora camera pentru o petrecere de Anul Nou folosind ghirlande neobișnuite din hârtie colorată sau pahare de plastic. Elementele unui astfel de decor arată deosebit de impresionant în lumina ghirlandelor electrice.
Ghirlandele realizate manual din fulgi de nea de plastic sunt foarte frumoase (principalul este că plasticul este transparent și subțire).
Ghirlandele realizate din desene și fotografii pe o temă de Anul Nou sunt potrivite și pentru decorarea atât a copacilor de conifere, cât și a suprafețelor netede, cum ar fi pereții.
Din exemplele și ideile date pentru realizarea de ghirlande neobișnuite, ați învățat din ce poate fi făcută o ghirlandă originală și ați fost convins că o mare varietate de materiale pot fi folosite pentru a crea aceste decorațiuni:
- conuri;
- tratate comestibile;
- margele;
- monede;
- spumă;
- agrafe de rufe și multe altele.
Alege una dintre ideile propuse și începe să faci ghirlande neobișnuite pentru brad cu propriile mâini, implicând alți membri ai familiei în procesul creativ.
Majoritatea accesoriilor pentru Sărbătorile de Anul Nou ușor de creat și nu necesită mult timp.
A face ghirlande originale de sărbători este opțiune grozavă timp liber, oportunitatea de a petrece timp cu cei dragi și de a realiza idei interesante folosind materialele disponibile și abilitățile tale creative.
Video
Cine dintre noi nu-și amintește cum, în copilărie, făceam lanțuri din hârtie colorată pentru pomul de Crăciun și pur și simplu pentru a decora camera. Adesea, întreaga familie a participat la acest proces interesant, dar lung. Pentru cei care nu-și amintesc, o ghirlandă tipică făcută cu propriile mâini Anul Nou, arăta ca în fotografia de sus. Acum, aceasta este una dintre opțiunile simple pentru ghirlandele de Anul Nou pe care bunicile le învață nepoților.
Zborul fanteziei: ghirlande de hârtie
Să vedem ce alte opțiuni pentru ghirlande poți să le faci singur. Poate că unele dintre ele vă vor fi necunoscute și veți fi bucuroși să le luați notă. Această secțiune s-a dovedit a fi voluminoasă, deoarece există într-adevăr o mulțime de opțiuni interesante. Hârtia este exact materialul care are toate calitățile necesare:
- Este ușor de lucrat cu el.
- El este disponibil.
- Pot fi culori strălucitoare.
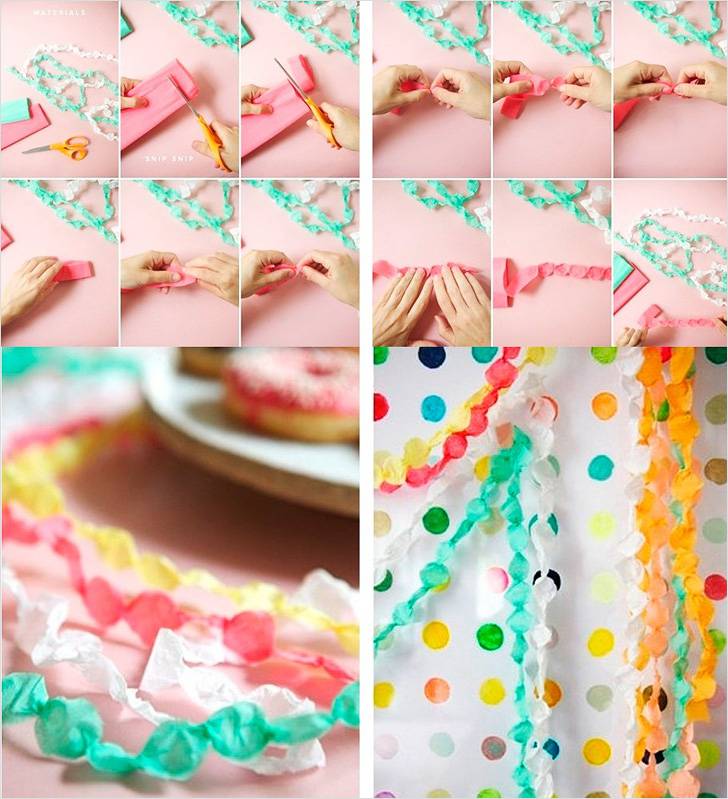
| Să facem o ghirlandă de inimioare în culorile de Anul Nou: alb, albastru, mentă. | |
 |
Tăiați benzi de hârtie de lățime arbitrară, dar identice între ele. O lățime bună este de 1-1,5 cm. |
 |
Am făcut multe pregătiri deodată. |
 |
Așezați benzile de hârtie împreună. Aliniați marginile. |
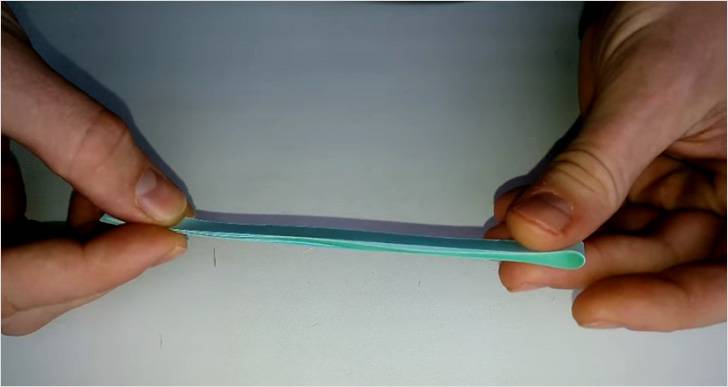 |
Îndoiți benzile în jumătate. |
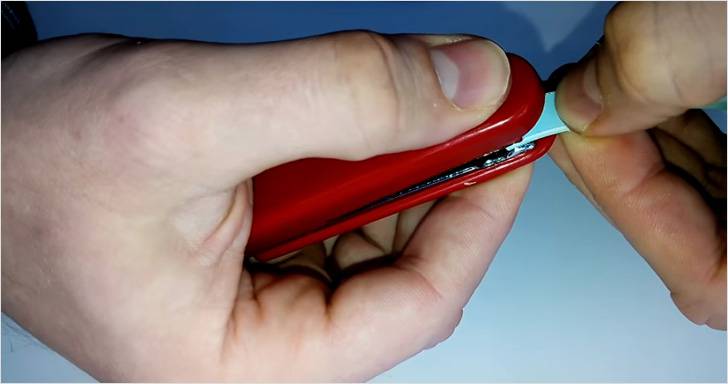 |
Asigurați pliul cu un capsator. |
 |
Împărțiți în două părți. |
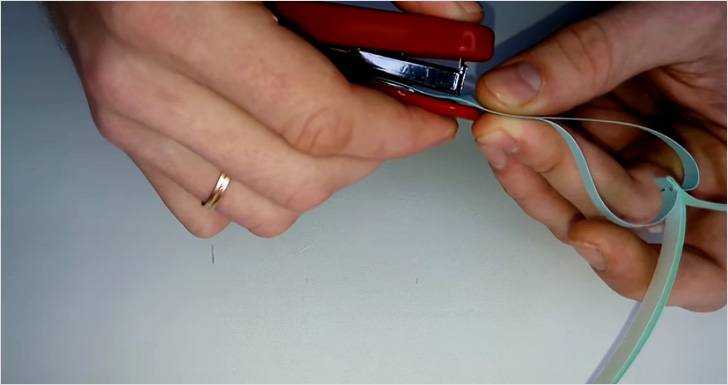 |
Asigurați fiecare bandă cu un capsator, așezându-le una peste alta, astfel încât să se întindă aerisit. |
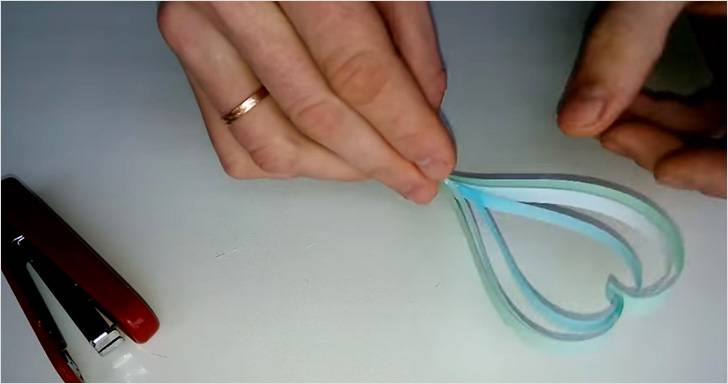 |
Asta se întâmplă. |
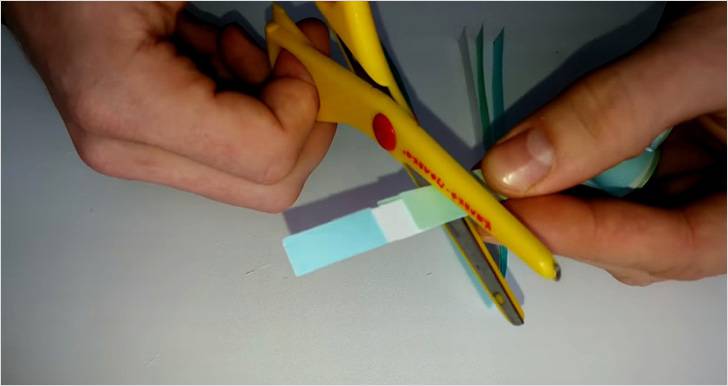 |
Tăiați excesul. |
 |
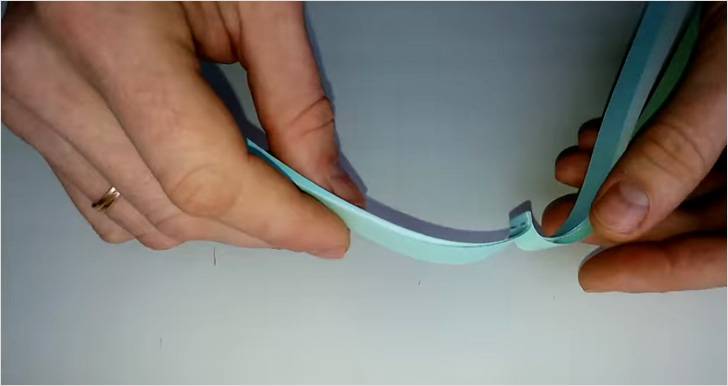
Îndoiți cele trei benzi de hârtie împreună din nou și în jumătate. Aplicați pliul așa cum se arată în imagine. |
 |
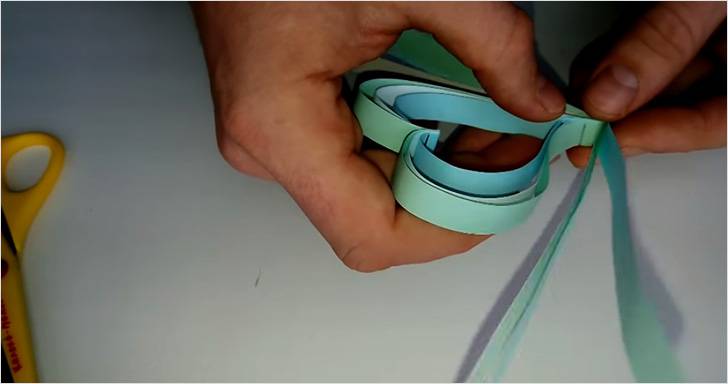
Îndoiți-vă peste fiecare bandă și fixați-o cu un capsator. |
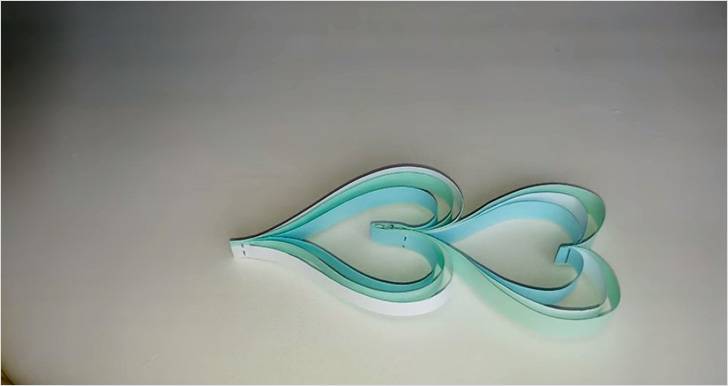 |
Două părți sunt deja conectate între ele. Repetând pașii, puteți asambla o ghirlandă de altă lungime. |
Este ușor și simplu să faci o ghirlandă în formă de acordeon din hârtie simplă sau o revistă. Această ghirlandă este atârnată pe un brad și împodobită într-un apartament. Când este depozitat, nu ocupă mult spațiu deoarece se pliază foarte compact. Se poate face aproape nesfârșit.
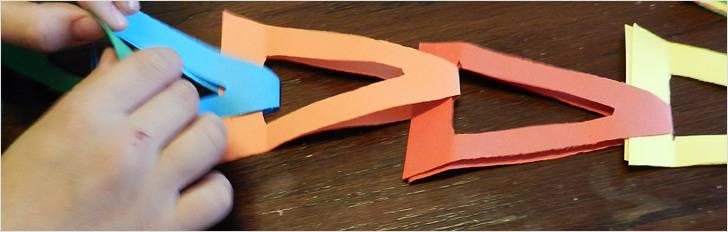
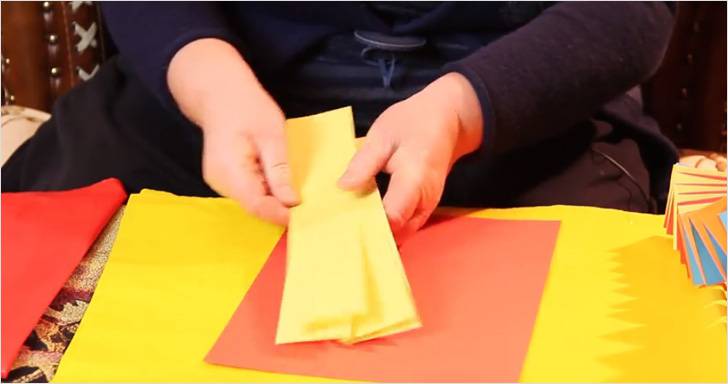 |
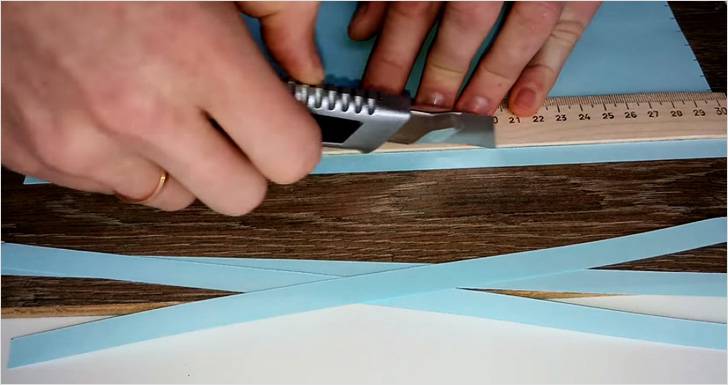
Pentru a face o ghirlandă veți avea nevoie de fâșii de hârtie colorată. Ce fel de hârtie există: puteți face dungi subțiri sau largi. O foaie de hârtie trebuie împărțită în 4 părți. |
 |
Îndoiți-l. Banda va avea o lățime de aproximativ 3,5 cm Puteți face o ghirlandă de aceeași culoare sau culori diferite. |
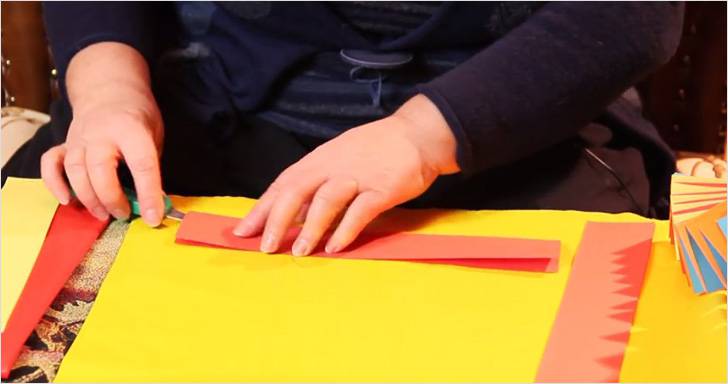 |
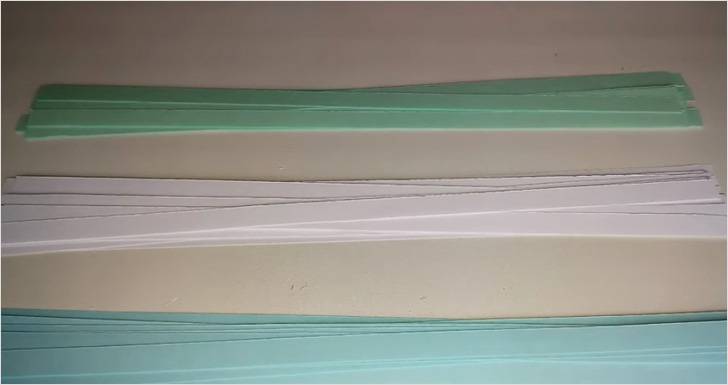
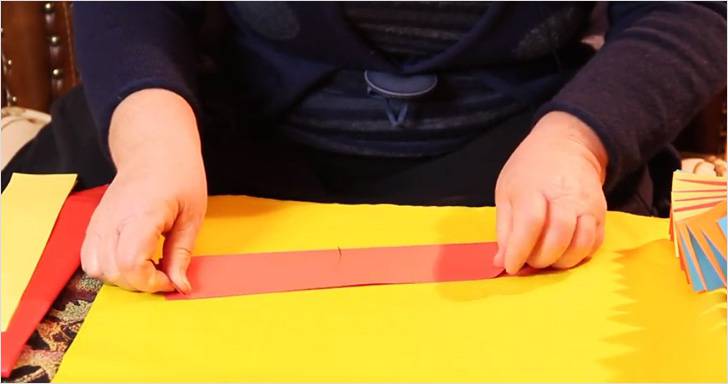
Tăiați o foaie de hârtie în fâșii cu un cuțit utilitar sau foarfece. |
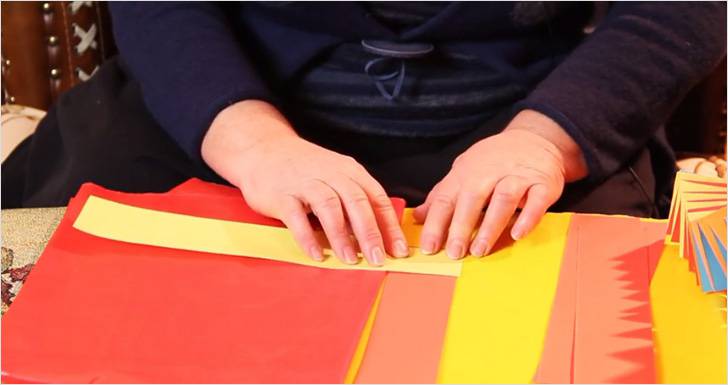 |
Pune o dungă roșie în partea de jos și lipește o dungă galbenă deasupra ei în unghi drept. |
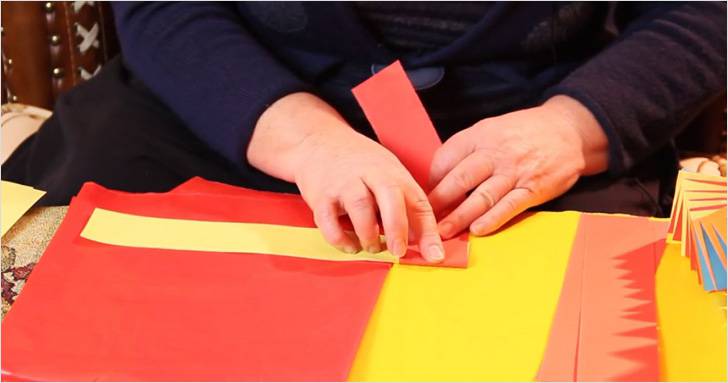 |
Îndoiți banda roșie spre tine, înfășurând-o peste cea galbenă. Netezește pliul. |
| Apoi acoperiți dunga roșie cu dunga galbenă. | |
| În continuare o înfășurăm pe cea roșie și continuăm așa până se termină dungile. | |
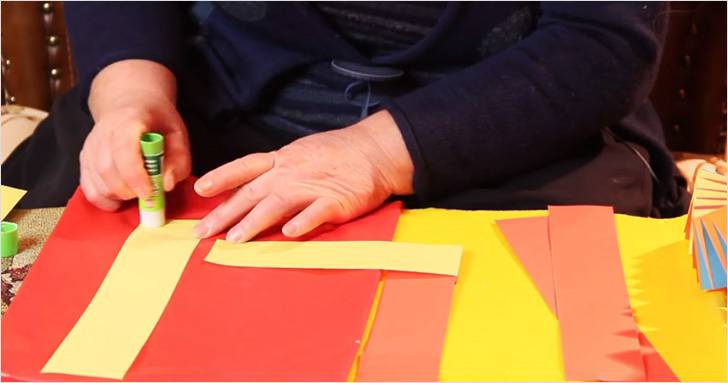 |
Creșteți treptat lungimea benzilor prin lipire de benzi noi, acestea pot fi de diferite culori; La sfârșitul lucrării, marginile benzilor trebuie lipite între ele. Puteți agăța decorațiuni suplimentare pe ghirlandă. |
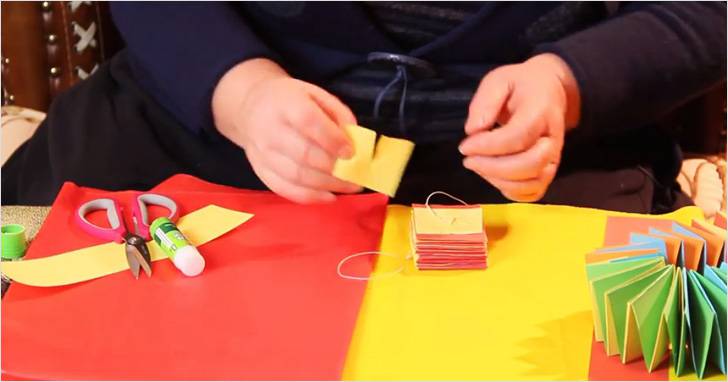 |
Pentru a atașa o buclă, trebuie să luați un fir, să îl pliați într-o buclă și să faceți un nod. Tăiați două pătrate din hârtie, tăiați-le dintr-o parte spre mijloc și lipiți-le pe buclă, plasând tăieturile în direcția opusă una față de cealaltă. Ascundeți nodul în interior și eliberați bucla prin fantă. |
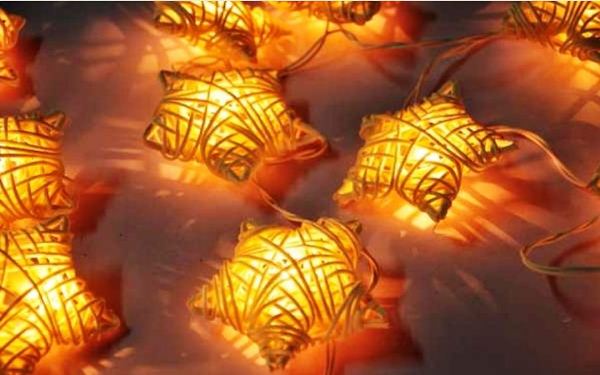
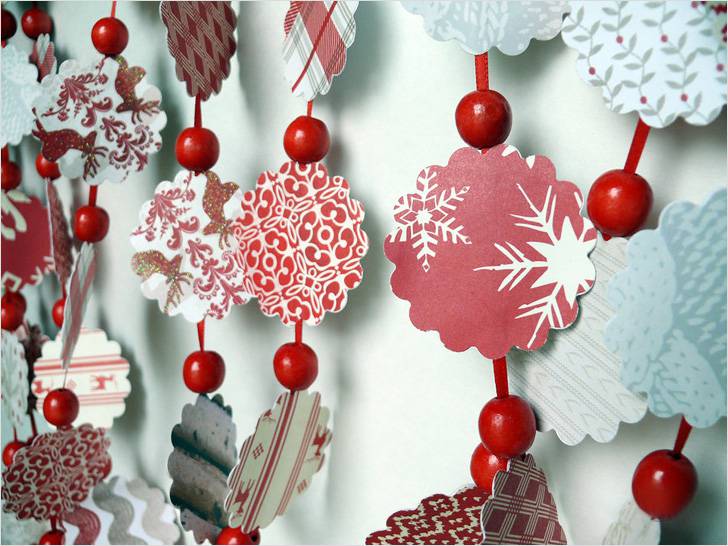
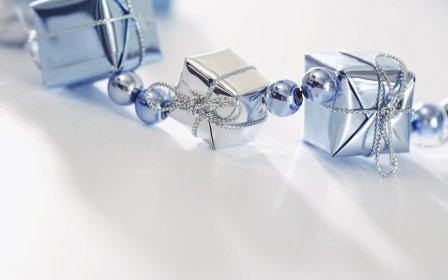
Vă sugerăm să faceți o ghirlandă interesantă și cu aspect elegant, cu bile și stele voluminoase de hârtie. Această frumusețe este realizată din carton argintiu și auriu, adaugă un farmec deosebit decorului.
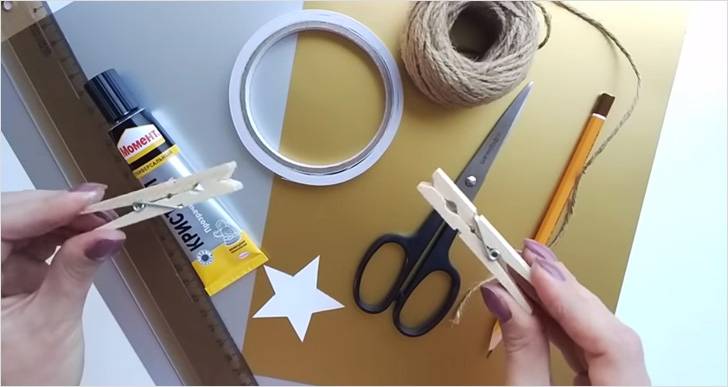 |
Veți avea nevoie de: o foaie de carton argintiu și auriu, lipici Moment-Crystal, sfoară, bandă dublu, foarfece, creion, riglă, șablon în formă de stea, două agrafe de rufe. |
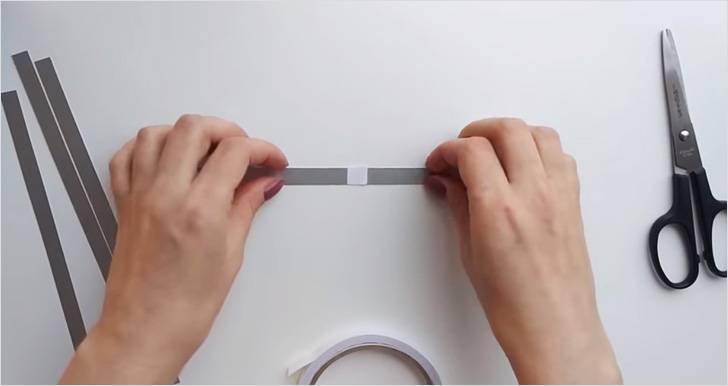 |
Tăiați 4 benzi înguste din carton argintiu. Lipiți o bucată de bandă dublu în mijlocul uneia dintre ele. Scoateți învelișul de protecție. |
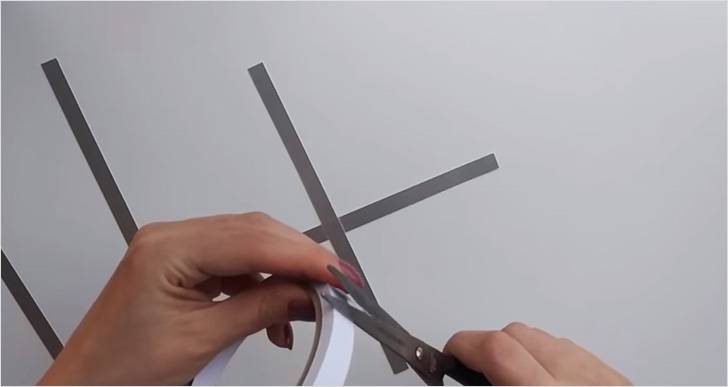 |
Lipiți a doua bandă perpendicular. Puneți din nou o bucată de bandă în centru. |
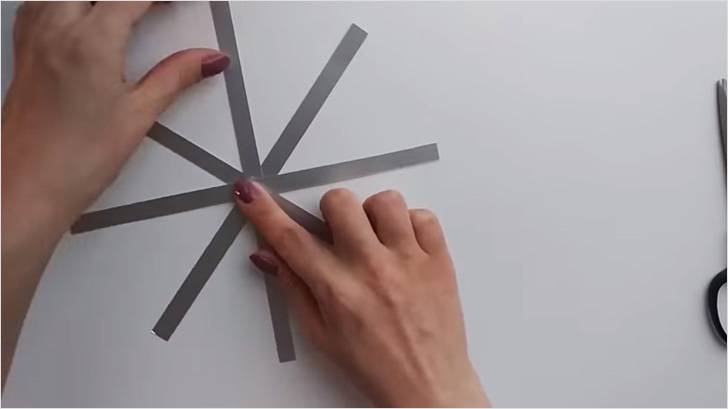 |
Și continuați asta până când lipiți toate benzile. |
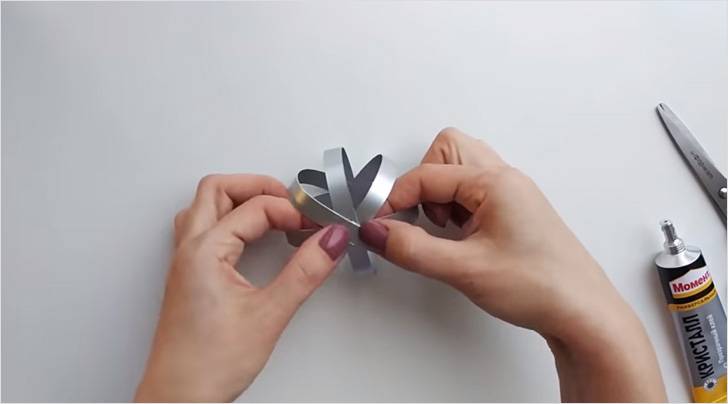 |
Îndoiți marginile benzilor în sus și conectați la un moment dat, fără a uita să lipiți fiecare capăt cu lipici Moment-Crystal. Atașați o agrafă de rufe pe zona de lipire pentru a vă elibera mâinile. |
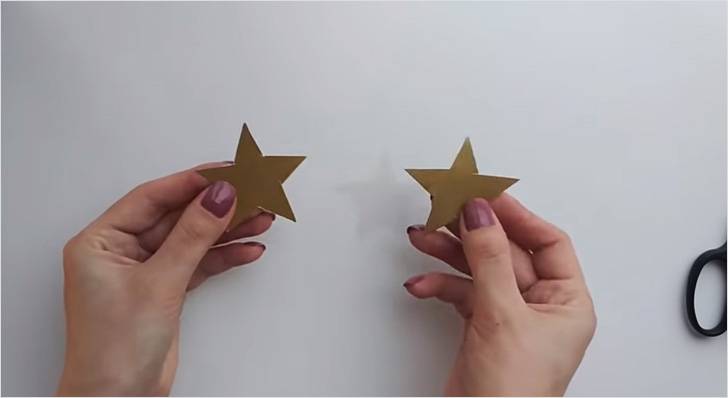 |
Din două bucăți pătrate de carton auriu, decupați două stele identice conform șablonului. |
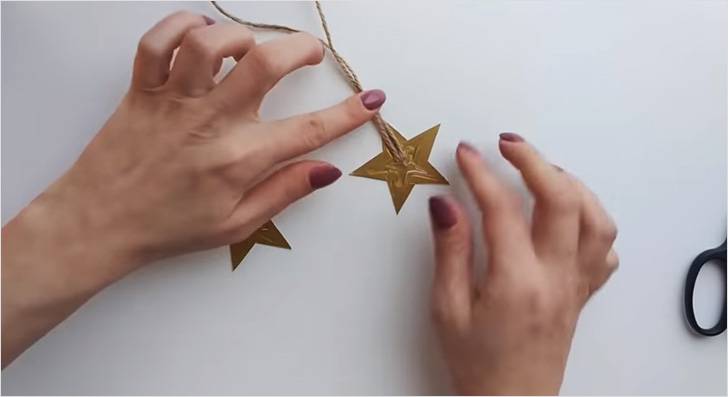 |
Puneți o buclă de sfoară între ele și lipiți-le împreună - acesta va fi un pandantiv. |
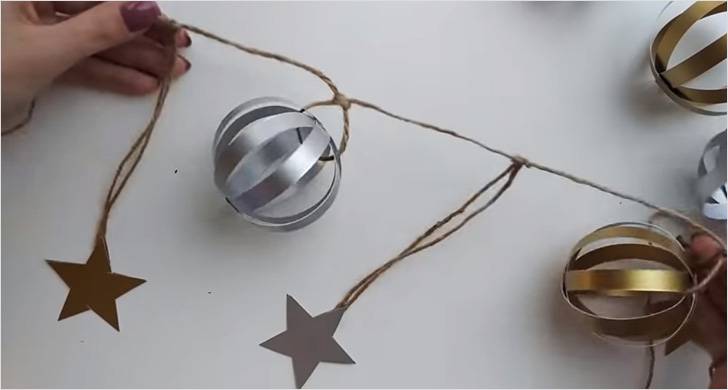 |
Când lipiciul se usucă, scoateți agrafele de rufe și puteți asambla ghirlanda. |
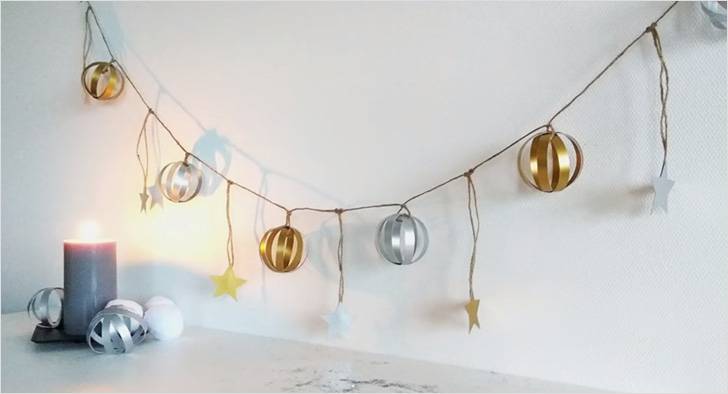 |
Decorează peretele cu o ghirlandă sau atârnă-l de tavan. |
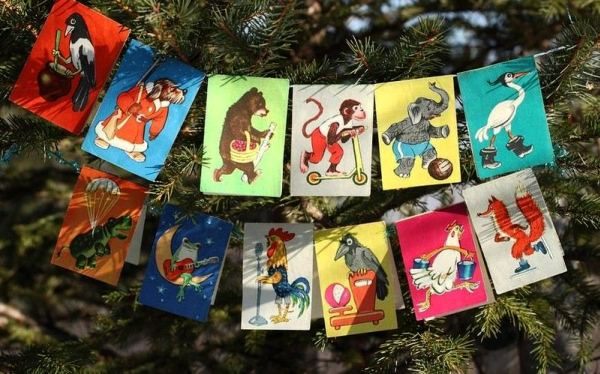
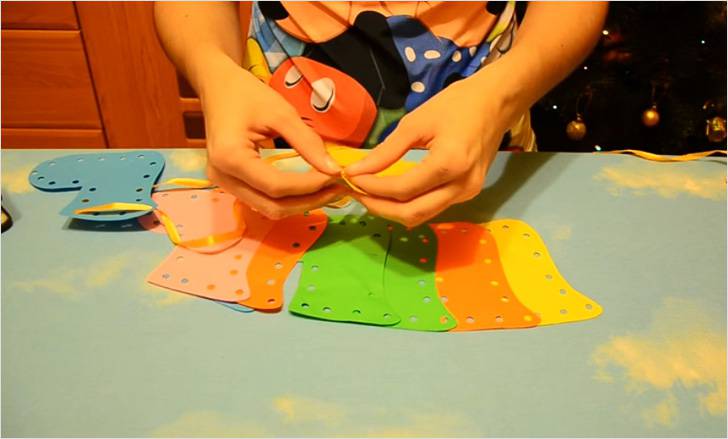
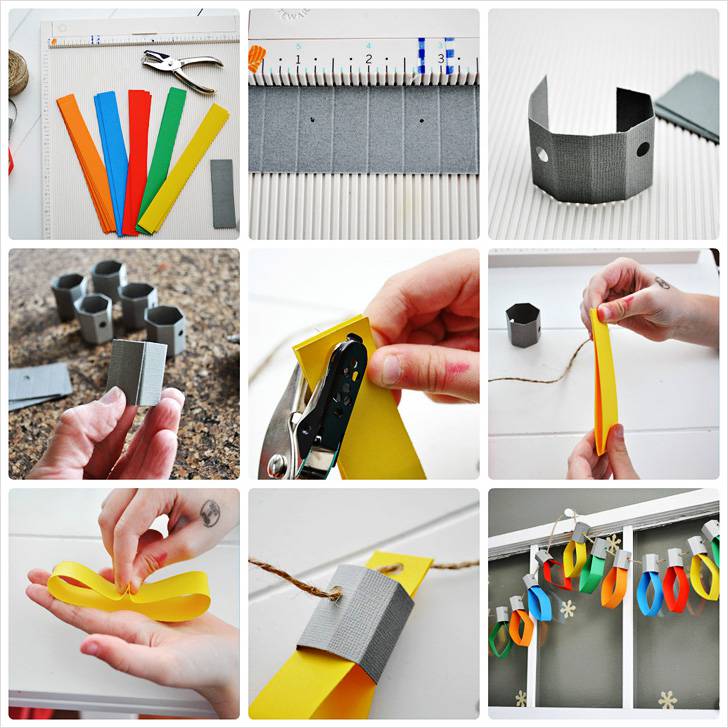
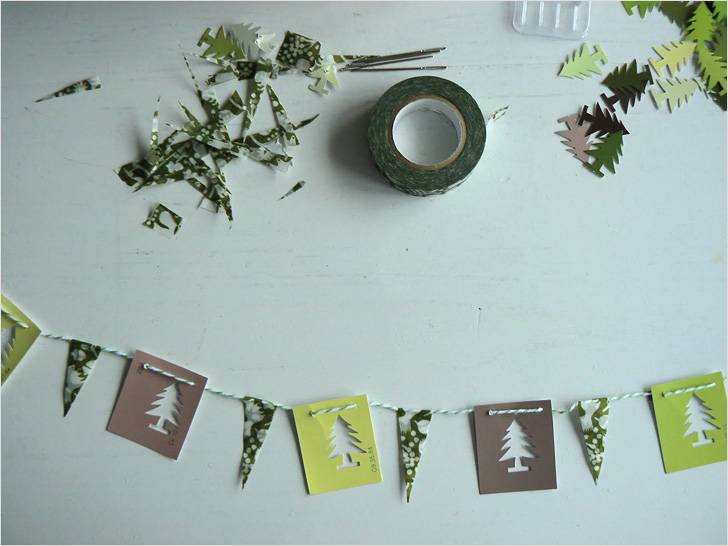
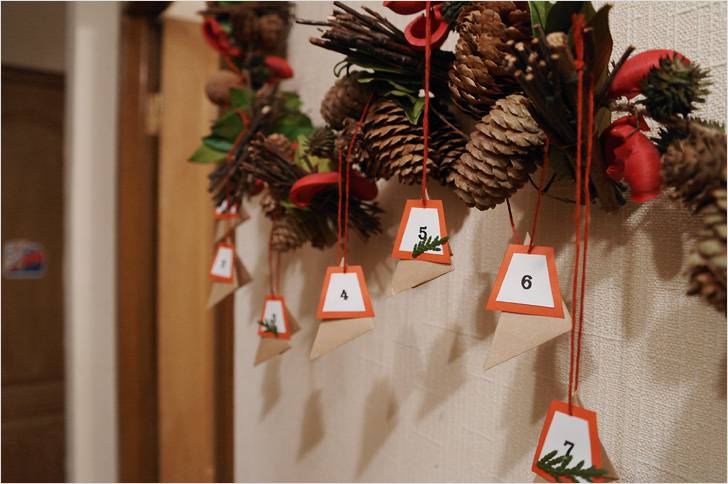
Pentru a face ghirlanda „Boot”, veți avea nevoie de: foarfece, un perforator, hârtie colorată, panglică, un creion sau pix, un șablon de cizmă.
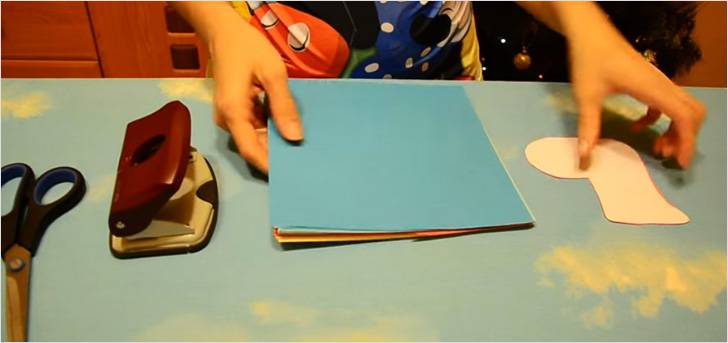 |
Șablonul este ușor de desenat singur. |
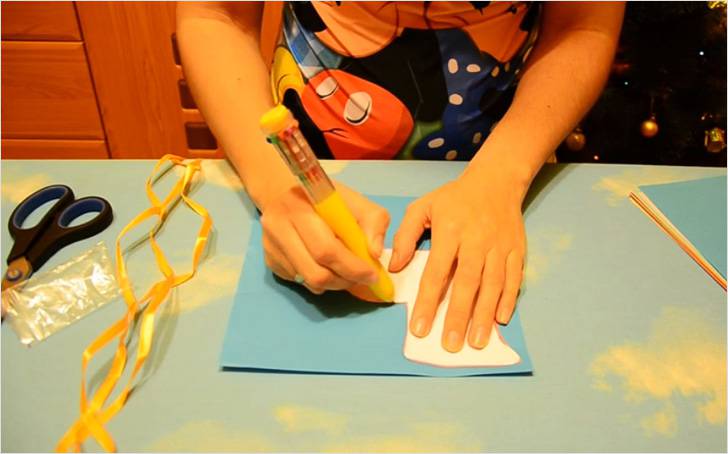 |
Luați șablonul și trasați-l pe hârtie colorată. |
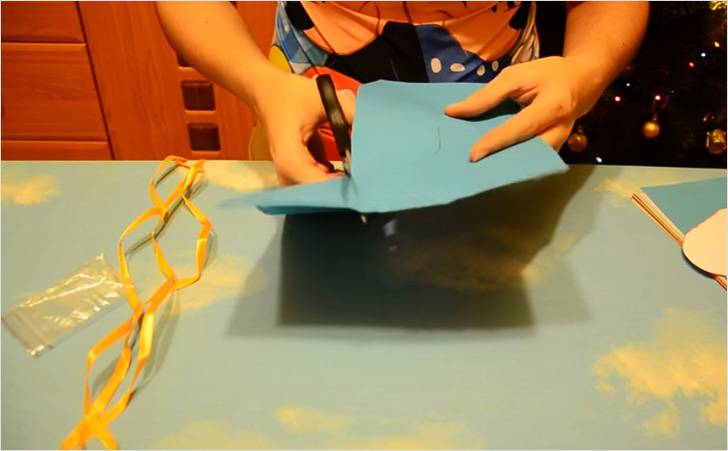 |
Decupați cizma încercuită. Facem numărul necesar de cizme de diferite culori. |
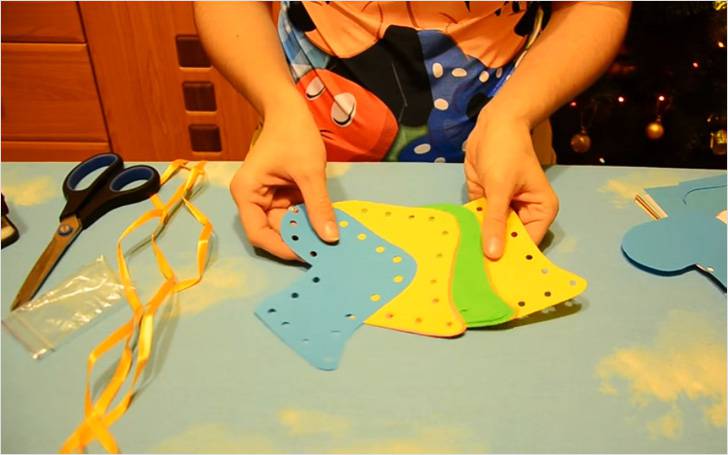 |
Apoi utilizați un perforator pentru a perfora găuri în jurul întregii cizme. |
 |
Înfilăm panglica de-a lungul marginii superioare a cizmelor. |
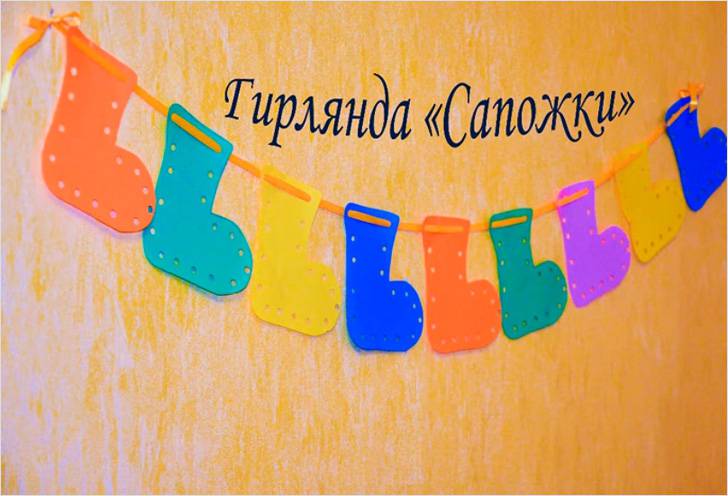 |
Atârnăm ghirlanda. |
Producția a încă două opțiuni pentru ghirlande este descrisă mai jos.
Video: ghirlandă în stil scrapbooking
Video: ghirlandă-ciucuri
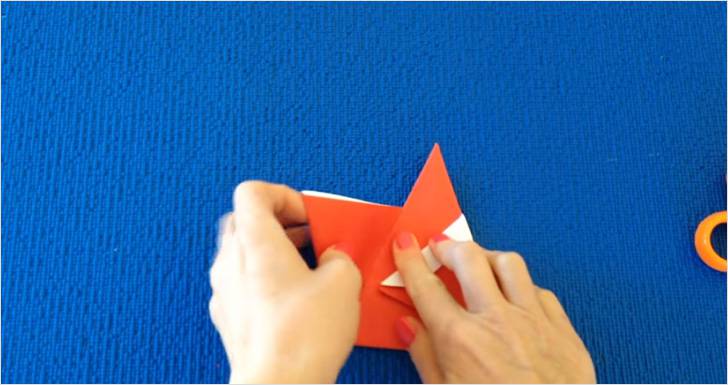
Dar astfel de ghirlande sunt departe de visul suprem. Dacă faci o ghirlandă de Moș Crăciun? Origami. Nu ai nicio îndoială, chiar dacă nu ai împăturit niciodată origami, vei reuși, pentru că mai jos vei găsi instrucțiuni pas cu pas.
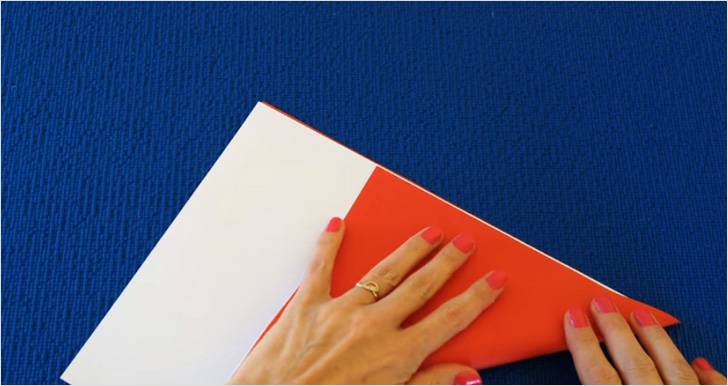 |
Așezați două coli de hârtie împreună: roșu și alb. Îndoiți în diagonală. |
 |
Tăiați partea în exces. |
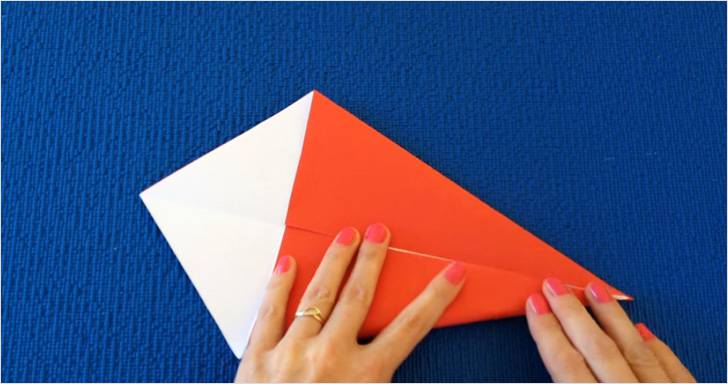 |
Desfaceți piesa pentru a crea o linie de pliere în diagonală. Așezați foaia astfel încât linia să fie îndreptată spre dvs. și îndoiți colțurile laterale spre mijloc. |
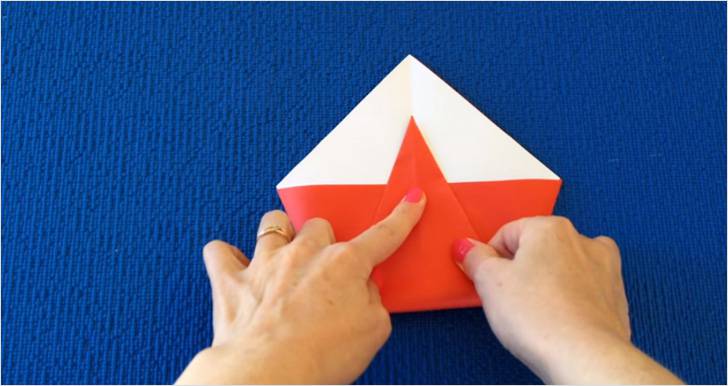 |
Îndoiți colțul roșu în sus. Partea de sus a colțului roșu ar trebui să fie aproximativ în mijlocul triunghiului alb. |
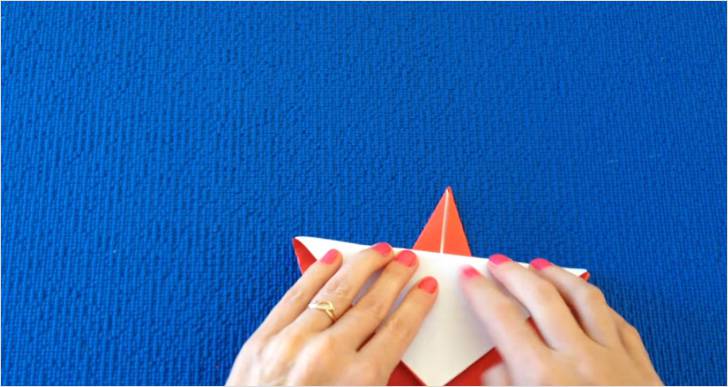 |
Întoarceți piesa de prelucrat pe cealaltă parte. Îndoiți colțul de sus în jos, pliul ar trebui să treacă peste partea cea mai lată, din colț în colț. |
 |
Apoi desfaceți pliul și, dând puțin înapoi, faceți unul mai mic. |
 |
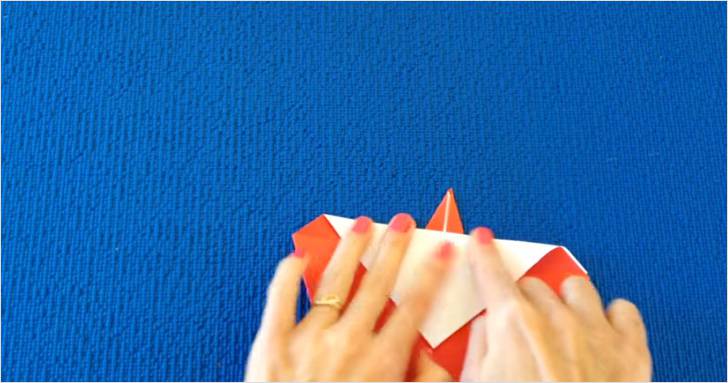
Faceți un alt pliu în jos de-a lungul liniei de pliere anterioară. |
 |
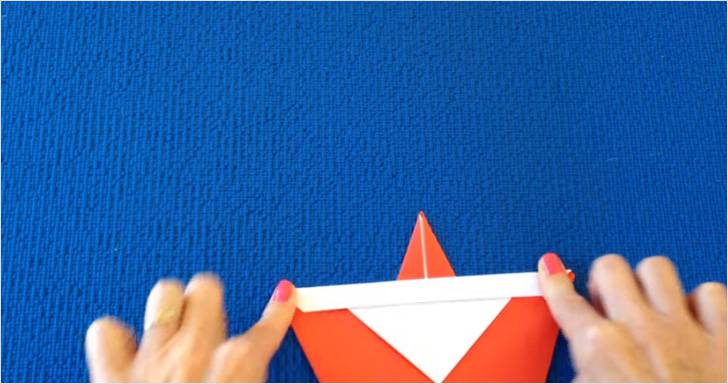
Întoarceți piesa de prelucrat. Îndoiți părțile laterale de-a lungul marginilor triunghiului din mijloc. |
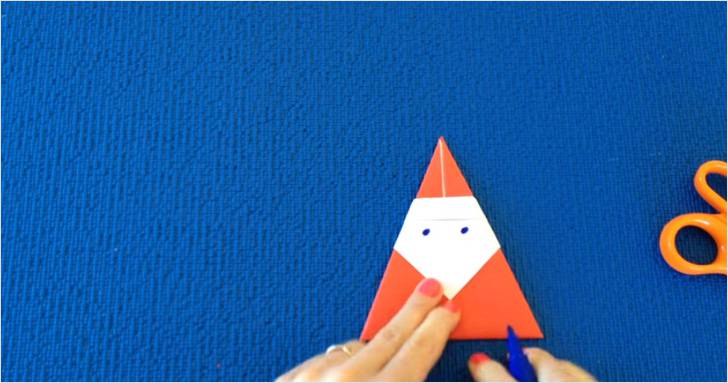 |
Întoarceți origami-ul din nou. Desenați ochii. Pentru a preveni desfacerea piesei de prelucrat, plasați „aripile” una în cealaltă sau lipiți-le cu bandă adezivă. |
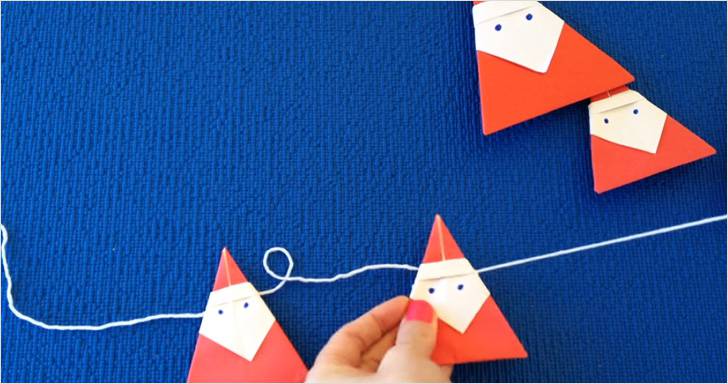 |
Înșiră figurile pe un fir. |
Copiii vor fi încântați dacă, în fața ochilor lor, transformați o foaie obișnuită de hârtie într-o ghirlandă, după cum se spune, cu o ușoară mișcare a mâinii. Pentru a face acest lucru, veți avea nevoie de mai multe coli de hârtie, foarfece și lipici pentru a conecta piesele individuale într-o bandă lungă.
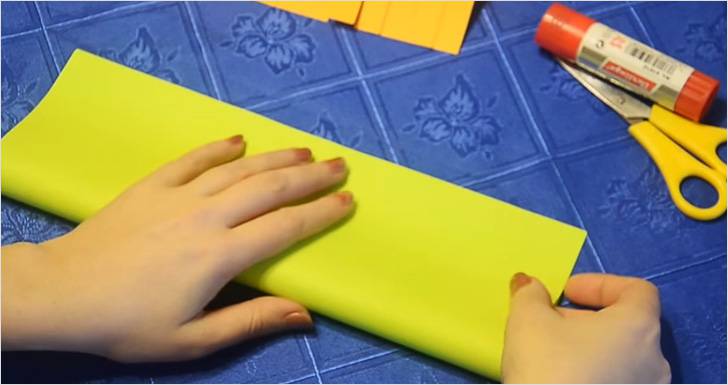 |
Îndoiți o foaie de hârtie colorată în jumătate pe lungime. |
 |
Apoi - iar în jumătate. |
 |
Faceți tăieturi lungi de-a lungul întregii margini. Întoarceți piesa de prelucrat pe cealaltă parte și faceți tăieturi similare între cele anterioare. |
 |
Derulați cu grijă. Lipiți piesele individuale împreună de-a lungul marginilor. |
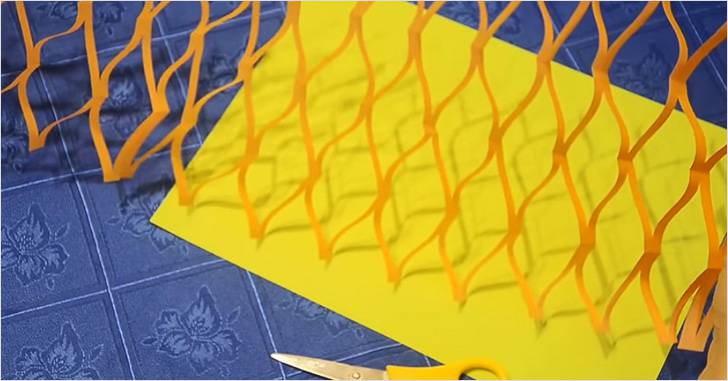 |
Întinde. |
Folosind un principiu similar, se realizează o altă versiune a ghirlandei, care poate fi lipită împreună sub formă de felinare.
Video: ghirlandă de întindere
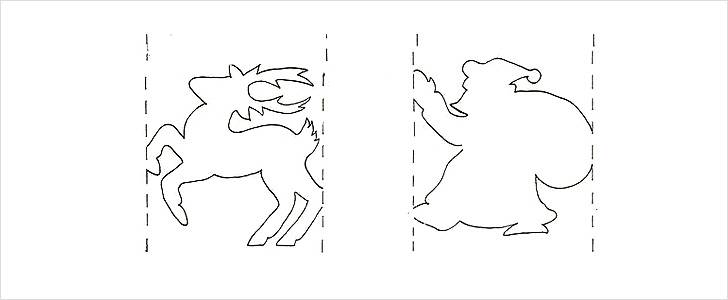
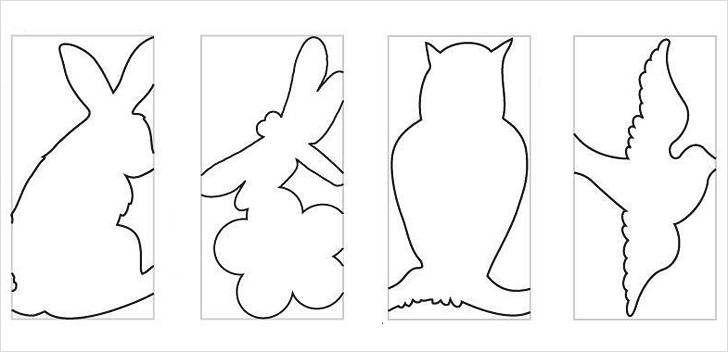
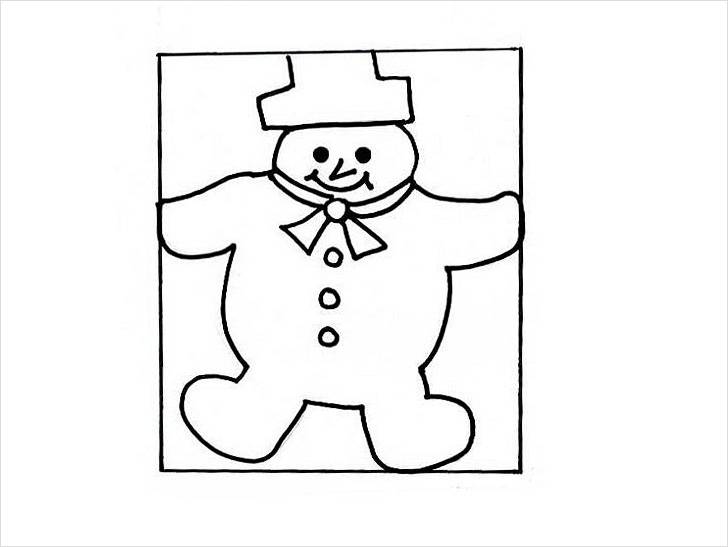
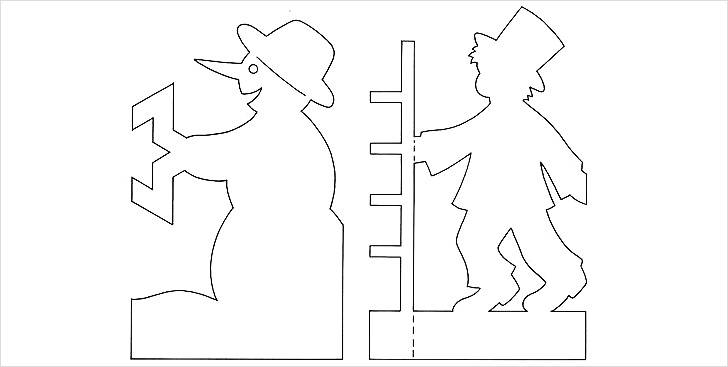
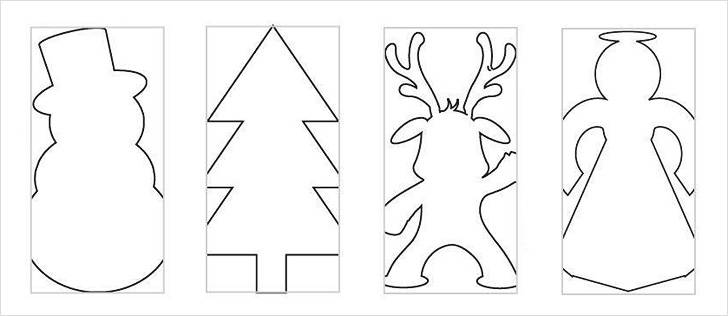
O modalitate foarte simplă de a face o ghirlandă pe care o poți prezenta copiilor este următoarea: o foaie de hârtie este îndoită în jumătate pe lungime și apoi în stil acordeon. O siluetă este desenată deasupra folosind un șablon sau manual. Este decupat. Acordeonul este întins și se obține o ghirlandă de siluete repetate de oameni de zăpadă, căprioare și păsări. Cum se face o astfel de decorare este prezentat mai detaliat în videoclip.
Video: ghirlandă de acordeon
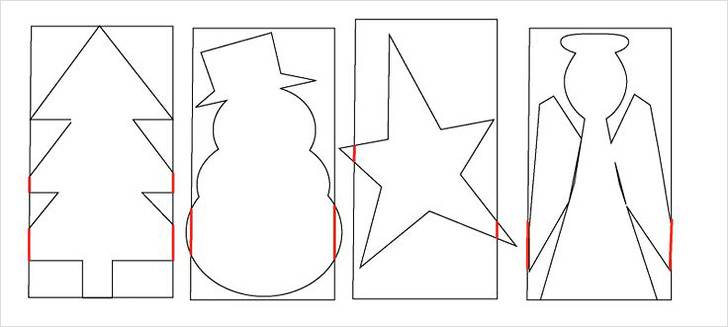
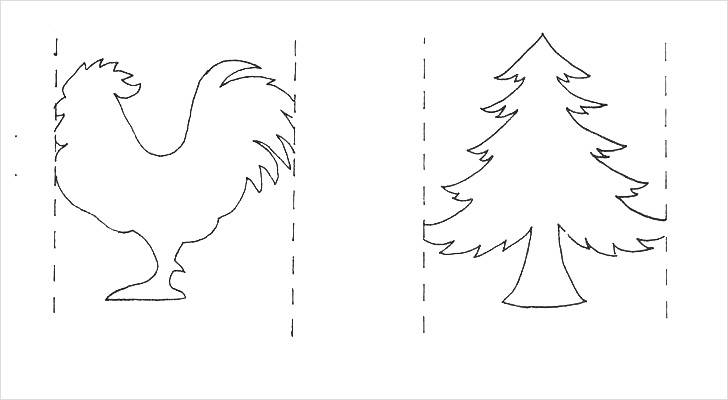
Postăm aici diferite șabloane cu care poți realiza o ghirlandă folosind acest principiu.
![]()
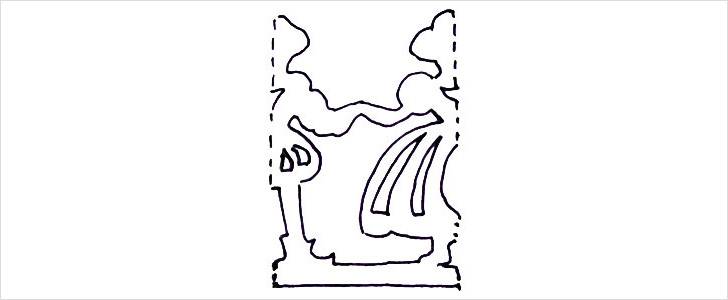
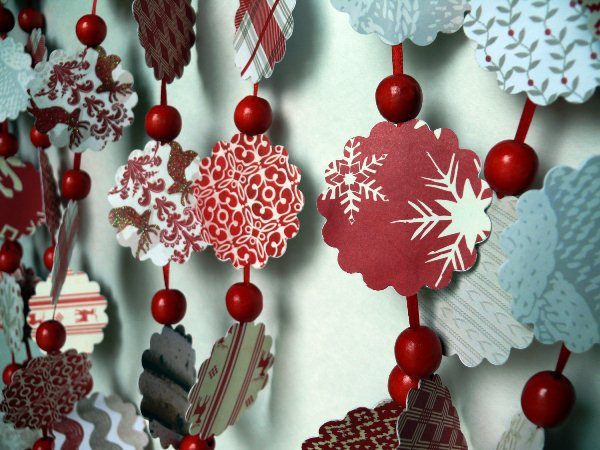
Există și modele foarte interesante pentru ghirlande de hârtie. De exemplu, acesta.
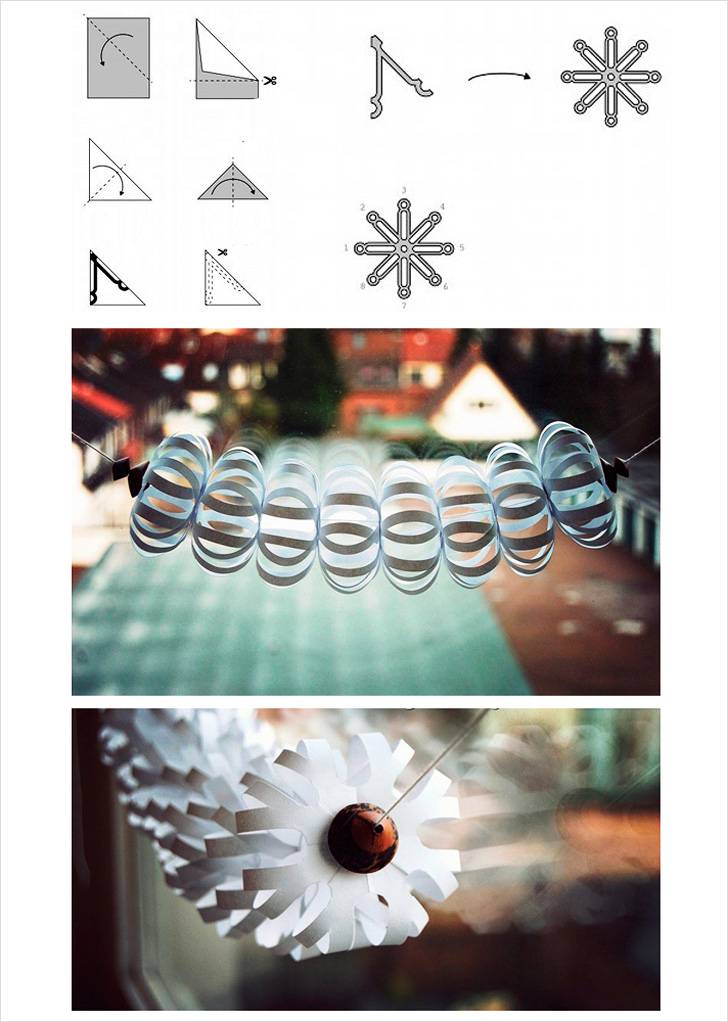
După cum puteți vedea, aici trebuie să tăiați un fel de fulg de zăpadă dintr-o foaie de hârtie. La asamblarea unei ghirlande, un fir este trecut prin mijlocul piesei, apoi toate razele sunt colectate pe ea. Apropo, ghirlandele din fulgi de nea sunt foarte populare, iar aceasta este departe de a fi singura opțiune. Se va dovedi foarte frumos dacă tăiați o mulțime de fulgi de nea sculptați și îi lipiți împreună, așa cum se arată în fotografie, apoi îi înșirați pe un fir.
![]()
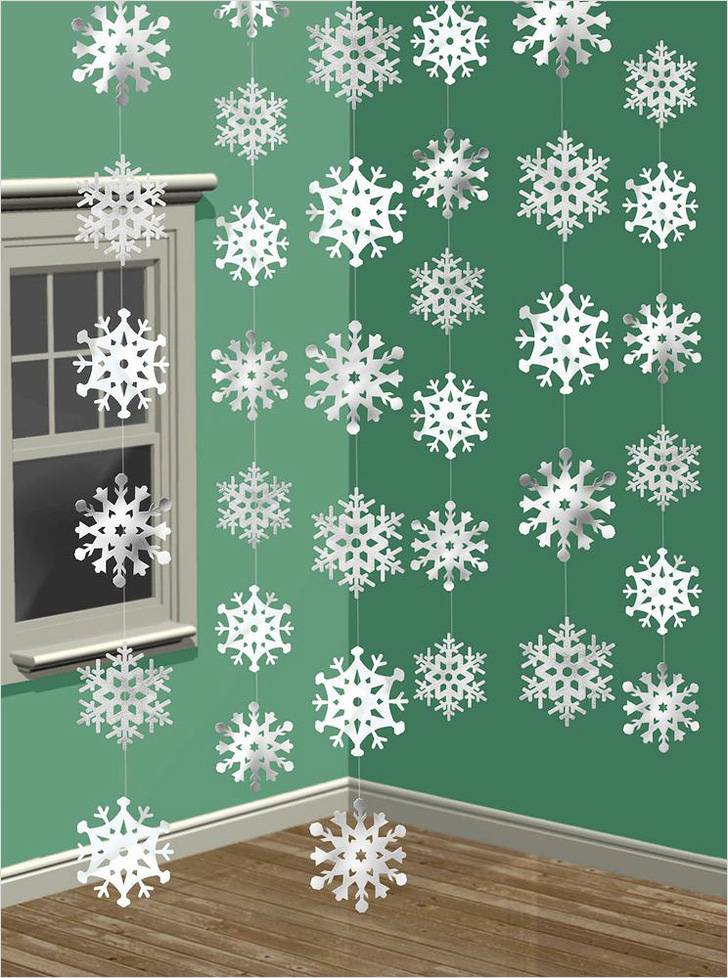
Aceasta este o ghirlandă concepută pentru a fi atârnată orizontal. Dar puteți plasa firele pe verticală, adunând pe ele fulgi de zăpadă mari sau mici, astfel încât modelul lor sculptat să fie clar vizibil.
Vezi mai multe idei. Poate o să-ți placă ceva mai bun.
![]()
Propriul meu electrician
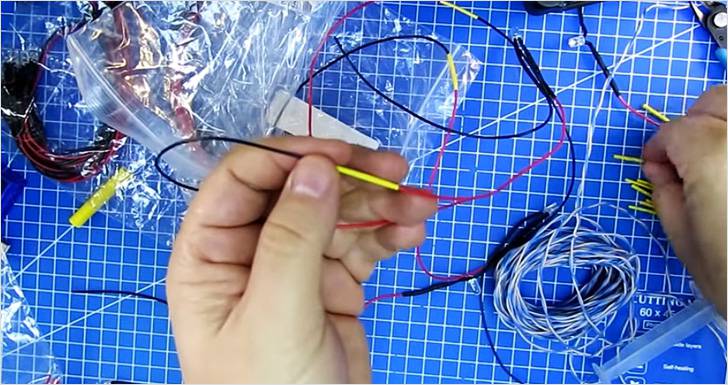
În zilele noastre puteți cumpăra cu ușurință o ghirlandă cu LED. Dar cât timp va funcționa? Pentru meșteri există o opțiune - de a colecta ghirlandă electrică pe cont propriu. Cumpărați LED-uri. Se pot vinde cu fire sau separat.
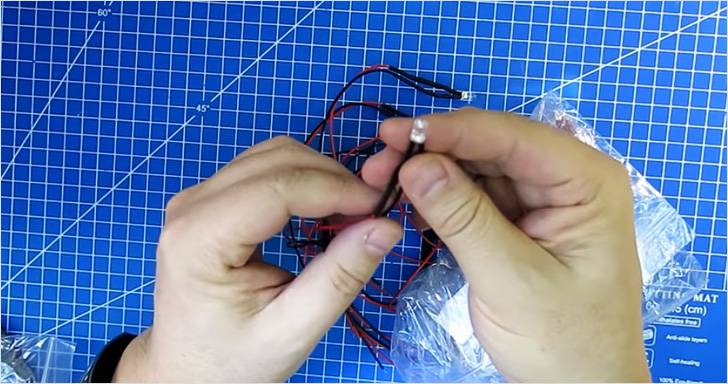 |
Dacă LED-ul este vândut cu fire, acesta include un LED color, sub termocontractabil există o rezistență de limitare a curentului în interior. 40 de LED-uri sunt suficiente pentru a face o ghirlandă. |
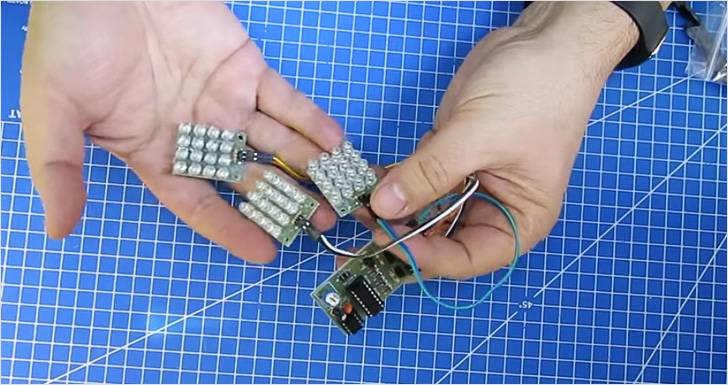 |
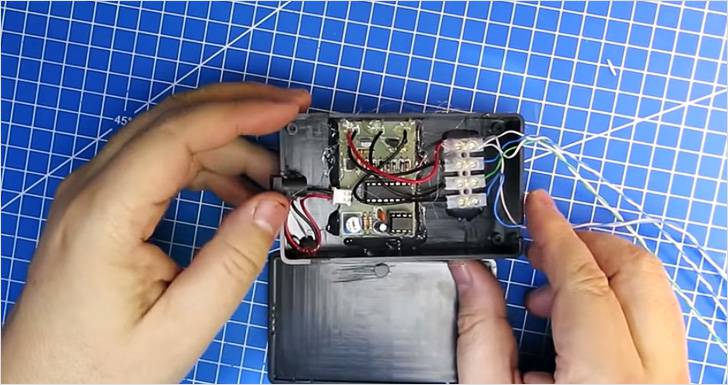
Am nevoie de un șofer. Puteți comanda acest design. Soferului i se furnizeaza curent, iar in loc de placi cu lampi, vom face trei ramuri ale unei ghirlande. |
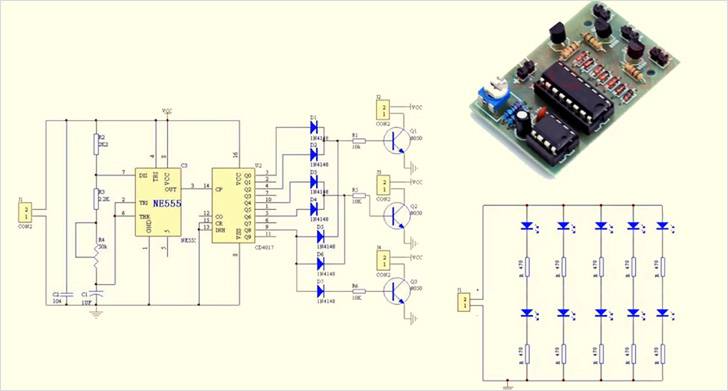 |
Iata schema electrica. |
 |
Este necesar să lipiți LED-urile împreună și să vă asigurați că există trei canale. Conectarea a două lămpi este foarte simplă. Lipiți plus la minus, acoperiți conexiunea cu termocontractabil. Se întâmplă ca firele către LED-uri să nu fie lipite, ci mai degrabă înșurubate. În acest caz, nu vorbim despre fiabilitatea designului. Va trebui să lipiți totul. |
 |
Pentru a oferi ghirlandei un aspect nobil, cumpărați o carcasă de plastic dintr-un magazin online - este ieftin, lipiți șoferul în interior cu adeziv topit la cald. Toate firele sunt acoperite cu un capac. |
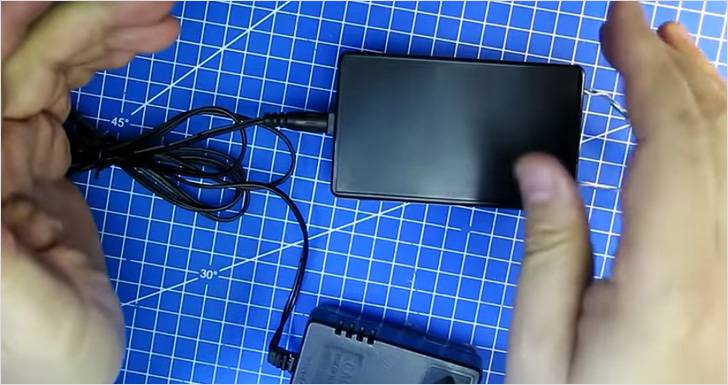 |
Puteți conecta ghirlanda la electricitate printr-o sursă de alimentare de 12 V de la echipamentul vechi. |
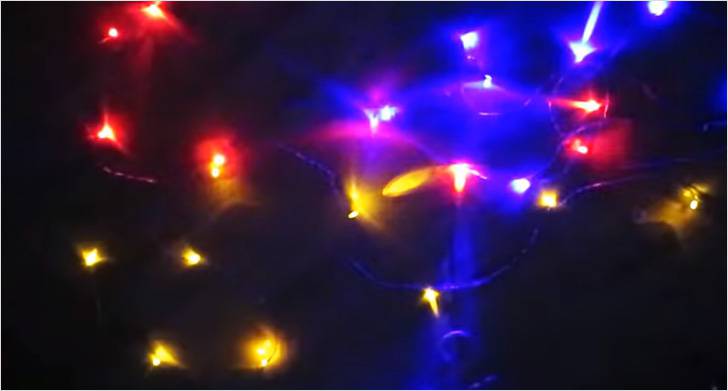 |
Ghirlanda funcționează. |
Dacă ghirlandele cu LED-uri sunt acum vândute peste tot, atunci ghirlandele realizate din lămpi cu incandescență obișnuite sunt acum problematice de cumpărat, dar le puteți face singur. Ele transmit perfect spiritul vremurilor și sunt potrivite pentru organizarea unei petreceri de Revelion în stil retro.
Video: ghirlandă retro de becuri
Conuri și alte materiale naturale
Multe opțiuni pentru ghirlande de conuri. Conurile trebuie pregătite - spălate și uscate. Utilizați suplimentar:
- dantelă;
- margele;
- împletitură;
- picior-despicat;
- panglici;
- crenguțe;
- batoane de scorțișoară sau stele de cuișoare;
- felii de citrice uscate.
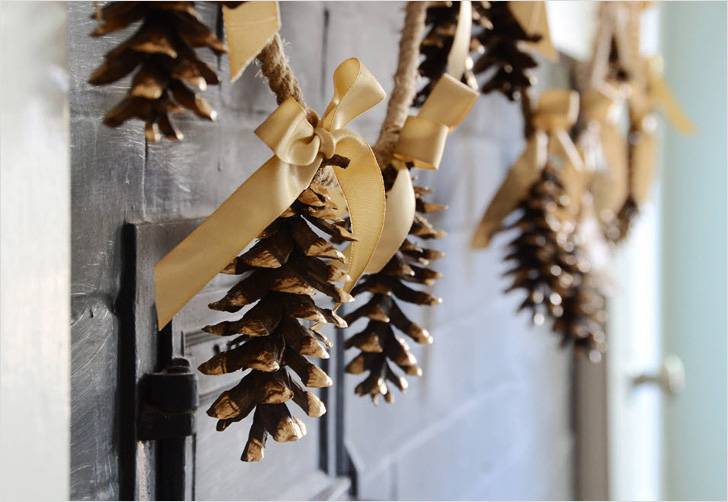
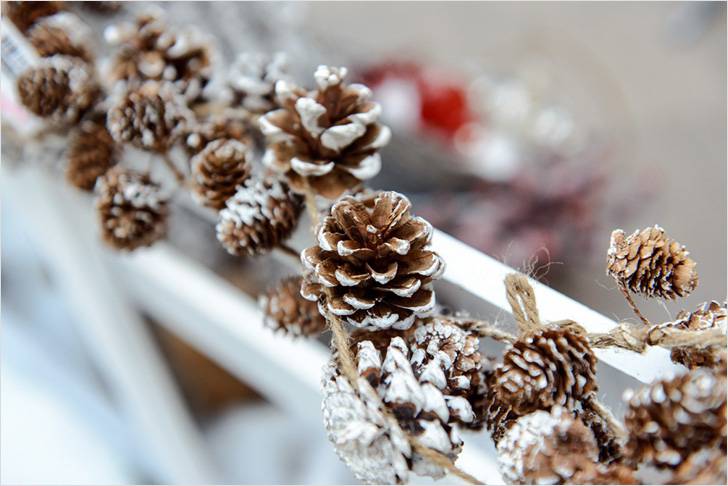
Instrumentele care sunt de obicei utile sunt un pistol termic sau un lipici de tip Moment-Crystal. Cea mai ușoară modalitate este de a aduna pur și simplu conurile pe un fir, după ce le nuanțați cu vopsea albă pentru a reprezenta zăpada, sau cu vopsele colorate. Ca vopsele sunt folosite guașa, emulsie pe bază de apă și vopsele acrilice.
Video: cum să pictezi conuri de pin
Ghirlande frumoase sunt colectate din conuri deja pregătite, pictate. Manipulările de bază pentru realizarea unei ghirlande de conuri sunt prezentate mai jos.
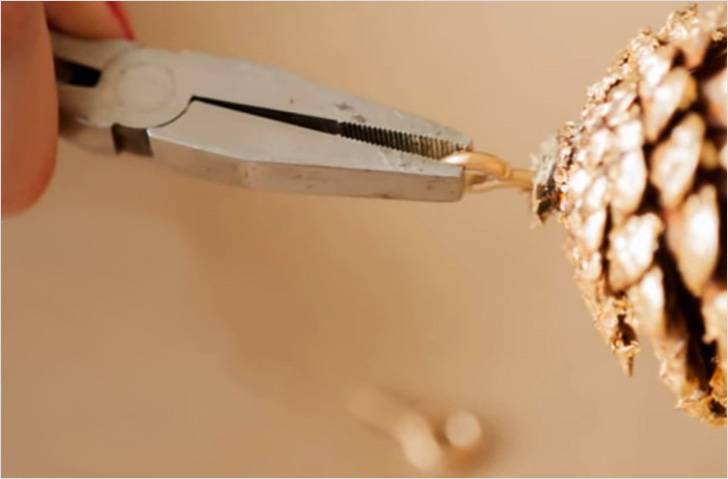 |
Pentru a înșira conuri pe o frânghie, trebuie să înșurubați un șurub cu un cârlig în con. Șurubul poate fi prevopsit cu vopsea spray în culoarea dorită. |
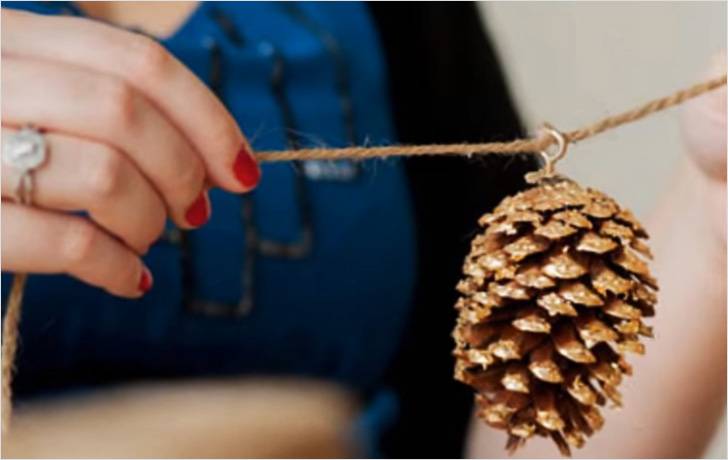 |
Când toate conurile sunt deja cu cârlige, tăiați o bucată de sfoară cât va fi ghirlanda. Să înșirăm un con. Este indicat să-l plasați în centru. După aceasta, facem un nod pentru a ține conul de pin pe loc. |
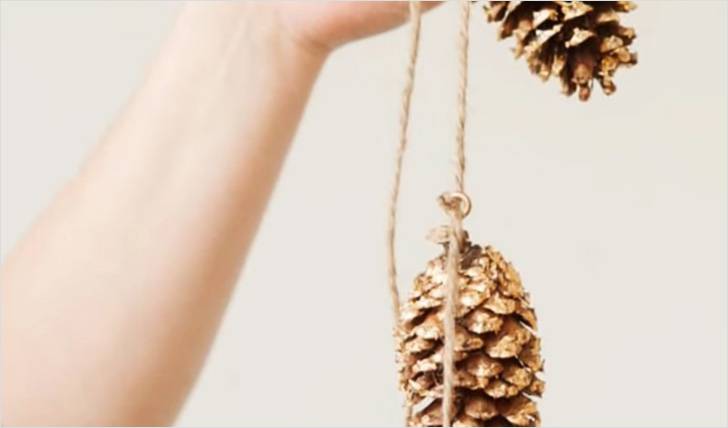 |
Adăugați numărul necesar de conuri de pin în jurul marginilor. Nu uitați să le fixați pe fiecare cu un nod. |
Și acolo puteți acționa la propria discreție, înșirați strâns conurile, așezați alt decor între ele și decorați-le cu funde. Apropo, ghirlandele din hârtie și baloane sunt completate cu conuri. Pentru inspirație, postăm câteva fotografii cu idei de design interesante.
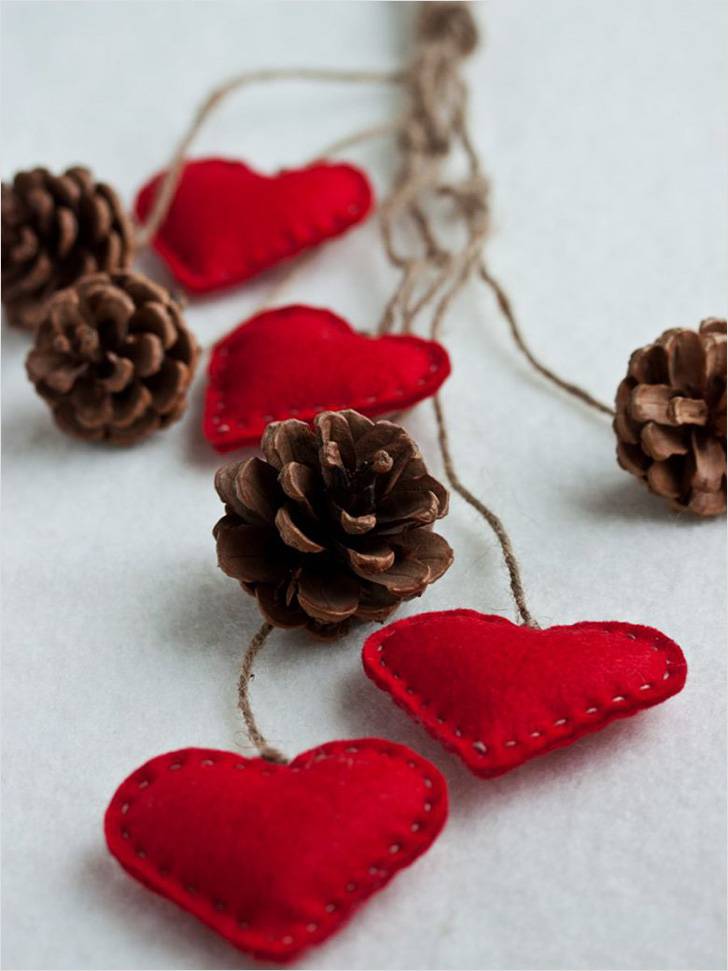
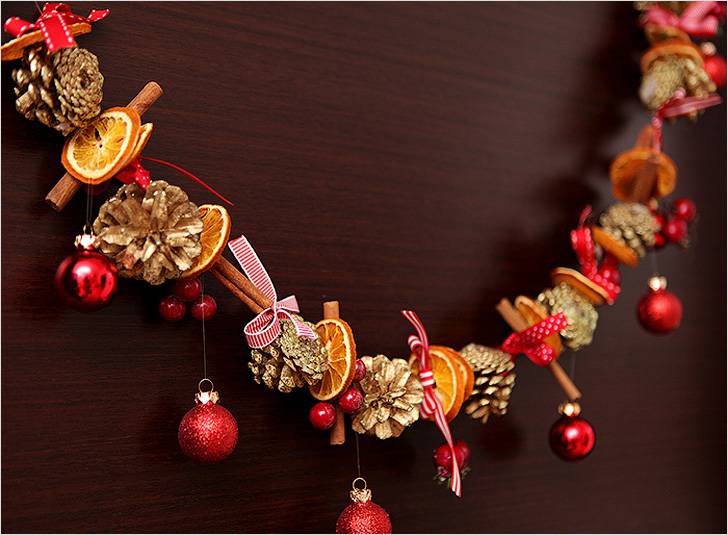

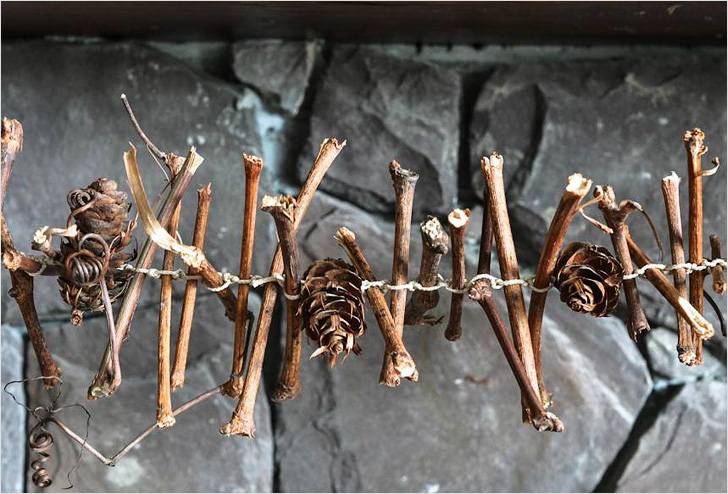
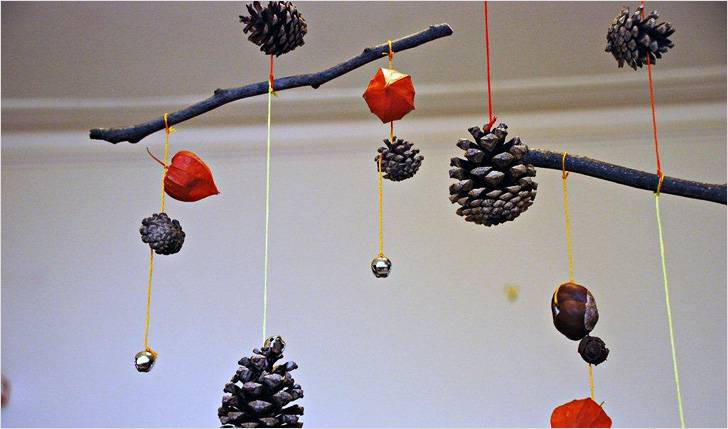
După cum puteți vedea, ghirlandele de conuri de pin sunt decorative, iar unele produse se disting și prin originalitate. Există chiar și ghirlande făcute din ramuri de foioase, care sunt împletite cu fir împreună cu conuri de pin.
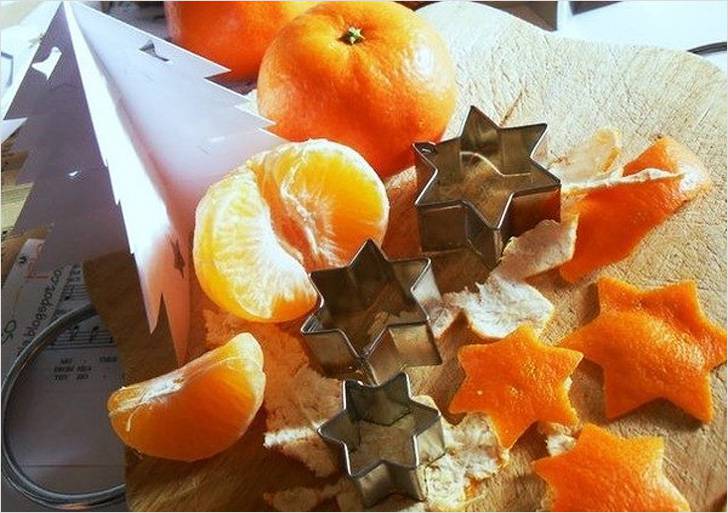
Fără miros de mandarine, Anul Nou își pierde puțin din magie și farmec aparte. Crustele din kilogramele de mandarine consumate în ajunul sărbătorii pot fi folosite pentru o cauză bună - realizarea unei ghirlande. Și se va dovedi nu simplu, ci imaginat. Utilizați forme metalice pentru prăjituri pentru a decupa stelele, inimioare sau alte forme.
Meșteșuguri din pâslă: idei interesante
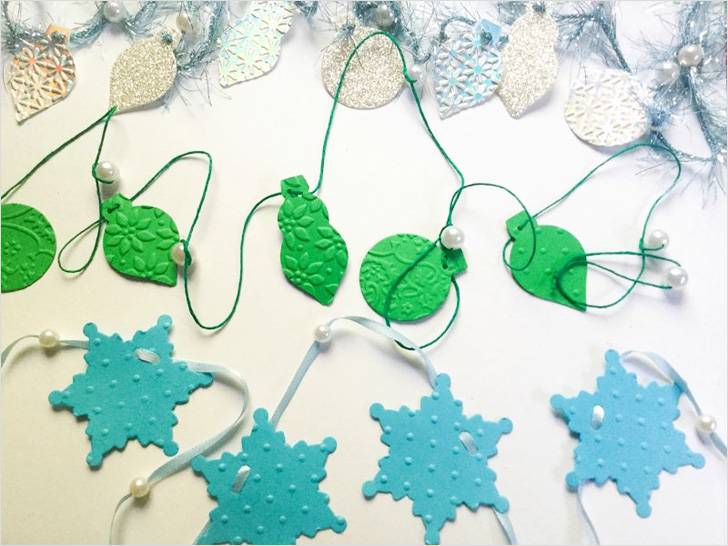
Pâsla este adesea folosită pentru a face jucării și decorațiuni, în special decorațiuni de Crăciun. Să încercăm să facem ghirlande de Anul Nou folosind tehnica obișnuită pentru acest material.
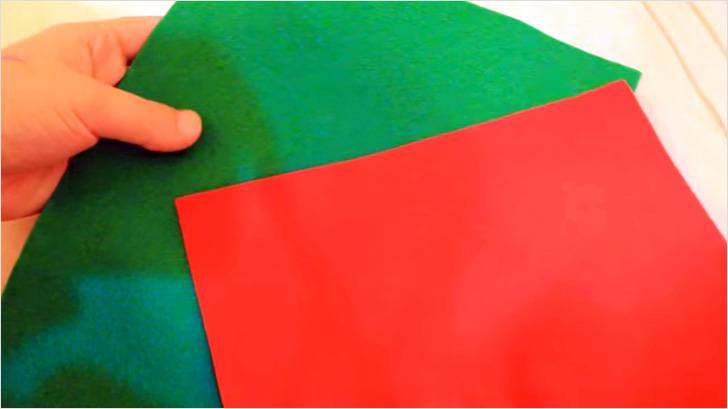
Veți avea nevoie de:
- pâslă verde, roșie, maro (albă);
- fire de tricotat roșii sau panglică;
- fire roșii obișnuite;
- ac;
- foarfece;
- Pandantiv cu tematică de Anul Nou;
- captuseala poliester
| Îndoiți pâsla roșie în jumătate. Desenăm ciorapi roșii pe ea. | |
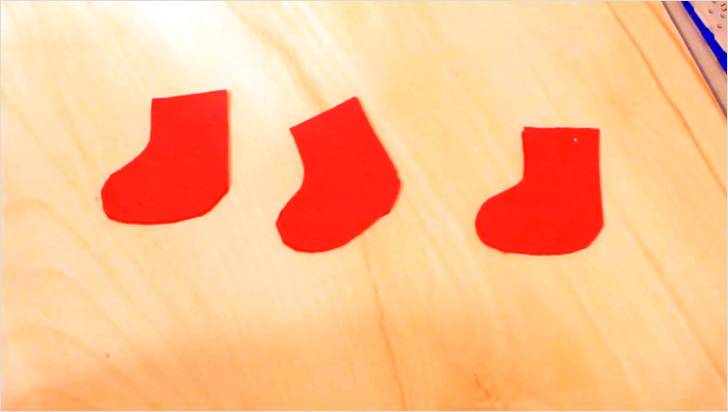 |
Tăiem spațiile goale câte două. |
 |
Tăiați benzi subțiri din pâslă maro sau albă. |
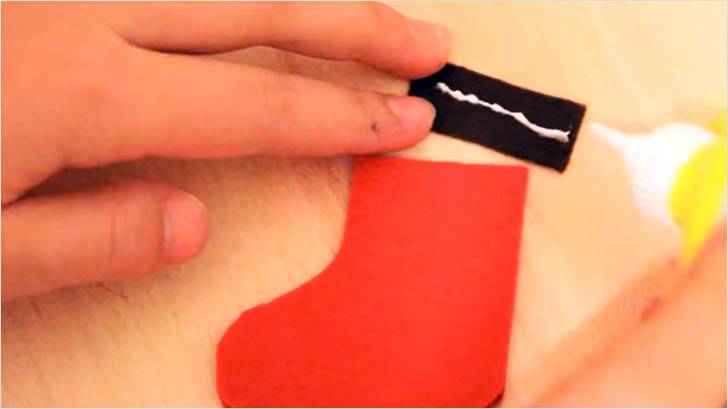 |
Semnele noastre sunt, de asemenea, stivuite în două. Lipiți benzi de pâslă maro (albă) folosind lipici PVA pe ciorapi. Repetăm aceeași operațiune pe verso. |
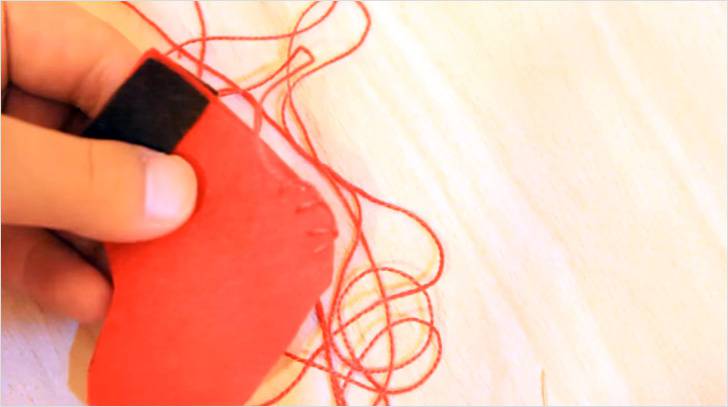 |
Cusem marginea produsului cu o cusătură pentru butoniere. Nu coasem vârful. |
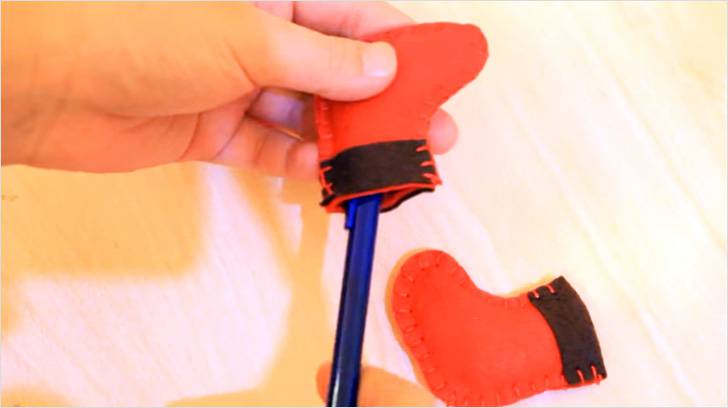 |
Umplem ciorapul cu umplutură de poliester prin orificiul din stânga. Folosim puțin umplutură. Dacă poliesterul de căptușeală nu împinge în interior, utilizați un creion sau un stilou ca unealtă. |
 |
Coaseți o buclă de pâslă. |
 |
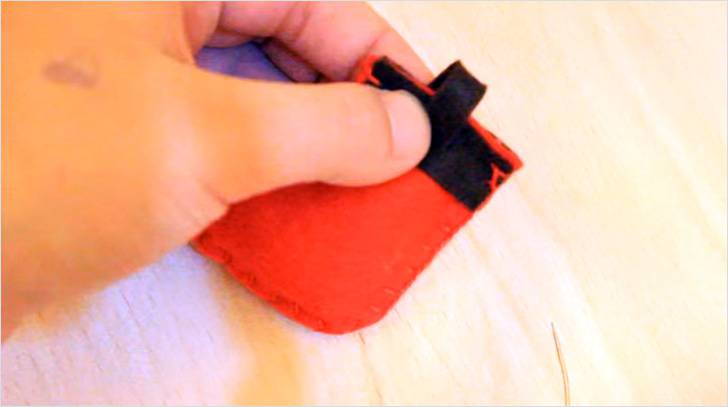
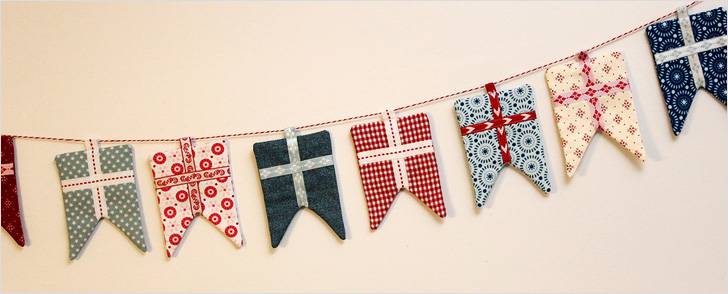
Vom face cadouri din pâslă roșie și verde. |
| Tăiem pătrate duble din pâslă verde și funde și dungi din pâslă roșie. | |
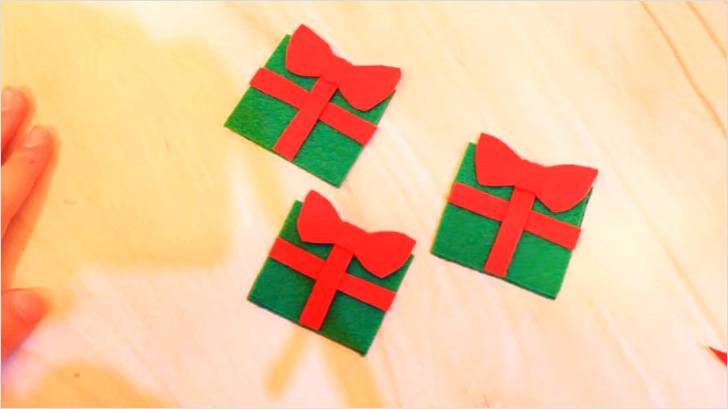 |
Lipim decorul roșu cu lipici PVA în această formă. |
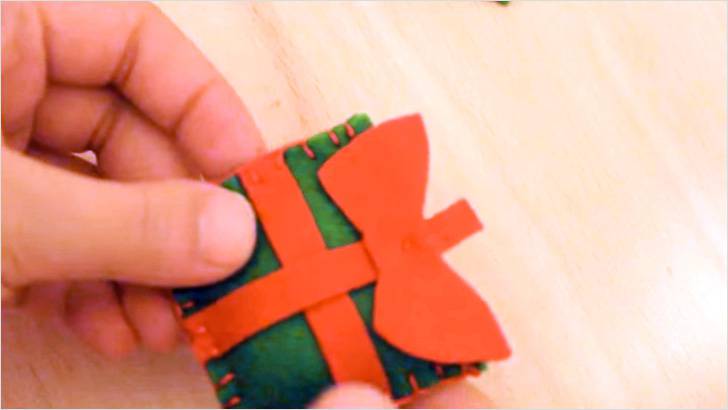 |
Cosem cadourile cu o cusătură pentru butoniere, lăsând o gaură în partea de sus și le umplem cu poliester de căptușeală, la fel ca ciorapii. Facem o buclă din pâslă roșie. |
 |
Înșirăm totul pe o ață de tricotat sau o panglică. |
 |
Pandantivul poate fi realizat din lut polimeric. |
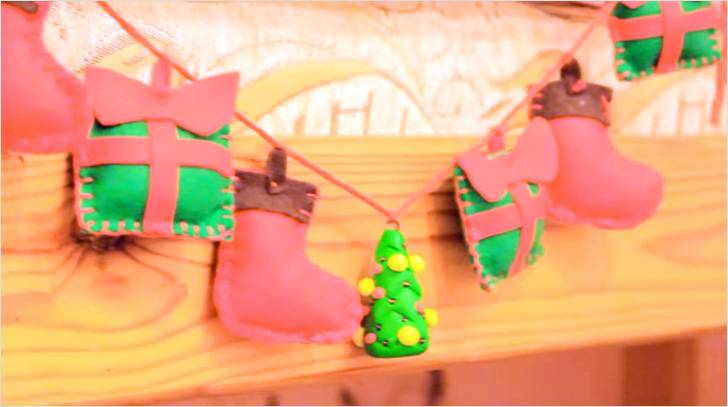 |
În general, este nevoie pentru a cântări mijlocul ghirlandei și a-i da formă în timp ce atârnă. |
Unde să pun resturile de țesătură
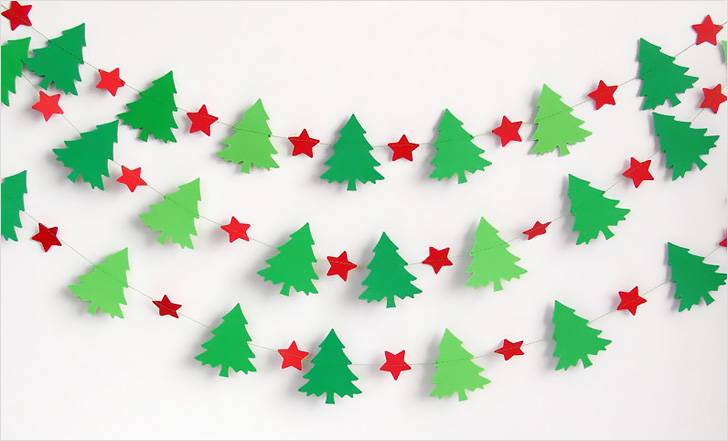
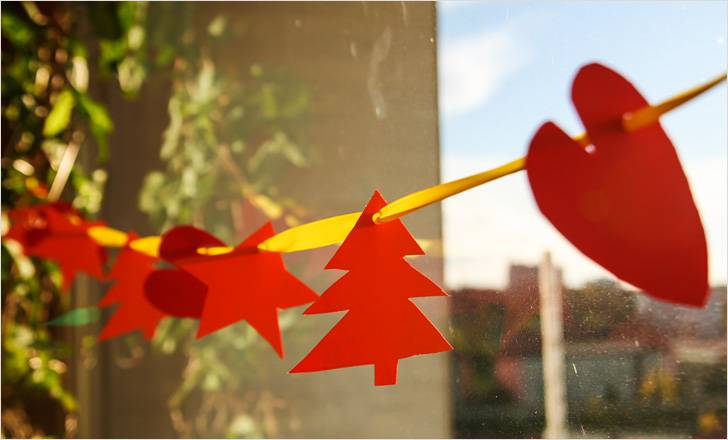
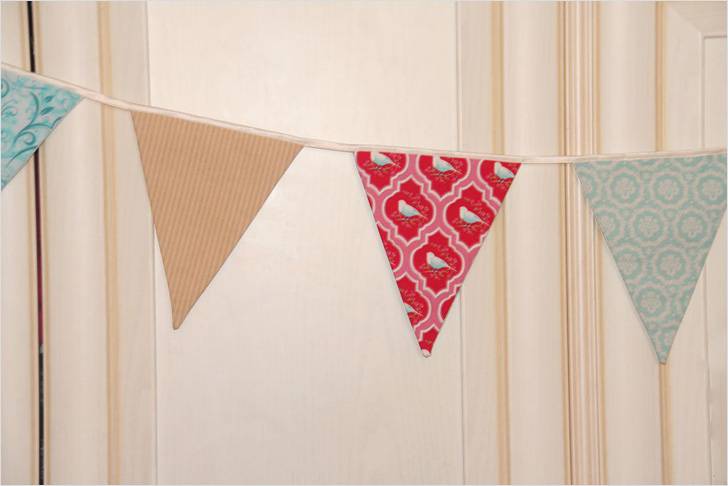
Am luat deja în considerare multe idei, dar nu ar trebui să uităm de încă un material - materialul obișnuit. În ajunul Anului Nou, se obișnuiește să scapi de lucrurile vechi și inutile, să golești dulapul de haine care au stat în el tot anul ca greutate moartă. Acesta poate fi folosit ca resturi pentru ghirlande strălucitoare pentru pomul de Crăciun. Decupați steaguri, pomi de Crăciun și stele din el. Agățați-l așa sau umpleți-l cu umplutură. Cu cât culorile sunt mai variate, cu atât mai bine.

Ghirlande neobișnuite
Și în sfârșit, câteva cuvinte despre ghirlande neobișnuite. Este puțin probabil ca aceste idei să fie primele care să vină în minte, deoarece abordarea producției lor a fost folosită într-un mod nestandard.
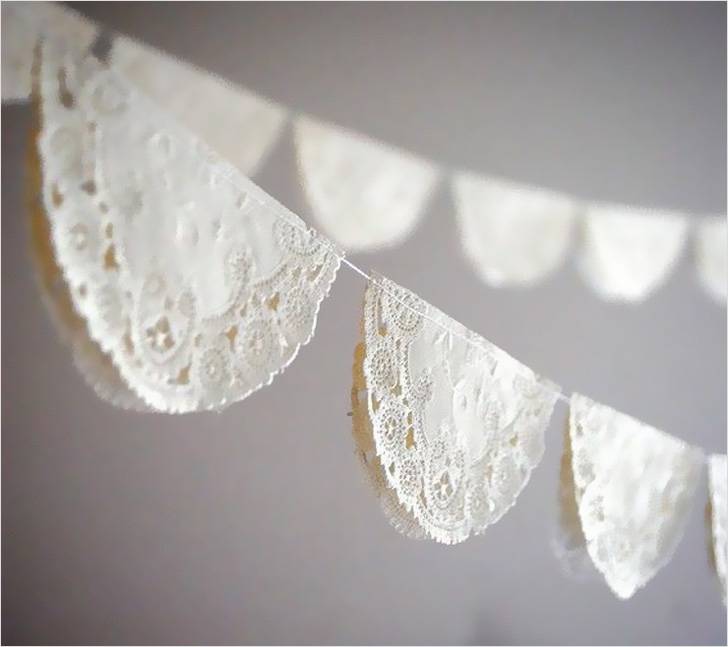
În primul rând, acestea sunt ghirlande de dantelă. Într-un caz, la fel ca una dintre ideile anterioare, se folosesc forme de prăjituri. Sunt acoperite cu adeziv PVA, de ele se lipește dantelă care, după uscare, este îndepărtată și capătă forma unei inimi. Rămâne doar să le înșiri pe un fir.

Într-o altă versiune, dantelă este tricotată, sau mai bine zis, fulgi de zăpadă din dantelă sunt tricotați, care arată grozav și sub forma unei ghirlande.
A treia opțiune este o ghirlandă de tuburi de cocktail.
Video: realizarea unei ghirlande din tuburi
Poate că acestea nu sunt toate ideile, dar măcar materialele prezentate sunt suficiente pentru a pregăti apartamentul și bradul de Crăciun pentru Anul Nou.
Ghirlandele de Revelion sunt cel mai comun mod de a decora o casă sau un apartament pentru sărbători. Acest decor poate fi cumpărat în aproape orice magazin, dar va fi mai interesant dacă îl faceți singur. Acest proces va atrage toți membrii familiei și, cel mai important, rezultatul va fi o ghirlandă originală pentru Anul Nou 2017, creată cu propriile mâini, cea mai potrivită materiale simple: hârtie, țesătură, lipici, foarfece, perforator.
lanț de hârtie
Un lanț de hârtie este cea mai simplă și mai comună ghirlandă de Anul Nou. Chiar și un copil mic poate reuși.
Pentru a o face veți avea nevoie de:
- Hârtie colorată;
- Lipici;
- Foarfece.
Progresul lucrării:
- Tăiați hârtia colorată în fâșii de lungime și lățime egale.
- Faceți un inel din bandă și fixați-l cu lipici.
- Treceți o altă fâșie de hârtie de altă culoare prin inel. Creați un inel.
- Conectați inelele în acest fel, alternând diferite culori. Se dovedește a fi un lanț de hârtie frumos.
Acest decor va fi un decor minunat pentru sărbătorile de Anul Nou.
Ghirlandă de Revelion din hârtie
Această ghirlandă este atașată de tavan și pur și simplu atârnă în jos. Pare foarte interesant ca decorare a camerei pentru Anul Nou.

Opțiunea 1. Trebuie să pregătiți:
- Hârtie colorată;
- Foarfece;
- Lipici.
Progresul lucrării:
- Felie hârtie coloratăîn fâșii de 5-7 cm lățime. Toți ar trebui să fie la fel.
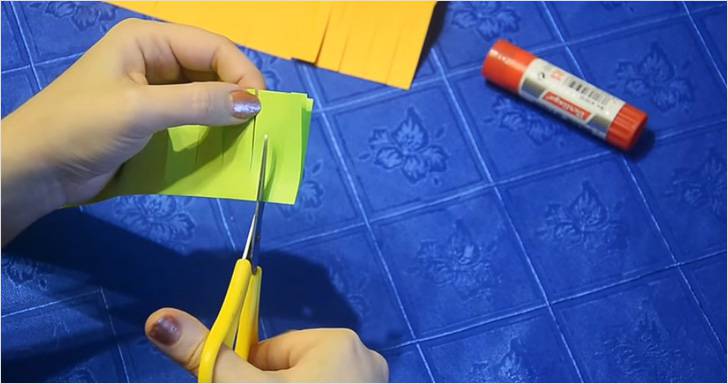
- Faceți tăieturi egale pe benzi la fiecare 1 cm, alternând din părți diferite.
- Lipiți marginile benzilor rezultate între ele la lungimea necesară.
- Atârnă o ghirlandă lucrată manual de tavan.
Opțiunea 2. Pentru a lucra la ghirlanda veți avea nevoie de:
- Hârtie colorată;
- Foarfece.
Tăiați un cerc din hârtie și tăiați-l treptat în spirală spre mijloc. Grosimea spiralei poate fi realizată de aproximativ 1-1,5 cm Ghirlanda este atârnată pe tavan. Puteți lipi un om de zăpadă de hârtie sau un brad de Crăciun de capătul liber al ghirlandei.
Ghirlandă de Crăciun din fulgi de nea voluminosi

Pentru a crea o ghirlandă de fulgi de nea voluminosi, trebuie să luați:
- hârtie A4 (color sau alb);
- Foarfece;
- Capsator.
Progresul lucrării:
- Tăiați un pătrat echilateral din hârtie. Îndoiți-l într-un triunghi isoscel.
- Faceți tăieturi din mijloc de 1,5-2 cm lungime. lăsând aproximativ 1 cm pe marginea opusă.
- Extindeți pătratul. Colțurile pătratului mic obținut în urma tăieturilor sunt fixate cu un capsator.
- Întoarceți și faceți același lucru cu următorul pătrat de dimensiune. În acest fel, fixați toate colțurile, alternând laturile.
- Fixați petalele rezultate împreună la mijloc și la margine pentru a face un fulg de zăpadă.
- Folosește un capsator pentru a lega fulgii de nea în două puncte unul față de celălalt, vei obține o ghirlandă de fulgi de nea voluminosi.
Astfel de ghirlandă frumoasă va deveni luxos Decor de Anul Nou. Va arăta perfect acasă sau la serviciu și va fi, de asemenea, un decor grozav pentru biroul școlii.
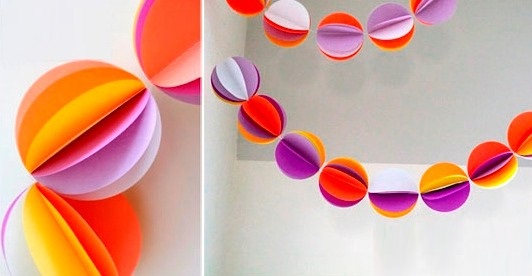
Ghirlandă de bile de hârtie
Bilele mici și îngrijite colorate, adunate pe un fir, sunt un decor bun de Anul Nou. Există mai multe opțiuni pentru a crea astfel de ghirlande. Mai jos sunt cele două cele mai comune.

Opțiunea 1. Pentru a crea veți avea nevoie de:
- Foarfece;
- Hârtie colorată;
- Fire;
- Lipici.
Cel mai dificil lucru în a face o astfel de ghirlandă cu propriile mâini este crearea bilelor în sine. Pentru a nu strica foile de hârtie colorată, puteți exersa pe un ziar obișnuit.
- Tăiați două spații libere din hârtie colorată. Sunt formate din 2 stuf.
- Începeți să țeseți 4 limbi, creând o formă de minge.
- Când mingea este terminată, urechile sunt atașate cu lipici. Tăiați excesul.
- Odată ce un număr suficient de bile sunt gata, înșiră-le pe un fir.
- Rezultatul este o ghirlandă multicoloră și originală care va decora o cameră sau un brad de Crăciun.
Opțiunea 2. Trebuie să pregătiți:
- Hârtie colorată (de preferință strălucitoare)
- Foarfece;
- Sticlă;
- Creion;
- Fire;
- Maşină de cusut.
Progresul lucrării:
- Pe hârtie colorată, trasând sticla, desenați cercuri (viitoarele elemente ale ghirlandei);
- Tăiați cu grijă.
- Puteți lua 6 cercuri sau mai multe pe minge. Îndoiți în combinație de culori care iti place mai mult.
- Folosind o mașină de cusut, coaseți o stivă în mijlocul cercului. La sfârșitul cercului, fără a întrerupe cusătura, continuați cusătura elementelor.
- Când ați terminat, îndoiți fiecare cerc în jumătate. Veți obține o mulțime de bile voluminoase legate strâns cu ață.
Frumoasa ghirlandă este gata. Puteți decora în siguranță o sală de clasă, un apartament sau un grup de la grădiniță cu el.
O ghirlandă de floricele de porumb și merisoare va arăta original pe copac și va fi un decor excelent de Anul Nou. Și cel mai important, crearea unei astfel de ghirlande aduce întotdeauna bucurie și distracție.
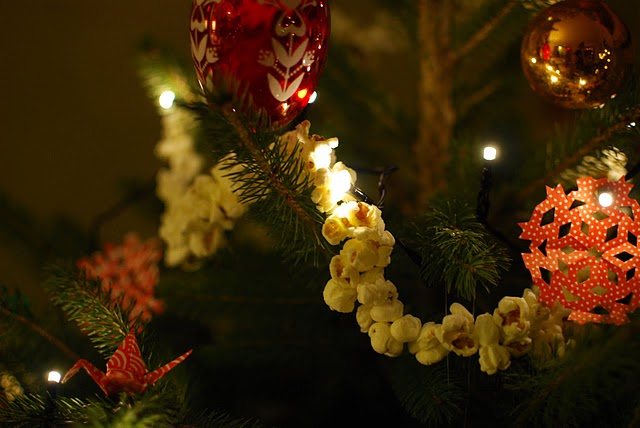
Pentru a-l crea veți avea nevoie de:
- Popcorn;
- Merișor;
- ață;
- Ac.
Folosind un ac, firați floricelele de porumb și merisoarele, alternând după cum doriți. Ghirlanda este gata. Dar trebuie să vă amintiți că este mai bine să gătiți mai multe floricele decât este necesar, deoarece o parte din ele se mănâncă în timpul realizării decorului.

Pentru a crea o ghirlandă de beteală din ambalaje de bomboane cu propriile mâini, veți avea nevoie de:
- Ambalaje;
- Foarfece;
- ață;
- Ac.
Progresul lucrării:
- Ar trebui să începeți prin a tăia dreptunghiuri identice din ambalajele de bomboane. Puteți alege orice dimensiune, de exemplu 3x5 sau 2x4. Depinde de ambalajele de bomboane disponibile.
- Răsuciți dreptunghiul într-un tub și, folosind un ac, treceți un fir prin mijloc.
- Faceți același lucru cu dreptunghiurile rămase.
- După ce am pus toate elementele pe fir, am primit beteală frumoasă pentru pomul de Anul Nou.
![]()
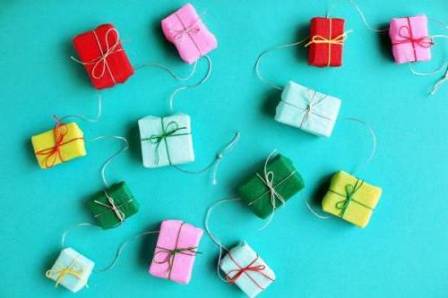
O ghirlandă de cadouri pe un pom de Crăciun va arăta original. Pentru ao crea trebuie să pregătiți:
- Foarfece;
- Cutii de chibrituri;
- Ață sau șnur;
- Adeziv topit la cald;
- Hârtie colorată, ambalaje de bomboane, pagini de reviste colorate;
- Bandă îngustă;
- Acul cu ochiul larg;
- margele;
- Panglici subțiri sau fire groase multicolore.
Progresul lucrării:
- Este necesar să împachetați fiecare cutie în hârtie și, astfel, să creați mici cadouri. Înainte de a folosi ambalaje de bomboane, acestea trebuie netezite printr-o foaie de hârtie folosind un fier de călcat. Este mai bine să fixați ambalajele de bomboane cu bandă îngustă. Învelișul de hârtie este asigurat cu lipici fierbinte.
- Pentru a da cadourilor un aspect finit, acestea ar trebui legate cu panglici sau fire multicolore. Fixați firele cu o fundă pe partea de sus a cadoului.
- Măsurați lungimea necesară a firului. Faceți un nod la un capăt.
- Folosind un ac, treceți fiecare cutie pe un fir. Puteți face noduri între cadouri sau puteți folosi diverse margele.
- Ghirlanda ta neobișnuită de bricolaj este gata. Puteți decora cu el un brad sau o fereastră. De asemenea, va arăta grozav de-a lungul peretelui sau deasupra șemineului.

Pentru cei cărora le place să decupeze fulgi de zăpadă pentru Anul Nou 2017, o ghirlandă din ei ar fi o idee grozavă. Pentru a crea un astfel de decor veți avea nevoie.