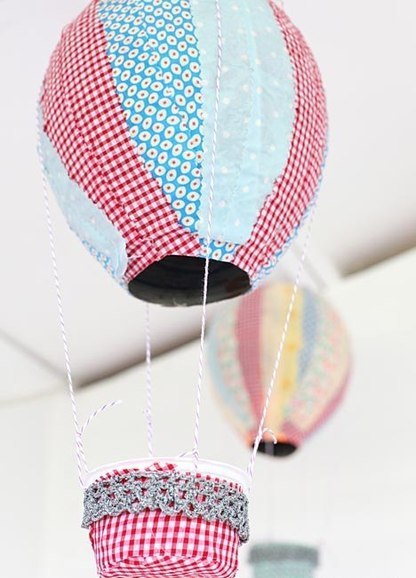
Astăzi vă vom arăta cum să vă faceți propriul balon din hârtie colorată. Puteți decora în mod creativ interiorul camerei unui copil cu aceste bile atașându-le de tavan folosind fire sau fir de pescuit subțire. Poti sa faci si un mobil pentru copii din ei. Puteți atașa bile de hârtie pe cadru folosind fire obișnuite, panglici subțiri de satin sau șireturi decorative. Dacă utilizați fir obișnuit sau fir de pescuit, atunci pentru mai mult aspect decorativînșiră pe ele mai multe margele strălucitoare de diferite dimensiuni și nuanțe.
După tăierea găurilor, îmbunătățim fața de dovleac de Halloween. Fiecare strat a acoperit secțiuni ale ziarului pentru a crea o conexiune perfectă. Cel mai bine este să faceți acest lucru înainte de a vă aplica buzele de dovleac. Găurile orbitale au apărut în găurile orbitale care vor simula o pânză de păianjen. Legătura a fost întărită prin acoperirea capetelor firului cu pietricele. Următorul pas a fost să creăm o structură pe dovleacul nostru.
Structura dovleacului hârtie igienică. Aici puteți folosi diferite idei și o puteți decora în moduri diferite. Trebuia să fim puțin înfricoșători și să ne placă culoarea unui dovleac adevărat. Este prea devreme pentru idei de artă alb-negru. Copiii ar trebui să aibă o imagine tradițională de dovleac de Halloween.
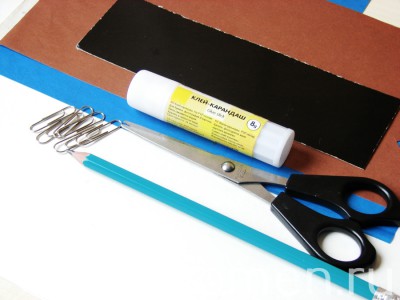
Deci, pentru a crea o minge, să pregătim câteva materiale:
- hartie colorata in doua nuante compatibile, am ales maro si albastru;
- carton de orice culoare;
- baton de lipici;
- foarfece;
- agrafe de hârtie;
- creion.
Baza a fost vopsea acrilică neagră. Dovleacul este colorat și în interior pentru a obține ambianța potrivită atunci când aprindem lampa din interiorul dovleacului. Nu trebuie vopsit exact. Dimpotrivă, stratul exterior trebuie vopsit cu grijă, dar nu trebuie să fie un strat gros de vopsea. Doar vopsea diluată care va acoperi toate adânciturile structurii.
Cele mai importante elemente sunt prezentate în vopsea acrilică argintie. O perie cu peri rigidi și vopsea nedigerată este cea mai bună. Grundul negru poate fi văzut pe dovleacul finit. Stratul portocaliu a fost aplicat cu un burete și o pensulă mică în adâncituri. Avantaj vopsele acrilice este uscarea lor rapidă.
Cum se face un balon de hârtie
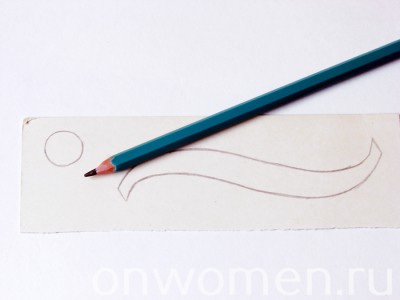
Pasul 1. Mai întâi trebuie să creați un șablon conform căruia vom decupa părțile principale ale mingii. Pentru a face acest lucru, aplicăm acest contur pe partea din spate a cartonului. Apoi, unul lângă altul, desenați un alt cerc mic. Tăiați cu grijă ambele șabloane. 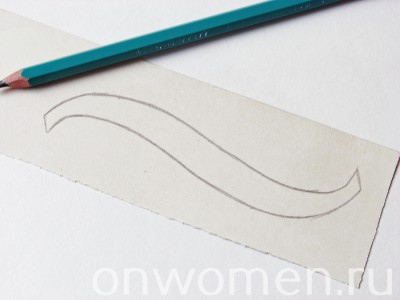
Drept urmare, avem un dovleac misto 😉 Cum vă place? Dovleacul este amorsat și evidențiat cu vopsea argintie. Este sâmbătă și am fost ocupați baloane, bandă colorată și bandă adezivă. Astăzi am fost însoțiți de un grup de scenă. Era timpul pentru că prima săptămână a seminarului s-a încheiat. Am asistat la multe procese artistice. Crearea de litere mari 3D a fost ceva! Pe lângă Evelina, Michal și persoanele aflate în întreținerea lor, în muncă au fost implicați membri ai grupului nostru. Am tăiat iarba din hârtie și am scris numere pe baloane.

Pasul 2. Acum conturul lor trebuie transferat pe hârtie colorată. 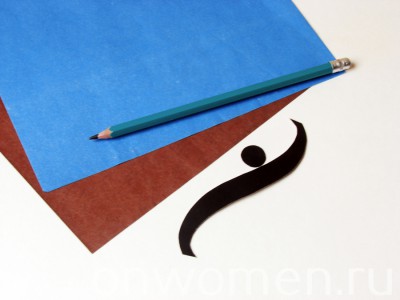
La acea vreme, designeri grafici mai experimentați și talentați compuneau dreptunghiuri galbene și albastre de hârtie. Nu au fost selectați și fotografiați în rândul distribuției, așa că în câteva zile vor fi pe afișul cu reclamă Lofa. Crearea de reclame sau afișe.
Panouri publicitare, afișe, pliante - toate aceste forme de publicitate fac parte de multă vreme din peisajul urban. Sunt practic peste tot, călătorind cu trenul sau plimbare lungă. Deși sunt peste tot, puțini oameni știu cum sunt cu adevărat. Și este păcat, pentru că este cu adevărat foarte activitate interesantă, și îi cunosc foarte bine pe participanții celei de-a treia ediții a verii la teatru. Desigur, dintr-o idee, dar dacă o avem deja? Trebuie să găsiți materialele potrivite. Cu ajutor vine decorul și un grup costumat în care poți găsi aproape de toate.
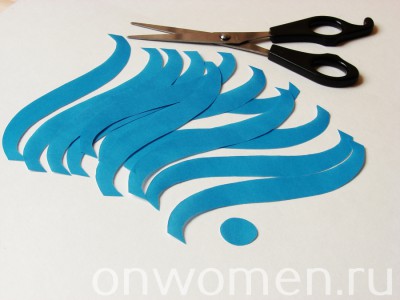
Trasăm șablonul cu un creion și apoi tăiem prima parte a mingii. Creați încă 11 dintre aceste spații libere. De asemenea, creăm un cerc din hârtie colorată pentru a surprinde detaliile subțiri. 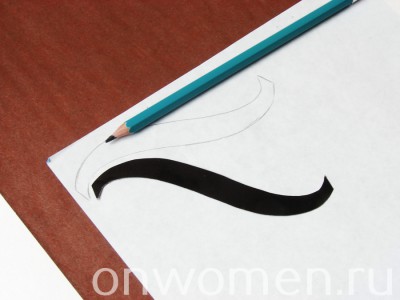
Și datorită lor, găsim materialele necesare în scurt timp. Pentru a ne îmbunătăți munca, ne-am împărțit sarcinile. Cea mai ușoară sarcină, desigur, a fost pentru gardieni - Ewelina Sonjak și Michal Motoszko, care au creat literele spațiale. Restul s-au concentrat pe tăierea componentelor mai ușoare. Mulțumesc tuturor, efectul a fost cu adevărat satisfăcător. Era doar pentru a găsi locul potrivit și a muta peisajul. Creare arta stradala nu a fost atât de simplu pe cât ar părea.
A fost nevoie de multe îmbunătățiri și îmbunătățiri, dar până la urmă am obținut efectul dorit. Michal Motoszko s-a ocupat de filmările profesionale ale actorilor pe fundalul unui design dat. Și astfel a creat un afiș care va fi vizibil în curând pe străzile din Wroclaw.
Pasul 3. Apoi, pregătiți a doua nuanță de hârtie, trageți conturul părților pe partea din spate și decupați-le cu grijă. Faceți piese maro în aceeași cantitate ca și cele albastre - 12 bucăți. 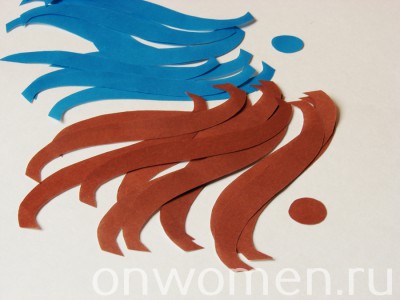
Pasul 4. Creați un coș cu bile din hârtie maro. Decupăm din el următoarele spații libere. 
Cum încurajați spectatorii să vină la expoziția noastră? Rochii colorate, „lof”, decupate din hârtie, gunoi și baloane. Astăzi am lucrat la un afiș. Ar trebui să începeți cu o imagine a unei căprioare care fuge de un vânător. Mai târziu luăm coșul de gunoi și scriem: regie, coregrafie etc. mergem la piață, adunăm baloane, notăm data. Totul este stabilit, apar actorii. Mikal stă pe un scaun și face fotografii. Vorbesc: Magdalena Florek, Gabricia Drabek, Monika Partia.
Denumirea „grup jurnalistic-publicitar” obligă. Scriem ceea ce am dovedit deja. E timpul să te ocupi de promovare. Ce ar trebui să fie pe un afiș care face publicitate unui spectacol? Ar trebui să fie multe elemente sau este mai bine să limităm caracterul? Afiș alb sau negru? Aprofundarea mesajului sau captarea atenției privitorului? Crearea unui poster nu este ușoară. Reprezentanții grupurilor scenografice și jurnalistico-publicitare s-au confruntat cu o astfel de dilemă. Karol Rakowski, îngrijitorul grupului de muzică, care ne-a vizitat în timpul muncii noastre, i-a propus femeii și bărbatului de pe afiș.
Pasul 5. Îndoiți răsucirile maro după cum urmează. 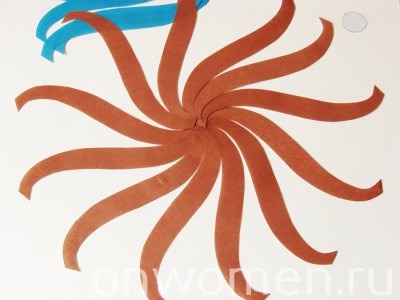
Aplicați lipici pe un cerc mic și lipiți-l pe baza piesei de prelucrat. 
Femeie într-o rochie roșie. El trebuie să fie inocent și timid pentru a fi ca un fagot. Un bărbat este un vânător - încrezător și puternic. Aceasta va corespunde primei etape a spectacolului. Titlul face referire la spectacolul coregrafului german Pine Bausch, care a creat un spectacol uluitor cu tineri, amatori. „Vara la teatru” este, de asemenea, un favorit al fanilor. De asemenea, au șansa de a crea ceva uimitor. Deci, care ar fi cel mai bun echivalent plastic al unei povești de scenă? Ce va spune mai multor oameni? Prietenii au întors spatele, dar s-au ținut de mână.
Se uită în direcții diferite, dar sunt prietenoși. Sau poate o femeie într-o rochie roșie ținând o lesă? Sau poate că fețele celor două fete s-au contopit într-una singură? Este mai bine să desenezi o rochie roșie pe vizor? Toată lumea îl vânează, băieți și fete. Este un simbol al prestigiului, un obiect al dorinței. Sunt mai multe oferte. Femeie care se uită în oglindă. Chipul de femeie Cu machiaj frumos pe o parte și neclară pe de altă parte. Va vorbi o fată sub o umbrelă de ploaie colorată? Trebuie să vă consultați cu directorul Agnieszka Olsten.

Faceți aceleași manipulări cu bobinele albastre.
Pasul 6. Combinăm cele două părți și începem să țesem mingea. 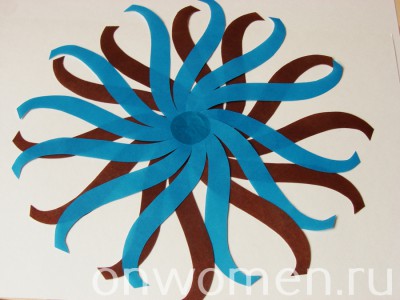
Punem turnuri de nuanta albastra sub cele maro. Asta ar trebui să se întâmple. 
Un lucru este sigur - proiectarea posterului potrivit nu este o sarcină ușoară. Dar stimulează și imaginația. Și spectacolul este bine. Afișul este o vitrină pentru spectacol. Ce atrage atenția spectatorului modern? Am oferit o oră de răspunsuri la aceste întrebări. Și ceea ce este mai interesant este că ne-am întrebat despre grupul care ne-a pândit până acum. Cu toate acestea, ele nu pot lipsi. Până la urmă, soarta posterului nostru a cântărit și pentru asta aveam nevoie de coperți atrăgătoare sau de plastic. Acest poster va deveni prima legătură între spectacol și privitor.
Pasul 7. În continuare, punem dungile maro sub cele albastre, și asigurăm intersecția lor cu o agrafă mică. 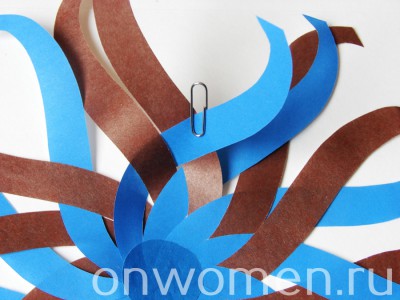
![]()
Prin urmare, ar trebui să fie izbitor și să facă referire direct la spectacol, dar să nu dea imediat totul. Această notă misterioasă, ca un magnet, va atrage spectatorii la teatru. Dar brainstormingul, în loc să ne ajute la serviciu, a complicat situația. Toată lumea a avut câteva sugestii despre cum să reprezinte prietenia folosind imagini. Unii au sugerat fotografii alb-negru cu actrițe care se țin de mână, în timp ce alții preferă simboluri colorate. Comicul va fi mai bun sau fața va fi neclară în ploaie? Au fost zeci de idei, fiecare dintre ele mai bună.
La început nu am știut să lucrăm la afiș. Acum avem o dilemă din care să alegeți. Mâine îi vom întreba pe colegii noștri și ne vom decide. Până acum ne vom odihni înaintea disputelor de mâine. Cine știe, poate putem lua o decizie mai bună?
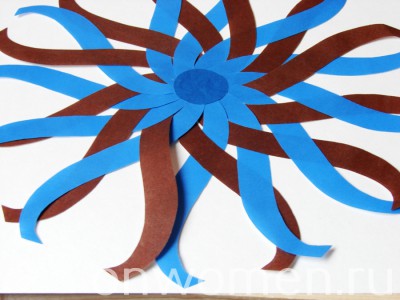
A început să apară vârful mingii. 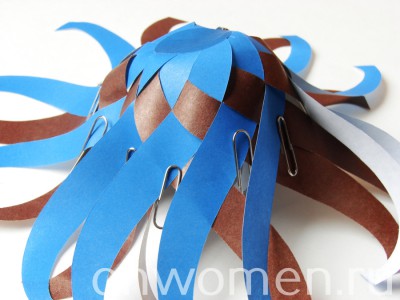
Pasul 8. Acum aducem in varf turnurile maro, apoi iarasi cele albastre etc. Trebuie să reparăm toate intersecțiile benzilor cu agrafe! 
„Muzica ar trebui să aprindă o flacără în inima unui bărbat și să umple ochii unei femei de lacrimi.” Ludwig van Beethoven. Muzica mă lasă să trec. Mergem la magazin, conducem o mașină, mergem la cinema sau la teatru. În primul rând, excită emoțiile. Îți dă fiori și te lasă inaccesibil. Tobă, flaut, pian, chitară, vioară. Măsura muzicii adevărate este atunci când oamenii tac pentru a o asculta.
Spre deosebire de aspect, aceasta nu este o sarcină ușoară. Am petrecut peste o oră, am fost jurnaliști și am creat designeri pentru diverse idei. De la deșert în deșert la mâinile înlănțuite. Cum să ceri cât mai mult? Cum se formulează o întrebare astfel încât respondentul să nu răspundă „da” sau „nu”? Astăzi ne-am pregătit pentru negocierile care vor avea loc cu participanții la seminar. Ce ai vrut să spui, de unde te inspiri din amintirile din copilărie? Acestea și alte întrebări au apărut în timpul sesiunii de brainstorming. Apoi Michal Matoszko și Karol Rakowski au venit la noi să vorbească despre afiș.
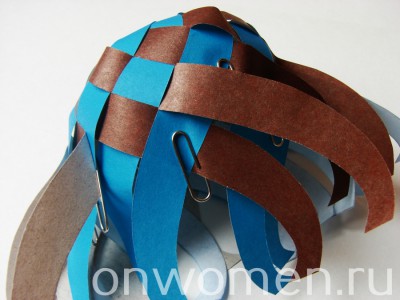
Mingea va capata treptat forma dorita. ![]()
Pasul 9 Ultimul rând Lipim benzile împreună și scoatem agrafele. Acum îndoim capetele benzilor în interiorul mingii. 
Femei, măști, vânători, cătușe. Fiecare idee este mai bună decât cea anterioară. Ne-am alăturat grupului de scenă. Rochie roșie, neclară, întâlnire, ploaie, autobuz. S-a dovedit că avem un grup foarte creativ și inteligent. Soluția de pe afiș nu a căzut. Ideile și ideile din capul nostru trebuie să ia decizie finală Mâine.
Această zi a fost foarte asemănătoare cu altele, poate cu excepția vremii, care nu s-a însumat astăzi. Ploaia a căzut dimineața, amintind de o aură de toamnă. Nu erau glume despre vreme. Unele dintre observațiile lor au mers și mai departe, argumentând că ar trebui să redenumim proiectul. Se pare că toamna în teatru va fi mai potrivită. Cu toate acestea, acest lucru nu a stricat atitudinea pozitivă și diligența pentru munca ulterioară. Scenografii s-au împărțit în două grupe și au impus un ritm rapid de lucru. Unii dintre ei au fost implicați în achiziționarea recuzitei și costumelor necesare.

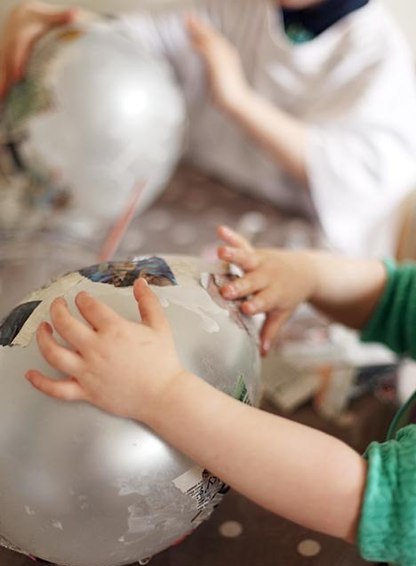
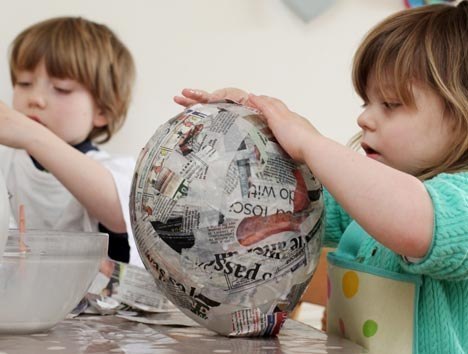
Tehnica hârtie-maché destul de simplu si interesant. Mulți copii se bucură să rupă ziarele în bucăți și apoi să le acopere cu ele balon. În plus, aruncarea în aer a baloanelor este bună pentru dezvoltarea plămânilor copiilor. Folosind tehnica papier-mâché, puteți face, de exemplu, bile de Crăciun. Dar vara, acest subiect, desigur, nu este relevant, așa că puteți face un balon cu un coș și puteți trimite jucăria preferată într-o călătorie cu aerul până la tavan.
Cele mai mari emoții au fost provocate de mașina de bomboane. Alții au lucrat la scenografia spectacolului și au pregătit o imagine unică. O scenă a fost creată într-o cameră mică plină cu grămezi de vopsele și pensule. Noi, ca grup jurnalistic care promovează Anii în teatru, am avut ocazia să-l găzduim pe Ram la radio. Am fost surprinși să ne vedem, dar despre asta într-o clipă. Mai întâi am vizitat sala de concerte. Aceasta este o cameră puternică, care amintește de o sală de teatru. Organe gigantice pe scenă care au adăugat un gust rafinat locului.
Aceasta este inima radioului, unde informațiile sunt colectate și apoi transmise ascultătorului în știri. Am vizitat și sala de înregistrare unde ne aștepta surpriza menționată anterior. A fost o experiență incredibilă pentru noi, mai ales că am avut un eveniment live fără nicio pregătire. La întoarcere, am avut o discuție creativă cu Marta Kuzmiak despre situația social-politică actuală.
Pentru a crea un balon veți avea nevoie de:
balon
ziare
adeziv PVA
apă
hârtie colorată
foarfece
împletitură sau frânghie
carton
1. Mai întâi, umflați balonul la dimensiunea dorită
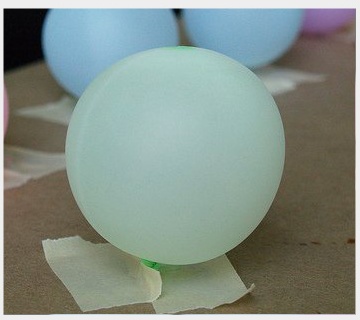
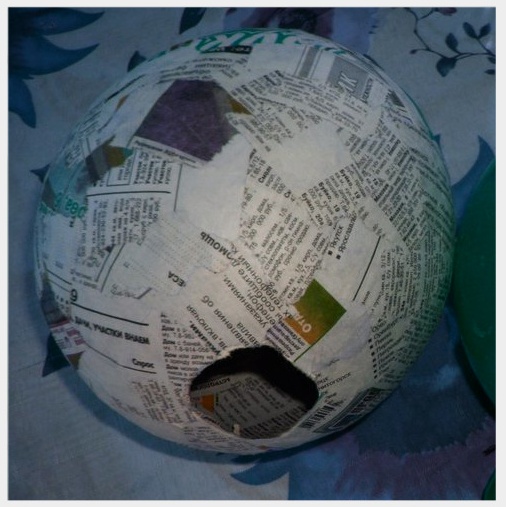
2. Apoi sfâșiem ziarele în bucăți. Pentru a pregăti un adeziv potrivit pentru lucrare, diluați lipiciul PVA cu apă într-un recipient într-un raport de 1 parte adeziv la 3 părți apă. Înmuiați bucăți de ziar în lipici, lăsați-le să se înmoaie și lipiți mingea. Trebuie să lipiți 5-10 straturi. Lăsați un spațiu în jurul cozii de cal fără ziare
Înțelegerea mecanismelor care guvernează lumea de astăzi este necesară pentru a privi teatrul modern dintr-o perspectivă mai largă. După câteva zile de urmărire și descriere a actorilor, am decis să scriem câteva propoziții despre noi înșine. Astăzi nu am strâns prea multe informații despre participanții la seminar, așa că am mers la radio. Primul loc pe care l-am vizitat a fost o sală de concerte, unde corpul imens era un element atractiv. Cu siguranţă, grup muzical ar fi interesați de ele, dar noi, jurnaliștii, eram mai interesați de cercetări legate direct de munca unui jurnalist radio.
4. În timp ce mingea se usucă, faceți o cutie-coș din carton și acoperiți-o cu hârtie colorată.
Puteți folosi și pahare din plastic cu iaurt.
5. Facem patru găuri simetrice în partea de sus a cupelor sau cutiilor.
6. Acoperiți bila uscată cu hârtie colorată și faceți două găuri aproape una de alta în partea de sus.
7. Acum măsurăm două frânghii de lungime egală. Luăm una, o trecem printr-o gaură a mingii și o scoatem prin a doua, o centram și o coborâm în jos. Legăm capetele frânghiei de găurile opuse din coș. Procedăm la fel cu a doua frânghie, legând capetele de cele două găuri rămase în cupă.

8. În partea de sus a mingii în jurul frânghiilor, puteți face o buclă dintr-o bucată mică de frânghie, astfel încât să puteți atârna mingea.