If you want to make the interior of your apartment not only beautiful, but also cozy, DIY crafts for home exactly what you need. Due to its diversity, handmade things will bring a unique atmosphere of home warmth to your home. In addition, you can easily change your interior depending on the season or just depending on your mood.
DIY crafts for home in photo
If you know for sure that you want to complement the design with new original things, but have not yet decided what they should be, the photos that you can see on the Internet will be very useful to you.
Ideas: DIY crafts for the home
They can be very different, it all depends on their purpose. Made homemade - things can be used as unusual interior details or as devices for storing all kinds of things needed in the household.
Beautiful DIY crafts for home
To create them, it is not necessary to purchase expensive materials in the store. Surely you have a lot of unnecessary things at home that seem to be no longer used, but at the same time it’s a pity to throw them away. Such items can be excellent material for new crafts. In addition, use improvised materials in your work. For example, paper, fabric, thread, wire, glue, buttons and other haberdashery, plastic, as well as natural materials.
Do not think that only an experienced craftsman can make beautiful interior items. Imagine, combine different materials and then you will certainly succeed. Of course, the first craft will require a certain amount of time and effort, but each subsequent one will be much faster and easier.
If you want to change the interior of the room, you can make a beautiful openwork lamp.
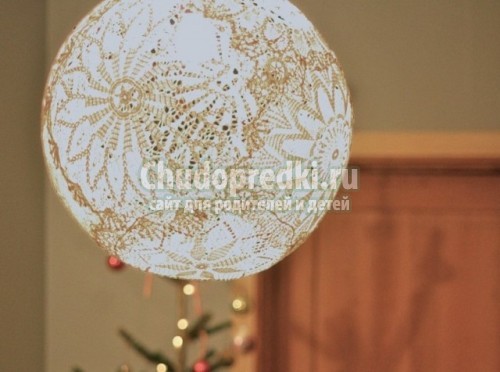
To do this, you will need: a balloon, a bottle of PVA glue, a brush, scissors and a lace napkin (you can buy it ready-made or knit it yourself). In addition, prepare a cartridge and a light bulb from an unnecessary lamp, as well as an oilcloth, which must be covered with a work surface so as not to stain it with glue.
So, first inflate the balloon to the desired size, which will match the size of the finished lampshade. After that, attach a napkin to the ball, and if it turns out to be larger, carefully cut off the excess lace with scissors.
After that, pour glue on a flat plate or in a plastic tray, and spread an oilcloth on the table and lay a napkin on it. Apply glue to the napkin with a brush. This should be done slowly and carefully so that the lace is completely covered with glue. When you've finished applying glue to one side, turn the napkin over and repeat on the opposite side. Then hang the ball on a strong thread so that it does not touch any surface, then evenly distribute the napkin on it. Try to smooth the lace so that there are no wrinkles on it, and the pattern looks beautiful and even. When you're done smoothing out the lace, you can apply another layer of glue to the doily. Fasten the edges of the napkin with a thread, while not forgetting to leave a hole through which you will insert the light bulb. Dry the workpiece should be at least a day, after which you can pierce the ball and get it through the hole. Then put the lampshade on the cartridge. Such an unusual openwork lamp will become a real decoration of any room!
DIY crafts for home: photo
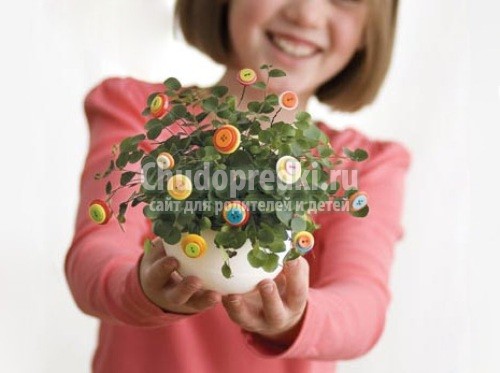
A fun master class on making bright flowers from buttons.
Together with a child, you can make beautiful bright flowers that will not only enliven your interior, but also add a good mood.
Such original homemade products can also be a great addition to a gift for relatives. For example, if you want to present flowers in a pot to your mother or sister, be sure to decorate them with such crafts and then a sea of positive emotions is guaranteed for everyone!
For work, prepare: floral wire, pieces of felt, multi-colored buttons, and pliers.
First, cut pieces from the wire fifteen to twenty centimeters long. Then choose buttons for flowers. Each flower should consist of three buttons, which should be of different colors and diameters. Fold the buttons so that the largest one is on the bottom, and then thread the wire through one of the holes. If you want, you can also cut out flowers from felt, place them under the largest button, and after that, thread the wire through the blank. After that, bend the wire and thread it through the opposite holes, but already pointing down. Next, twist both ends of the wire together, after which you can decorate the pot with a flower. Such cheerful and unusual flowers will be a great addition to non-flowering plants.
Fans of the unusual will surely enjoy original DIY crafts for home made from straws for a cocktail. For example, using multi-colored cocktail tubes, you can decorate an old lamp.
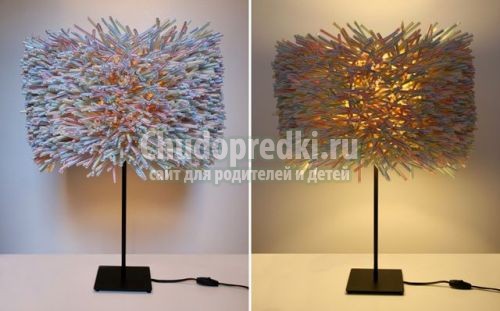
To do this, simply cut the tubes into several pieces, and then paste over the surface of the old lamp with them.
Very often, convenient and practical for the home can be made from items that are in every home. For example, old wooden hangers can easily be turned into a very handy dish rack.
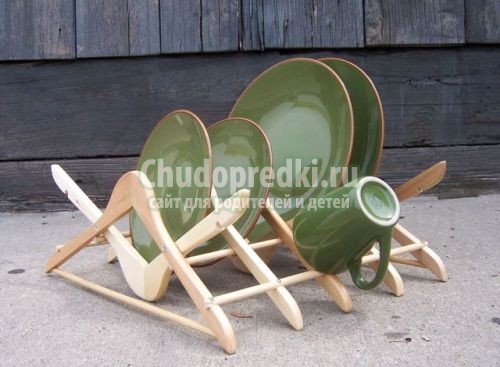
Such a stand is made easily and quickly, but at the same time it will turn out not only convenient, but also practical.
For work you will need: eight wooden hangers and self-tapping screws. You must first separate the metal hooks from the hangers, since you will not need them, and also remove the lower thin crossbars on six of the eight hangers. After that, six hangers are interconnected with self-tapping screws, and the hangers must be placed with a “jack”. The first and last in the design should be hangers with crossbars. Attach the remaining crossbars with self-tapping screws to the side of the stand (for this, you can first make recesses in the shoulders). Thanks to the crossbars attached to the sides, the structure will be more durable and stable.
Plastic hangers are also suitable for such a dryer. If you use wood, they must first be painted with a waterproof emulsion. In this case, your stand will not deteriorate from moisture, and you can use it for a long time.
Unusual DIY crafts for the home
They can also be made from traffic jams. For example, it can be an original hot stand, which is useful in the kitchen of every housewife.
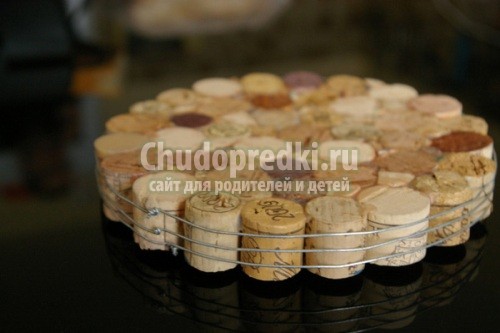
To do this, you just need to lay out the corks on the table in the shape of an oval, square or circle, and then carefully tighten them with wire, without clamping too much. The free space that will remain between some of the corks can be filled with corks that are pre-cut into four pieces. When everything is carefully filled, you can drag the stand with a few more rings of wire.
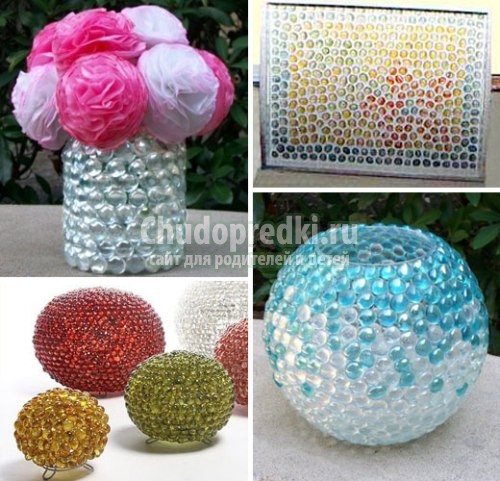
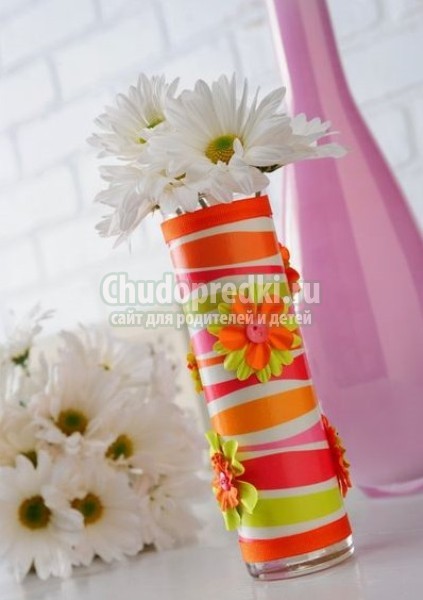
You can also easily make a stylish vase for your home that can be used not only as a decor item, but also as a gift.
To do this, you will need: a round glass vase, a sheet of scrapbooking paper, a piece of ribbon of a suitable color about thirty centimeters long, a few buttons, paper flowers (you can make them yourself) and a simple pencil. In addition, prepare PVA glue and some decoupage glue, a ruler and a stationery knife.
Before you start decorating the glass surface, it must be thoroughly washed and cleaned of labels. If the surface of the glass is oily, it must be degreased and then dried.
After that, you can cut a strip from decoupage paper, the width of which is slightly less than the height of the vase. For example, if your vase is twenty centimeters high, you can cut a paper strip about seventeen centimeters wide. In this case, you will have narrow strips of glass below and above free. When the strip of the desired width is cut, wrap the vase with it, mark the desired length on paper and cut the strip. Before cutting the paper, you can additionally add about a centimeter to the desired length. This is necessary in case you suddenly cut the paper unevenly or miscalculate. If the length is measured correctly, an extra centimeter can be cut off.
After that, you can apply glue to the paper with a brush, and then wrap the vase with paper. The adhesive should be applied in an even thin layer. After you wrap the entire surface of the vase with paper, carefully smooth out all the wrinkles and air bubbles on it. After that, leave the workpiece for twenty minutes, so that the glue dries slightly.
Then, with a brush, apply a thin layer of glue to the edges of the vase, and when it dries, apply another layer. If at the same time you slightly stain the paper with glue, do not worry, because this place will be covered with tape. Attach the ribbon to the vase and cut a piece of the desired length. For insurance, you can add a few millimeters. In total, you need to cut off two pieces of tape, one of which will be glued on top and the second on the bottom. To stick the tape, apply a thin layer of glue to it. Apply the same layer of glue to the glass, and then tightly wrap the vase with tape, trying to keep it snug against the paper. At the same time, if a little glue comes out, it can be easily wiped off by hand. Then you can decorate the vase with flowers made of paper, and the middle of each flower can be decorated with a bright button. After you finish decorating your vase, leave it overnight for the glue and paper to dry completely.
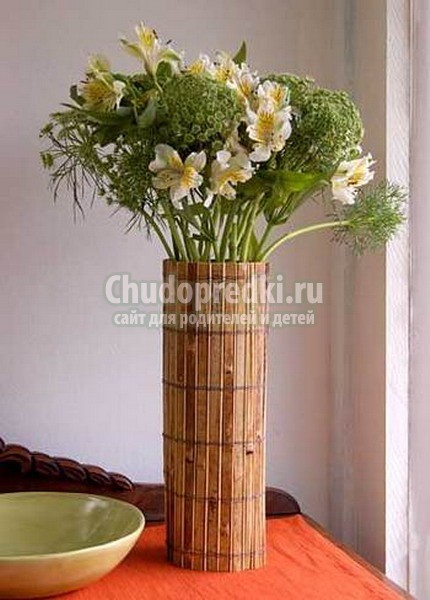
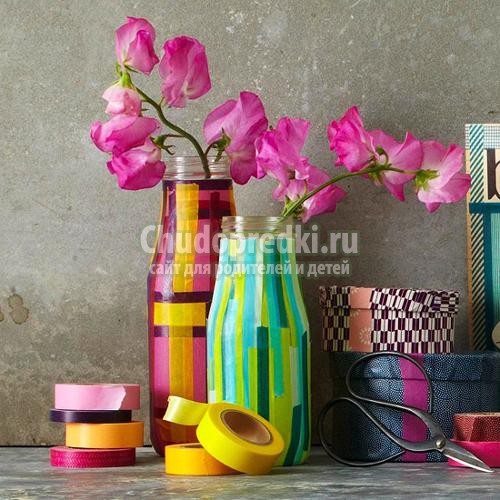
A vase decorated with colored bamboo sticks also looks very interesting. To do this, in addition to a glass vase, you will also need: scissors, colored thin bamboo straws (they can be luminous), some colored construction tape and thin rubber bands. It is most convenient to fasten the parts together with a glue gun.
First line the outside of the vase with colorful bamboo straws and secure them at the top and bottom with thin rubber bands. If the straws are too long, trim them carefully. After that, cut two strips from the construction tape, the length of which is slightly larger than the width of the vase. Attach one strip at the top and the other at the bottom. To attach the tape, glue the ends with a glue gun. That's all, the original vase is ready!
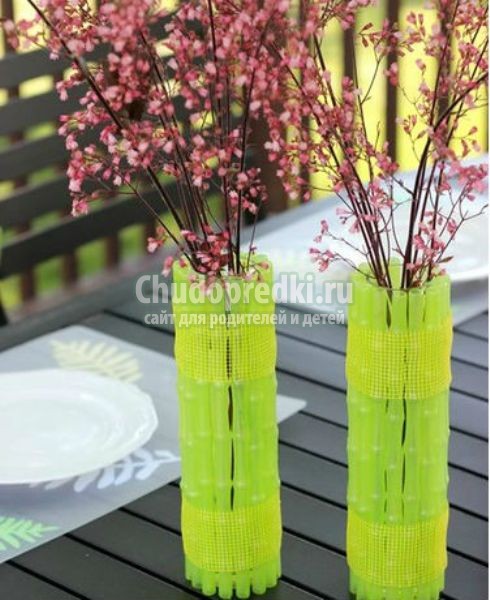
Because the bamboo straws are not glued to the glass, you can easily replace them with straws of a different color. However, in this case, you should move the vase very carefully, because it can simply slip out of its bright case. To prevent this from happening, you can use a glue gun and securely glue all the straws to the glass.
You can use such original vases both for fresh flowers and for various bouquets and compositions of dried flowers, autumn leaves or just tree branches.
Do not be afraid to experiment with things that are different in their purpose, since very often it is such a non-standard combination that makes it possible to create comfortable and practical things that are stunning in their beauty with your own hands. For example, from ordinary stools and old knitted sweaters, you can make original, comfortable and soft chairs for the home.
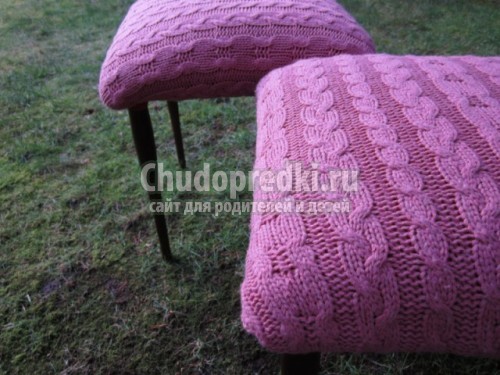
To make such an unusual piece of kitchen furniture, you will need old stools, wide foam rubber (you can use old pads that have lost their appearance instead), a knitted sweater and a stapler with which you will attach a knitted fabric to a stool. If you have a suitable knitted blanket, you can also use it. In this case, all stools will be the same color.
First, cut the sweater or blanket into pieces of the right size and carefully work the edges so that the knitted fabric does not unravel. Then place foam rubber or a cushion on the stool, cover everything with a piece of knitted fabric and carefully attach the edges to the underside of the stool seat with a stapler.
If you like our site, express your "thank you"
by clicking the buttons below.