When creating man in his own image, the Almighty forgot several details. For example: hands should grow from the right place, or the nose should not stick into things that don’t belong. But all these are small things compared to the fact that we still cannot fly. This is unfortunate, and the person is trying in every possible way to get into the air by any means possible. I will now tell you in more detail about one of these methods. You will learn how to draw a ball with a pencil. Aerostat - correct name balloon. But no one cares; for us it is an ordinary spherical object, capable of rising to a bird's eye height thanks to heated air. It is used extremely rarely as a means of transportation. Usually this is a type of attraction. Every girl dreams of riding such a miracle. It's very romantic, scary and fun. Yes, in that order. I would also ride one if I had one. But in the absence of it, I can just copy it:
How to draw a balloon step by step
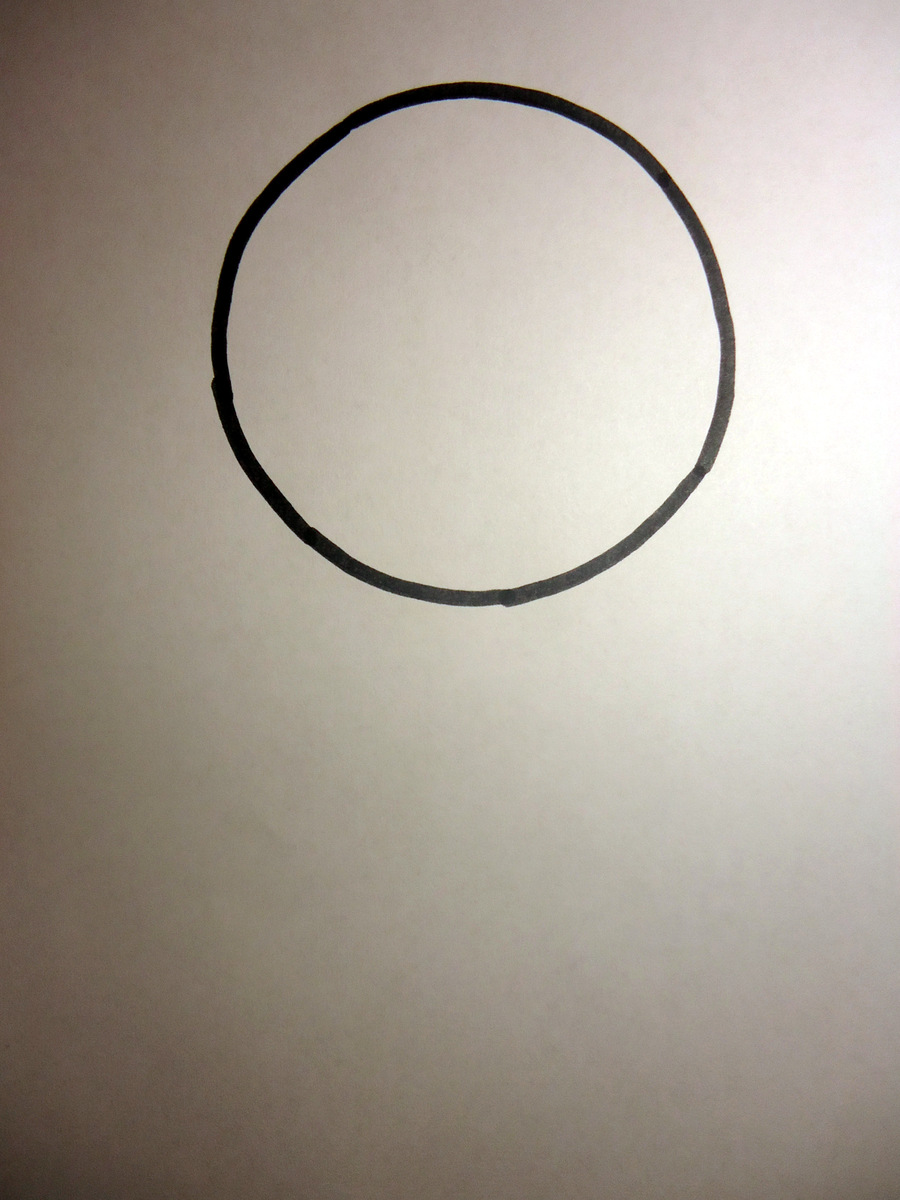
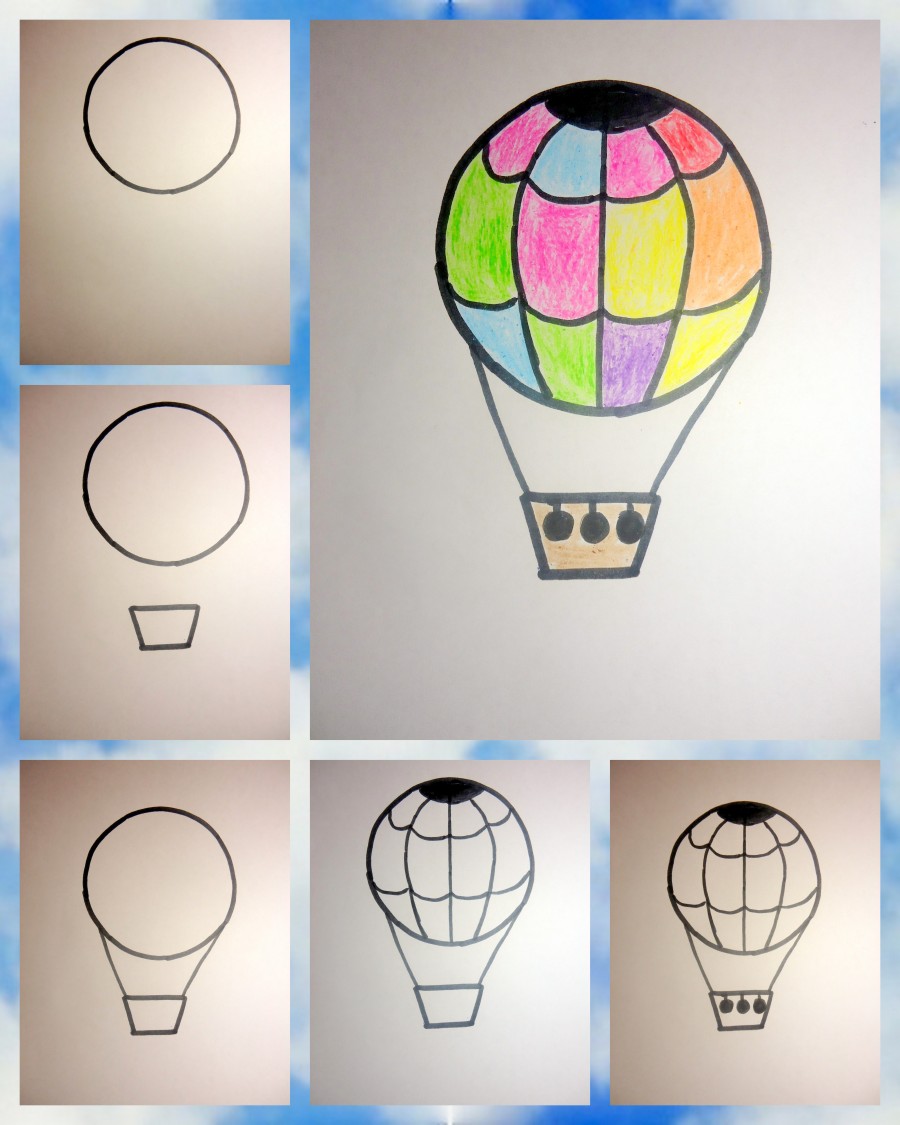
Step one. Let's draw this shape.  Step two. Now we’ll make it smoother, we should get geometric shapes.
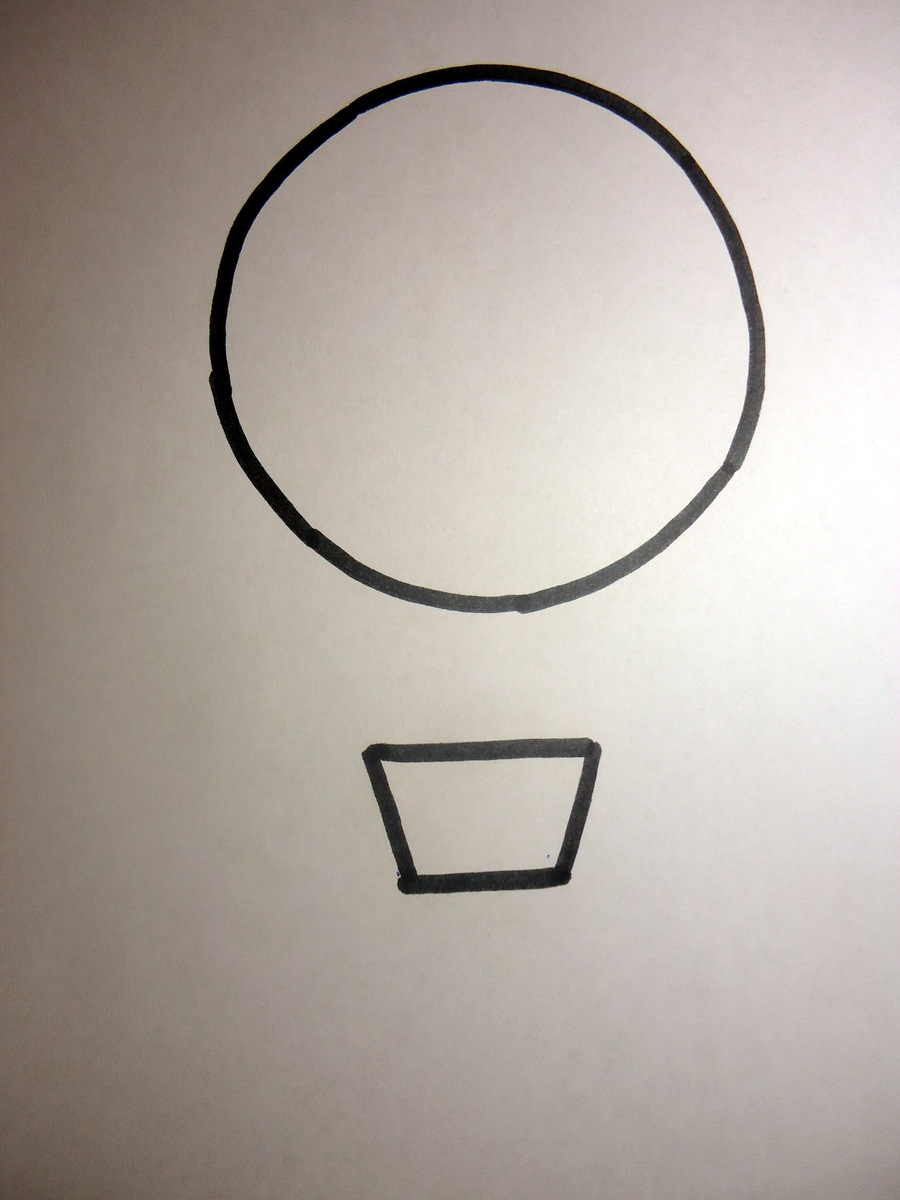
  Step three. We delete the auxiliary lines and outline the contours.
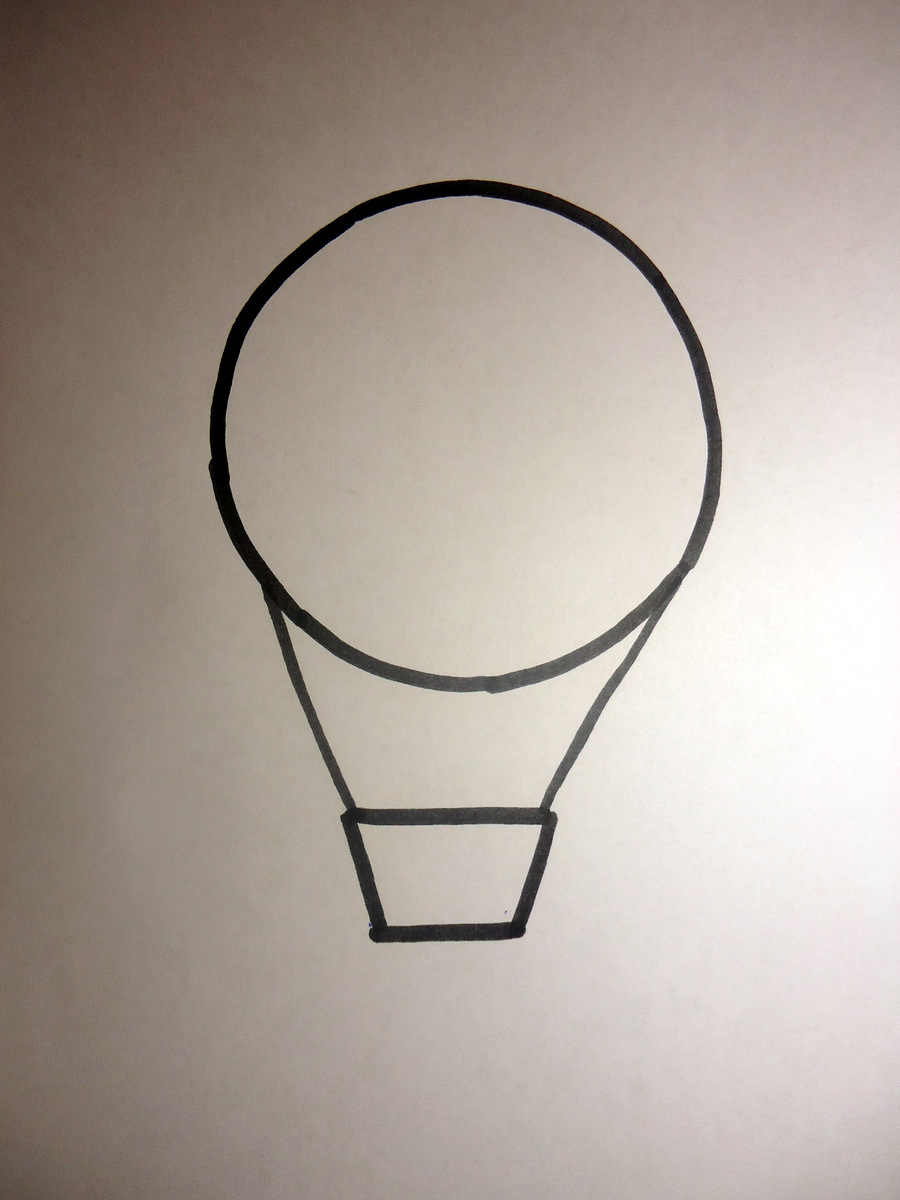
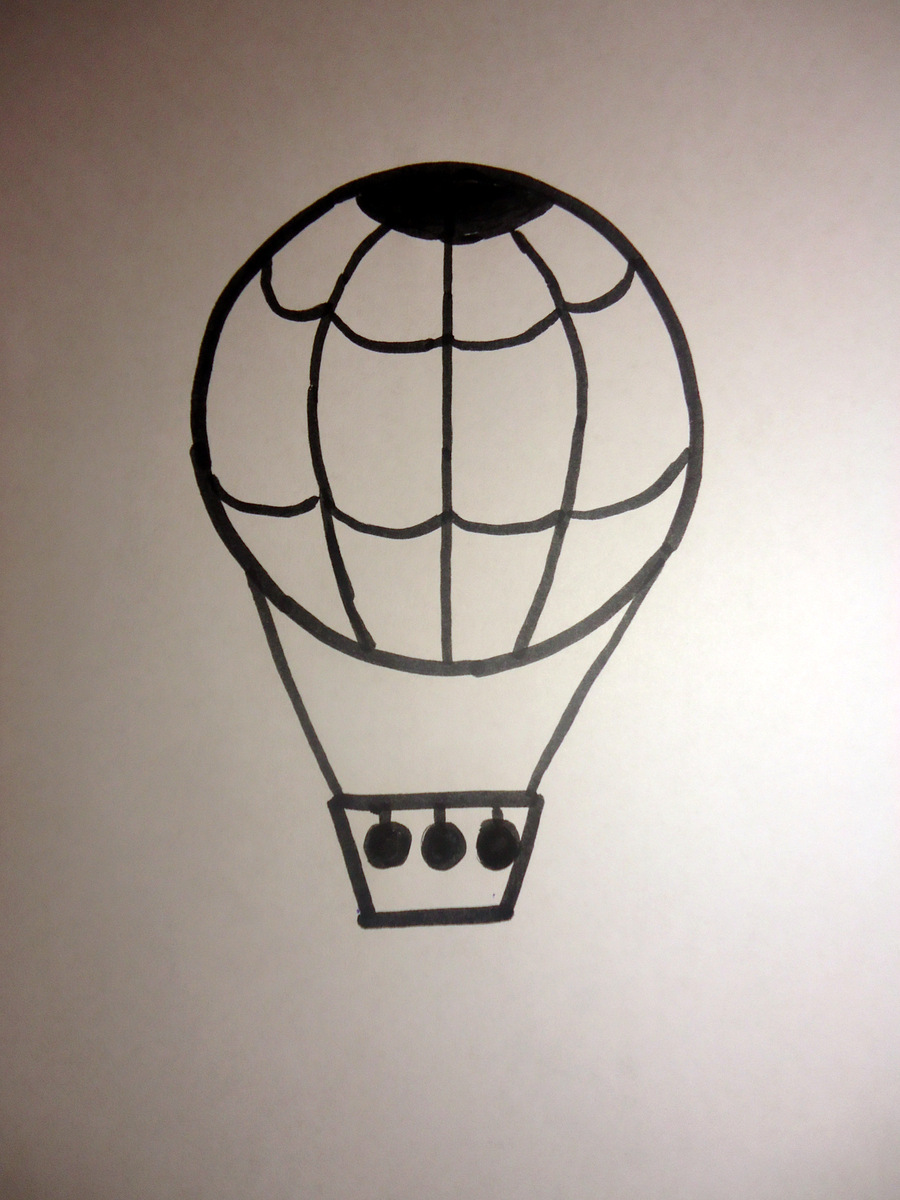
  Step four. Let's divide it like a tangerine into slices.
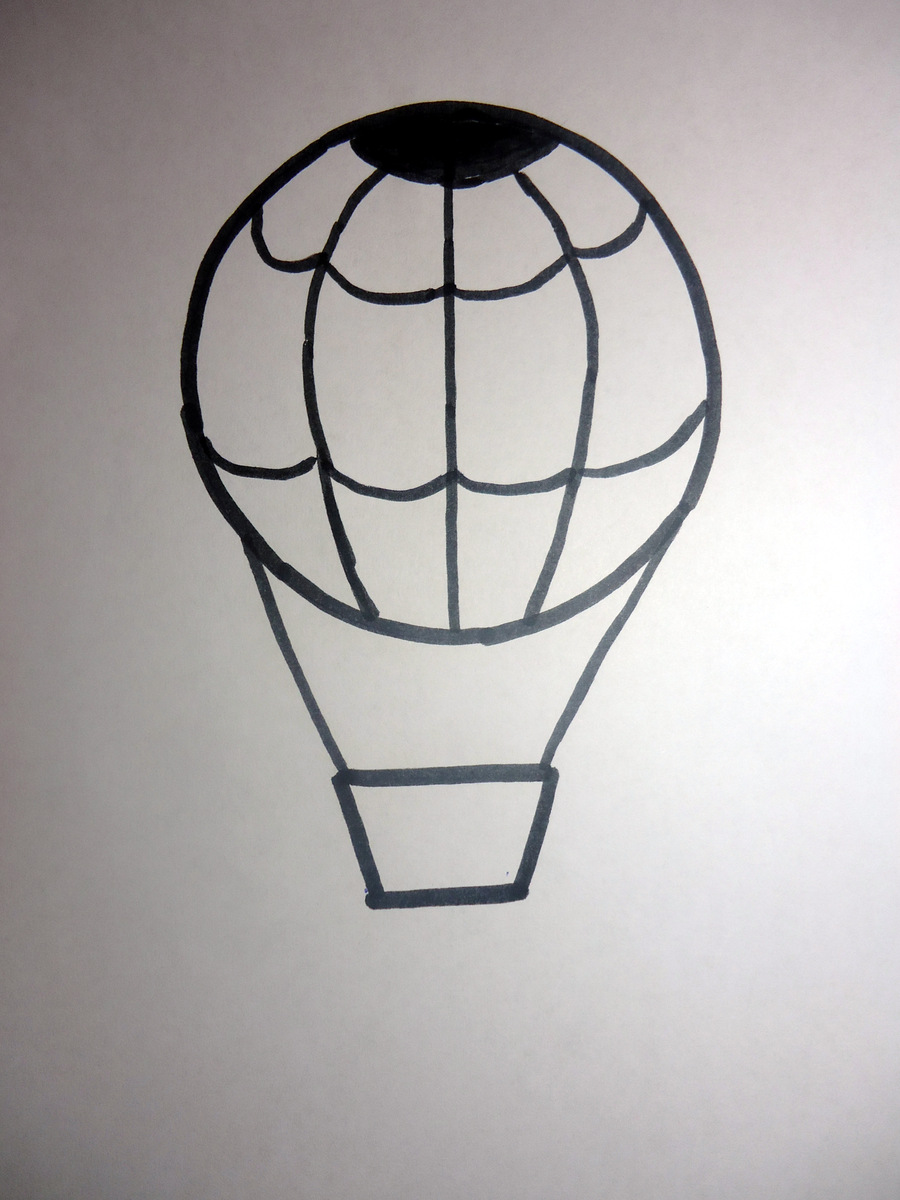
  Step five. Now the same thing, only horizontal lines. And don't forget to draw the basket.
  We have lessons on drawing other flying objects and celestial bodies, here.
Hello!
Today we will briefly return to childhood and draw a Balloon!
Remember how exciting it was to smear colored circles and sausages on strings...
But a game is a game, and with us everything is for real. The ball must be colored and transparent!
This is what we will strive for.
The lesson is simple and short, but fun and joyful!
So, GO!
Create a document 300x300 pix, RGB, 72
dpi
Let me remind you that if the document size is different, you need to change the settings (which I will give as an example).
Using a tool Ellipse(ElipsTool) draw an oval of any color.
Rasterize the layer (while on the layer with the oval, right-click - select Rasterize layerRasterizeLayer).
Remove the fill ( Fill) before 0
%.
Let's go to Layer-Layer Styles (Layer-
LayerStyle) - see screenshot. I used Inner Shadow, Inner Glow and Gradient:
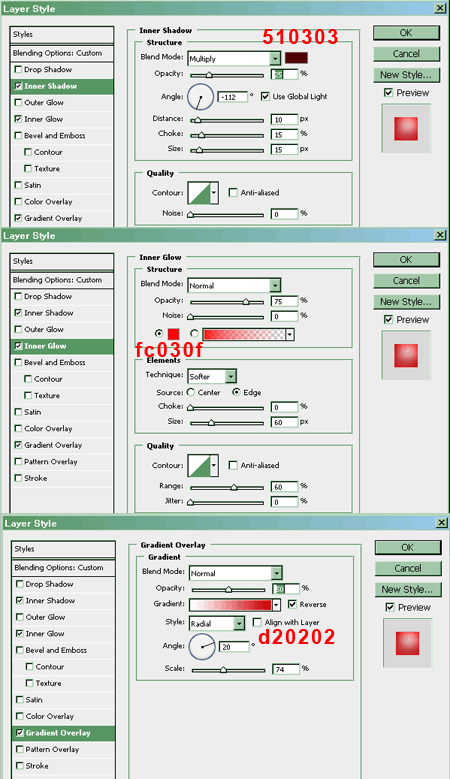
Here's what happens:
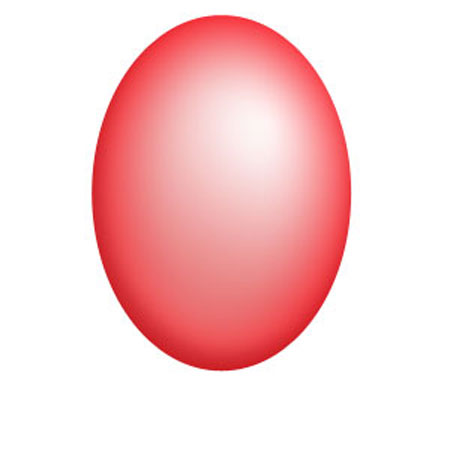
Well, the ball is almost ready!
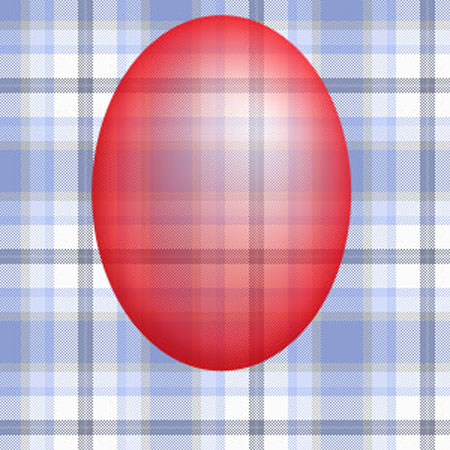
For ease of work, you can add a colored background so that you can see where to make adjustments.
Let's add a little realism!
Take the red one Brush (BrushTool) Opacity(Opacity) 20-30
% and draw highlights on a New Layer.
Then, blur it out a little: Filter-Gaussian Blur (Filter-
GaussianBlur) approximately 5
pix.
Again Brush (BrushTool) and everything is the same only in white (on a New Layer).
To teach a child to draw a balloon with a pencil, you will need only 10 minutes of free time, and also a ruler with geometric shapes.
On balloons Not only brave balloonists rise, but also romantic princesses from girls' cartoons. It’s so interesting to look at the planet from a great height! To teach a child to draw a balloon with a pencil, you will need only 10 minutes of free time, and also a ruler with geometric shapes.
Main design elements:
- the actual ball,
- basket on ropes,
- ballast (sandbags).
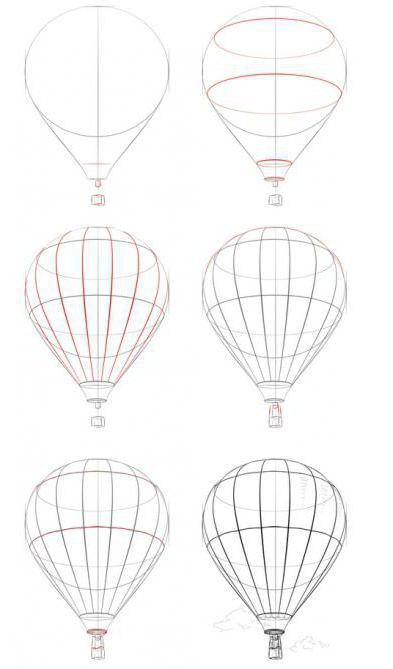
Draw a circle of large diameter on a vertical sheet of paper. In reality, the ball is shaped more like an incandescent light bulb, but this is difficult for small children. For now we are learning to make a schematic and quite recognizable image.
Just below the ball there will be a basket. We choose its shape in accordance with the child’s capabilities. For older people - a trapezoid, for kids - a rectangle, even if using a ruler. The width of the basket is significantly smaller than that of the ball.
We connect the two parts with strong ropes.
We give the ball visual volume. In the upper part we paint over the oval, in the center we lower a straight line, on the sides of it - arcs. We complete the design with wavy transverse lines.
We “hang” several bags of sand outside - this is ballast.
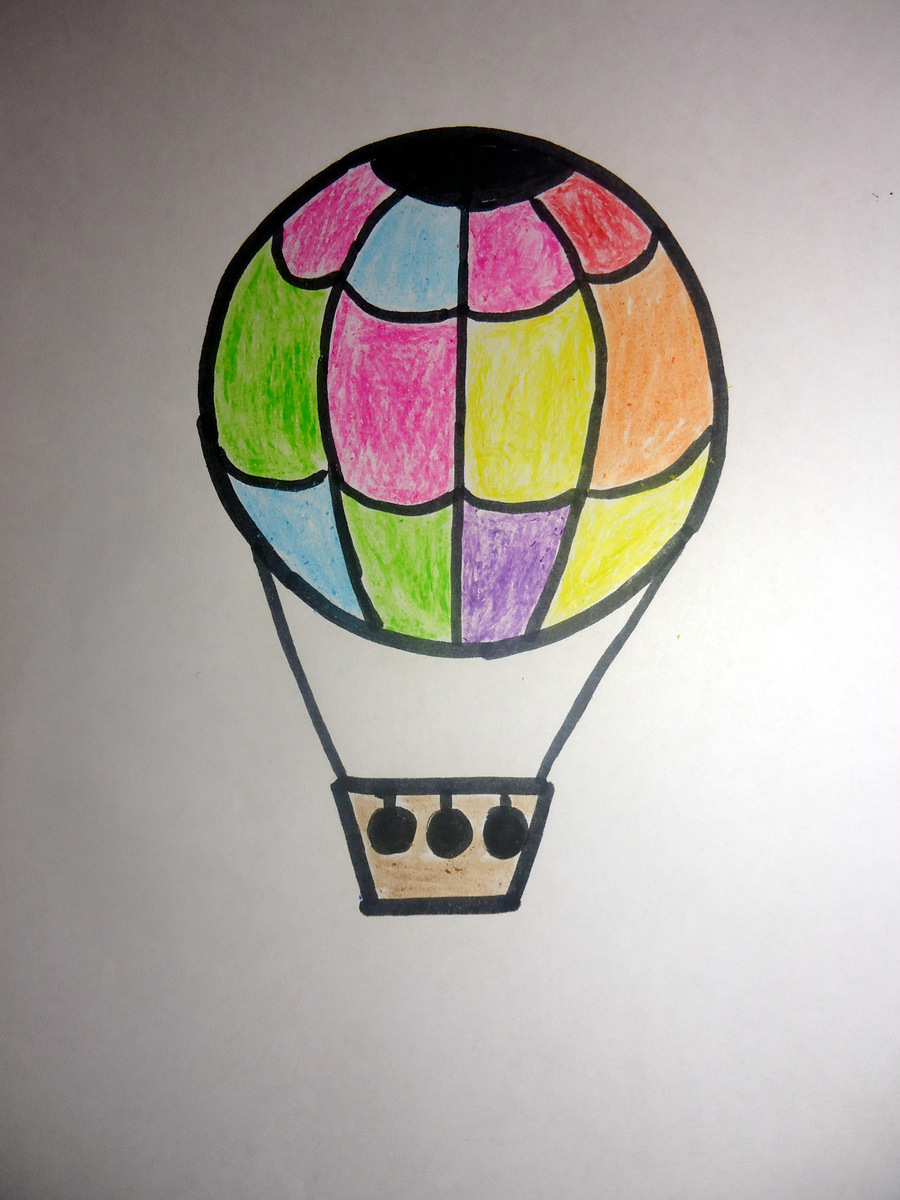
We color the picture so that it becomes as bright and joyful as a hot air balloon flight.
It is easy to consolidate the acquired skill. Draw several circles in the album at a distance from each other. Invite your child to finish drawing the balls with a pencil or felt-tip pen. The image is simple, and it can be reproduced with chalk on the asphalt, a stick on the sand, or a finger on a scattering of semolina. The main thing is to master three basic elements. Well, at the same time, you can tell why the ball changes height, how its flight depends on the wind.
Another option for an art master class is in a cartoon with the song “Draw a picture, Topic!” This series for kids is posted online in the public domain. Now that a preschooler can draw a hot air balloon step by step, it’s time to write an adventure story and launch your first aeronauts into the sky.
Show balloons– a very colorful event that always attracts many spectators. Preschoolers and their parents can make an application on this topic. Let each ball have a unique pattern, like a mosaic assembled from pieces of holographic colored paper or tracing paper. Illustrations from unnecessary magazines and advertising booklets, passed through a hole punch, are also suitable for decoration. The preparation of the craft is very simple: a ball, a trapezoidal basket, twisted thread for ropes.
In modern life, too much of everything is automated and mechanized. And the more valuable become hand-made things and drawings created with soul. Many people love to draw - young children, teenagers, and adults. Sometimes you want to depict some interesting real object. For example, how to draw Balloons with a basket, you can find out from this article.
Where do the balloons come from?
A long time ago, people wanted to rise above the ground. Hot air ballooning made it possible to travel by air relatively safely. In essence, such an aircraft is a sphere connected by ropes to a passenger basket. This method of transportation is still used today, but more as an entertainment attraction or as an option for a romantic date. Many artists depict it on love cards. How to draw balloons? Let's find out, it's worth learning, if only to please your loved one.
Stages of creating a drawing
Let's take a closer look at how to draw a balloon step by step. First of all, you need to decide how many balls will be depicted and determine the proportions of the objects. At the next stage of deciding how to draw balloons, you need to outline a large sphere and a small basket. Next, the sphere itself is divided into shares, like an orange - these are the ropes that hold the ball and the basket together. You also need to detail the passenger basket, making sure that it is connected to the ball itself. When completing the drawing, you need to carefully remove the construction lines with an eraser. In order to add dynamics and liveliness to your work, you can outline clouds, treetops, and birds flying nearby.
Thus, the question of how to draw balloons has been successfully resolved. The finished work can be framed and given to a loved one. In addition, you can make a romantic postcard from the drawing.